 by
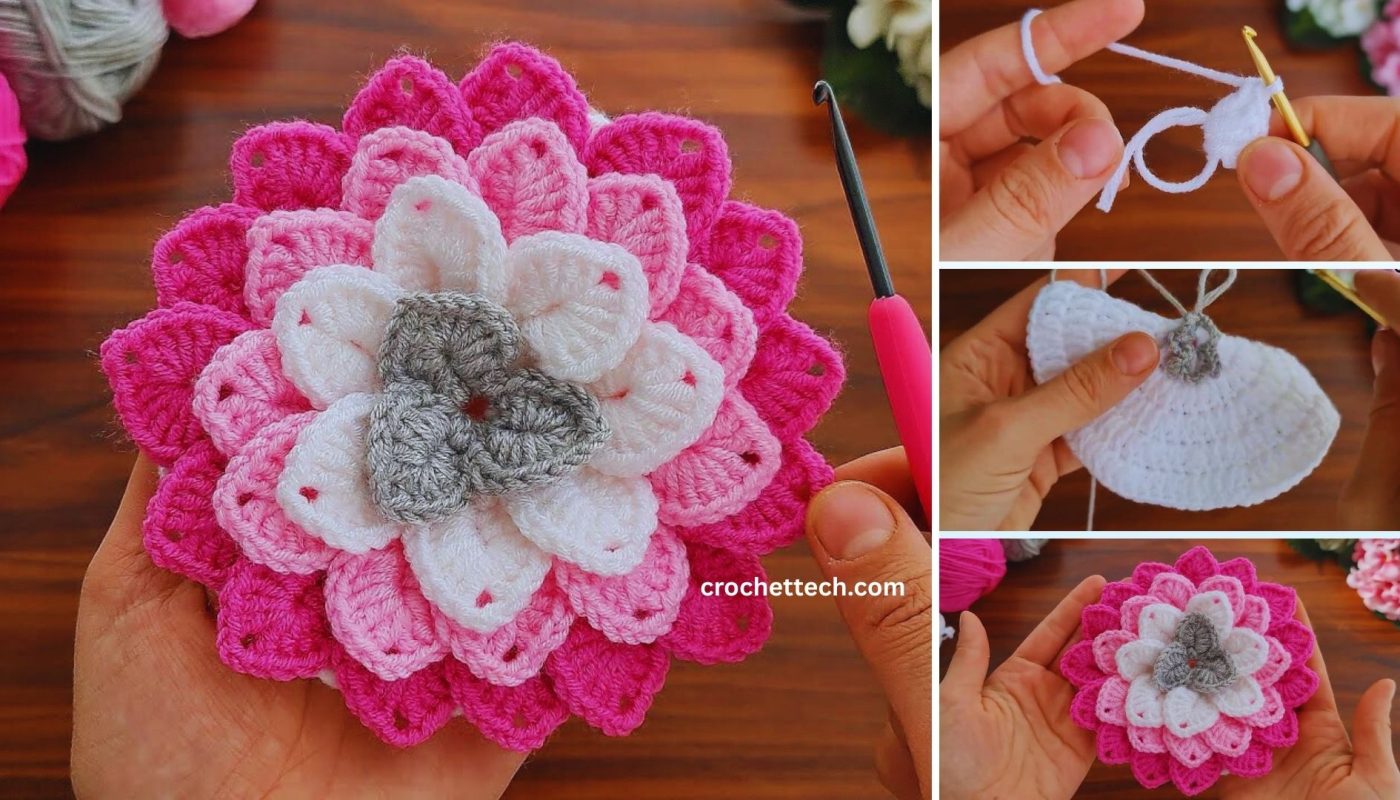
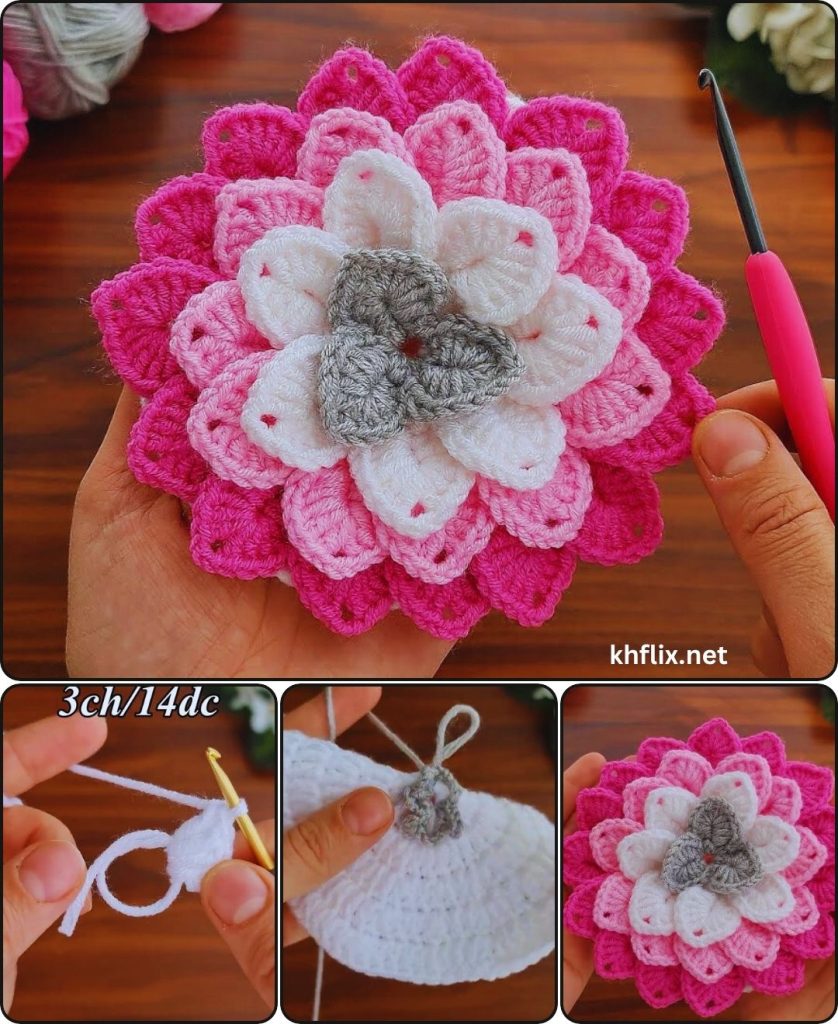
by Let’s create a stunning large crochet rose flower! This project is surprisingly accessible for beginners, even though the final result looks intricate and impressive. The secret lies in using a clever technique that builds height gradually, allowing a flat strip of crochet to transform into a beautiful, spiraled bloom. You’ll be amazed at what you can achieve with just a few basic stitches!
How to Crochet a Large Rose Flower: A Detailed Beginner’s Guide
This comprehensive guide will walk you through every step of making a substantial and beautiful crochet rose. We’ll focus on a beginner-friendly pattern that uses simple stitches and a clever construction method, ensuring you can create a stunning flower even if you’re new to crochet. This method avoids complex shaping, letting you concentrate on the satisfying process of watching your flower come to life.
Skill Level: Beginner
This project is perfectly suited for you if you’re comfortable with (or ready to learn!):
- Holding your hook and yarn: The fundamental grip.
- Making a slip knot: The starting point for most crochet projects.
- Chain (ch): The most basic stitch, forming your foundation.
- Slip Stitch (sl st): Used for joining rows and neatening ends.
- Single Crochet (sc): A short, dense stitch, great for sturdy fabric.
- Half Double Crochet (hdc): An intermediate stitch, taller than sc and works up quickly.
- Double Crochet (dc): A taller stitch, creating a more open and flexible fabric.
- Working in rows: Crocheting back and forth across your work.
- Weaving in ends: The essential finishing touch for a clean look.
Finished Rose Dimensions (Approximate):
Using worsted weight yarn and the suggested hook, your finished large rose will typically be about 3.5 to 5 inches (9 to 12.5 cm) in diameter and 1.5 to 2 inches (4 to 5 cm) tall. The exact size will vary a bit depending on your personal tension (how tightly or loosely you crochet) and how snugly you roll your rose. This size is perfect for adorning blankets, hats, bags, or even as a standalone decorative piece.
Materials You’ll Need:
Gathering your materials before you start makes the process smoother and more enjoyable.
- Yarn: Approximately 30-50 yards (27-45 meters) of Worsted Weight (Medium #4) Yarn.
- Color Choice: Pick a color that evokes the feeling of a rose for you – classic deep red, soft pink, elegant white, cheerful yellow, or even a unique lavender or deep fuchsia.
- Yarn Type: Acrylic yarn is highly recommended for beginners. It’s smooth, inexpensive, widely available, and doesn’t split easily, making it very forgiving to work with. It also holds its shape well after rolling.
- Crochet Hook: Size H/5.0mm. This hook size is a versatile choice for worsted weight yarn. It creates a fabric that’s dense enough to hold the rose’s shape but still flexible enough to roll and form beautiful petals.
- Yarn Needle (Tapestry Needle): This is absolutely essential for the final step of sewing your rose together. It has a blunt tip and a large eye, making it easy to thread yarn through and perfect for joining crochet pieces without damaging the stitches.
- Scissors: Any pair of sharp scissors will do for cutting your yarn.
Understanding the Rose Construction: The Magic Behind the Bloom
The beauty of this rose pattern lies in its simplicity. Instead of crocheting individual petals and joining them, we create one long, flat strip of crochet. This strip is cleverly designed with sections of increasing height. When you roll this strip, the taller sections naturally flare out, forming the layers of petals, while the shorter sections create the tighter inner bud.
The construction process involves three main stages:
- Foundation Chain: This is your starting point, determining the overall length and, therefore, the size of your finished rose.
- Petal Strip: You’ll work rows of gradually increasing stitch heights (from single crochet to half double crochet to double crochet) into this foundation. These variations in stitch height are what create the realistic “petal” effect when rolled.
- Rolling and Sewing: The crocheted strip is gently rolled into its iconic spiral shape and then securely stitched at the base to hold it all together.
Let’s Crochet Your Large Rose!
Follow these steps carefully, and don’t be afraid to take your time. Practice makes perfect!
Part 1: Crocheting the Petal Strip
This long strip is the heart of your rose. The length of your initial chain directly influences how large and full your finished rose will be.
- Starting Chain:
- Begin by making a slip knot and placing it onto your H/5.0mm crochet hook. If you’re unsure how, search for a quick video tutorial on “how to make a slip knot” – it’s a fundamental skill.
- Now, chain (ch) 60. This is a good length for a truly substantial, beautiful rose.
- Want it a little smaller but still large? Chain 50-55.
- Dreaming of a super full, extra-large rose? Chain 70-80.
- Count your chains carefully! It’s easy to lose count, so maybe count them twice.
- Row 1 (Foundation Row – Single Crochet):
- We’ll start by making a row of single crochet (sc) stitches into your chain. This creates a sturdy, dense base for your petals.
- Insert your hook into the 2nd chain from your hook. (Don’t count the loop directly on your hook; count the first actual chain stitch after that.)
- Yarn over (wrap the yarn from back to front over your hook).
- Pull the yarn through the chain stitch (you now have 2 loops on your hook).
- Yarn over again.
- Pull the yarn through both loops on your hook. Congratulations, you’ve made your first single crochet (sc)!
- Continue to work 1 sc into each remaining chain across the entire row. You should end up with a total of 59 single crochet stitches.
- Once you’ve reached the end of the row, chain 1 (ch 1). This chain 1 acts as a “turning chain” and gives you the necessary height to start the next row.
- Turn your work. This means flipping your crochet piece over, like turning a page in a book, so your hook is ready to work into the first stitch of the new row.
- Row 2 (Smallest Petals / Inner Layer – Single Crochet & Chain 1):
- This row starts creating the texture for your inner, tighter petals.
- Work (1 sc, ch 1) into the first single crochet stitch of the previous row. (This means you’ll make one sc stitch, then chain one, all into the very first stitch space.)
- Now, skip the next single crochet stitch.
- Work (1 sc, ch 1) into the single crochet stitch after the one you skipped.
- Repeat this pattern: * Skip 1 sc. Work (1 sc, ch 1) into the next sc. *
- Continue repeating from * to * across the entire row. You’ll end up with approximately 30 (sc, ch 1) pairs.
- At the end of the row, chain 2 (ch 2). This chain 2 will give you the necessary height for the next row and counts as the first half double crochet (hdc) of the next row (though you won’t work into it directly until the end of the next row).
- Turn your work.
- Row 3 (Medium Petals – Half Double Crochet & Chain 1):
- This row builds slightly taller petals, adding to the rose’s fullness.
- You’ll be working into the chain 1 spaces from the previous row. These are the little gaps created by your “ch 1” stitches.
- Work (2 half double crochet (hdc), ch 1) into the first chain 1 space from the previous row. (To make an hdc: Yarn over, insert hook into the chain 1 space, yarn over, pull up a loop [you now have 3 loops on your hook], yarn over, pull through all 3 loops on your hook. Make two of these, then ch 1.)
- *Work (2 hdc, ch 1) into the next chain 1 space.*
- Repeat from * to * across the entire row.
- You’ll have 30 (2hdc, ch 1) groups.
- At the end of the row, chain 3 (ch 3). This chain 3 gives you the necessary height for the next row and counts as the first double crochet (dc) of the next row.
- Turn your work.
- Row 4 (Largest Petals / Outer Layer – Double Crochet & Chain 1):
- This final row creates the largest, most prominent petals, which will form the outermost layers of your rose.
- You’ll continue working into the chain 1 spaces from the previous row.
- Work (3 double crochet (dc), ch 1) into the first chain 1 space from the previous row. (To make a dc: Yarn over, insert hook into the chain 1 space, yarn over, pull up a loop [you now have 3 loops on your hook], yarn over, pull through 2 loops, yarn over, pull through the remaining 2 loops. Make three of these, then ch 1.)
- *Work (3 dc, ch 1) into the next chain 1 space.*
- Repeat from * to * across the entire row.
- You’ll have 30 (3dc, ch 1) groups.
- Fasten off your yarn. This means cutting the yarn, leaving a very long tail (at least 24-30 inches / 60-75 cm is ideal for a large rose). Then, pull this long tail completely through the loop left on your hook and gently tug to secure the knot. This long tail is absolutely critical for sewing your large rose together later!
Part 2: Rolling and Shaping Your Rose
This is the most exciting part, where your flat strip transforms into a gorgeous 3D flower! Take your time and enjoy the process.
- Identify the Smallest End: Look at your crocheted strip. One end will have the shorter, single crochet stitches (from Row 2). This is the end where you started your initial chain. This end will form the tight center bud of your rose. The other end, with the taller double crochet stitches (from Row 4), will be the outermost petals.
- Start the Roll:
- Take the end with the smallest petals (the sc end).
- Begin to roll this end tightly inwards a few times with your fingers, forming a small, snug cylinder – this is the very core of your rose.
- Continue Rolling and Shaping:
- As you continue to roll the rest of the strip, begin to slightly angle it downwards and outwards. This is the secret to creating the natural spiral effect. The taller sections (hdc and dc rows) will naturally begin to flare out more than the tighter inner ones.
- Let the crocheted fabric and the petals overlap naturally as you roll. Don’t pull too tightly on the rolling; allow the petals to sit somewhat loosely and gracefully, mimicking the way real rose petals unfurl. Guide them with your fingers to ensure they form a pleasing, continuous spiral.
- Keep rolling until you’ve used the entire strip and your rose has taken shape.
- Secure with Pins (Optional but Highly Recommended):
- Once you’ve rolled the entire strip into your desired rose shape, it’s very helpful to use a few sewing pins (dressmaker pins) to temporarily hold the base of the rose together. Stick the pins through the layers at the bottom to keep them from unraveling while you prepare to sew. This makes the next step much easier.
Part 3: Sewing the Rose Together
This is the crucial step that will make your beautiful, large rose permanent and hold its shape. This is why that long tail is so important!
- Thread Your Needle:
- Thread the very long tail you left from Row 4 onto your yarn needle.
- Sew the Base Thoroughly:
- Starting from the very center of the rose’s base (the underside of the rolled flower), pass your yarn needle repeatedly through all layers of the rolled fabric. Imagine you’re stitching across the “bottom” or “back” of the rose.
- Be meticulous and thorough: Make multiple stitches, going from one side of the base to the other, ensuring you catch every single layer of the rolled strip with your needle. This is vital to secure the spiral and prevent it from unraveling over time.
- Aim to create strong, tight stitches at the base that are not visible from the front (top) of the rose.
- Work your way back and forth across the entire base several times until it feels very sturdy and completely secure. Don’t skimp on this step!
- As you sew, you can continue to gently adjust and shape the petals with your fingers, fluffing them out slightly if desired to enhance the 3D effect.
- Final Secure:
- Once the base feels absolutely solid and secure, weave in any remaining yarn tail into the base of the rose. Pass the needle through the stitches on the underside of the rose several times, going in different directions, to hide the tail completely and ensure it won’t come undone.
- Trim any excess yarn close to the fabric, being careful not to cut any of your rose stitches.
Final Touches:
- Weave in All Remaining Ends:
- You should only have one other tail left: your short starting tail from the initial chain. Use your yarn needle to weave this tail into the base of the rose as well, making sure it’s secure and hidden.
- Gently Shape and Admire:
- With your fingers, gently fluff and adjust the petals to achieve your desired rose shape. You can subtly curl individual petals outwards or inwards to create a more organic and natural look.
- Step back and admire your beautiful, handmade large crochet rose!
Congratulations! You’ve successfully crocheted a stunning large rose flower! This impressive bloom is a testament to your growing crochet skills. It’s ready to add a touch of handmade elegance to blankets, hats, bags, headbands, or simply brighten a space as a lovely decorative piece.
What will you do with your gorgeous new rose?