 by
by This tutorial will guide you through creating a stylish and functional crochet pouch using a single granny square. This is a perfect project for beginners looking to make a wearable accessory and a great way to use up small amounts of yarn. You’ll learn how to make a classic granny square, fold and join it to form a pouch, and add a finishing strap.
Skill Level: Beginner
This project is a great choice if you’re comfortable with:
- Chain (ch): The foundation of crochet.
- Slip Stitch (sl st): For joining stitches and rounds neatly.
- Double Crochet (dc): The main stitch for granny squares.
- Working in Rounds: Crocheting in joined circles.
- Fastening Off: Securely ending your yarn.
- Weaving in Ends: The crucial final step for a polished and durable project.

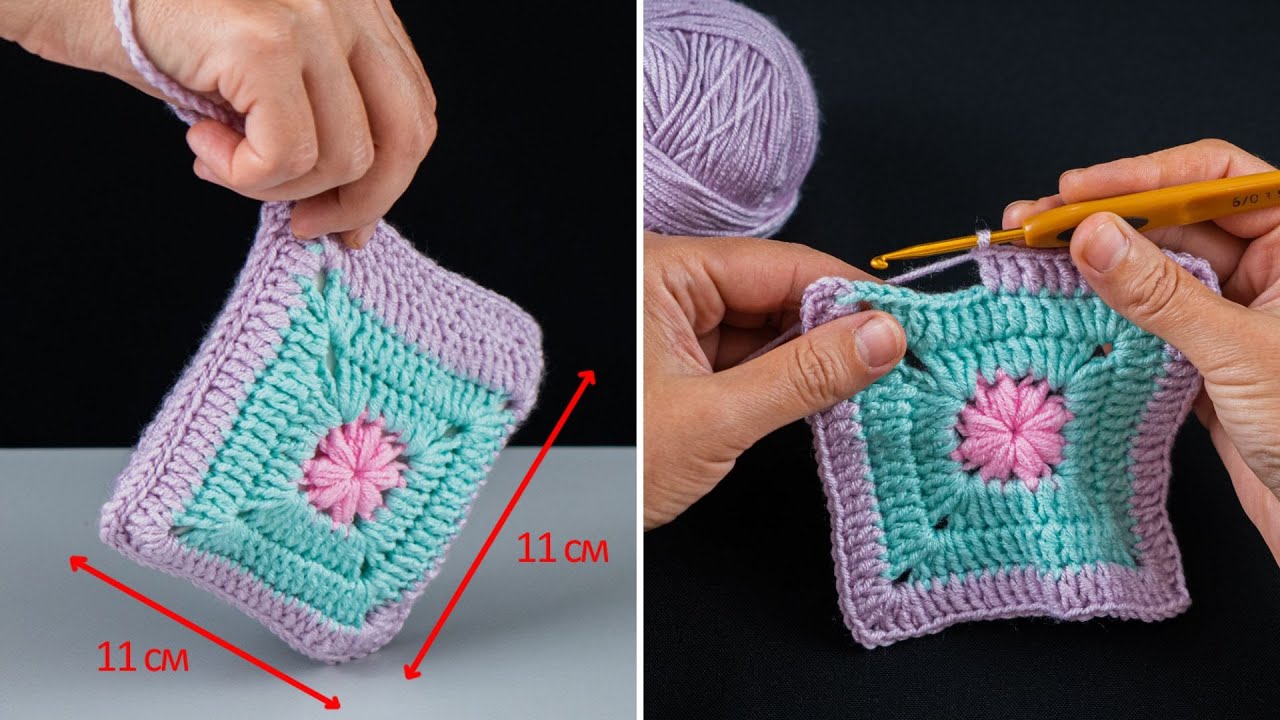
Finished Pouch Dimensions (Approximate):
The finished size will depend on the size of your granny square. For a medium-sized pouch (perfect for small essentials, coins, or a set of earbuds), your square should measure about 8-10 inches (20-25 cm) per side. The finished pouch will be about 5 inches (12.5 cm) wide and 4 inches (10 cm) tall when folded.
Materials You’ll Need:
- Yarn: Approximately 50-75 yards (45-68 meters) of Worsted Weight (Medium #4) Yarn. Cotton yarn is a great choice as it’s durable and holds its shape well.
- Crochet Hook: Size H/5.0mm. This hook size pairs well with worsted weight yarn.
- Yarn Needle (Tapestry Needle): Essential for weaving in ends and sewing the pouch together.
- Scissors: Any sharp pair for cutting your yarn.
- Button or Snap Closure (Optional): For a secure closure.
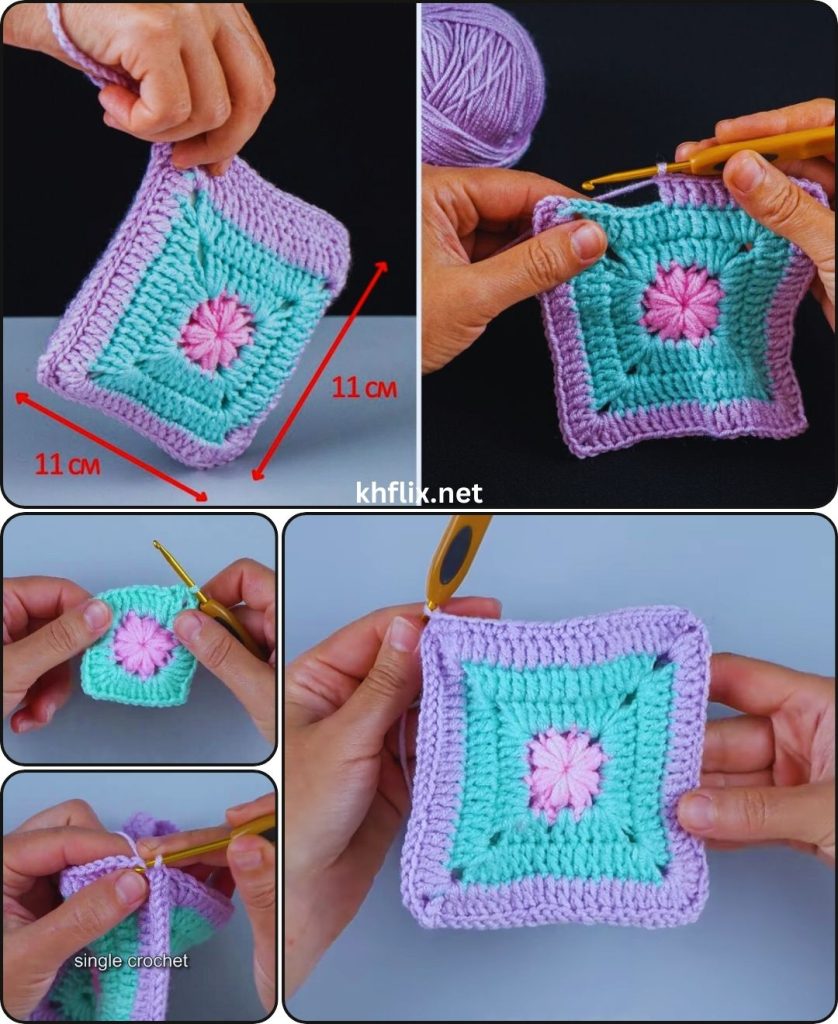
Part 1: Crocheting a Single Large Granny Square
The foundation of this pouch is one large, solid granny square. This eliminates the need for joining multiple motifs and makes the project quick to complete.
- Round 1 (Magic Ring):
- Create a Magic Ring (MR).
- Chain 3 (ch 3) (counts as your first dc).
- Work 2 double crochet (dc) stitches into the ring.
- Chain 2 (ch 2) (this creates your first corner space).
- *Work 3 dc into the ring. Chain 2 (ch 2).*
- Repeat from * to * two more times.
- Join with a slip stitch (sl st) to the top of the beginning ch 3. (4 clusters of 3 dc, 4 corner spaces)
- Round 2:
- Chain 3 (ch 3) (counts as your first dc).
- Work 2 dc into the same corner space.
- Chain 1 (ch 1) (this creates a side space).
- In the next corner space, work (3 dc, ch 2, 3 dc).
- Chain 1 (ch 1).
- In the next corner space, work (3 dc, ch 2, 3 dc).
- Chain 1 (ch 1).
- In the next corner space, work (3 dc, ch 2, 3 dc).
- Chain 1 (ch 1).
- In the first corner space (where you started), work 3 dc.
- Join with a sl st to the top of the beginning ch 3.
- Round 3:
- Chain 3 (ch 3).
- Work 2 dc into the same corner space.
- Chain 1 (ch 1).
- Work 3 dc into the next side space.
- Chain 1 (ch 1).
- In the next corner space, work (3 dc, ch 2, 3 dc).
- Chain 1 (ch 1).
- Continue this pattern: 3 dc into each side space and (3 dc, ch 2, 3 dc) into each corner space.
- Join with a sl st to the top of the beginning ch 3.
- Repeat Round 3 until your square measures about 8-10 inches (20-25 cm) on each side. The number of rounds will vary based on your yarn and tension, but it’s typically around 8-10 rounds.
Part 2: Assembling the Pouch
Once you’ve completed your granny square, it’s time to transform it into a pouch!
- Fold the Square:
- Lay your granny square flat with the right side facing down.
- Fold the bottom third of the square up toward the center.
- Fold the top third down to meet the folded-up section. You should now have a layered rectangle with the top flap covering the front of the pouch.
- Sew the Sides:
- Using a yarn needle and a long tail of yarn, begin sewing the two sides of the pouch together.
- You can use a whip stitch for a clean and simple seam. Sew through both layers of fabric, from front to back, along one side of the pouch.
- Repeat on the other side.
- Fasten off both tails of yarn securely.
Part 3: Adding the Strap (Optional)
A simple crochet chain is all you need to create a functional strap for your pouch.
- Create the Strap:
- Attach your yarn to one of the top corners of the pouch (where the flap meets the side).
- Chain 25-30 (ch 25-30), or more if you want a longer strap.
- Slip stitch to the opposite corner of the pouch.
- Fasten off, leaving a tail.
- Weave in All Ends:
- Use your yarn needle to meticulously weave in all the yarn tails from the square, the seams, and the strap. This is the most crucial step for a professional and durable finish.
Congratulations! You’ve successfully crocheted an easy and stylish Granny Square Pouch! This project is a fantastic way to show off your creativity and make a one-of-a-kind accessory. What will be the first thing you carry in your new pouch?