 by
by Welcome! Here is a detailed, step-by-step guide to creating a beautiful and easy four-color granny square pouch. This pattern is perfect for beginners looking to practice color changes and for anyone who loves a quick, functional, and charming project.
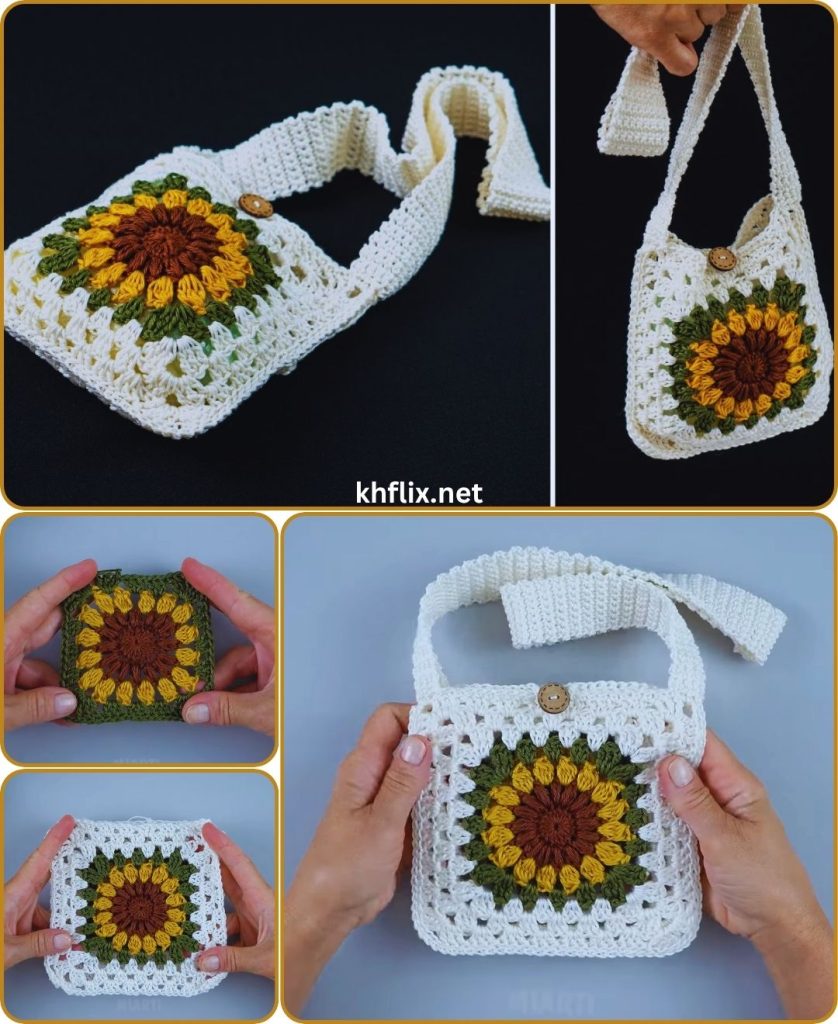
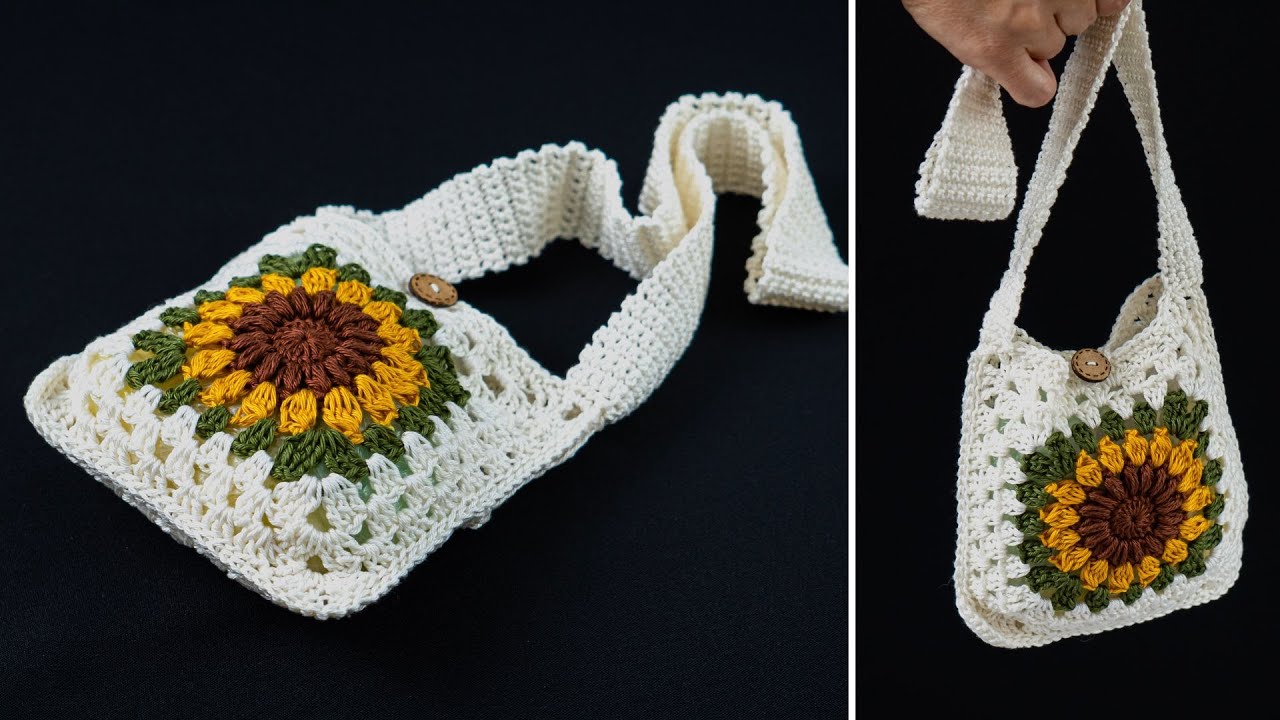
How to Crochet an Easy Four-Color Granny Square Pouch: A Detailed Step-by-Step Pattern
The classic granny square is one of the most iconic and versatile motifs in crochet. It’s simple, works up quickly, and can be used to create everything from blankets to cardigans. In this detailed guide, we will take this humble square and transform it into a stylish and practical pouch, perfect for holding coins, makeup, craft supplies, or any small treasures.
This project uses four complementary colors to create a vibrant and eye-catching design. It’s an excellent way to use up scrap yarn and practice your fundamental crochet skills, including changing colors and seaming. Let’s get started!
Before You Begin
Skill Level
Easy / Beginner-Friendly. You should be comfortable with basic crochet stitches.
Materials & Tools
- Yarn: Worsted weight (Category 4) or DK (Category 3) yarn in four different colors. We will refer to them as Color A, Color B, Color C, and Color D. Cotton yarn is a great choice for pouches as it’s durable and holds its shape well.
- Crochet Hook: A size appropriate for your yarn. For worsted weight, a 4.5mm (US G-7) or 5.0mm (US H-8) hook is recommended. For DK weight, a 4.0mm (US G-6) hook is a good choice.
- Tapestry Needle (or Yarn Needle): Essential for weaving in ends and seaming.
- Scissors: For cutting yarn.
Abbreviations (US Crochet Terms)
- ch: chain
- st(s): stitch(es)
- sl st: slip stitch
- sc: single crochet
- dc: double crochet
- sp: space
- beg: beginning
- [ … ]: repeat instructions within brackets as directed
Gauge & Finished Size
- Gauge: While not critical for a pouch, a consistent gauge will ensure your two squares are the same size. A 5-round granny square using worsted weight yarn and a 5.0mm hook should measure approximately 6×6 inches (15×15 cm).
- Finished Pouch Size: Approximately 6 inches wide by 6.5 inches tall, excluding the drawstring.
Part 1: Crocheting the Granny Squares (Make 2)
We will create two identical 5-round granny squares. Each round will feature a color change, creating a beautiful pattern.
The Classic Granny Square Pattern
Starting the Square (with Color A)
You can start your granny square in two ways:
- Magic Ring (Recommended): Create a magic ring/circle. This method creates a tightly closed center with no hole.
- Chain Method: Ch 4, and sl st into the first ch to form a ring.
Round 1 (Color A)
- Start with your chosen method (magic ring or ch 4 ring).
- Ch 3 (this counts as your first dc stitch).
- Work 2 more dc into the center of the ring. This is your first “granny cluster.”
- Ch 2. This creates your first corner space.
- [Work 3 dc into the ring, then ch 2]. Repeat this step 2 more times.
- You should now have four 3-dc clusters and three ch-2 corner spaces.
- To complete the round, sl st into the top of the beginning ch-3.
- Fasten off Color A and cut the yarn, leaving a 6-inch tail to weave in later.
Your square now has 4 clusters and 4 corner spaces.
Round 2 (Color B)
- Take Color B and make a slip knot on your hook.
- Insert your hook into any of the four ch-2 corner spaces from Round 1.
- Complete a standing dc (or, alternatively, join with a sl st and ch 3). Work 2 more dc into the same corner space.
- Ch 2, then work 3 more dc into the same corner space. This forms your first new corner: (3 dc, ch 2, 3 dc).
- Ch 1. This chain creates the space along the side of the square.
- Move to the next ch-2 corner space. Work [(3 dc, ch 2, 3 dc), ch 1] in each of the remaining 3 corners.
- To finish, sl st into the top of the beginning dc (or the top of the ch-3).
- Fasten off Color B.
Your square now has 8 clusters and 4 corner spaces.

Round 3 (Color C)
- Join Color C with a slip knot on your hook into any ch-2 corner space.
- In that corner space, work (3 dc, ch 2, 3 dc).
- Ch 1.
- In the next ch-1 side space, work 3 dc.
- Ch 1.
- You’ve now reached the next corner. Repeat the pattern around: work (3 dc, ch 2, 3 dc) in each of the four corner spaces, and work 3 dc in each of the four ch-1 side spaces. Remember to place a ch 1 between every cluster.
- After completing the final side cluster and a ch 1, sl st to the top of the beginning stitch to join.
- Fasten off Color C.
Your square now has 12 clusters and 4 corner spaces.
Round 4 (Color D)
- Join Color D into any ch-2 corner space.
- The pattern continues to expand. You now have two side spaces between each corner.
- Repeat the pattern from Round 3: Work (3 dc, ch 2, 3 dc) in each corner space, and work 3 dc in each ch-1 side space. Place a ch 1 between all clusters.
- When you’ve worked all the way around, sl st to join.
- Fasten off Color D.
Your square now has 16 clusters and 4 corner spaces.
Round 5 (Color A)
- We return to our first color to frame the square nicely.
- Join Color A into any ch-2 corner space.
- Repeat the same pattern as the previous rounds, working corners and sides as established. You will now have three side spaces between each corner.
- Work all the way around, sl st to join.
- Do not fasten off the second square! For the first square, fasten off and weave in all your ends. For the second square, leave the yarn attached to proceed with assembly.
Important Step: Weave in Your Ends Before assembly, take your first completed square and use your tapestry needle to weave in all the yarn tails on the back side. This is crucial for a durable and professional-looking pouch. Do the same for the second square, except for the final working yarn tail.
Part 2: Assembling the Pouch
Now that you have two beautiful, identical squares, it’s time to turn them into a pouch.
Step 1: Positioning Place the two squares together, ensuring the wrong sides are facing each other and the right (pretty) sides are facing out. Line up all the stitches and corners perfectly.
Step 2: Seaming the Sides We will use a single crochet seam, which is sturdy and creates a lovely finished edge. We will join three of the four sides, leaving the top open.
- You should still have Color A attached to a corner of your second square. If you fastened off, re-join Color A in any corner, making sure to go through the stitches of both squares.
- Ch 1 to secure.
- Working through both layers of fabric (i.e., through the stitches of both squares simultaneously), work 1 sc in each stitch and 1 sc in each ch-1 space down the first side.
- When you reach the first corner, work 3 sc into the corner space. This helps create a sharp, defined corner.
- Continue working sc evenly across the bottom edge of the pouch in the same manner.
- Work 3 sc in the next corner space.
- Continue working sc evenly up the third and final side.
- When you reach the top corner, stop. Do not fasten off. The top edge remains open.
Your two squares are now joined to form a bag!
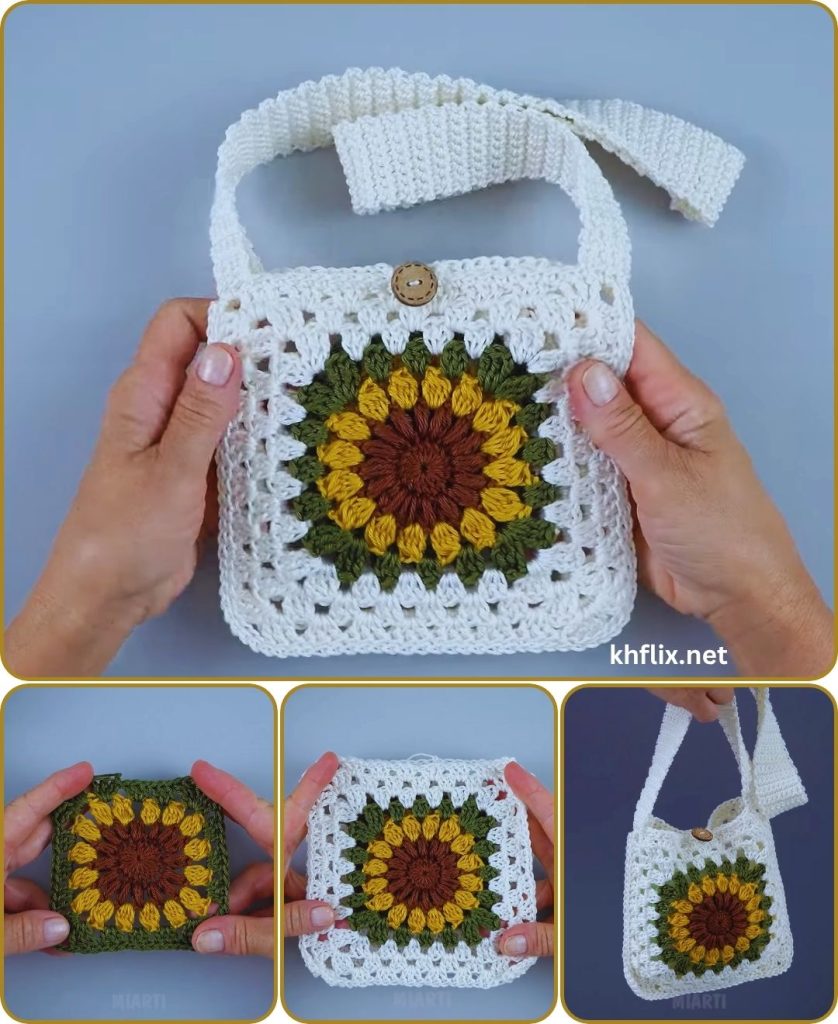
Part 3: Creating the Top Border and Drawstring Channel
This finishing touch provides a neat opening and a place to thread our drawstring. We will continue working with Color A.
Round 1 of Border:
- Now, working only on the top layer of the front side of the pouch opening, work 1 sc in each stitch across.
- When you reach the side seam, work 1 sc into the seam itself to bridge the gap.
- Continue working 1 sc in each stitch across the top of the back side of the pouch.
- Sl st to the first sc of the round to join.
Round 2 of Border:
- Ch 1. Work 1 sc in each stitch all the way around the opening.
- Sl st to the first sc to join.
Round 3 of Border (Eyelet Round for Drawstring):
- Ch 4 (this counts as 1 dc + ch 1).
- Skip the next stitch.
- [Dc in the next stitch, ch 1, skip the next stitch].
- Repeat the instructions in [ … ] all the way around the opening.
- Sl st into the 3rd ch of the beginning ch-4 to join. This creates a series of small holes for the drawstring.
Round 4 of Border:
- Ch 1. Work 1 sc in each stitch and each ch-1 space around the opening.
- Sl st to the first sc to join. Fasten off and weave in your final end.
Part 4: Making and Adding the Drawstring
You have a few options for the drawstring.
Option 1: Simple Crochet Chain (Easiest) Using Color D (or any color you prefer), leave a 6-inch tail and make a crochet chain that is approximately 20-25 inches (50−65 cm) long. Fasten off, leaving another 6-inch tail.
Option 2: I-Cord (Sturdier) For a more substantial, rope-like cord, crochet an I-cord to your desired length.
Threading the Drawstring:
- Starting from the front center of your pouch, use your tapestry needle or a safety pin attached to one end of the drawstring to weave it in and out of the eyelet holes created in Round 3 of the border.
- Once threaded all the way through, tie the two ends of the drawstring together in a secure knot. You can trim the ends or add beads or small tassels for extra flair.
To create simple tassels, wrap yarn around two or three fingers about 10-15 times. Tie it off at the top, secure it to the end of your drawstring, and trim the bottom loops evenly.
Customization Ideas
- Color Play: Use a single color for a minimalist look, or a different color for every round to create a rainbow effect.
- Add a Lining: For extra durability, especially if you plan to store sharp objects like crochet hooks, you can hand-sew a simple fabric lining inside the pouch.
- Embellishments: Sew on buttons, beads, or small appliqués to the front of your pouch for a unique touch.
Congratulations! You have successfully created a beautiful and functional Four-Color Granny Square Pouch. This project is a testament to how simple shapes and vibrant colors can combine to make something truly special. Enjoy your new creation!