 by
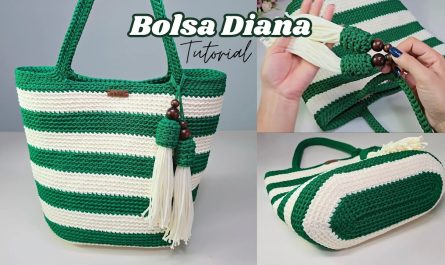
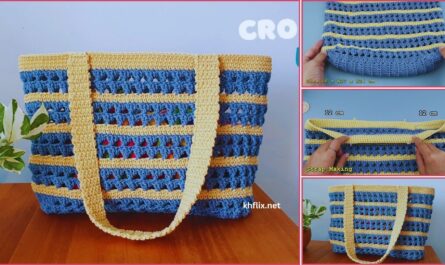
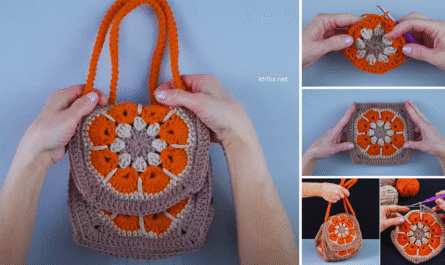
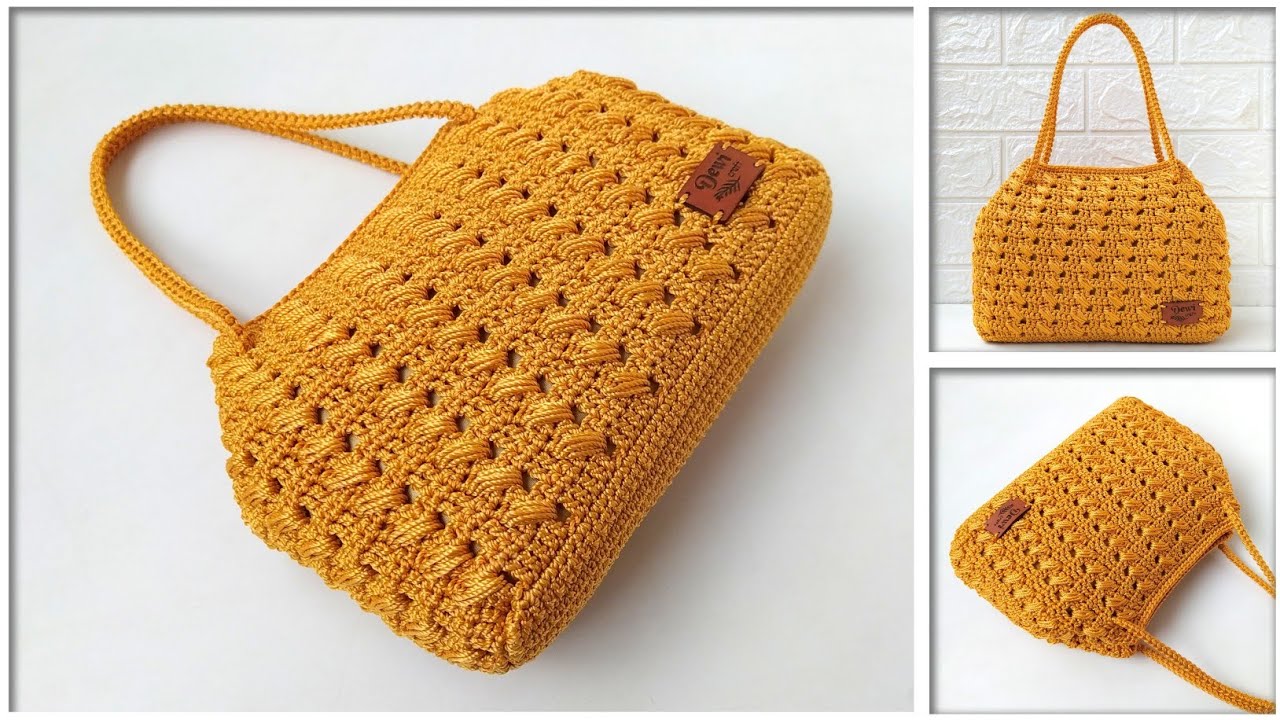
by Crochet bags are a practical and stylish accessory that you can make at home with just yarn, a hook, and a little creativity. For beginners, a pattern crochet bag is a perfect project because it allows you to practice basic crochet stitches, learn how to create texture and motifs, and make something beautiful and functional in a relatively short time.
In this tutorial, we will guide you step by step through creating a beginner-friendly patterned crochet bag, including materials, stitch patterns, handles, and finishing tips.
🌟 Why a Patterned Crochet Bag is Perfect for Beginners
Patterned crochet bags are a great beginner project because:
- They teach stitch variation in a simple, repeatable way
- Small motifs or textures make mistakes less noticeable
- The project is manageable in size
- You end up with a stylish, usable bag
- Offers a creative way to combine colors and patterns
Even if this is your first bag, using a simple repeating pattern ensures it looks professional.
🧶 Materials Needed
Yarn
- Medium-weight cotton or acrylic yarn (worsted weight is ideal)
- Two or three colors for a simple pattern design
- Cotton yarn is recommended for strength and durability
Crochet Hook
- 5 mm to 6 mm (adjust according to yarn thickness)
Other Supplies
- Scissors
- Yarn needle for weaving in ends
- Stitch markers (optional)
- Fabric lining (optional, for sturdier bag)
🪡 Basic Crochet Stitches Used
This project is beginner-friendly and uses simple stitches:
- Chain (ch)
- Slip stitch (sl st)
- Single crochet (sc)
- Half double crochet (hdc)
- Double crochet (dc)
✨ Optional: Back loop only (BLO) or simple shell stitches for added texture.
📏 Determining Bag Size
The size can be adjusted depending on your preference:
- Small bag: 8–10 inches wide, 6–8 inches high
- Medium bag: 10–12 inches wide, 8–10 inches high
- Large bag: 12–15 inches wide, 10–12 inches high
Adjust the foundation chain for width and number of rows for height.
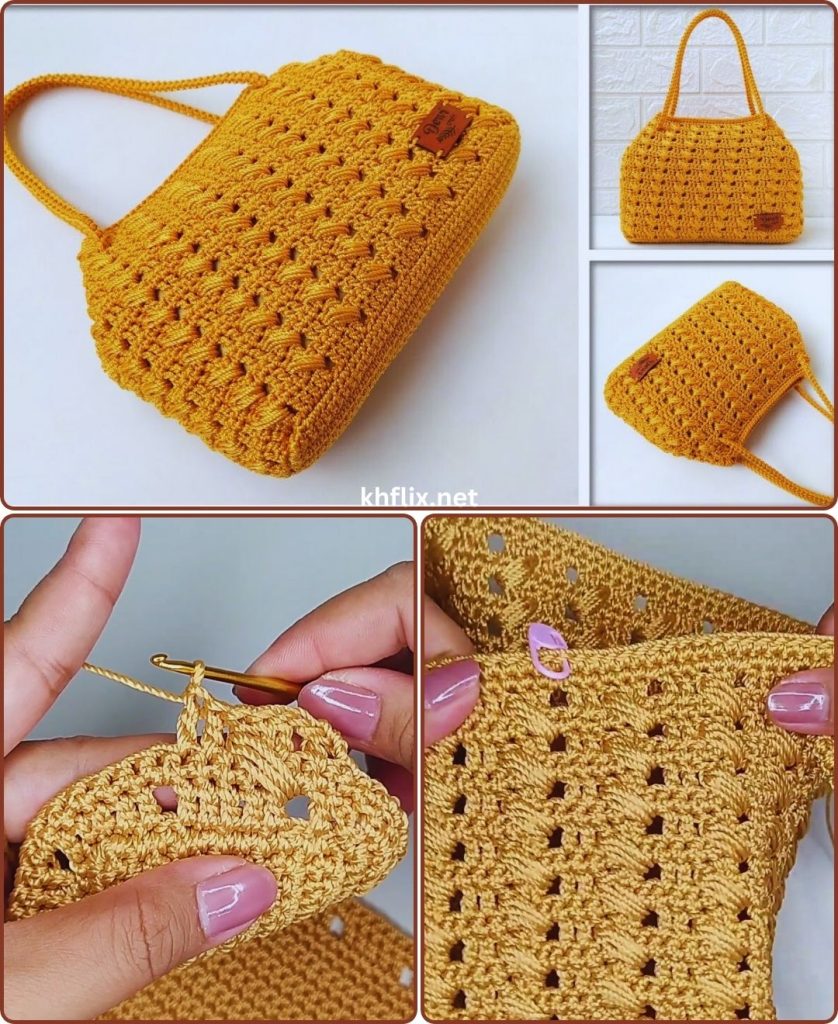
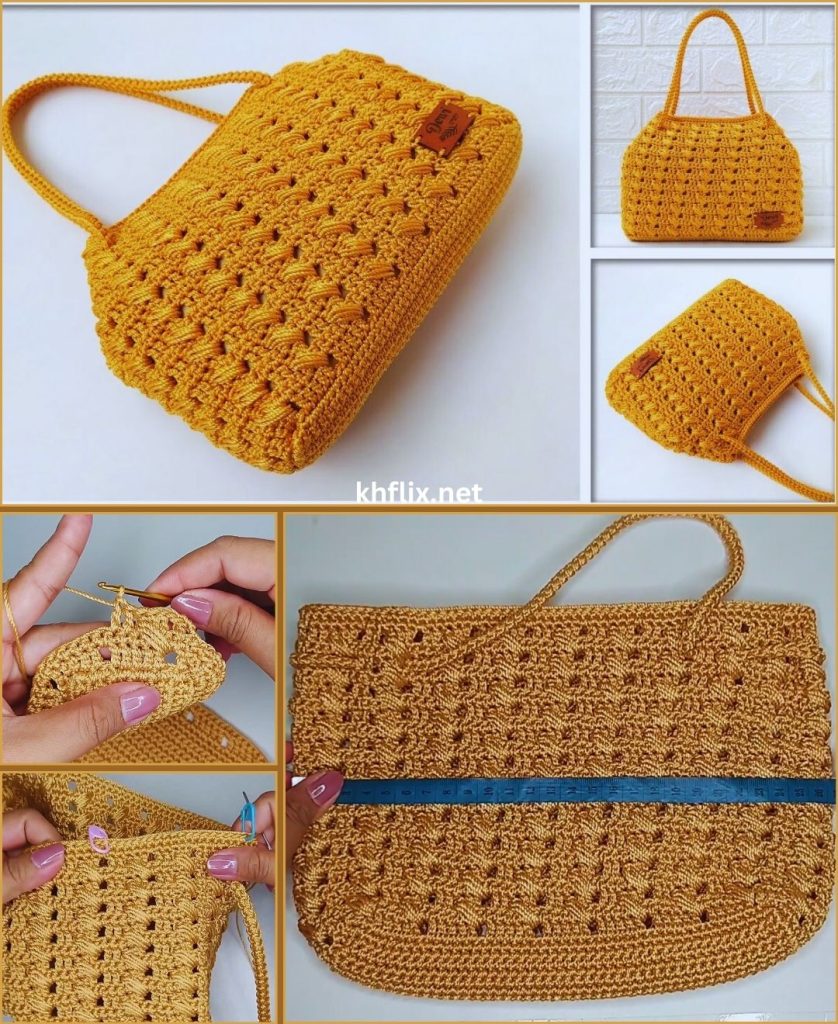
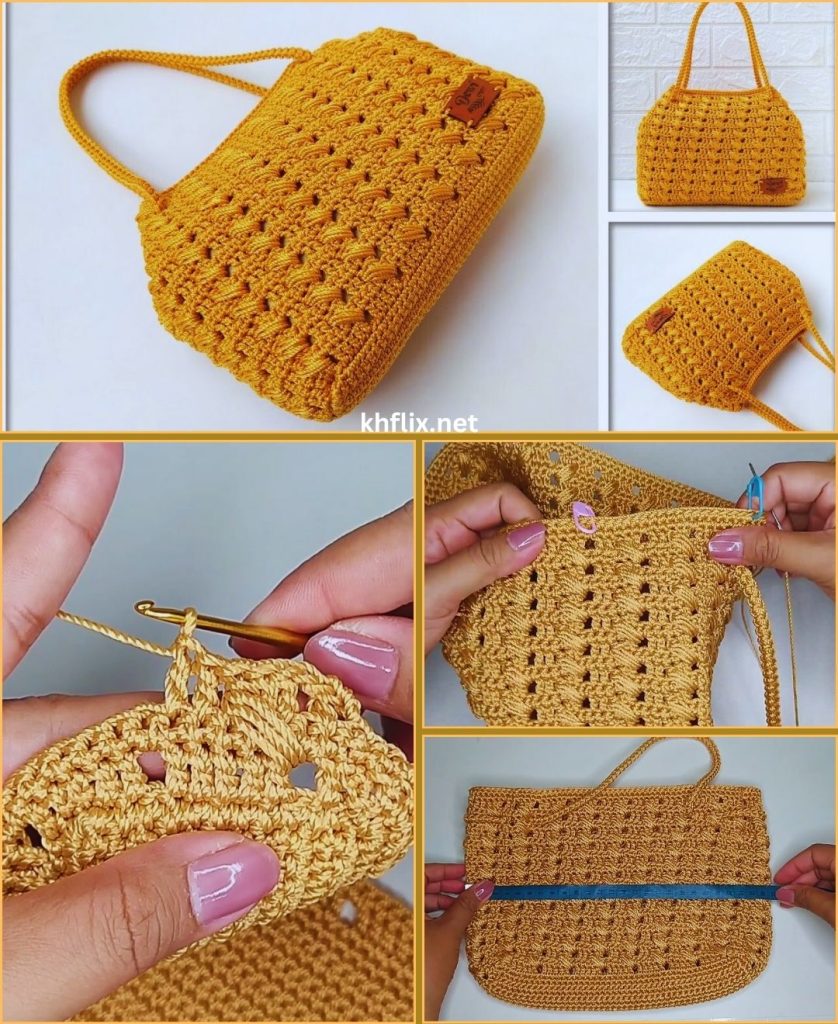
🧵 Step-by-Step: Easy Pattern Crochet Bag
Step 1: Make the Base
- Start with a foundation chain according to your desired width.
- Work 1 row of single crochet or half double crochet.
- Continue working rows until the base reaches the desired depth (usually 3–5 inches).
✨ Tip: For extra sturdiness, use two strands of yarn held together or a slightly tighter tension.
Step 2: Start the Pattern
For a simple patterned effect:
Example Pattern: Shell Stitch
- Row 1: sc in each stitch
- Row 2: Skip 2 stitches, 5 dc in next stitch, skip 2 stitches, sc in next stitch, repeat across the row
- Row 3: sc in each stitch and chain space
- Repeat rows 2 and 3 for the desired bag height
Other pattern options for beginners:
- Alternating rows of sc and dc
- Simple stripes using different colors
- BLO stitches for textured ridges
The repeatable nature of patterns ensures your bag looks neat.
Step 3: Shape the Bag
- Keep working your chosen pattern until the bag reaches the desired height.
- For a tapered top, decrease stitches evenly on each row.
- For a straight-top bag, simply continue with the same stitch pattern.
Step 4: Create Handles
Handles can be done two ways:
Option 1: Integrated Handles
- Leave spaces in the top row for handles (skip stitches for handle opening).
- Work the same pattern around the remaining stitches.
Option 2: Separate Handles
- Chain desired length for shoulder or hand carry (usually 20–24 inches).
- Work single crochet or hdc across the chain.
- Attach securely to the bag using slip stitches or sewing.
- Reinforce with extra stitches at attachment points.
Step 5: Optional Decorative Elements
- Use contrast colors to highlight the pattern
- Add crochet flowers, tassels, or bobble stitches for style
- Buttons, beads, or appliques can be sewn on for extra charm
Decorative touches make your bag unique and eye-catching.
Step 6: Finish and Weave in Ends
- Cut yarn, leaving a small tail.
- Pull through and tighten the last stitch.
- Use a yarn needle to weave in all loose ends.
- Optional: lightly block the bag for a neat finish.
Step 7: Optional Lining
- Sew a fabric lining for a stronger bag
- Lining prevents items from slipping through holes
- Gives the bag a professional finish
🎨 Color & Pattern Ideas
- Alternating two colors for a classic stripe pattern
- Three-color block pattern for a modern look
- Single color with textured stitches for elegant simplicity
- Gradient or ombre effect with yarn for a soft, stylish vibe
- Small motif repeats, like flowers or shells, for a decorative design
💡 Beginner Tips
- Keep your tension consistent for neat stitches
- Count stitches and rows to maintain symmetry
- Use stitch markers to mark top row or handle placement
- Practice pattern on a small swatch before starting the full bag
- Don’t rush—bags are easier when made patiently
🧼 Care Instructions
- Most cotton yarn bags are machine washable on gentle cycle
- Lay flat to dry to maintain shape
- Avoid harsh detergents to preserve color
- Fabric lining can be hand washed separately
🌈 Skill Level
- Beginner-friendly with optional decorative techniques
- Uses simple, repeatable stitch patterns
- Great for learning pattern creation, shaping, and handle attachment
🎁 Why Pattern Crochet Bags Make Perfect Gifts
- Handmade bags are practical, stylish, and personal
- Ideal for birthdays, holidays, or housewarming gifts
- Can be customized in size, color, and pattern
- Eco-friendly alternative to store-bought handbags
✨ Final Thoughts
Creating a pattern crochet bag is a fun, rewarding, and beginner-friendly project. With basic crochet skills, you can make a stylish, functional, and personalized bag. By using simple stitch patterns, repeating textures, and optional decorative touches, even beginners can create bags that look professional and unique.
Crochet bags combine creativity, practicality, and handmade charm in one project—perfect for learning and gifting! 👜💖🧶
If you want, I can also make a visual diagram and row-by-row template showing the pattern layout, handle placement, and suggested color scheme for beginners to follow more easily.
Do you want me to create that diagram?