 by
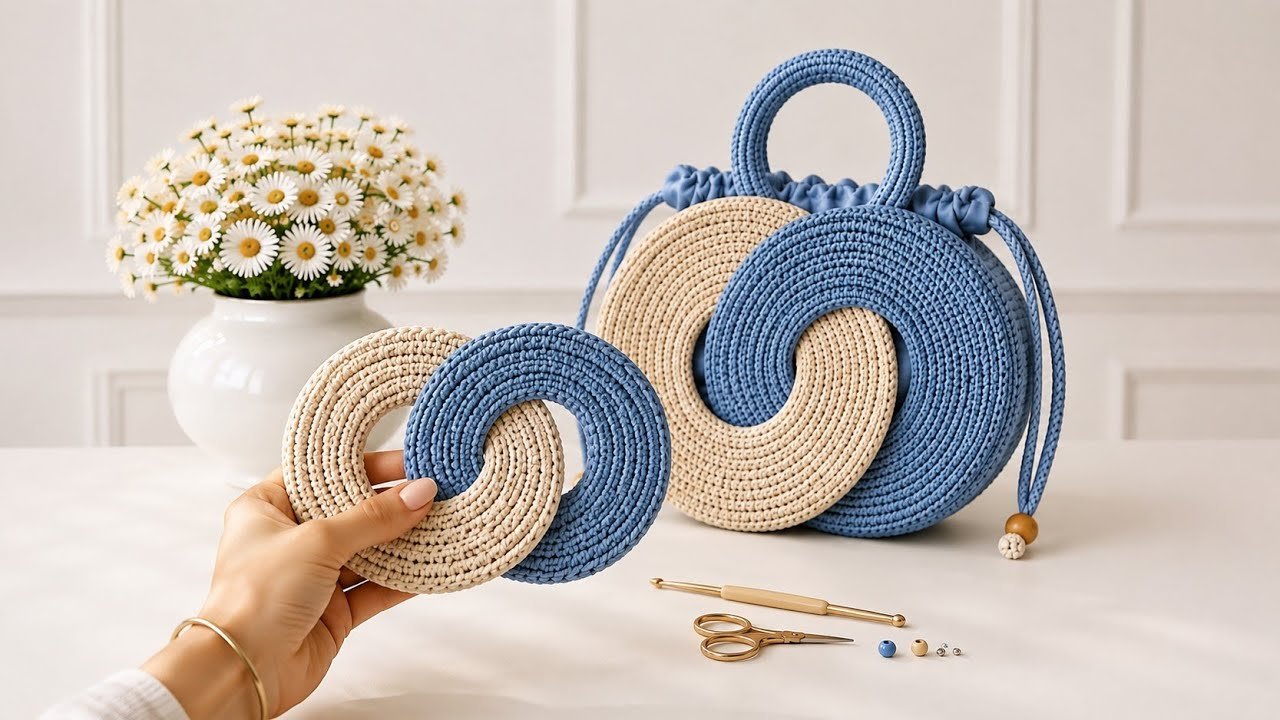
by The Chain Motif Bag is a masterclass in modern, structural elegance. Instead of traditional solid stitches or dense floral squares, this design relies on interlocking, geometric chain links—often worked in thick cord or firm cotton—to create a mesmerizing, architectural pattern. It looks avant-garde and high-end, perfectly balancing negative space with structural integrity.
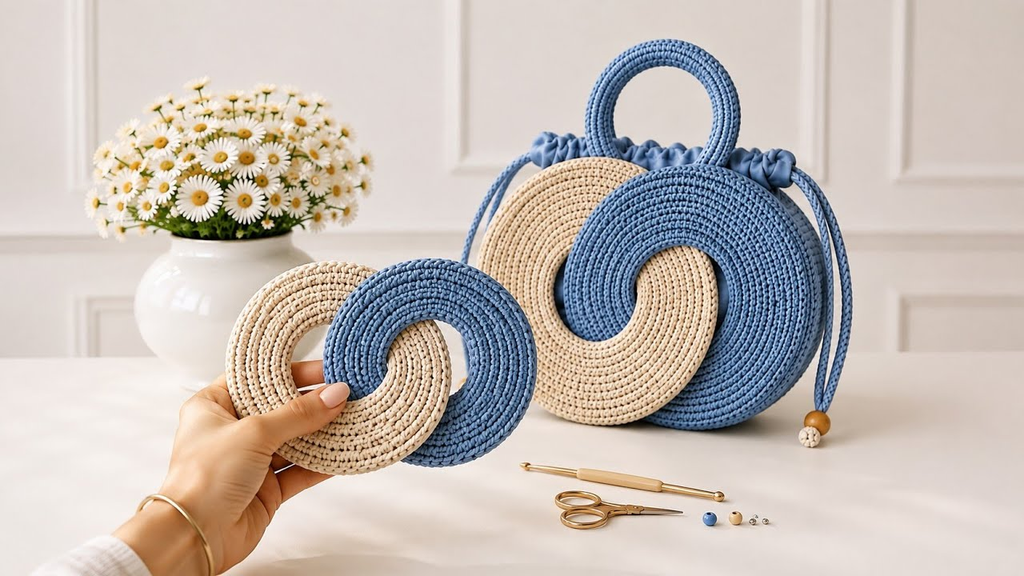
Here is your detailed, step-by-step masterclass on how to crochet a stunning Chain Motif Bag from scratch.
🧶 The Professional Chain Motif Toolkit
- Yarn: Sturdy 100% Cotton (Worsted weight) or 3mm Braided Macrame Cord. Because the chain motif features open loops, standard acrylic yarn will stretch and sag. A rigid cord or tight cotton yarn is mandatory to keep the links crisp and defined.
- Hook: 4.0 mm or 4.5 mm. A slightly smaller hook keeps the tension tight, ensuring the interlocking chains hold their geometric shape without warping.
- Extra Supplies:
- Tapestry needle for weaving ends.
- A color-coordinated fabric lining (an absolute must for open-work bags!).
- Optional magnetic snap closure or leather straps.
🛠 Phase 1: Crafting the Individual Chain Links (The Motif)
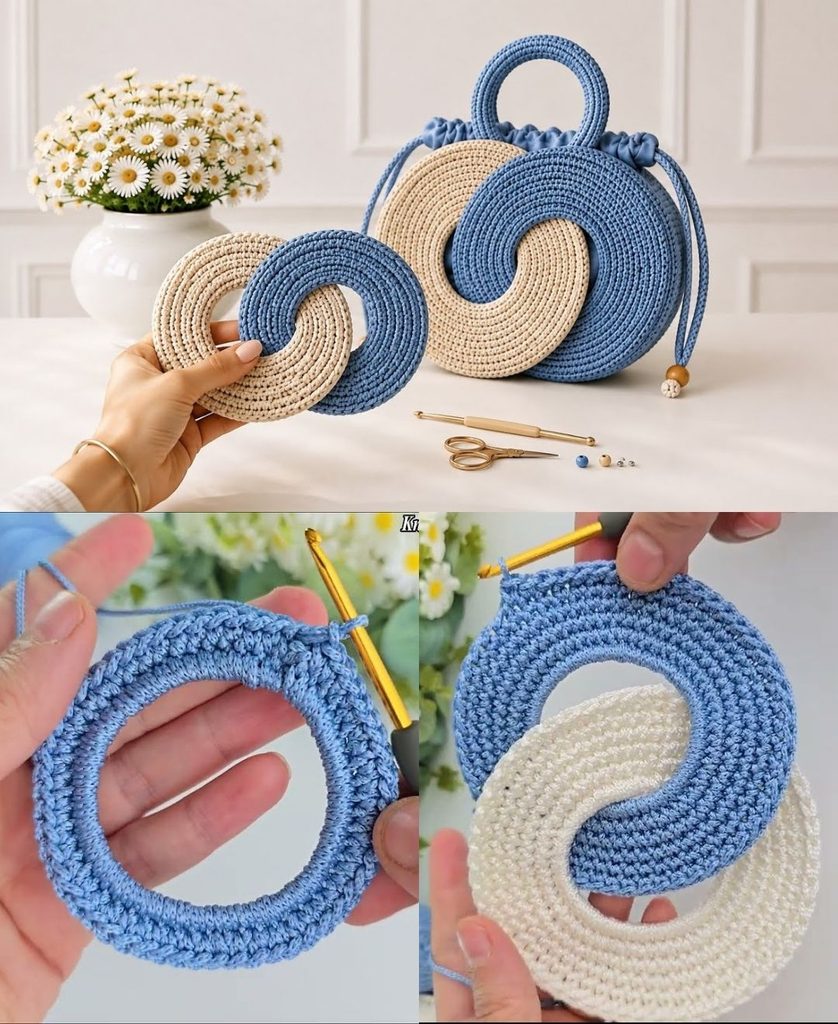
Rather than working in the round continuously, the most striking chain motif bags are assembled from individual, interlocking “chain links” or modular geometric loops.
- The Starting Link:
ch 12, join with asl stto form a closed ring.ch 1, work 18 to 20 sc (single crochet) directly into the ring. Join with asl stto the first sc. Fasten off, leaving a short tail. This forms your first solid, thick ring.
- The Interlocking Second Link:
ch 12, but before you join the chain into a ring, thread it through the center of your first completed ring!- Join the chain with a
sl stto form a ring that is now permanently linked to the first one. - Work 18–20 sc around this new ring. Fasten off.
- Building the Chain Strip: Continue this process—threading each new chain through the previous link before working your single crochets—until you have a long, flexible strip of interlocking links that matches the desired width and height of your bag panels.

🛠 Phase 2: Assembling the Panels
To build a standard tote or structured handbag, you will create multiple interlocking strips and join them together.
- Creating the Body Panels:
- Make 4 to 6 long interlocking chain strips (depending on how wide you want your bag).
- Lay them side-by-side. Use your yarn needle and a length of your cord to whip-stitch the adjacent strips together along their touching outer edges, creating a cohesive, mesh-like geometric sheet.
- Make two identical sheets: one for the front panel and one for the back panel.
- The Sides and Base (The Gusset):
- To give the bag depth, crochet a solid strip of single crochets or half-double crochets using the same yarn to act as a bottom and side gusset.
- Attach the gusset to your front and back chain panels using a tight, clean whip stitch or a flat slip-stitch join.
🌟 Phase 3: Structural Integrity & The “Boutique” Finish
Because the chain motif inherently contains large, open gaps, finishing details are what elevate this project from a craft experiment to a luxury accessory.
1. The Non-Negotiable Fabric Lining
- Because your belongings (keys, pens, coins) would slip straight through the open chain links, a fabric lining is mandatory.
- Cut a cotton fabric to match the exact interior dimensions of your bag box.
- Sew the lining pouch, fold the top edge over by half an inch, and meticulously hand-stitch it to the inner rim of your crochet chain opening using a matching thread.

2. The Reinforced Rim
- To prevent the top opening of your bag from stretching outward when carried, work 2 to 3 rounds of tight single crochet right along the top edge of your chain panels.
- Pro-Trick: As you crochet this final top border, lay a piece of nylon cord or thick twine inside your stitches (“carrying the cord”). Crochet right over it. This creates an unyielding, rigid rim that keeps the bag’s shape permanently intact.
3. Professional Handles
- Pair your chain motif body with sleek leather straps or structured bamboo handles.
- Attach them by crocheting small, dense rectangular tabs directly onto the reinforced top rim of the bag, securing the hardware firmly so the weight is distributed evenly across the rigid top border.

✨ Pro-Tips for Success
- Block Before Lining: Before sewing in your fabric lining, lay your finished chain panels flat, pin them to exact measurements, and steam them thoroughly. This locks the geometric links into a neat, uniform grid.
- Monochrome Magic: Chain motif bags look most high-end when worked in a single solid color (such as crisp optic white, jet black, or rich saddle brown). The beauty of the bag lies entirely in its texture and shadows, so avoiding multicolored yarns keeps the design looking modern and architectural.
Would you like a guide on how to install a hidden magnetic snap into the lining of this bag, or would you prefer instructions for crafting a matching chain-link shoulder strap?
Video tutorial: