 by
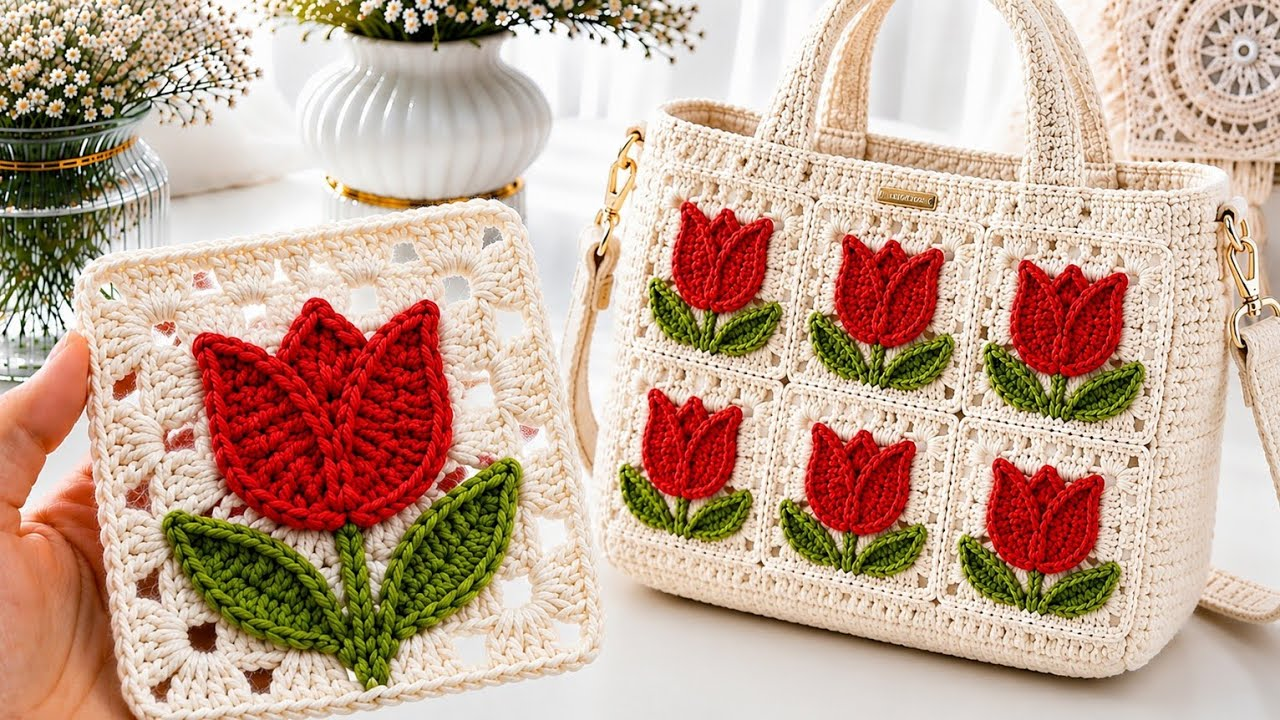
by Creating a Tulip Flower Motif is a wonderful way to bring springtime charm into your handmade creations. The iconic, upright shape of a tulip lends itself beautifully to textured stitchwork, making it a standout feature whether you are crafting a boutique handbag, a delicate table runner, or a classic granny square blanket.
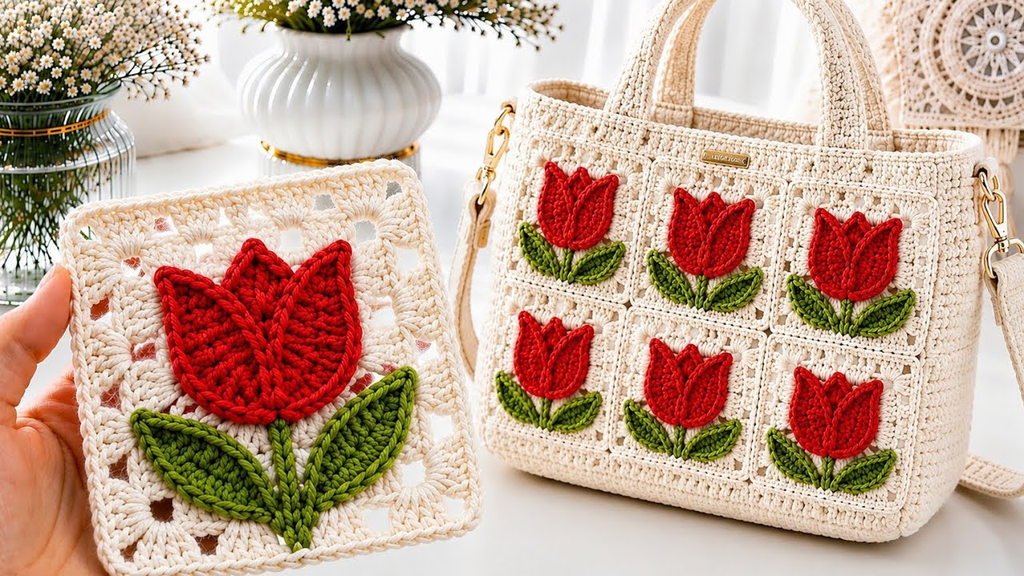
Here is your detailed, step-by-step masterclass on how to crochet a stunning tulip flower motif and adapt it into your choice of a bag, table runner, or granny square project.
🧶 The Tulip Motif Toolkit
- Yarn:100% Cotton Yarn (Sport weight or DK for bags and runners; Worsted weight for blankets). Cotton gives the tulip petals sharp, clean definition and ensures the motif maintains its structural shape.
- Palette: Vibrant tulip colors for the blossom (such as soft pink, crimson, magenta, or sunshine yellow), rich green for the stem and leaves, and a neutral background color (like cream, oatmeal, or charcoal) to frame the square.
- Hook: 3.5 mm to 4.0 mm (for cotton/fine projects) or 5.0 mm (for cozy blankets). A snug hook size keeps your tension even and professional.
- Extra Supplies: Tapestry needle for weaving in ends, blocking mats, and pins.
🌷 Step 1: Crafting the Tulip Flower Motif
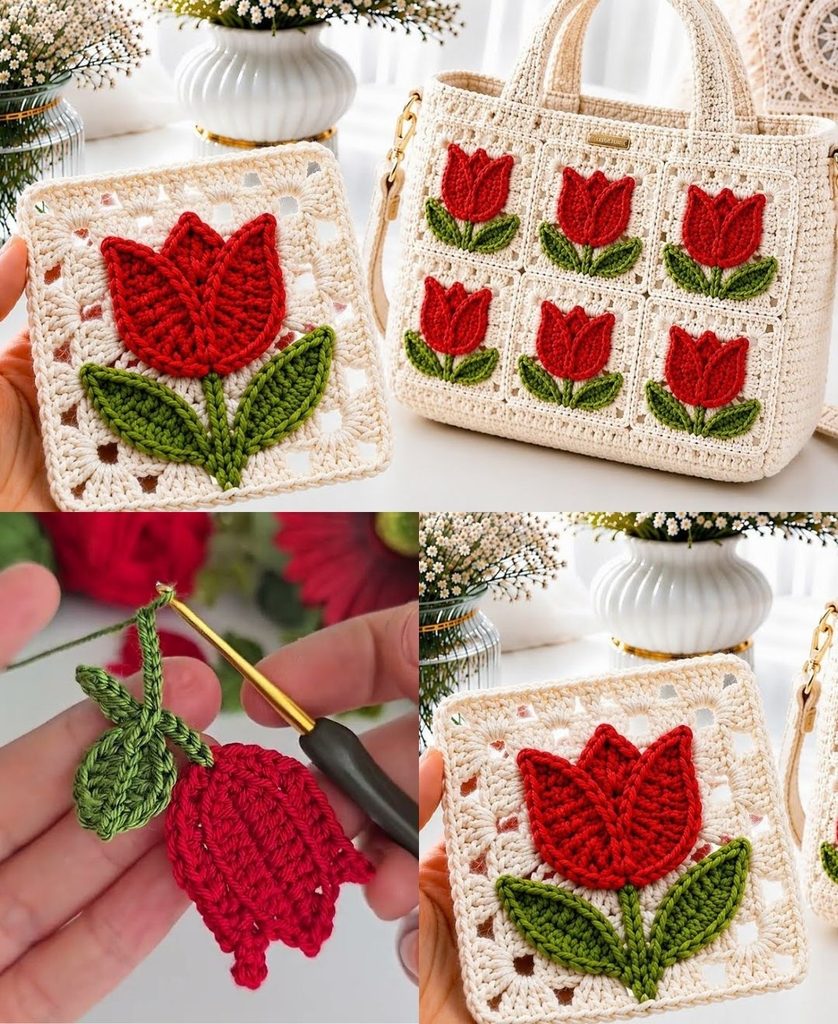
This design features a 3D or textured flat tulip bloom sitting atop a green stem and leaves, enclosed within a crisp geometric square frame.
Phase 1: The Stem and Leaves
- With your Green yarn,
ch 6and join with asl stto form a tiny ring. ch 3(counts as dc), work 2 dc into the ring to form the base of the stem.ch 2, and work a small leaf on either side by working(1 hdc, 2 dc, 1 hdc)into the chain spaces, creating symmetrical foliage branching out from the center stem. Fasten off green, leaving a short tail.

Phase 2: The Tulip Blossom
- Attach your Tulip Petal Color (e.g., pink or crimson) directly to the top of the green stem.
- Row 1 (The Base of the Blossom): Work 3 dc into the top of the stem. Turn.
- Row 2 (The Blooming Body):
ch 3, work2 dcin the first stitch,1 dcin the middle stitch, and3 dcin the last stitch to flare the tulip outward. Turn. - Row 3 (The Pointed Petal Tips): To create the classic notched top of a blooming tulip, work
(sl st, ch 2, dc)in the first section, skip a stitch, and work cluster variations across the top edge to shape the distinct curved petals. Fasten off tulip color.
Phase 3: Squaring the Motif (The Frame)
- Attach your Background Color (e.g., cream) to any outer edge of your tulip blossom.
- Work your corners
(2 dc, ch 2, 2 dc)and side spaces(3 hdc or dc groups)to transform your floral shape into a crisp, geometric square. - Complete the final round with even side stitches to ensure a sharp, 90-degree corner on all four sides. Fasten off and weave in your ends.

👜 Step 2: Adapting Your Tulip Squares Into Projects
Once you have mastered your base tulip square, you can connect them using a clean Flat Slip Stitch Join (working through the back loops only) to create three stunning items:
Option A: The Boutique Tote Bag
- Motif Count: Make 12 to 16 identical tulip squares (configured into front and back panels).
- Assembly: Join your squares into an open box or tote configuration using flat slip stitches.
- Boutique Finish: Because motif bags have open spaces, sew a custom cotton fabric lining inside. Work 3 rounds of tight single crochet around the top rim—carrying a piece of nylon cord inside the stitches—to give the bag a rigid, unyielding edge that won’t stretch under weight.

Option B: The Elegant Table Runner
- Motif Count: Make a single striking row of tulip squares (e.g., 6 to 8 squares long) or a wider runner (2 squares wide by 6 squares long) so the tulips stand upright down the center of your table.
- Assembly: Join the squares end-to-end with a clean flat join.
- Boutique Finish: Add a delicate border of single crochets or picots around the entire outer perimeter of the runner. Steam-block the finished piece heavily so it lies completely flat across your dining surface.
Option C: The Heirloom Granny Square Blanket
- Motif Count: Scale up your yarn to worsted weight and make a grid of squares (e.g., 5 squares wide by 6 squares long, alternating tulip squares with solid textured granny squares for visual balance).
- Assembly: Slip-stitch your squares together into a vibrant, garden-themed throw blanket.
- Boutique Finish: Frame the entire throw with a lush, 3-round border of half-double crochet stitches in your background color to anchor the floral design.
✨ Pro-Tips for a Professional Finish
- Block Every Square: Before assembling your tote bag, table runner, or blanket, pin every single tulip square to blocking mats, mist them thoroughly with water or steam, and let them dry flat. Crisp, uniform squares make the final assembly seamless and professional.
- Color Hierarchy: Keep the background color and green stem yarn identical across all squares to unify the piece, allowing your vibrant tulip blossom colors to pop with striking contrast!
Video tutorial: