by
by Creating a Heart Flower Bag is a delightful way to combine romantic motifs with modern, boutique-style accessory design. By merging classic heart-shaped granny squares with blooming floral centers, you can craft a stunning, eye-catching handbag that feels both whimsical and expertly tailored.
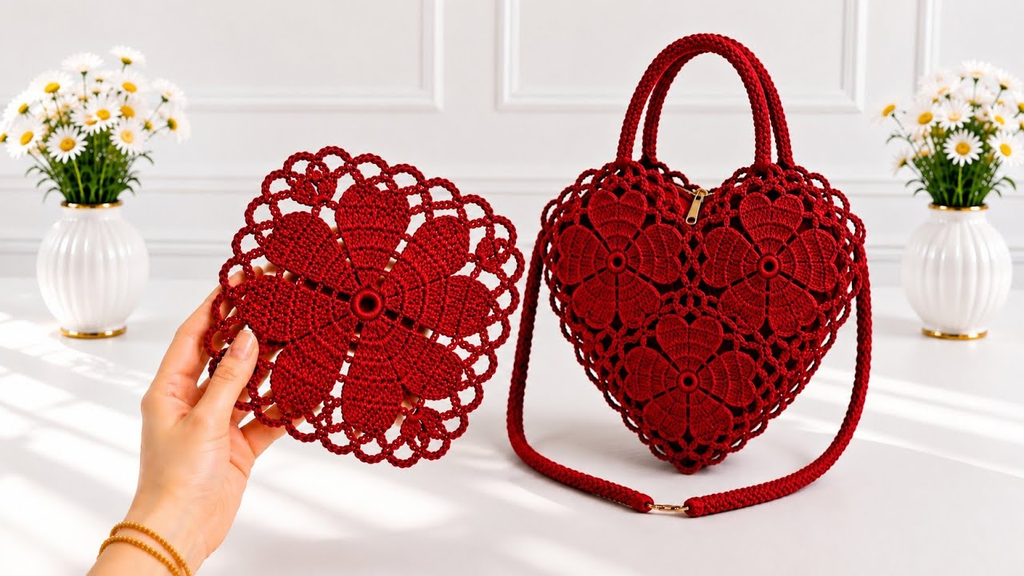
Here is your detailed, step-by-step masterclass on how to crochet a beautiful Heart Flower Bag from scratch, complete with structural reinforcement and professional finishing.
🧶 The Heart Flower Bag Toolkit
- Yarn:100% Mercerized Cotton Yarn (Sport weight, DK, or Worsted weight). Cotton yarn is mandatory for motif bags because it has minimal stretch, preventing your bag from sagging or distorting when loaded with your daily essentials.
- Palette: A vibrant focal color for the flower centers (such as sunshine yellow), a romantic hue for the hearts/petals (such as soft blush pink, crimson, or lavender), and a unifying neutral background color (like cream, beige, or black) to frame the motifs.
- Hook: 3.5 mm or 4.0 mm. A slightly snug hook creates a tight, dense gauge, ensuring the bag fabric is sturdy and durable.
- Extra Supplies:
- Tapestry needle for weaving in ends.
- Cotton fabric for an interior lining (essential for motif bags to prevent small items from slipping through).
- Optional magnetic snap closure.
💖 Step 1: Crafting the Heart Flower Motif Square
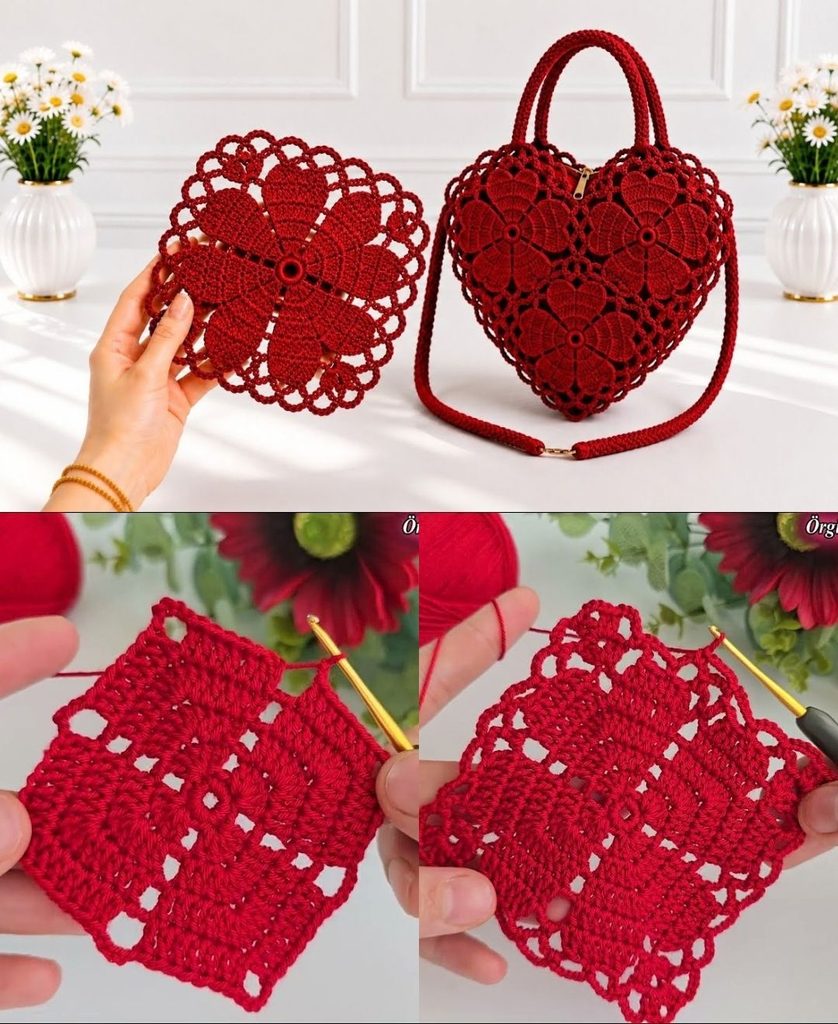
The building block of your bag is a geometric square that features a blooming floral center nestled directly inside a heart shape. You will need to make 12 to 13 identical squares (typically 4 for the front panel, 4 for the back panel, and 4 to 5 for the side and bottom gussets).

Round 1: The Flower Center (Pistil)
- With your center color (e.g., yellow),
ch 4and join with asl stto form a ring. ch 1, and work 12 sc (single crochet) directly into the ring. Join with asl stto the first sc. Fasten off yellow.
Round 2: Shaping the Heart & Petals
- Attach your heart/petal color (e.g., blush pink) into any stitch.
- Work a combination of taller stitches (treble and double crochets) grouped into lobes to form the upper curves of the heart, dropping down to single crochets at the bottom point. For example: Work
(2 tr, 2 dc)in one stitch,2 dcin the next,1 hdcdown the sides, a sharp point at the bottom with(1 dc, ch 1, 1 dc), and mirror up the other side. - Join with a
sl stand fasten off your heart color.

Round 3: Squaring the Motif (The Frame)
- Attach your background color (e.g., cream or black) into one of the top corner spaces of your heart shape.
- The Corner:
ch 3(counts as dc), work(2 dc, ch 2, 3 dc)in that same space to form your sharp corner. - The Sides: Work groups of 3 hdc (half double crochet) evenly along the sides of the heart to bridge the gaps.
- Next Corner: Work
(3 dc, ch 2, 3 dc)in the next corner space. - Repeat this pattern around (corners get
3 dc, ch 2, 3 dc, and side gaps get3 hdc) to transform your heart shape into a pristine, geometric square. Fasten off, leaving a long tail for joining.
🧩 Step 2: Assembling and Joining the Squares
Once your heart flower squares are complete, layout your grid:
- Front Panel: 4 squares arranged in a 2×2 grid.
- Back Panel: 4 squares arranged in a 2×2 grid.
- Side and Bottom Gusset: Connect remaining squares to form the structural depth of the bag.
The Professional Join: Avoid bulky seams by using the Flat Slip Stitch Join working exclusively through the back loops only of your square edges. This keeps the seams flat, flexible, and visually crisp.

🌟 Step 3: Structural Integrity & Boutique Finishes
Because motif bags feature delicate petal spaces and open joins, adding professional structural elements transforms your homemade project into a luxury accessory:
1. The Non-Negotiable Fabric Lining
- Cut a durable cotton or satin fabric to match the exact interior dimensions of your assembled bag structure.
- Sew the lining pouch, fold the top edge over by half an inch, and meticulously hand-stitch it to the inner rim of your crochet opening using matching thread.
2. The Reinforced Top Rim
- Work 2 to 3 rounds of tight single crochet (sc) right along the top opening of your bag.
- Pro-Trick: Lay a piece of nylon cord or thick twine inside your stitches (“carrying the cord”) as you work your final top border. This creates an unyielding rim that stops the bag from stretching or sagging when loaded up.
3. Professional Straps
- Craft sturdy handles by crocheting long, dense straps (using thermal stitch or multiple rows of half-double crochet) or attach sleek leather handles. Anchor them securely into the reinforced top rim of the bag so weight is distributed evenly.
✨ Pro-Tips for Success
- Block Every Square: Before joining your heart flower squares together, pin every single piece to a blocking board, mist them with water or steam, and let them dry flat. Sharp, blocked squares make assembly significantly easier and keep the bag’s geometry pristine.
- Unified Background Color: Keeping your background framing yarn identical across all squares unifies the piece, allowing your vibrant floral hearts to pop with striking contrast!
Video tutorial: