 by
by Certainly! Below is a comprehensive and detailed article titled “How to Crochet a Granny Square Sunflower Bag.” It covers everything from inspiration and materials to step-by-step instructions on making sunflower granny squares, assembling the bag, and finishing touches.

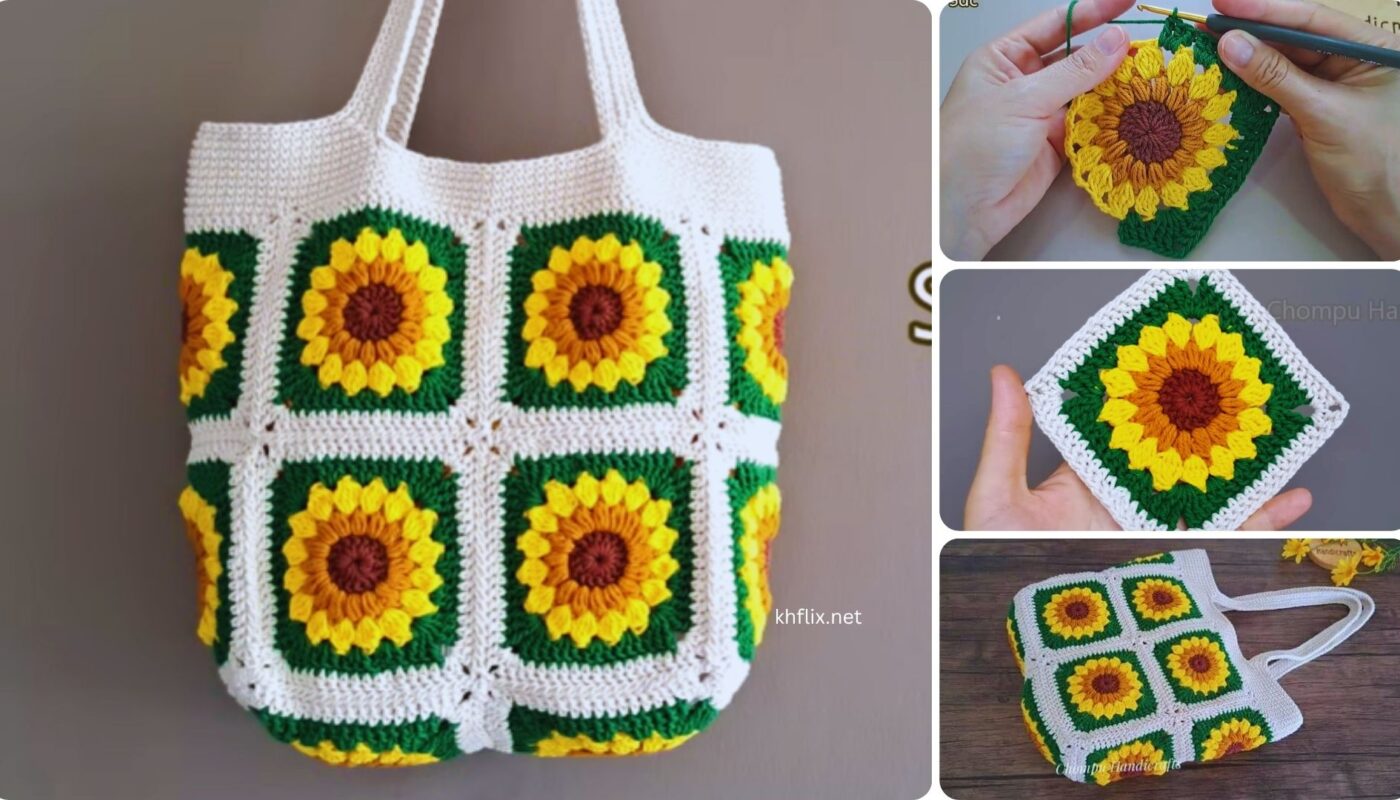
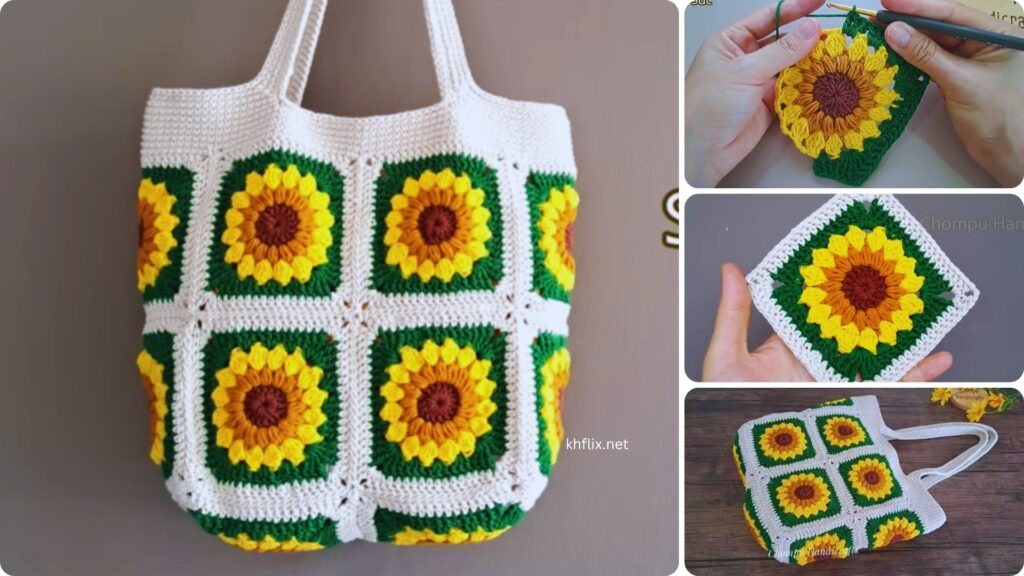
🌻 How to Crochet a Granny Square Sunflower Bag: A Complete Guide for Beginners and Beyond
The classic granny square has long been a favorite motif in the world of crochet. Add a vibrant floral twist to it—specifically, a sunflower design—and you get one of the most beautiful, boho-chic, and functional accessories: the Granny Square Sunflower Bag.
Whether you’re heading to a summer market, packing a picnic, or looking to make a handmade gift, this sunflower bag is the perfect project to express creativity and style.
🌼 Why Make a Sunflower Granny Square Bag?
A sunflower granny square bag is:
- Eco-friendly: Reusable and washable.
- Charming and nostalgic: Perfect for vintage lovers or fans of retro style.
- Customizable: Easily modified in size, shape, or color scheme.
- Fun to make: A great way to use up leftover yarn and improve crochet skills.
- A conversation starter: Bright, eye-catching, and handmade with love.
🧶 Materials You Will Need
Before getting started, gather the following materials:
Yarn
Choose worsted weight yarn (Category 4) in sunflower-inspired colors:
- Dark Brown – for flower centers
- Yellow or Gold – for petals
- Cream, White, or Olive Green – for square background and joining
- Optional: use cotton for durability, or acrylic for budget-friendly softness
Other Supplies
- 5.0 mm (H/8) crochet hook
- Scissors
- Yarn needle (for weaving in ends and sewing)
- Measuring tape
- Stitch markers (optional)
- Fabric lining and magnetic snap or button (optional for structure and closure)
🧵 Stitches and Abbreviations (U.S. Terms)
- ch – chain
- sl st – slip stitch
- sc – single crochet
- hdc – half double crochet
- dc – double crochet
- tr – treble crochet
- sp – space
- st(s) – stitch(es)
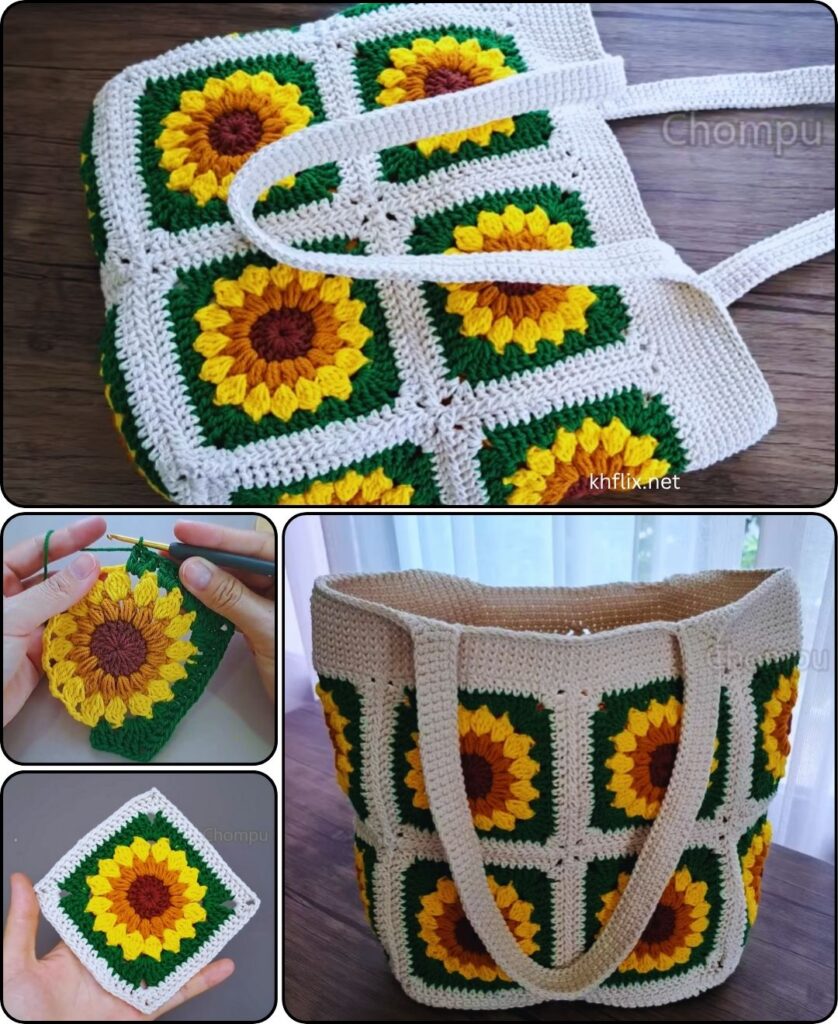
🌻 Sunflower Granny Square Pattern (Step-by-Step)
Each granny square in this bag features a sunflower motif. Here’s how to make one.
🌸 Round 1 – Flower Center (Dark Brown)
- Make a magic ring.
- Ch 2 (counts as dc), make 11 dc into the ring.
- Sl st to top of ch-2 to join. (12 dc total)
- Fasten off.
🌸 Round 2 – Petals (Yellow)
- Join yellow yarn in any dc.
- (Ch 2, 2 dc in same st, ch 2, sl st in next st) – repeat around (6 petals total).
- Continue pattern (ch 2, 2 dc, ch 2, sl st) in each st around to make 12 petals.
- Sl st to join, fasten off.
🌸 Round 3 – Forming the Square (Background Color)
- Join background color between any two petals.
- Ch 3 (counts as dc), 1 dc in same sp, dc in next 2 spaces,
- (2 dc, ch 2, 2 dc) in next sp to form a corner.
- Continue in pattern to create four corners, filling sides with dc clusters.
- Sl st to join. You should now have a square shape around the flower.
🌸 Round 4 – Traditional Granny Square Row
- Continue in background color or switch to a complementary shade.
- In each corner space, work: (3 dc, ch 2, 3 dc)
- In each side space, work: 3 dc
- Repeat for all four sides.
- Sl st to finish, and fasten off.
✅ Make 13–17 squares depending on the bag size you want.
🧩 Bag Layout and Assembly
Once all your sunflower squares are complete, it’s time to assemble the bag.
Suggested Layout for Medium Bag (13 squares)
- Front panel: 3 squares (row 1) + 3 squares (row 2) = 6 squares
- Back panel: 6 squares (same layout)
- Bottom & sides: Use 1–2 extra squares
🧵 Joining the Squares
There are several joining methods:
- Whip stitch with a yarn needle (flat, neat)
- Single crochet join (adds a raised texture)
- Slip stitch join (strong and subtle)
- Lay your squares out flat.
- Join front and back squares first to form rectangles.
- Join side and bottom squares to front/back panels.
- Sew side seams and bottom edges to complete the bag body.
👜 Crochet Bag Handles
Once your bag body is formed, it’s time to add handles or straps.
Option A: Crocheted Straps
- Ch 70–80 (depending on desired length).
- Row 1: Sc in 2nd ch from hook, and in each across.
- Row 2–4: Ch 1, sc across for thickness.
- Fasten off and sew securely to the top inside edge of the bag.
Option B: Attach Ready-Made Handles
- Use leather straps, rope, or wooden rings
- Sew or rivet them securely to the top of the bag
- For stability, line the top edge of the bag first
🎀 Optional Additions and Embellishments
Lining (Recommended)
- Cut and sew a cotton or linen fabric lining
- Insert and hand-stitch or machine-stitch to the inside of your bag
- Adds structure and prevents stretching
Closure
- Sew in a magnetic snap, button and loop, or zipper
- Ensures contents stay secure
Decor Ideas
- Add tassels or fringe to the sides
- Crochet small leaves or mini flowers for the front
- Use different yarn textures for contrast
💧 Washing and Care
- Hand-wash or spot-clean gently with cold water
- Lay flat to dry
- Avoid bleach or high heat (especially with acrylic yarn)
- If lined, remove or spot clean lining if needed
💡 Tips for Success
- Block your squares before joining to ensure a flat and even shape
- Keep consistent tension across all squares
- Weave in ends securely to prevent unraveling
- Choose complementary or contrasting colors for dramatic effect
🌟 Variations to Try
- Mini version: Use fewer squares for a clutch or pouch
- Backpack style: Add longer straps and a drawstring top
- Crossbody: Create a single shoulder strap for a stylish crossbody look
- Color palette changes: Try pink petals, blue centers, or fall-inspired hues
📝 Final Thoughts
Creating a Granny Square Sunflower Bag is more than just a crochet project—it’s a joyful blend of creativity, craftsmanship, and fashion. Each square is a tiny canvas, and together they bloom into a beautiful, functional tote you’ll be proud to carry.
This project allows you to practice motif work, color changes, seaming, and finishing techniques. Plus, it gives you a unique, handcrafted bag that will never go unnoticed.
So grab your hook, pick your colors, and let those sunflowers bloom—one stitch at a time.