 by
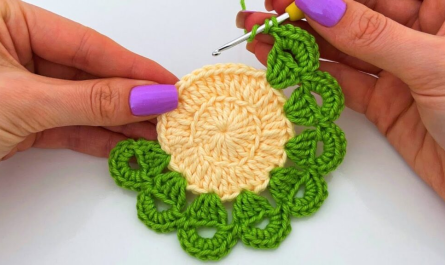
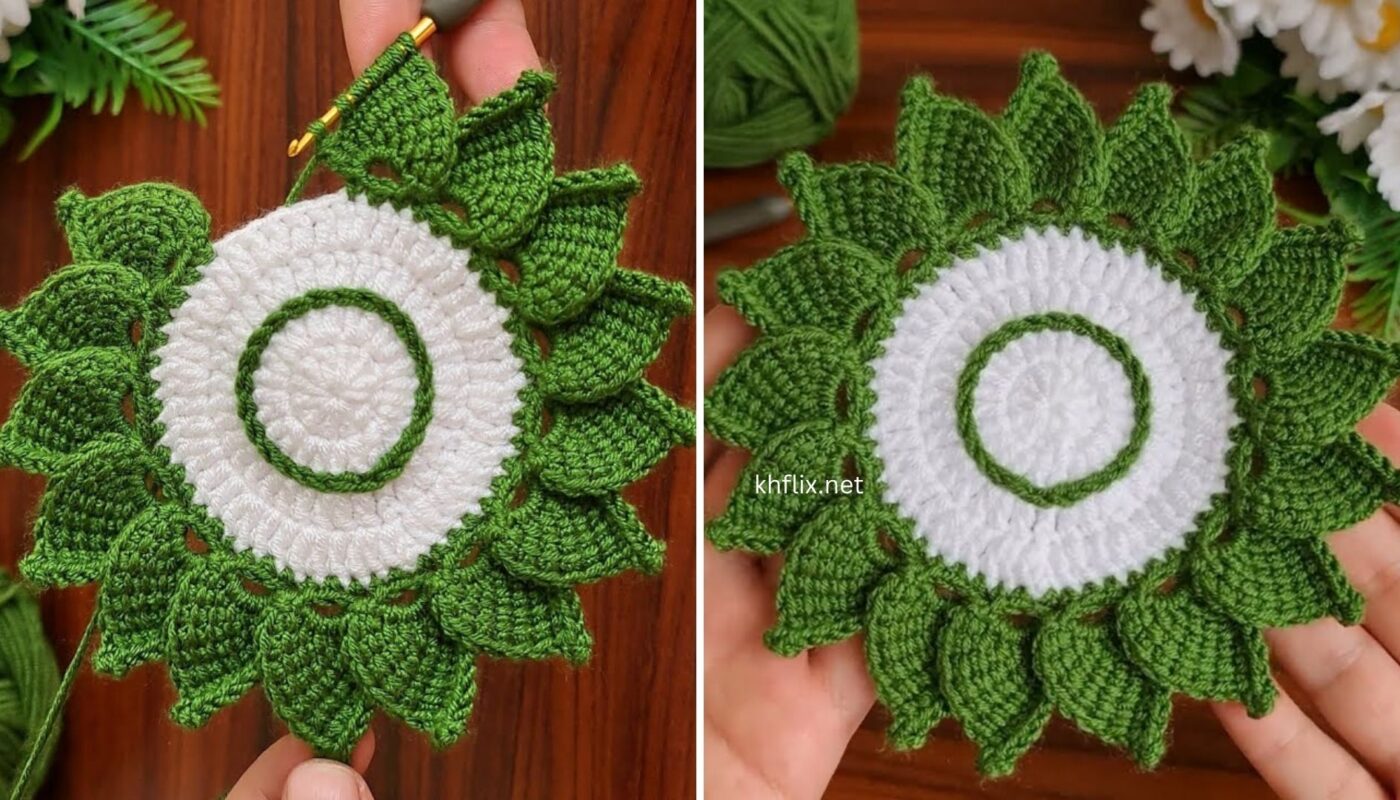
by You want a super easy, very useful, and beautiful crochet coaster! This pattern focuses on simplicity and functionality, creating a sturdy, flat, and absorbent coaster with a lovely, subtle motif. We’ll use a solid circle base with a simple, elegant edge.
Pattern: Super Easy & Very Useful Crochet Coaster Motif
This tutorial will guide you through creating a simple, sturdy, and beautiful circular coaster. It’s designed to be incredibly easy for beginners and highly functional for everyday use.
Goal: To crochet a flat, dense, circular coaster (approx. 4-5 inches in diameter) with a pretty, subtle motif, using basic stitches.
Materials You’ll Need:
- Yarn:
- 100% Cotton Worsted Weight (Medium #4) Yarn: This is essential for coasters because cotton is absorbent and heat-resistant. Acrylic yarn can melt under hot mugs.
- Choose any beautiful color you like!
- Crochet Hook:
- Size H/5.0mm (or a size that produces a dense, flat fabric with your chosen cotton yarn. If your coaster curls up, go up a hook size. If it’s too floppy or gappy, go down a hook size).
- Yarn Needle (Tapestry Needle): For weaving in ends.
- Scissors
- Stitch Marker (Optional, but highly recommended for beginners): To mark the beginning of each round, as we’ll be working in continuous spirals or seamlessly joined rounds.
Abbreviations Used:
- ch: chain
- sl st: slip stitch
- sc: single crochet
- hdc: half double crochet
- dc: double crochet
- st(s): stitch(es)
- MR: magic ring (or magic circle)
- FO: fasten off
- inc: increase (usually by working 2 stitches into the same stitch)
Understanding the Coaster’s Simple Structure
This coaster is essentially a flat circle worked in continuous rounds (or seamlessly joined rounds). The “motif” comes from the inherent spiral/concentric circles of crochet and a simple, elegant final border.
- Round 1 (Center): A small, solid starting point.
- Subsequent Rounds (Expanding): Evenly spaced increases are made in each round to ensure the circle lays perfectly flat. We’ll use half double crochet (hdc) for a dense, sturdy fabric.
- Final Round (Beautiful Edge): A simple decorative stitch pattern adds a pretty finish.
Let’s Start Crocheting!
We will use Half Double Crochet (hdc) stitches for the main body of the coaster. Hdc creates a fabric denser than dc but taller than sc, making it perfect for a sturdy coaster.
Part 1: The Coaster Center (Starting Method)
You have two excellent options for starting your circle. The Magic Ring (MR) is preferred for a truly closed center with no hole. The Chain Ring is a good alternative for absolute beginners.
Option A: Chain Ring (Beginner-Friendly)
- Ch 3.
- Sl st into the first chain you made to form a ring. (This creates a small loop to work into).
Option B: Magic Ring (MR / Magic Circle – Recommended for a no-hole center)
- Create a Magic Ring.
- Ch 1 (does NOT count as a stitch; it just secures the ring).
Part 2: Expanding the Coaster Circle (Half Double Crochet)
We’ll use hdc stitches for the main body. If you’re using a stitch marker, place it in the first stitch of each round.
Round 1:
- Into the center ring (from Option A or B), ch 1 (does not count as a stitch).
- Work 8 hdc (half double crochet) into the center ring.
- Sl st into the first hdc to join the round. (8 hdc).
- If using Magic Ring, gently pull the starting yarn tail to close the center hole tightly.
Round 2:
- Ch 1 (does not count as a stitch).
- Work 2 hdc in each hdc around (hdc increase in every stitch). (16 hdc).
- Sl st into the first hdc to join the round.
Round 3:
- Ch 1 (does not count as a stitch).
- Work 1 hdc in the first st, then 2 hdc in the next st (inc). Repeat from * to * around. (24 hdc).
- Sl st into the first hdc to join the round.
Round 4:
- Ch 1 (does not count as a stitch).
- Work 1 hdc in the first st, 1 hdc in the next st, then 2 hdc in the next st (inc). Repeat from * to * around. (32 hdc).
- Sl st into the first hdc to join the round.
Round 5:
- Ch 1 (does not count as a stitch).
- Work 1 hdc in each of the first 3 sts, then 2 hdc in the next st (inc). Repeat from * to * around. (40 hdc).
- Sl st into the first hdc to join the round.
- At this point, your coaster should be approximately 3.5 – 4 inches in diameter and laying perfectly flat. If it’s curling up, you might need to add more increases in the current round or go up a hook size. If it’s rippling, you might have too many stitches or need to go down a hook size.
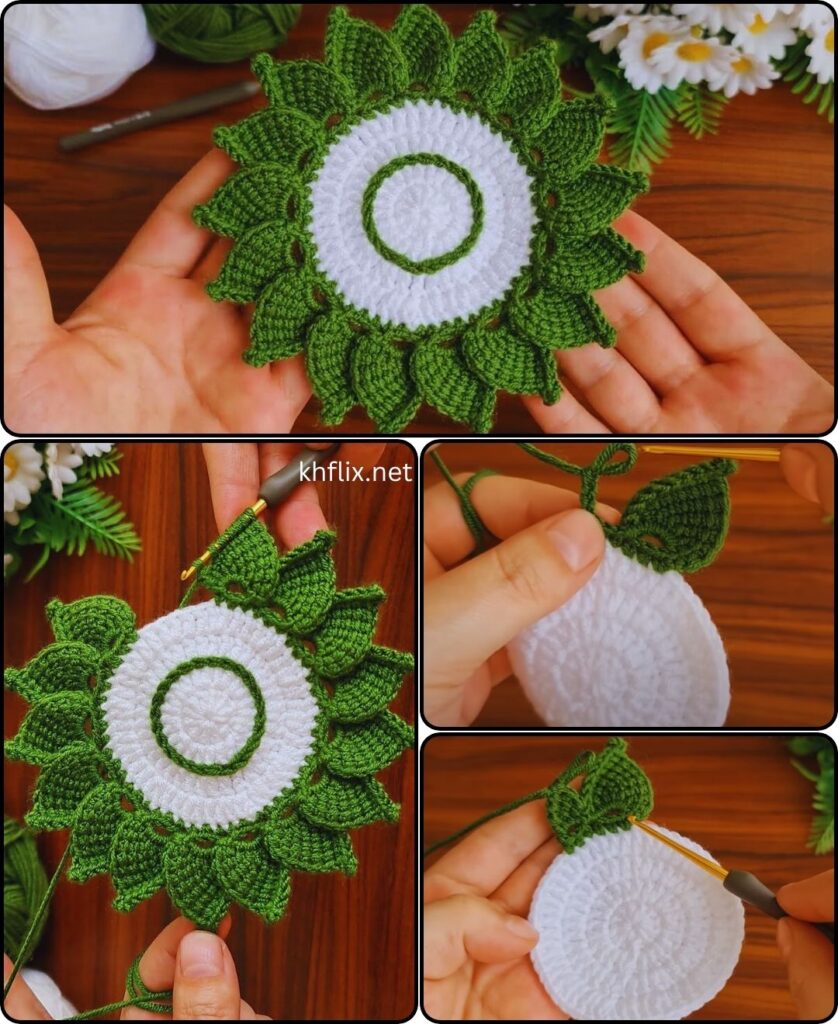
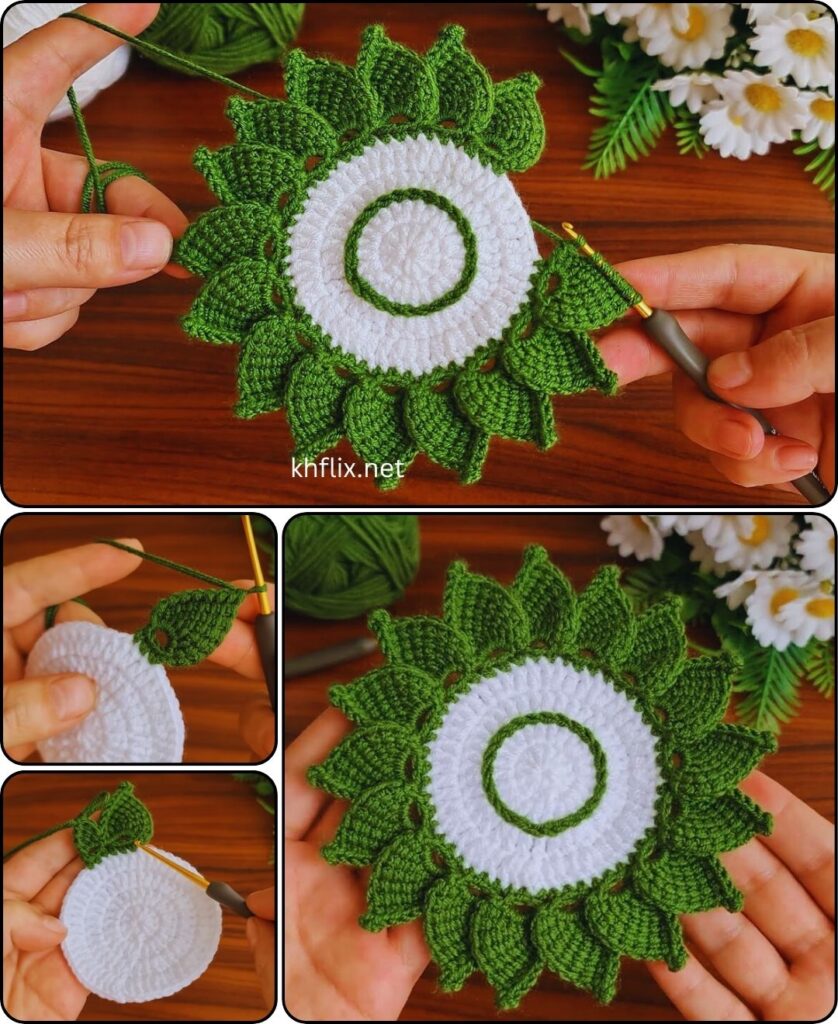
Part 3: The Beautiful Motif Edge (Scalloped Edge)
This final round adds a simple yet elegant touch, creating a lovely scalloped “flower-like” border.
- Sl st into the first hdc of Round 5 (or into the next stitch if you just completed the sl st to join Round 5).
- Round 6 (Scalloped Edge):
- Ch 1 (does not count as a stitch).
- Skip 1 st.
- In the next st, work (1 sc, 1 hdc, 1 dc, 1 hdc, 1 sc) all into the same stitch.
- Skip 1 st.
- Sl st into the next st.
- This completes one scallop.
- Repeat the following 9 more times (for a total of 10 scallops):
- Skip 1 st.
- In the next st, work (1 sc, 1 hdc, 1 dc, 1 hdc, 1 sc) all into the same stitch.
- Skip 1 st.
- Sl st into the next st.
- After your last scallop, sl st into the very first sl st you made at the beginning of Round 6 (where you started this round).
- FO (Fasten Off), leaving a tail of about 6-8 inches.
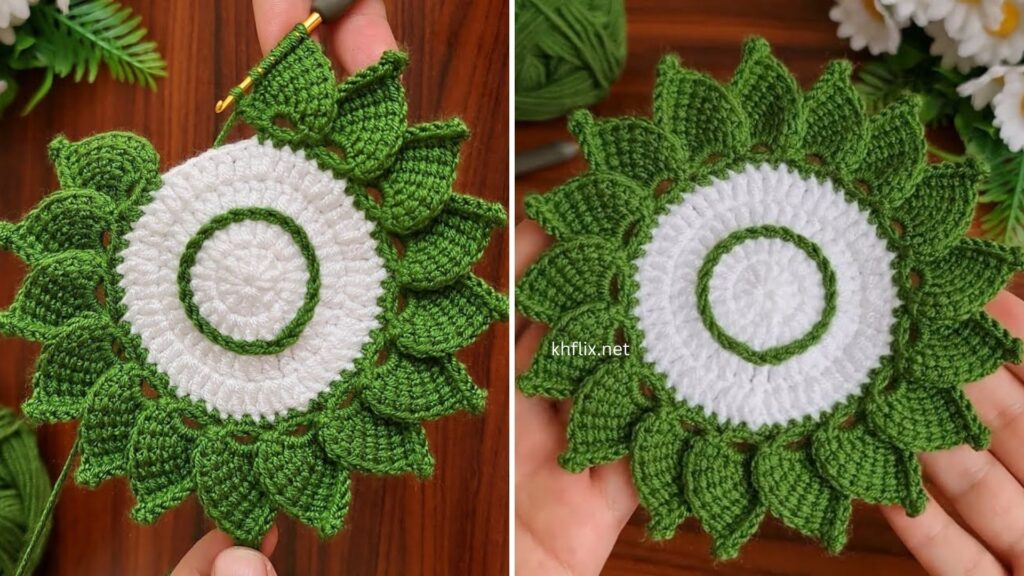
- You should now have a beautiful circular coaster with lovely scalloped edges!
Finishing Your Coaster
- Weave in All Ends: This is vital for a clean, durable coaster.
- Thread each yarn tail onto your yarn needle.
- Carefully weave the tail through several stitches on the back of your coaster. Go in different directions to secure it firmly and make sure it won’t unravel.
- Trim any excess yarn close to the fabric.
- Blocking (Highly Recommended for Flatness):
- Gently wet your coaster (or spray it with water until it’s damp).
- Pin the coaster flat onto a foam blocking mat, a corkboard, or a towel-covered surface. Gently shape it into a perfect circle, ensuring the scallops are even.
- Let it air dry completely. Blocking makes your coaster lay perfectly flat and gives it a very professional finish.
Tips for Beginners:
- Cotton Yarn is Non-Negotiable for Coasters: Seriously, don’t use acrylic for hot beverages!
- Check Your Gauge/Tension: If your coaster is wavy, you have too many stitches or your tension is too loose. If it’s cupping/curling, you need more stitches or your tension is too tight. Adjust your hook size accordingly.
- Counting Stitches: Always count your stitches at the end of each round. This is the #1 way to ensure your circle stays flat and perfect.
- Use a Stitch Marker: It makes it so much easier to identify the first stitch of a round when working in the round.
- Video Tutorials are Your Friend: If you’re unsure about a stitch (like hdc) or how to work in the round, search for quick video tutorials on YouTube.
- Make a Set! These coasters work up quickly and make fantastic gifts. Experiment with different colors to create a rainbow set or match your home decor.
Enjoy using your beautiful, super easy, and very useful crocheted coaster!