by
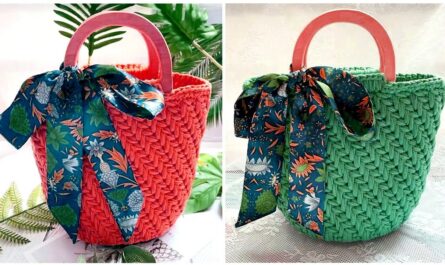
by Crocheting a multicolor handbag allows for endless creativity and a unique, vibrant accessory. The “multicolor” aspect can be achieved through various techniques, but for an accessible tutorial, we’ll focus on striped patterns, which are straightforward, visually striking, and suitable for advanced beginners.
How To Crochet a Handbag – Multicolor (Striped Design)
This tutorial will guide you through creating a sturdy, functional handbag using a simple construction method, with detailed instructions on how to incorporate multiple colors effectively through striping.
Skill Level: Advanced Beginner / Intermediate
You should be comfortable with:
- Basic crochet stitches (ch, sc, hdc, dc, sl st).
- Working in the round.
- Making neat stitch joins.
- Basic color changes.
Finished Handbag Dimensions (Approximate for a Medium Bag):
- Base: 10 inches (25 cm) long x 4 inches (10 cm) wide
- Height: 10-12 inches (25-30 cm) (excluding handles)
You can easily adjust these dimensions by changing your starting chain length for width, and the number of rounds for height and base width.
Materials You’ll Need:
- Yarn:
- Worsted Weight (Medium #4) Cotton or Cotton Blend Yarn: This type of yarn is durable, holds its shape well, and is easy to work with for bags. Acrylic can also work, but cotton offers more stiffness.
- Colors: Choose 2 to 4 contrasting or complementary colors.
- Color A (Main/Base Color): Approx. 200-300 yards
- Color B, C, D (Accent Colors): Approx. 50-100 yards each
- Total Yarn: 350-600 yards, depending on bag size and number of colors.
- Crochet Hook:
- Size H/5.0mm (or the hook size that gives you a firm, dense fabric with minimal gaps. Going down half a size from your usual can make the bag sturdier).
- Yarn Needle (Tapestry Needle): Essential for weaving in ends and any assembly.
- Scissors
- Stitch Markers: Very helpful for marking the beginning of rounds and increase points.
- Measuring Tape: For checking dimensions and gauge.
- Optional Enhancements:
- Bag Lining Fabric: For added structure and to prevent items from falling through stitches.
- Zipper or Magnetic Snap: For bag closure.
- D-rings or Purchased Handles: If you prefer non-crocheted handles.
Gauge (Important for Size and Density!):
Creating a gauge swatch is highly recommended, especially for bags where structure is important.
- With your H/5.0mm hook and chosen yarn, crochet a swatch in single crochet (sc):
- 14 sc stitches = 4 inches (10 cm)
- 16 sc rows = 4 inches (10 cm)
Adjust your hook size if necessary to match the gauge.
Abbreviations Used:
- ch: chain
- sl st: slip stitch
- sc: single crochet
- hdc: half double crochet
- dc: double crochet
- inc: increase (work 2 stitches into the same stitch)
- st(s): stitch(es)
- ch-sp: chain space
- FO: fasten off
- BLO: Back Loop Only
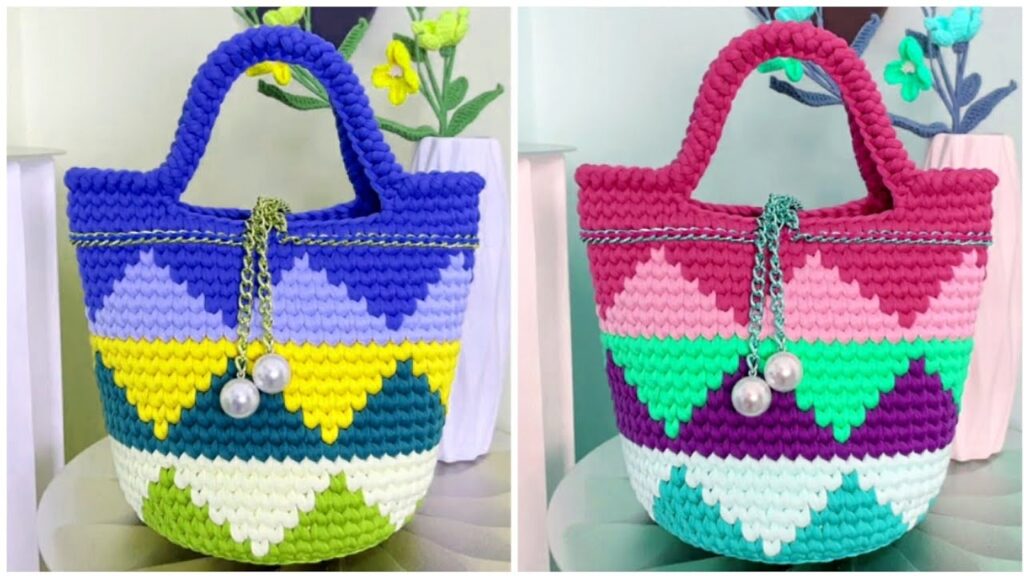
Understanding Multicolor Techniques (Stripes):
The beauty of a striped bag lies in strategic color changes.
- Neat Color Changes: This is key!
- When to change: Always change colors on the last yarn over of the stitch before the color change is desired.
- Example: If you’re ending a round with Color A and want to start the next round with Color B: Work the last stitch of the round with Color A until you have 2 loops on your hook. Drop Color A, pick up Color B, yarn over with Color B, and pull through the 2 loops to complete the stitch. Then sl st to join the round with Color B.
- Carrying Yarn vs. Cutting Yarn:
- Cutting Yarn: For thin stripes (1-2 rows/rounds), it’s often best to cut the yarn after each color change, leaving a tail to weave in. This prevents the “carried” yarn from showing through lighter colors or adding bulk.
- Carrying Yarn: For thicker stripes or if you’re alternating just two colors frequently, you can “carry” the non-working yarn loosely behind your work by crocheting over it. Make sure it’s loose enough not to pull the fabric. This saves on weaving in ends. However, for a handbag, it’s often cleaner to cut and weave for a crisper finish and less bulk.
Let’s Start Crocheting Your Multicolor Handbag!
We’ll use a simple oval base and work straight up in single crochet for a dense, sturdy bag, incorporating stripes.
Part 1: The Oval Base (Color A)
- With Color A, Ch 27. (This will make a base about 10 inches long before widening).
- Round 1: Sc in the 2nd ch from hook. Sc in each of the next 24 ch. Work 3 sc in the last ch (this turns the corner). Now working down the other side of the starting chain: Sc in each of the next 24 ch. Work 2 sc in the last ch (which is the same as the first sc of the round, completing the oval turn). Sl st to the first sc to join. (Total: 54 sc).
- Round 2: Ch 1 (does NOT count as a stitch). Sc in the same st as join. Sc in each of the next 24 sc. Work 3 sc in the next sc (corner increase). Sc in each of the next 26 sc. Work 3 sc in the next sc (corner increase). Sl st to the first sc to join. (Total: 58 sc).
- Round 3: Ch 1. Sc in the same st as join. Sc in each of the next 25 sc. Work 3 sc in the next sc. Sc in each of the next 28 sc. Work 3 sc in the next sc. Sl st to the first sc to join. (Total: 62 sc).
Your base should now be about 10 inches long and 4 inches wide. You can add more increasing rounds if you want a wider base, maintaining the increase pattern at the ends.
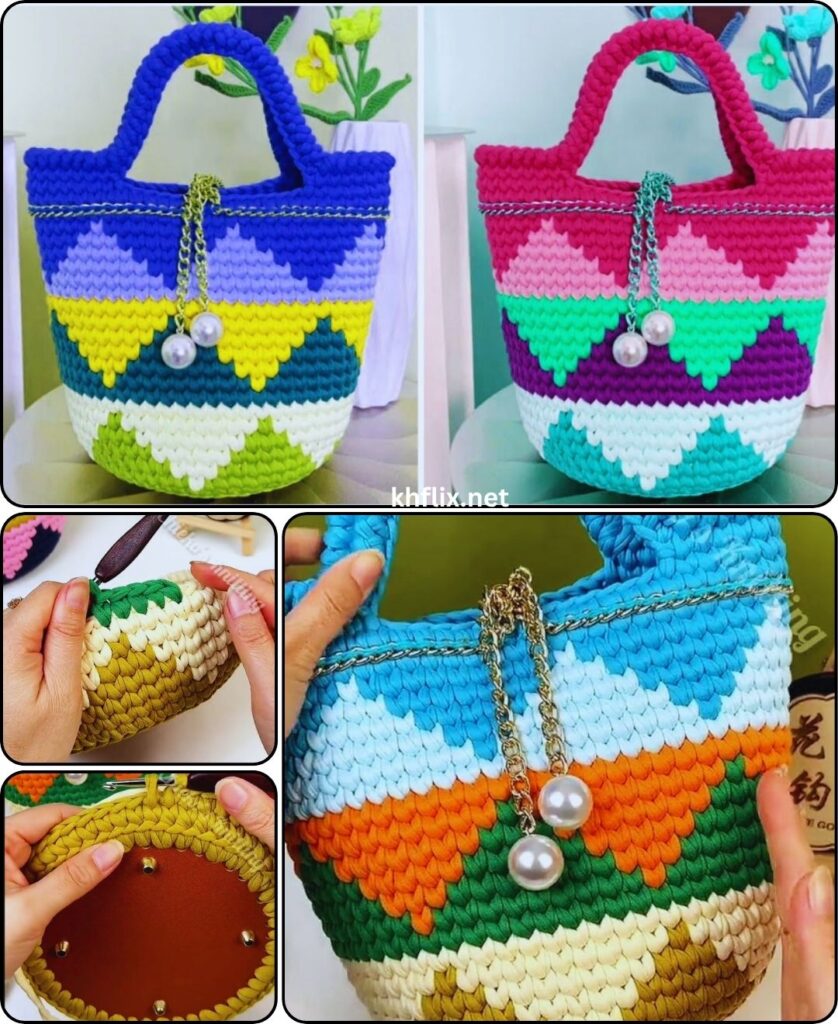
Part 2: The Body of the Bag (Stripes!)
Now we’ll work straight up to form the body of the bag, introducing your accent colors. We’ll work in continuous rounds (spiral) for minimal seams, but you can also join rounds with a sl st and ch 1 for each round if you prefer. For stripes, joining rounds often makes for neater color changes. We’ll assume joined rounds here for clarity in color changes.
- Stripe Pattern Idea (Adjust to your liking):
- 4 rounds of Color A
- 2 rounds of Color B
- 2 rounds of Color C
- 2 rounds of Color D
- Repeat, or create your own sequence!
- Round 4 (Start Body, Color A):
- Change to Color A (if it’s not already on your hook from Round 3 join).
- Ch 1 (does NOT count as a stitch). Sc in the BLO (Back Loop Only) of each sc around. Sl st to the first sc to join. (Total: 62 sc). Working in BLO creates a nice ridge at the bottom of the bag and helps it stand up.
- Round 5 (Color A):
- Ch 1. Sc in each sc around. Sl st to the first sc to join. (Total: 62 sc).
- Round 6 (Color A):
- Ch 1. Sc in each sc around. Sl st to the first sc to join. (Total: 62 sc).
- Round 7 (Color A):
- Ch 1. Sc in each sc around.
- Perform a clean color change to Color B on the last sl st to join. (Total: 62 sc).
- Cut Color A, leaving a 4-inch tail to weave in.
- Round 8 (Color B):
- With Color B, Ch 1. Sc in each sc around. Sl st to the first sc to join. (Total: 62 sc).
- Round 9 (Color B):
- Ch 1. Sc in each sc around.
- Perform a clean color change to Color C on the last sl st to join. (Total: 62 sc).
- Cut Color B, leaving a 4-inch tail to weave in.
- Continue: Repeat this pattern of 2 rounds per accent color and 4 rounds per main color (or your chosen stripe sequence).
- For Color C, work 2 rounds.
- For Color D, work 2 rounds.
- Then, change back to Color A and work 4 rounds.
- Keep repeating until your bag reaches your desired height (e.g., 10-12 inches). Finish on a round of Color A if possible, for a cohesive look with the handles.
Part 3: Top Edge & Crocheted Handles
Once the bag body reaches your desired height, you’ll create the top edge and handles.
- Top Edge Round 1 (Color A):
- With Color A, Ch 1. Sc in each sc around. Sl st to the first sc to join. (Total: 62 sc).
- Top Edge Round 2 (Color A – Reinforcement):
- Ch 1. Sc in each sc around. Sl st to the first sc to join. (Total: 62 sc).
- Handle Round (Color A):
- Ch 1. Sc in the first 8 sc.
- First Handle: Ch 20 (adjust chain length for desired handle length, e.g., 20 for short shoulder bag, 30-40 for cross-body). Sk the next 15 sc (this creates your handle opening).
- Sc in the next 15 sc (this is the top of the other side of the bag).
- Second Handle: Ch 20. Sk the next 15 sc.
- Sc in the last 7 sc. Sl st to the first sc to join.
- Handle Reinforcement Round (Color A):
- Ch 1. Sc in each sc around, working sc stitches all the way around each chain-20 handle. When you encounter a handle opening, work into each ch from the handle chain, then continue into the sc stitches on the bag body.
- Sl st to the first sc to join.
- Handle Finishing Round (Color A):
- Ch 1. Sl st in each sc around for a very sturdy and neat finish to the top edge and handles.
- Sl st to the first sl st to join.
- FO, leaving a 6-inch tail to weave in.
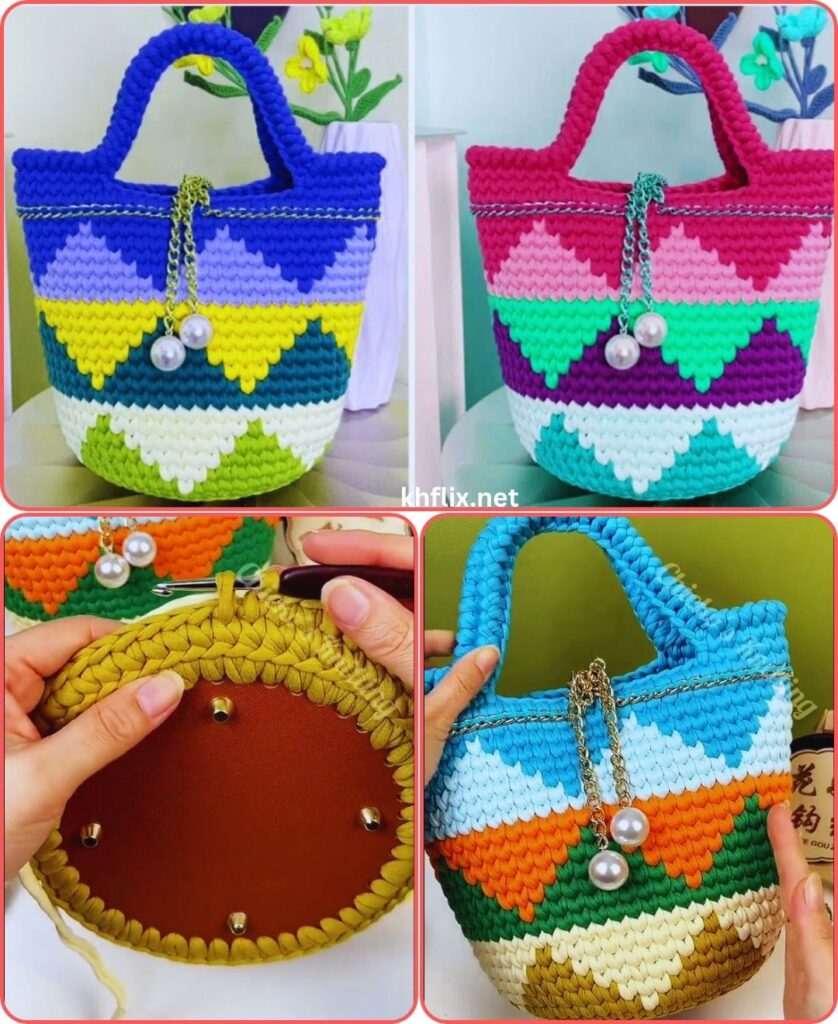
Part 4: Finishing & Optional Enhancements
- Weave in All Ends: This is crucial for a clean, professional-looking handbag. Take your time with all the color changes, securing each tail neatly into the fabric of the bag. This prevents unraveling and keeps the inside tidy.
- Lining (Highly Recommended): For a truly functional handbag, a fabric lining adds structure, prevents stretching, and ensures small items don’t slip through the stitches.
- Method: Measure the inside of your finished bag. Cut fabric pieces (main body, bottom, and optionally side gussets) slightly larger than the bag. Sew them together to create a fabric “bag.” Hand-sew or machine-stitch the lining to the top inside edge of your crocheted bag.
- Closure:
- Magnetic Snap: Easily sewn onto the fabric lining or directly onto the top inside edge of the crocheted bag.
- Zipper: Can be sewn into a fabric lining.
- Button & Loop: Crochet a small chain loop on one side of the bag and sew a decorative button on the other.
- Blocking (Optional): If your bag feels a bit uneven, you can stuff it tightly with towels or plastic bags to reshape it, then lightly mist it with water and let it dry. This helps set the shape.
Your multicolor crocheted handbag is now complete! Enjoy your vibrant and unique accessory!