 by
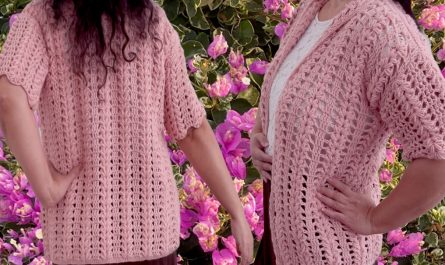
by Making a “blouse jacket” can sound intimidating, but with this very easy crochet tutorial, you’ll create a stylish and versatile layering piece using simple rectangular panels. This project is perfect for advanced beginners who have mastered basic stitches and are ready to tackle their first garment. The half double crochet (hdc) stitch creates a lovely, soft fabric with just enough drape for a comfortable fit.
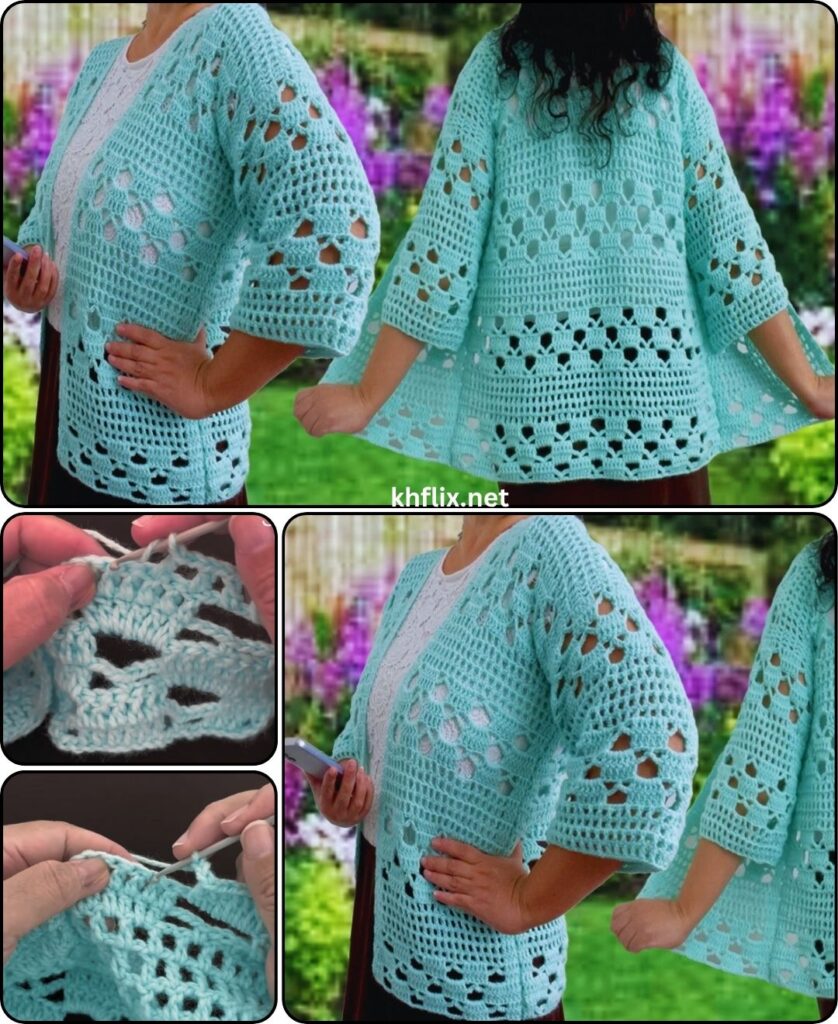
How to Make a BLOUSE JACKET – Very Easy Crochet Tutorial
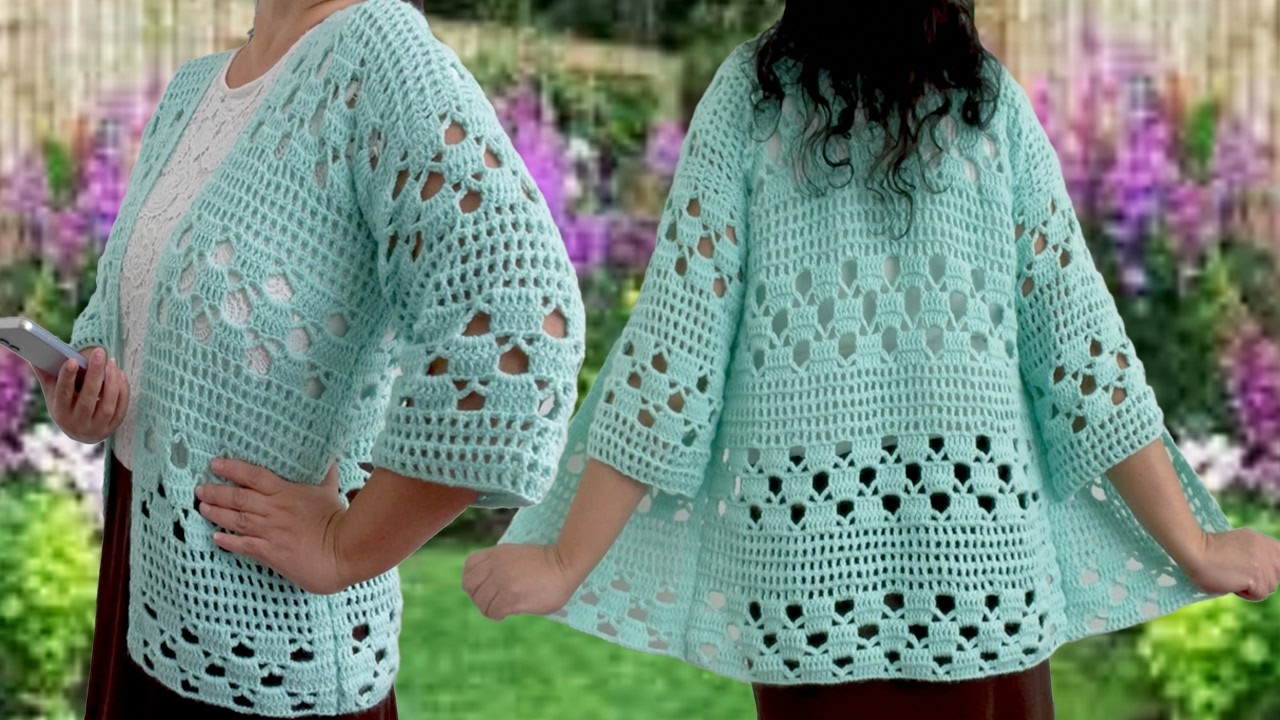
Project Overview: This tutorial will guide you through crocheting a simple, open-front blouse jacket (think of it as a lightweight cardigan or cover-up). It’s constructed from five basic rectangular panels – a back, two fronts, and two sleeves – which are then seamed together. This method minimizes complicated shaping, making it incredibly beginner-friendly!
Skill Level: Very Easy / Advanced Beginner (Requires familiarity with chaining, slip stitch, half double crochet, and basic seaming).
Finished Flat Dimensions (Approximate for Size S/M):
- Back Panel: 18 inches (46 cm) wide x 22 inches (56 cm) long
- Front Panels (each): 9 inches (23 cm) wide x 22 inches (56 cm) long
- Sleeves (each): 14 inches (36 cm) wide (at widest point) x 14 inches (36 cm) long (approx. 3/4 sleeve)
Sizing Adjustments:
- Width: To make wider, add stitches in multiples of 1 to your initial chain for each panel.
- Length: To make longer, add more rows to each panel.
- Sleeve Width: Adjust initial chain.
- Sleeve Length: Adjust number of rows.
- It’s highly recommended to measure yourself or a garment you love to get the best fit.
Materials You’ll Need:
- Yarn:
- Worsted Weight (Medium #4) Yarn: Approximately 1000 – 1200 yards (915 – 1100 meters).
- Recommended: A soft acrylic, cotton blend, or wool blend with good drape. Avoid very stiff yarns.
- Crochet Hook:
- Size H/5.0mm (or the hook size that gives you a fabric with good drape that’s not too stiff).
- Yarn Needle (Tapestry Needle): Essential for weaving in ends and seaming panels.
- Scissors
- Measuring Tape: Crucial for checking your gauge and panel dimensions.
- Stitch Markers (Optional but Recommended): To mark starting chains or specific points.
Gauge (Crucial for Sizing!):
Creating a gauge swatch is vital to ensure your finished jacket matches the intended size.
- With your H/5.0mm hook and chosen yarn, crochet a swatch in half double crochet (hdc).
- 14 hdc stitches = 4 inches (10 cm)
- 11 hdc rows = 4 inches (10 cm)
If your swatch is smaller than the gauge, go up a hook size. If it’s larger, go down a hook size. Adjust until you match the gauge.
Abbreviations Used:
- ch: chain
- sl st: slip stitch
- hdc: half double crochet
- st(s): stitch(es)
- FO: fasten off
Understanding Blouse Jacket Construction:
This blouse jacket is constructed from 5 simple rectangular pieces:
- Back Panel: One large rectangle.
- Front Panels: Two identical, slightly narrower rectangles.
- Sleeve Panels: Two identical rectangles.
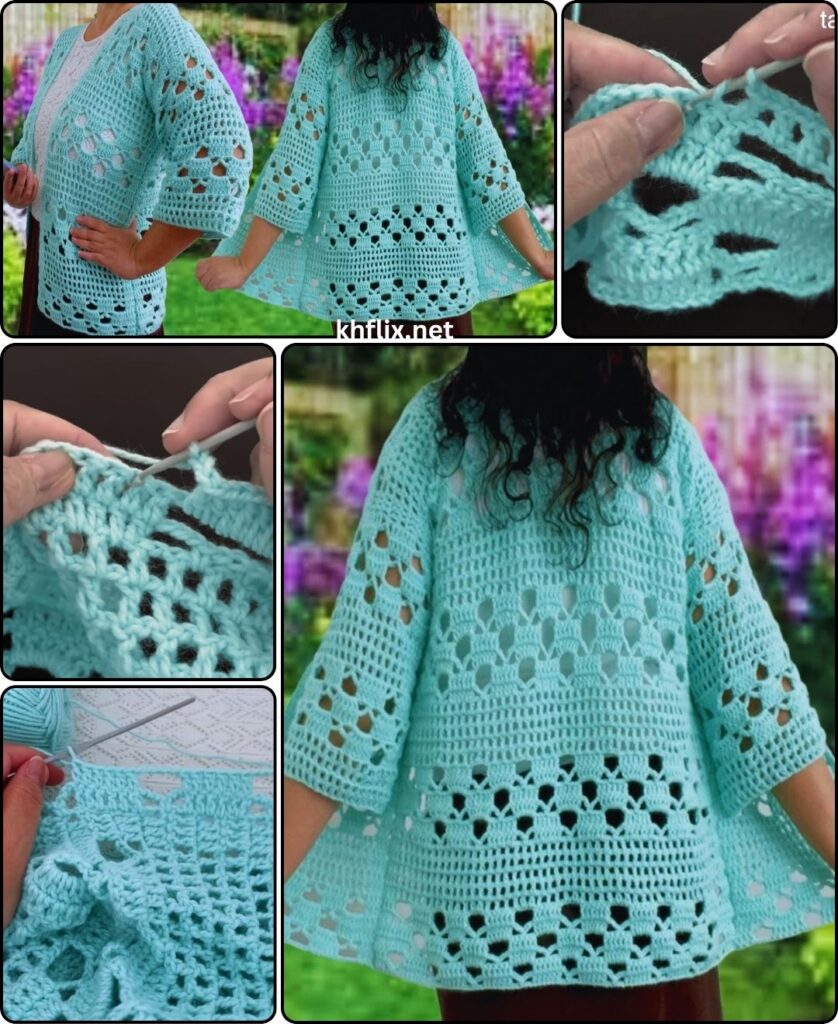
Once all panels are crocheted, they are sewn together at the shoulders, sides, and armholes to form the finished garment. A final optional border ties everything together.
Let’s Start Crocheting Your Blouse Jacket!
Part 1: The Back Panel
You’ll create one large rectangle for the back of the jacket.
- Starting Chain: Ch 65. (This will be approximately 18 inches / 46 cm wide).
- Row 1: Hdc in the 2nd ch from hook, and hdc in each ch across. (Total: 64 hdc). Ch 1, turn.
- Row 2: Hdc in the first hdc, and hdc in each hdc across. (Total: 64 hdc). Ch 1, turn.
- Repeat Row 2 until your panel measures approximately 22 inches (56 cm) long, or desired length. This should be about 60 rows.
- FO, leaving a long tail (approx. 20 inches / 50 cm) for seaming.
Part 2: The Front Panels (Make 2 Identical Panels)
You’ll create two smaller rectangles for the front of the jacket. These are identical.
- Starting Chain: Ch 33. (This will be approximately 9 inches / 23 cm wide).
- Row 1: Hdc in the 2nd ch from hook, and hdc in each ch across. (Total: 32 hdc). Ch 1, turn.
- Row 2: Hdc in the first hdc, and hdc in each hdc across. (Total: 32 hdc). Ch 1, turn.
- Repeat Row 2 until your panel measures approximately 22 inches (56 cm) long, matching the length of your Back Panel. This should be about 60 rows.
- FO, leaving a long tail (approx. 20 inches / 50 cm) for seaming.
- Repeat steps 1-5 to make the second Front Panel.
Part 3: The Sleeves (Make 2 Identical Panels)
You’ll create two rectangles for the sleeves. This tutorial is for a 3/4 length sleeve, but you can add more rows for a longer sleeve.
- Starting Chain: Ch 50. (This will be approximately 14 inches / 36 cm wide at the top, around the bicep area).
- Row 1: Hdc in the 2nd ch from hook, and hdc in each ch across. (Total: 49 hdc). Ch 1, turn.
- Row 2: Hdc in the first hdc, and hdc in each hdc across. (Total: 49 hdc). Ch 1, turn.
- Repeat Row 2 until your panel measures approximately 14 inches (36 cm) long. This should be about 38 rows.
- FO, leaving a long tail (approx. 20 inches / 50 cm) for seaming.
- Repeat steps 1-5 to make the second Sleeve Panel.

Part 4: Assembly (Seaming Your Blouse Jacket)
This is where your rectangular pieces come together to form the jacket. Using a yarn needle and the long tails you left, or a new piece of yarn, whip stitch or mattress stitch are good options for invisible seams.
- Shoulder Seams:
- Lay the Back Panel flat.
- Place one Front Panel on top of the Back Panel, aligning the top edges and the outer side edges.
- Count in from the outside edge of the Front Panel approximately 9 inches (23 cm). This will leave a gap in the center for your neckline.
- Seam the top edge of the Front Panel to the top edge of the Back Panel for approximately 4.5 inches (11.5 cm) from the outer shoulder. This will be about 16 stitches. (The remaining stitches in the center form the neckline).
- Repeat for the other Front Panel, ensuring the neckline opening is symmetrical.
- Side Seams:
- Fold the jacket at the shoulder seams, so the Front and Back Panels are aligned.
- Starting from the bottom edge, seam the side edges of the Front Panel to the side edges of the Back Panel.
- Stop seaming when you reach approximately 7 inches (18 cm) down from the shoulder seam. This unseamed portion forms your armhole opening.
- Repeat for the other side seam.
- Sleeve Seams:
- Fold each Sleeve Panel in half lengthwise.
- Seam the long raw edges together to form a tube.
- Attaching Sleeves:
- Turn the jacket inside out.
- Align the seam of a sleeve tube with the bottom of the armhole opening you left unseamed.
- Carefully seam the top raw edge of the sleeve tube around the armhole opening of the jacket. Ensure an even distribution of stitches.
- Repeat for the second sleeve.
Part 5: Optional Edging/Border (Recommended for a Finished Look)
A simple border will give your blouse jacket a polished, professional finish.
- Join Yarn: Join your yarn with a sl st to any stitch at the bottom corner of the jacket’s front opening.
- Work Border: Ch 1, then work 1 sc evenly around the entire front opening (up one front, around the neckline, and down the other front) and along the bottom edge of the jacket. Aim for 1 sc per hdc row along the vertical edges, and 1 sc per hdc stitch along the bottom horizontal edge.
- When you reach your starting point, sl st to the first sc to join.
- Optional Second Round (for a wider border): Ch 1, sc in each sc around. Sl st to join.
- FO.
Part 6: Finishing Your Blouse Jacket
- Weave in All Ends: Take your time to carefully weave in every loose yarn tail using your yarn needle. This is crucial for a clean and professional appearance.
- Blocking (Highly Recommended!): Blocking will help your seams lie flat, define your stitches, and ensure your jacket hangs beautifully.
- Method: Gently wet your finished jacket (by misting with water or a gentle soak). Lay it flat on a clean blocking mat or a thick towel. Gently smooth and shape the jacket to its intended dimensions, making sure the seams are straight. Pin it if necessary. Allow it to air dry completely.
Your very easy and beautiful crochet blouse jacket is now complete! Enjoy your versatile new handmade garment.