by
by Certainly! Here is a detailed, comprehensive article on How to Make a Beautiful Crochet Baby Cardigan Using Three Colors. This guide covers everything from choosing materials, planning colors, to step-by-step instructions for creating a charming, cozy, and colorful baby cardigan.
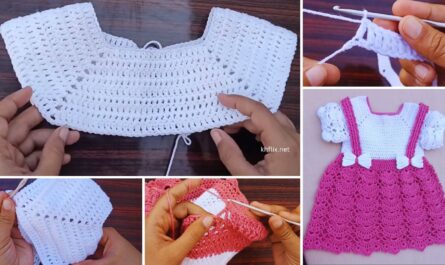
How to Make a Beautiful Crochet Baby Cardigan with Three Colors
Crocheting a baby cardigan is a heartwarming project, especially when it’s crafted with love and a thoughtful blend of three charming colors. Whether you’re making a gift for a baby shower or creating something cozy for your own little one, this guide will walk you through how to make a beautiful, handmade baby cardigan using basic crochet techniques and a splash of creativity.
🧶 Materials You’ll Need
Before you begin, gather the following supplies:
Yarn
- Three colors of soft baby yarn (DK/light worsted weight is ideal)
- Main Color (MC): for body
- Contrast Color 1 (CC1): for sleeves, borders or stripes
- Contrast Color 2 (CC2): for accents like edging, cuffs or buttons
- Yarn weight: Light (Category 3)
- Suggested fiber: Cotton-acrylic blends or baby-specific yarns for softness
Tools
- Crochet hook (typically 4.0 mm / G-6 for DK yarn)
- Yarn needle for weaving in ends
- Stitch markers
- Scissors
- Buttons (3–5 depending on size and style)
- Measuring tape
📏 Sizing Guide
This pattern can be adjusted for different baby sizes. Here’s a basic guide to help you:
| Age | Chest Circumference | Length | Sleeve |
|---|---|---|---|
| 0–3 months | 16″ (40.5 cm) | 8″ | 5″ |
| 3–6 months | 17″ (43 cm) | 9″ | 6″ |
| 6–12 months | 18″ (46 cm) | 10″ | 7″ |
🧵 Stitch Abbreviations (US Terms)
- ch – chain
- sl st – slip stitch
- sc – single crochet
- hdc – half double crochet
- dc – double crochet
- inc – increase (2 stitches in one)
- dec – decrease (crochet 2 together)
🧤 Design Overview
This cardigan is worked from the top down, using a raglan style construction. You’ll work the yoke first, then split off for the body and sleeves. Color transitions can be placed at yoke stripes, sleeves, or edging for a visually appealing design.

🧶 Step-by-Step Instructions
Step 1: Yoke (Top Part)
Using Main Color (MC):
- Foundation Chain: Chain 56 (for 3–6 months).
- Row 1: Dc in 4th ch from hook and in each chain across. Turn.
- Row 2–6: Begin raglan increases. Place stitch markers to separate back, front, and sleeves (e.g., 10 front, 8 sleeve, 20 back, 8 sleeve, 10 front).
- Increase at each marked point with (dc, ch 1, dc).
- Continue until you have about 90–100 stitches.
Optional: Add stripes using CC1 every 2 rows for a colorful yoke.
Step 2: Splitting the Body and Sleeves
On the last row of the yoke:
- Work across the front stitches.
- Skip sleeve stitches and chain a few (3–5) for underarm.
- Work across back, skip other sleeve, chain underarm stitches, finish front.
Now you’re working the body only.
Step 3: Body of the Cardigan
Switch to Color CC1 for a bold stripe or keep using MC.
- Work even rows (dc or hdc) down to your desired length (typically 8–10 inches).
- Optional: Create alternating bands of MC and CC2 for a playful effect (e.g., 2 rows MC, 1 row CC2).
- Finish last 2 rows in Color CC2 for a nice base.
Step 4: Sleeves
Join yarn to the armhole, using CC1 or another contrast.
- Work in the round or rows to avoid a seam.
- Decrease slightly every 3–4 rows for shaping.
- Sleeve length: usually 5–7 inches depending on age.
- Add 2–3 rows in CC2 to create a cozy cuff.
Repeat for the second sleeve.
Step 5: Front Bands and Collar
Switch to CC2:
- Attach yarn at bottom corner, work sc evenly up the front edge.
- At neckline, work short rows of hdc for a rounded collar or continue sc for a flat one.
- Make buttonholes on one side every 6–8 rows (ch 2, skip 2, continue sc).
- Add buttons to the other side.
🌟 Color Layout Ideas
Here are a few fun ideas to use your three colors beautifully:
Option 1: Classic Trio
- MC for the main body
- CC1 for sleeves
- CC2 for trims and edging
Option 2: Ombre Fade
- Start with CC2 at top (yoke), blend into CC1, then finish body in MC
Option 3: Striped Accents
- Alternate stripes of MC and CC1 every 3 rows on the body
- Use CC2 for all trims

🧼 Finishing Touches
- Weave in all ends carefully using a yarn needle.
- Lightly block the cardigan using steam or water to shape it.
- Sew on buttons securely.
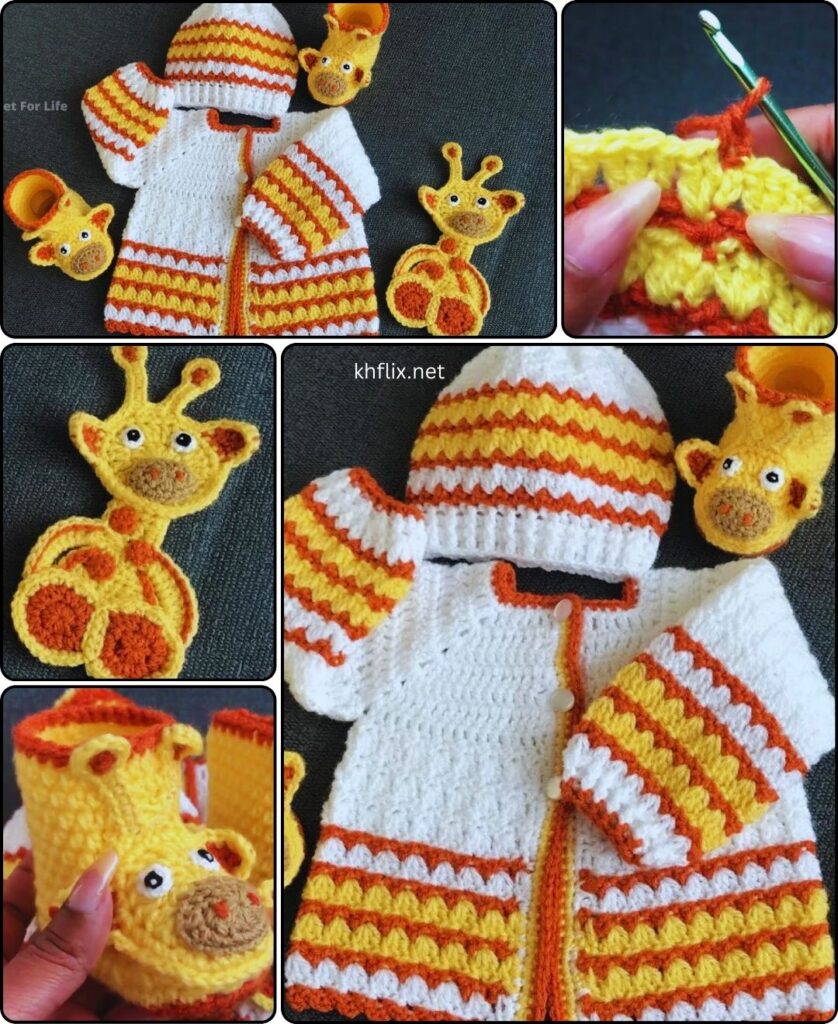
- Add optional decorations like:
- Small crocheted flowers
- Embroidered initials
- Tiny animal appliqués
👶 Tips for Success
- Swatch first: Always check your gauge with your yarn and hook.
- Soft yarn is key: Baby skin is sensitive, so use hypoallergenic yarn.
- Easy care: Choose machine-washable yarns for parents’ convenience.
- Color balance: Try not to overpower the design—use the boldest color for small accents.
🧡 Why Handmade Matters
A handmade baby cardigan isn’t just clothing—it’s a keepsake. Every stitch carries care, time, and affection. Whether you gift it or keep it, the cardigan becomes a treasured piece of someone’s early years.
Conclusion
Making a crochet baby cardigan with three colors is a satisfying and joyful project for crafters of all levels. By combining simple techniques with a thoughtful color palette, you can create something both functional and beautiful. Add your personal touch, play with patterns, and enjoy the process—because there’s nothing like seeing a baby wrapped in something you made with love.