 by
by Certainly! Below is a long, comprehensive article on how to make a crochet baby dress (frock) pattern for a 2-year-old girl, featuring a classic and festive red and white color scheme. This guide is perfect for beginner to intermediate crocheters and includes everything from materials and measurements to step-by-step instructions and finishing tips.
👗 How to Make a Crochet Baby Dress Pattern | Frock for 2-Year-Old Girls in Red and White Color
✨ Introduction
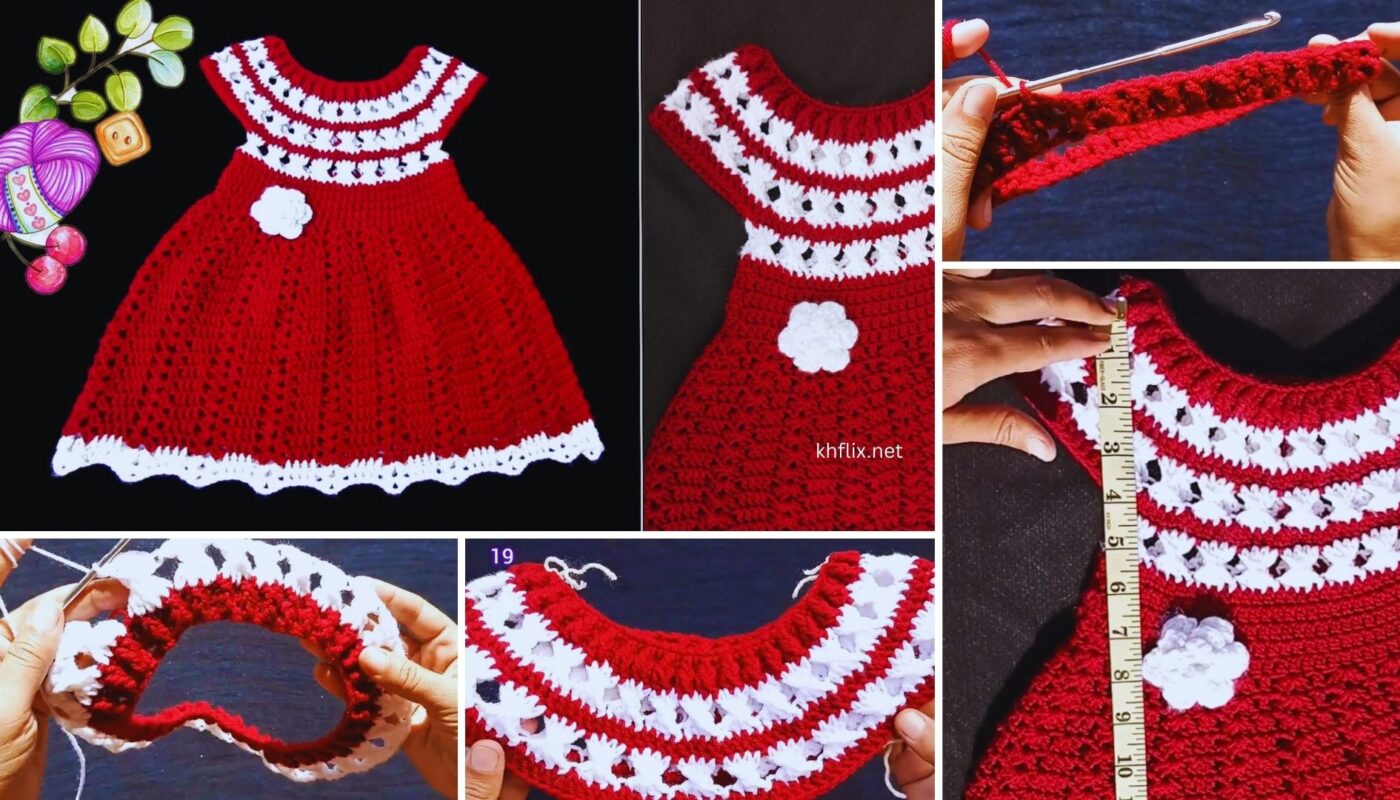
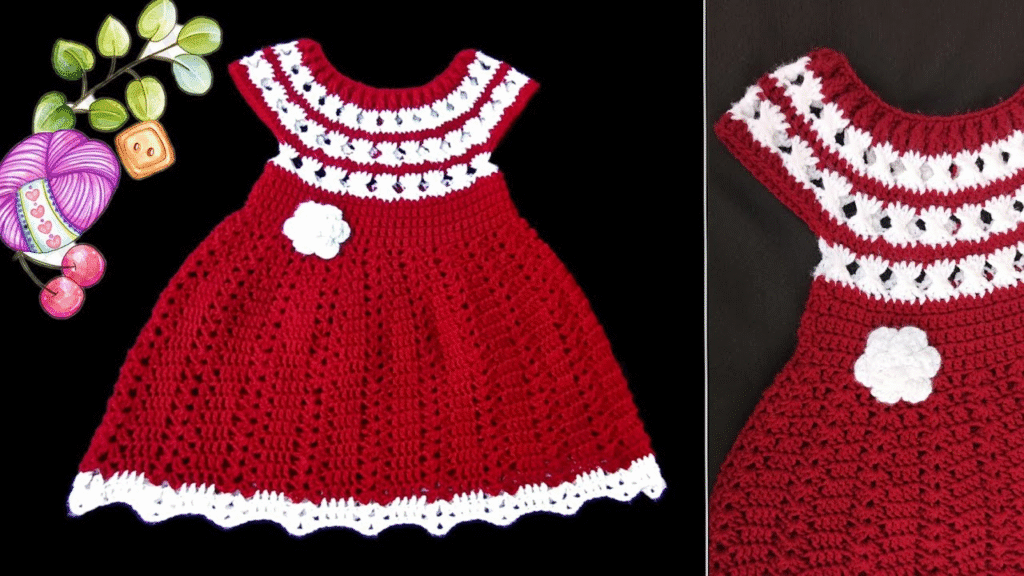
Creating a handmade crochet baby dress is a joyful and rewarding experience. Not only does it allow you to craft a beautiful and wearable piece of art, but it also creates a keepsake filled with love and intention. This detailed pattern is for a charming crochet frock suitable for a 2-year-old baby girl, designed in a timeless red and white color combination that’s perfect for holidays, birthdays, or everyday elegance.
The dress features a fitted yoke, flared skirt, buttoned back, and optional cap sleeves. Using simple stitches and color changes, even a beginner can complete this with a bit of patience and care.
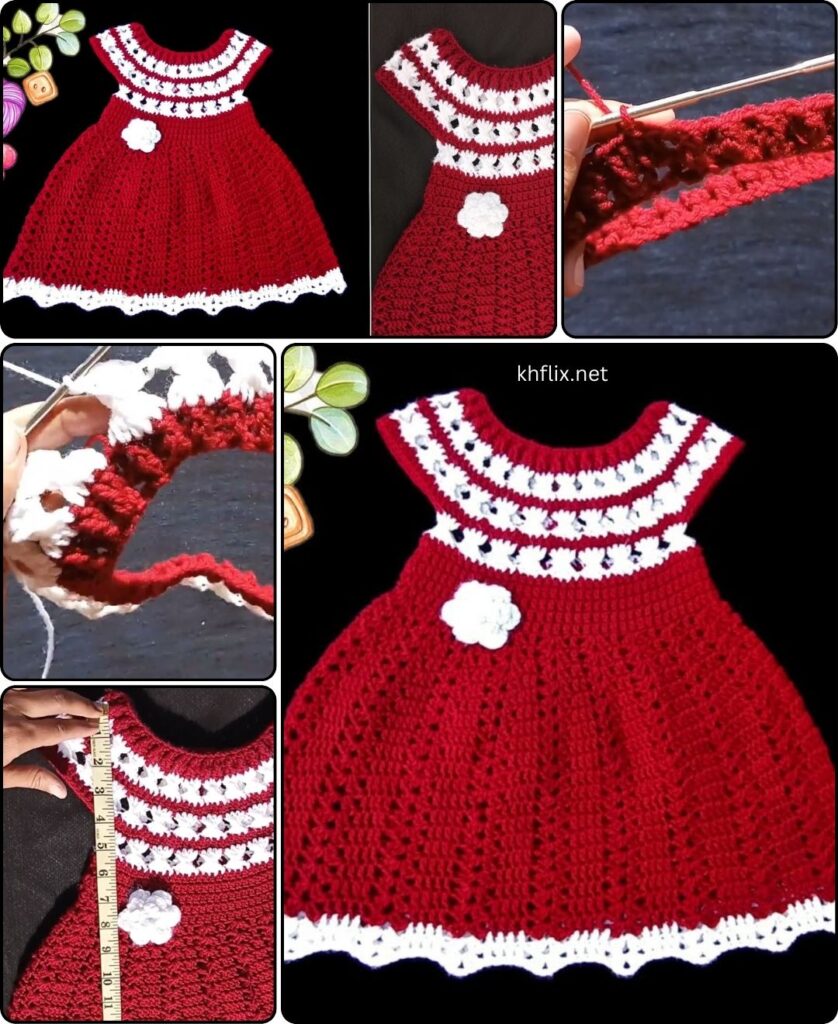
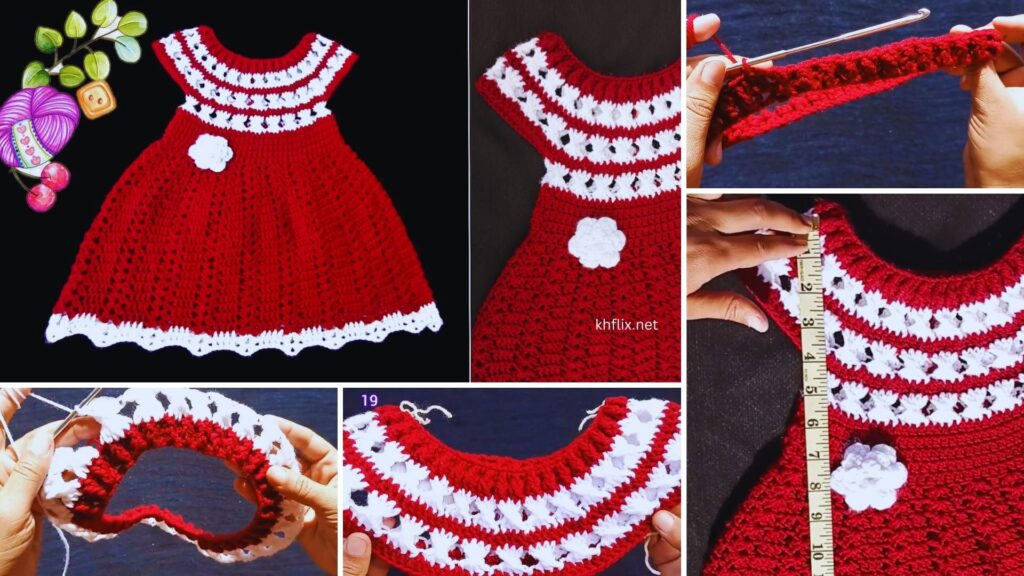
📏 Size Information
- Age Group: 2 Years
- Chest Circumference: Approx. 20–22 inches (50–56 cm)
- Dress Length: 15–17 inches (38–43 cm)
- Armhole Depth: 4.5–5 inches (11–12.5 cm)
This pattern can be easily adjusted by modifying the starting chain or yoke rounds for smaller or larger sizes.
🧺 Materials Required
| Item | Details |
|---|---|
| Yarn | DK weight (Light #3) soft cotton/acrylic yarn in red and white |
| Hook | 3.5 mm (E) or 4 mm (G), depending on tension |
| Tapestry Needle | For sewing ends |
| Buttons | 2–3 small buttons for back closure |
| Stitch Markers | Helpful for marking armholes |
| Scissors | For trimming yarn |
| Measuring Tape | To ensure accurate sizing |
| Optional Ribbon | For a decorative bow or waistband |
🧵 Stitches Used (US Terms)
| Abbreviation | Stitch Name |
|---|---|
| CH | Chain |
| SL ST | Slip Stitch |
| SC | Single Crochet |
| HDC | Half Double Crochet |
| DC | Double Crochet |
| Shell | 5 DC in the same stitch |
| PICOT | CH 3, SL ST into first chain (decorative edge) |
🎨 Color Scheme
- Red: For the bodice, bottom rows, or stripes
- White: For alternating skirt rounds, neckline edging, and accents
You may alternate every round for a candy-stripe effect or use red for the bodice and white for the skirt (or vice versa).
👚 Construction Overview
The dress is constructed in three main parts:
- Top yoke – Circular or back-opening fitted section
- Skirt – Worked in the round with shell or V-stitch pattern
- Finishing touches – Edging, sleeves (optional), and back buttons
🧶 Pattern Instructions – Step by Step
🔴 Step 1: Yoke (Red)
- Foundation Chain:
CH 64 (or multiples of 8 for size adjustments).
If you prefer a back-opening style, work in rows. Otherwise, join with SL ST into a ring. - Round 1:
CH 2 (counts as first DC), DC in each CH around. SL ST to join. (64 DC) - Rounds 2–5:
Continue DC rounds to build up the yoke. You may alternate colors (e.g., white for Round 3).
✅ Your yoke should measure approximately 2.5 to 3 inches in height.
⚪ Step 2: Divide for Armholes
You will now separate the stitches for sleeves and body:
- 16 DC for front
- 16 DC for back
- 16 DC for each sleeve
- DC across 16 stitches (back),
- CH 4 (for underarm),
- Skip 16 stitches (sleeve),
- DC next 16 (front),
- CH 4, skip 16 (other sleeve),
- Join to beginning DC with SL ST.
You now have a round body with two armhole openings.
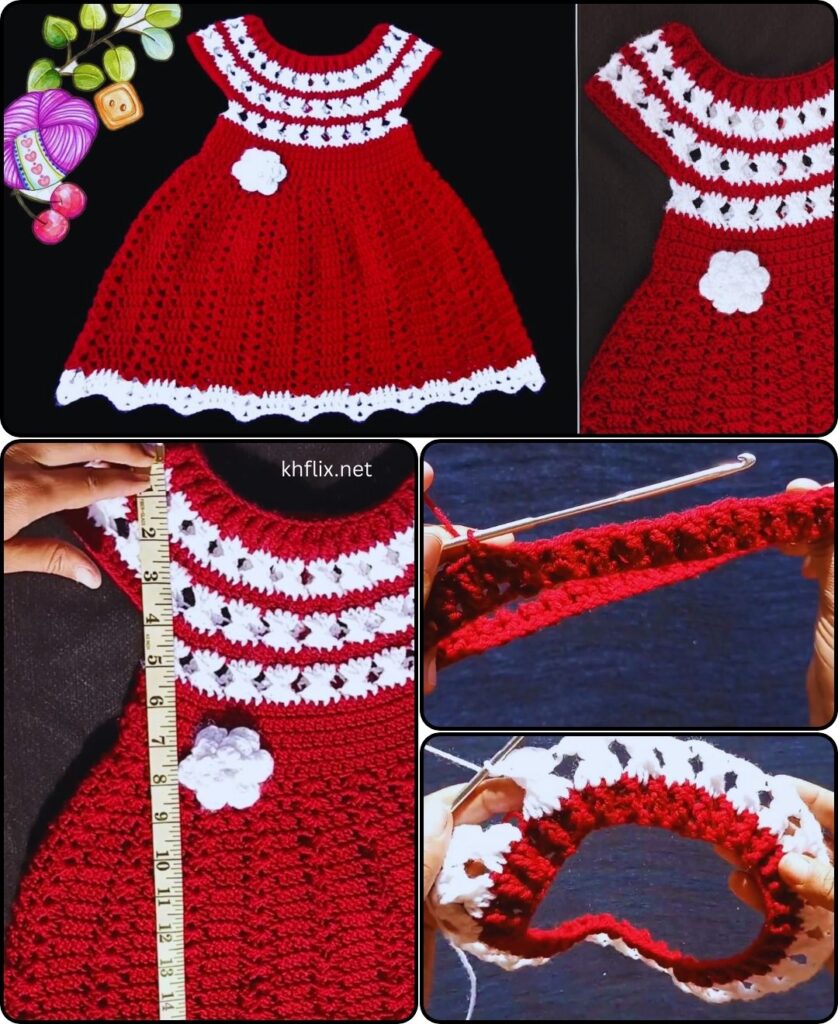
🔴 Step 3: Start the Skirt
Switch to red yarn or begin alternating colors.
Use Shell Stitch for fullness and elegance.
Round 1 (Red):
- CH 3, skip 1, work 5 DC (shell) in next, skip 1, SC in next stitch, repeat around.
Round 2 (White):
- SL ST into center of shell, CH 3, 4 DC in same, SC into next SC, repeat.
Alternate red and white every round. Continue for 15–20 rounds (or until desired length).
🎯 For more fullness, increase the number of shells by placing 2 shells between every 3rd set.
⚪ Step 4: Finish the Hem
With white yarn:
- Work one round of SC.
- Add optional PICOT edging: SC, CH 3, SL ST into first CH, skip 1, repeat.
You may also use crab stitch (reverse SC) for a twisted, elegant finish.
🔘 Step 5: Back Opening and Buttons
If you made a back slit:
- Work rows of SC on both sides of the slit to neaten the edges.
- Add 2–3 buttonholes on one side (CH 2, skip 2).
- Sew buttons on the opposite side.
Neaten the neckline with 1 round of SC in white.
🎀 Step 6: Optional Cap Sleeves
Join white yarn at the armhole and work:
- Round 1: SC around armhole
- Round 2: Shells or picot stitches
- Fasten off and weave in ends
These give a delicate cap sleeve look.
🎁 Decorative Additions
| Option | Placement |
|---|---|
| Satin Ribbon | Weave through waist and tie a bow at back or front |
| Crochet Flower | Add to bodice, waist, or hem |
| Pearls or Beads | Sew along shell edges or neckline |
| Lace Trim | Attach along hem for a vintage look |
🧼 Care Instructions
- Hand wash in cold water or gentle cycle
- Lay flat to dry
- Avoid wringing or tumble drying
- Use mild baby-safe detergent
📌 Tips for Success
- Use stitch markers to define armhole joins
- Check sizing after yoke before proceeding to skirt
- Maintain even tension for a uniform look
- Block the dress lightly to shape petals and edges
📸 Styling Ideas
- Holiday Dress: Red yoke, white skirt with red trim, ribbon bow
- Birthday Outfit: Add decorative crocheted flowers or butterflies
- Photo Shoot: Pair with matching baby booties and headband in red and white
🧵 Summary of the Pattern
| Section | Details |
|---|---|
| Yoke | 64 DC worked in rounds or rows |
| Armholes | Formed by skipping stitches and chaining |
| Skirt | Alternating red and white shell rounds |
| Edging | White picot or crab stitch |
| Closure | Back slit with buttons |
| Sleeves | Optional cap sleeves in white |
❤️ Final Thoughts
This red and white crochet baby dress for a 2-year-old is a delightful project that blends practicality with beauty. Whether you’re gifting it, using it for a family event, or making it just for fun, this frock will become a treasured part of any child’s wardrobe.
With a little patience and creativity, you can turn simple yarn and stitches into a masterpiece filled with love and charm.