by
by Certainly! Here’s a comprehensive long-form article explaining how to crochet a shrug or jacket for women, size 32–34 (Small to Medium). This easy-to-follow guide is suitable for confident beginners or intermediate crocheters, and it features a simple construction method using a rectangular base—making it elegant, versatile, and beginner-friendly.
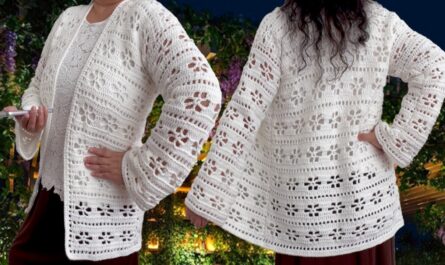
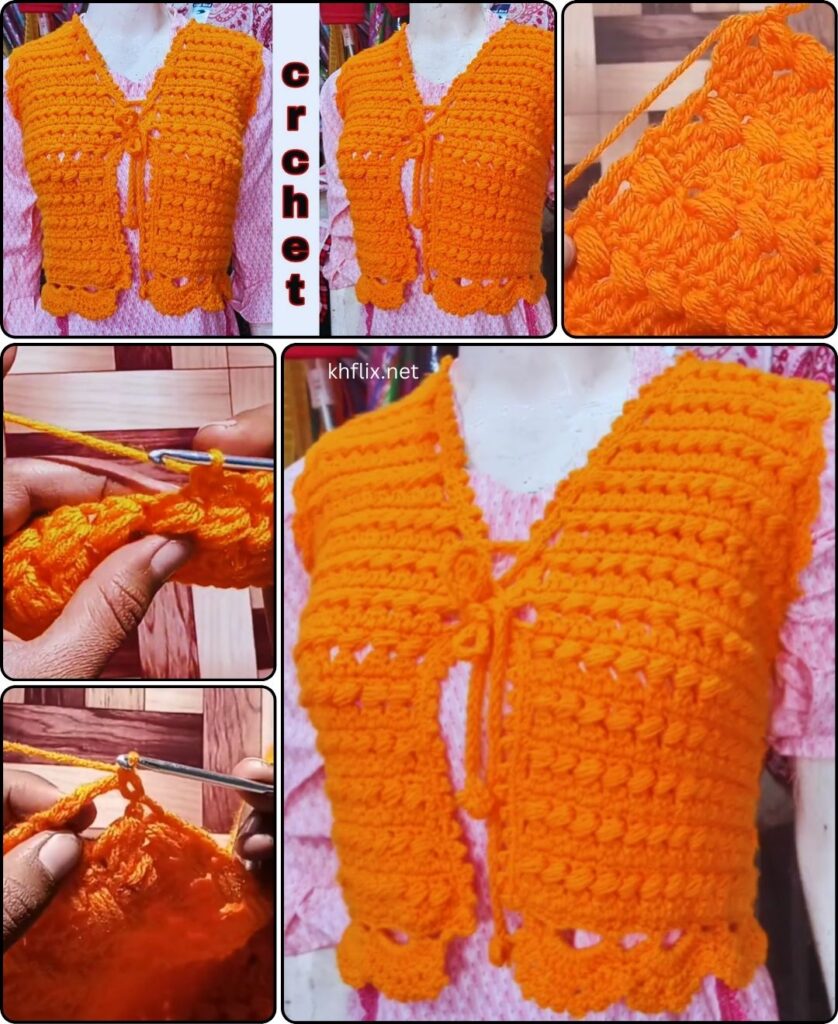
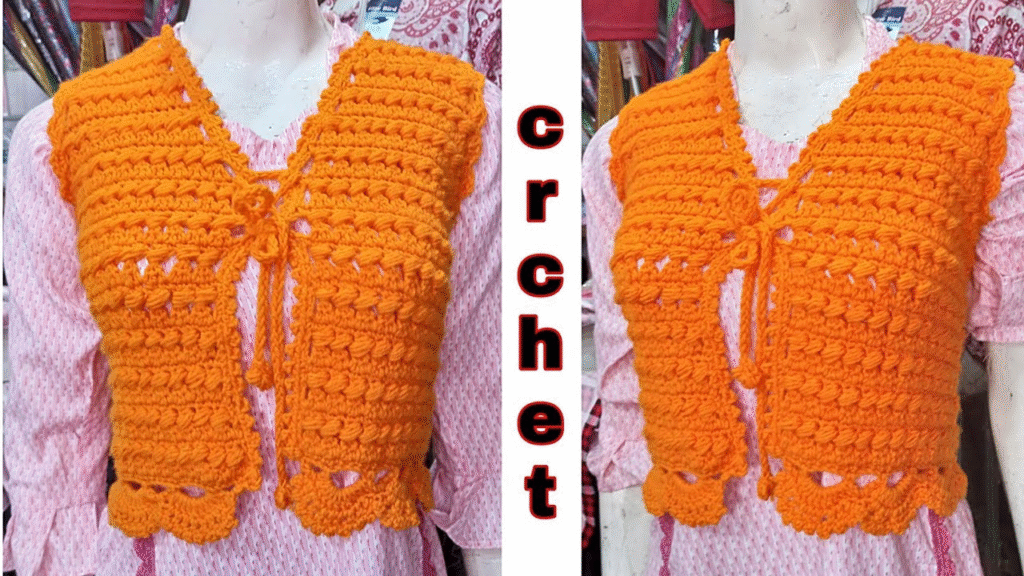
🧥 How to Crochet a Shrug for Ladies / Crochet Jacket for Women
Size: Small to Medium (32–34 inch Bust)
🧶 Introduction
A crochet shrug or jacket is the perfect layering piece for women—stylish, cozy, and timeless. Whether worn over a dress, tank top, or even casual t-shirt, a handmade shrug adds both warmth and a touch of elegance to your outfit. In this detailed tutorial, you’ll learn how to make a crochet shrug/jacket designed to fit women with a 32–34 inch bust. It uses a simple rectangular construction, which means there is no complicated shaping—just basic stitches, folding, and a little seaming.
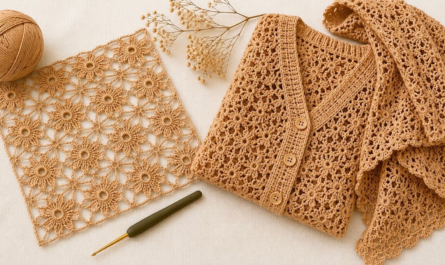
✨ Features of This Shrug Pattern
- Size: Small to Medium (32–34 inch bust)
- Construction: One rectangle, folded and seamed
- Style: Open front, short sleeve or long sleeve options
- Yarn Weight: DK (#3) or Light Worsted (#4)
- Skill Level: Easy
- Stitches Used: Double Crochet, V-Stitch, Single Crochet (US terms)
📏 Sizing Information
This pattern is sized for a bust size of 32–34 inches, with a slightly loose fit. The rectangle measurements can be adjusted for a custom fit.
| Garment Measurement | Inches |
|---|---|
| Width (across back + sleeves) | 38–40″ |
| Height (from neck to waist) | 18–20″ |
| Armhole Opening | 7–8″ |
📌 Tip: Add more length to the rectangle for a longer jacket or drop sleeves.
🧺 Materials You’ll Need
| Item | Description |
|---|---|
| Yarn | 500–600g of DK or Light Worsted yarn |
| Crochet Hook | 5.0 mm (H-8) or as needed to meet gauge |
| Stitch Markers | Optional (for armhole placement) |
| Tapestry Needle | For weaving in ends and seaming |
| Scissors | For trimming yarn |
| Measuring Tape | To check rectangle size and armholes |
Recommended Yarn Types:
- Cotton blend for breathability
- Soft acrylic for warmth
- Linen for a lightweight summer shrug
🧵 Stitch Guide (US Crochet Terms)
| Abbreviation | Stitch Name |
|---|---|
| CH | Chain |
| SC | Single Crochet |
| DC | Double Crochet |
| SL ST | Slip Stitch |
| V-Stitch | DC, CH 1, DC in same stitch |
🔲 Construction Overview
This shrug is made by:
- Crocheting one large rectangle
- Folding the rectangle
- Seaming the sides (leaving room for armholes)
- Optionally adding sleeves or edging
📐 Part 1: Crochet the Rectangle
Step 1: Make a Foundation Chain
To create a 38–40″ wide rectangle:
- CH 113 (for V-stitch base: multiples of 3 + 2)
📏 This will be the width of your shrug when laid flat.
Step 2: Begin the Pattern
Row 1:
- DC in the 5th CH from hook (creates your first V-stitch)
- Skip 2 chains, DC, CH 1, DC all in next stitch (V-stitch)
- Repeat across row.
- End with DC in the last stitch. Turn.
Row 2:
- CH 3 (counts as DC), work V-stitch (DC, CH 1, DC) into each CH-1 space from the previous row
- Repeat across, ending with DC in the top of turning CH. Turn.
🔁 Repeat Row 2 until your rectangle measures about 18–20 inches in height.
✅ Now you have a completed rectangular fabric.
✂️ Part 2: Fold and Seam the Shrug
Folding the Rectangle:
- Lay your rectangle horizontally (long side as width).
- Fold the two short edges inward until they meet in the center.
- The open center becomes the back neckline and the folds become the arms.
Seaming:
- Use a tapestry needle and yarn or SL ST with your hook.
- Seam from each outer edge inward, about 5–6 inches.
- Leave 7–8 inches open for armholes.
- Fasten off and weave in the ends.
💡 You’ve now created the shrug shape with sleeves!
🧥 Part 3: Add Edging (Optional but Recommended)
Neckline and Front Edge:
- Join yarn at the bottom front corner.
- CH 1, SC evenly around the entire front and neckline opening.
- Repeat for 2–3 rows for a clean, neat band.
✨ Optional edging ideas:
- Shell Stitch Edge: (SC, skip 1, 5 DC in next, skip 1, SC)
- Picot Edge: (SC, CH 3, SL ST in 1st CH, skip 1, SC)
🧶 Part 4: Add Sleeves (Optional)
You can leave the sleeves open (cap style) or crochet full sleeves.
To Add Sleeves:
- Join yarn at the armhole.
- CH 2, work DC (or HDC) evenly around the armhole.
- Join with SL ST, continue working in rounds.
- Optional: Decrease 2 stitches every few rounds for taper.
- Stop when desired length is reached (e.g., 14″ for full sleeve).
Add ribbed cuffs with FPDC and BPDC for stretch and texture.
🧼 Washing and Care Instructions
- Hand wash or use delicate machine cycle
- Use cold water and mild detergent
- Lay flat to dry
- Store folded to maintain shape
🌟 Style Tips and Customization
- Use a gradient or self-striping yarn for a boho-chic look
- Add buttons or a tie closure at the front
- Try a lacy stitch pattern for a summer shrug
- Create a hood by sewing an extra rectangle to the neckline
- Use metallic yarn for an evening or festive jacket
🧵 Pattern Recap Summary
| Step | Method | Notes |
|---|---|---|
| Rectangle | V-stitch rows | 38–40” wide, 18–20” tall |
| Folding | Fold short ends inward | Creates back and sleeves |
| Seaming | Join side edges | Leave 7–8” for armholes |
| Edging | SC or decorative trim | Around neckline and sleeves |
| Sleeves | Optional rounds in DC | Taper if desired |
💖 Final Thoughts
This easy and beautiful crochet shrug is a must-make for anyone looking to create their first wearable project. It’s flattering, adjustable, and can be dressed up or down depending on your yarn choice. The simple rectangle construction makes it beginner-friendly, while the option to add sleeves, trims, and edging offers plenty of creativity for intermediate crafters.