 by
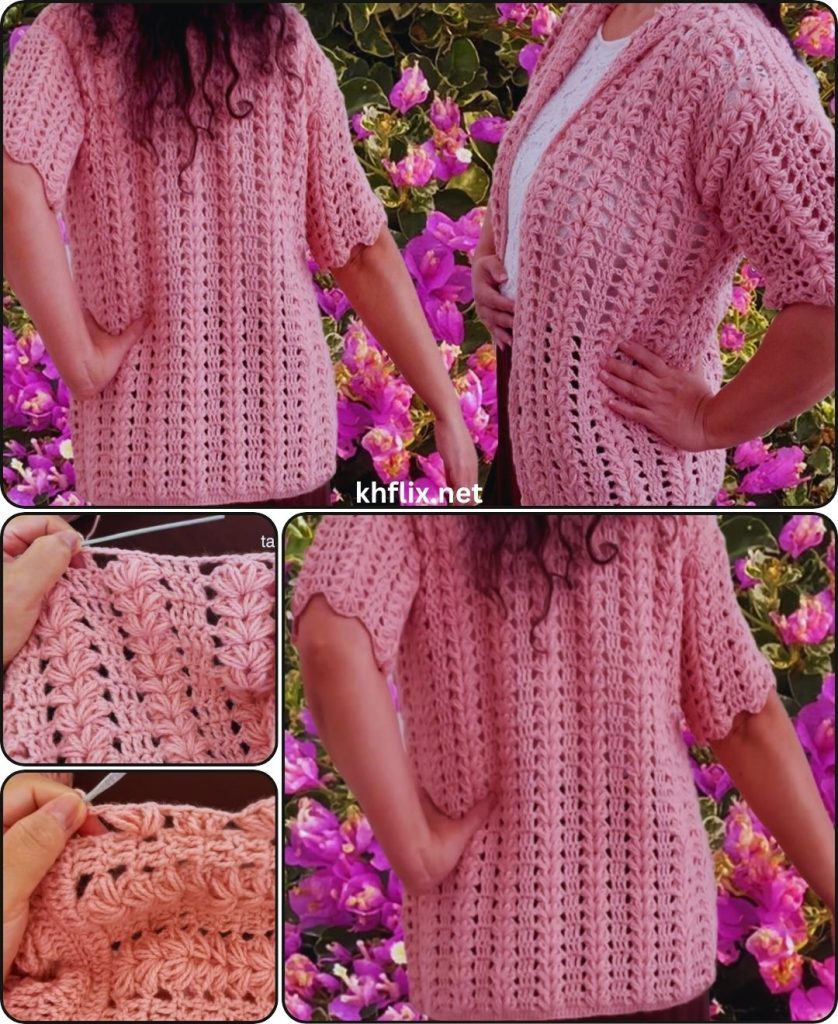
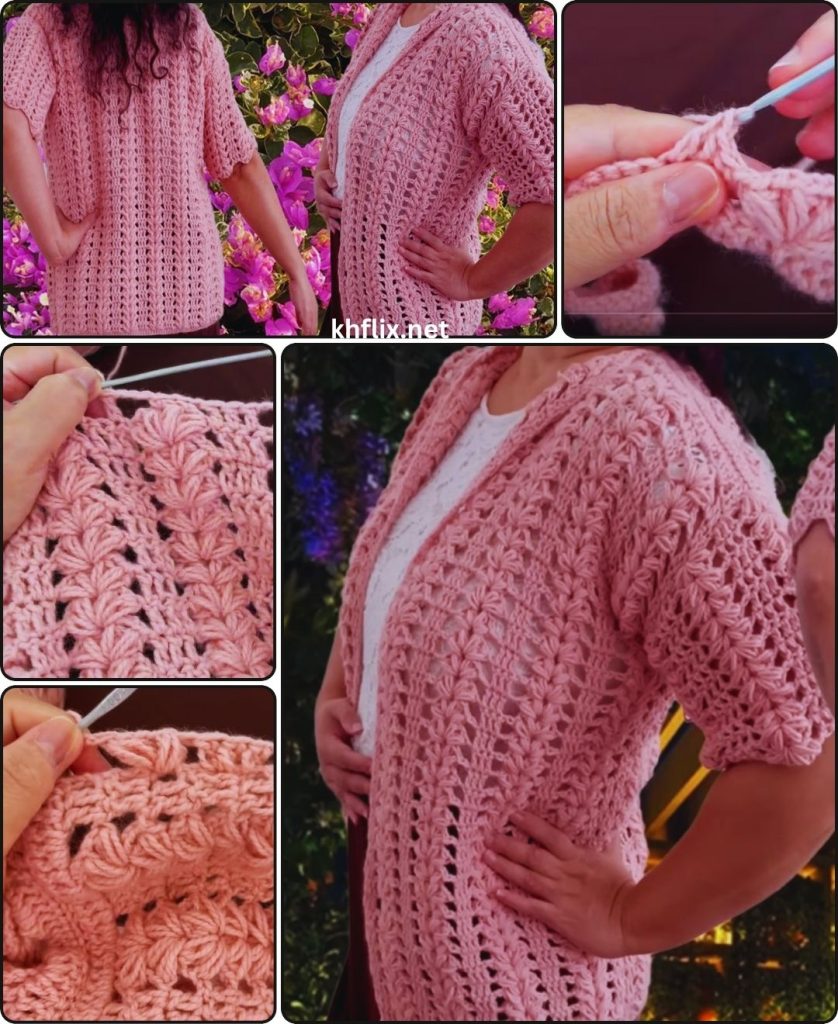
by Crocheting your own cardigan is a fantastic project that results in a versatile and cozy garment! This tutorial focuses on an easy-to-follow method that’s perfect for those comfortable with basic stitches and looking to make their first wearable. We’ll create a simple, open-front cardigan (often referred to as a “blouse sweater jacket” for its lightweight, layering style) that’s quick to work up using basic rectangles and minimal shaping.
Skill Level: Confident Beginner to Intermediate
This project is ideal if you’re comfortable with:
- Chain (ch): The foundation of crochet.
- Single Crochet (sc): A dense, sturdy stitch.
- Double Crochet (dc): A taller stitch that works up quickly.
- Half Double Crochet (hdc): A versatile stitch that offers good coverage.
- Working in Rows: Crocheting back and forth.
- Basic Seaming: Joining pieces together with a yarn needle or crochet hook.
- Fastening Off: Securing your yarn.
- Weaving in Ends: The essential final step for a polished look.
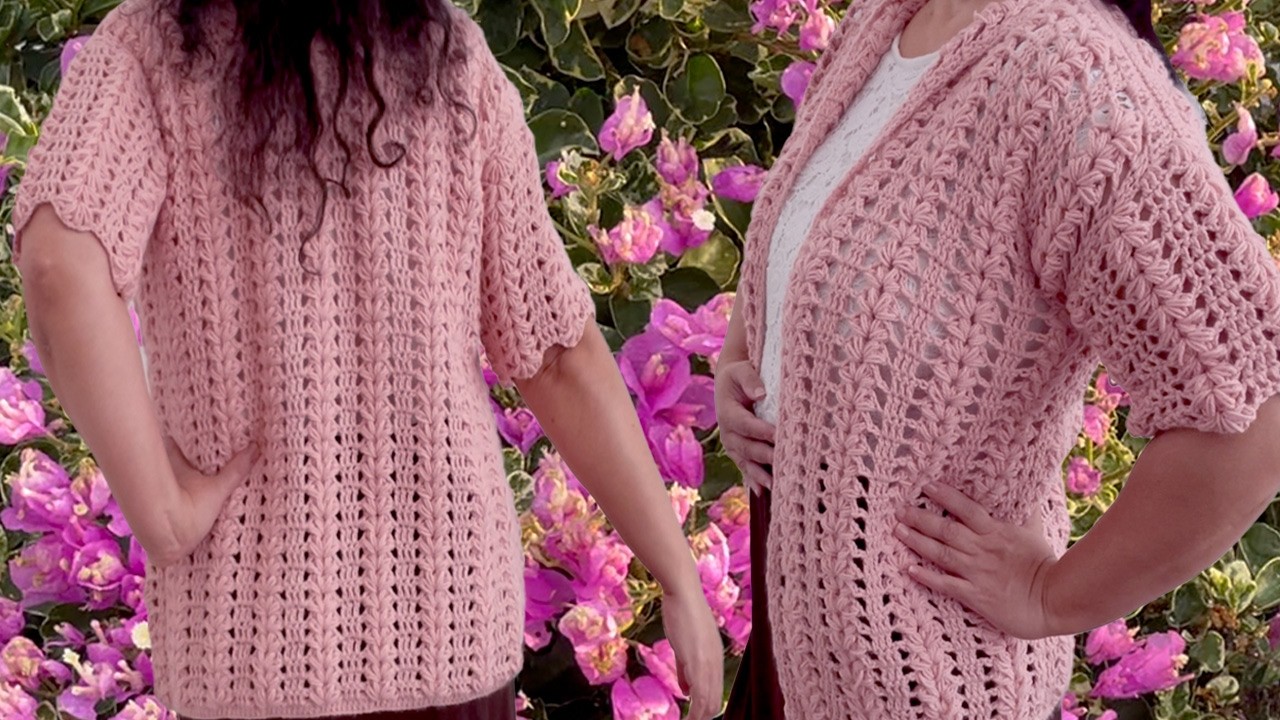
Finished Cardigan Style & Fit:
This tutorial aims for a relaxed, slightly oversized fit, typical of a comfortable layering piece. It will be an open-front cardigan with a straightforward, boxy silhouette, making it forgiving for sizing.
Finished Cardigan Dimensions (Approximate – Adult Small/Medium):
Using worsted weight yarn and the suggested hook, a typical Adult Small/Medium might measure:
- Back Panel Width: 18-20 inches (45-50 cm)
- Back Panel Length: 22-24 inches (55-60 cm)
- Sleeve Length: 17-18 inches (43-46 cm) (from underarm)
- Sleeve Width (flat): 6-7 inches (15-18 cm) at widest point
Adjusting Size:
- For a wider cardigan: Increase your starting chain for the back panel. Ensure your front panels are half the width of the back.
- For a longer cardigan: Add more rows to all your panels (back and front).
- For different sleeve lengths/widths: Adjust the starting chain for the sleeves and the number of rows.
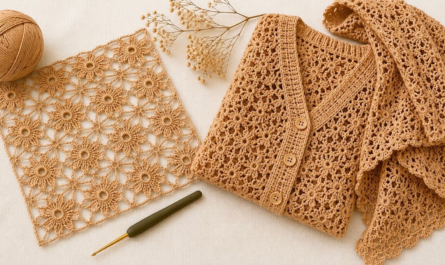
Materials You’ll Need:
Gathering your supplies before you begin ensures a smooth and enjoyable crocheting session!
- Yarn: Approximately 800-1200 yards (730-1100 meters) of Worsted Weight (Medium #4) Acrylic, Cotton, or a Blend.
- Why these fibers? Acrylic is affordable, comes in a huge range of colors, and is easy to care for. Cotton or cotton blends offer good drape and breathability. Choose a color you love! The yardage can vary significantly based on your chosen size, stitch pattern density, and personal tension. It’s always better to have a bit extra than to run out.
- Crochet Hook: Size J/6.0mm or K/6.5mm. A larger hook size with worsted weight yarn creates a fabric with nice drape, which is perfect for a cardigan that drapes well. If you crochet loosely, use a 6.0mm; if tightly, try 6.5mm.
- Yarn Needle (Tapestry Needle): This specialized blunt-tipped needle with a large eye is essential for seaming your cardigan pieces together and weaving in all your loose yarn tails for a clean finish.
- Scissors: Any sharp pair for cutting your yarn.
- Stitch Markers (Optional but Recommended): Helpful for marking armholes when seaming or keeping track of rows, especially for symmetrical pieces.
- Measuring Tape: Crucial for checking your gauge (see below) and ensuring your panels are the correct size.
Gauge: The Most Important Step!
Before you start, creating a gauge swatch is crucial for ensuring your finished cardigan will be the correct size. Different crocheters have different tension, and yarn thickness can vary.
- Crochet a small square: Using your chosen yarn and hook, crochet a square about 6×6 inches (15×15 cm) using the main stitch pattern you’ll use for the body (e.g., if you’re mostly doing double crochet, make a square of dc).
- Measure: Lay your swatch flat. Measure how many stitches you have in 4 inches (10 cm) and how many rows you have in 4 inches (10 cm).
- Adjust:
- Too many stitches in 4 inches? Your stitches are too small. Go up a hook size (e.g., from J/6.0mm to K/6.5mm).
- Too few stitches in 4 inches? Your stitches are too large. Go down a hook size.
- Repeat until your gauge matches the pattern (or adjust the pattern’s starting chain/row counts to match your gauge).
For this tutorial, aiming for 12-14 dc stitches = 4 inches (10 cm) and 7-8 dc rows = 4 inches (10 cm) is a good general guideline.
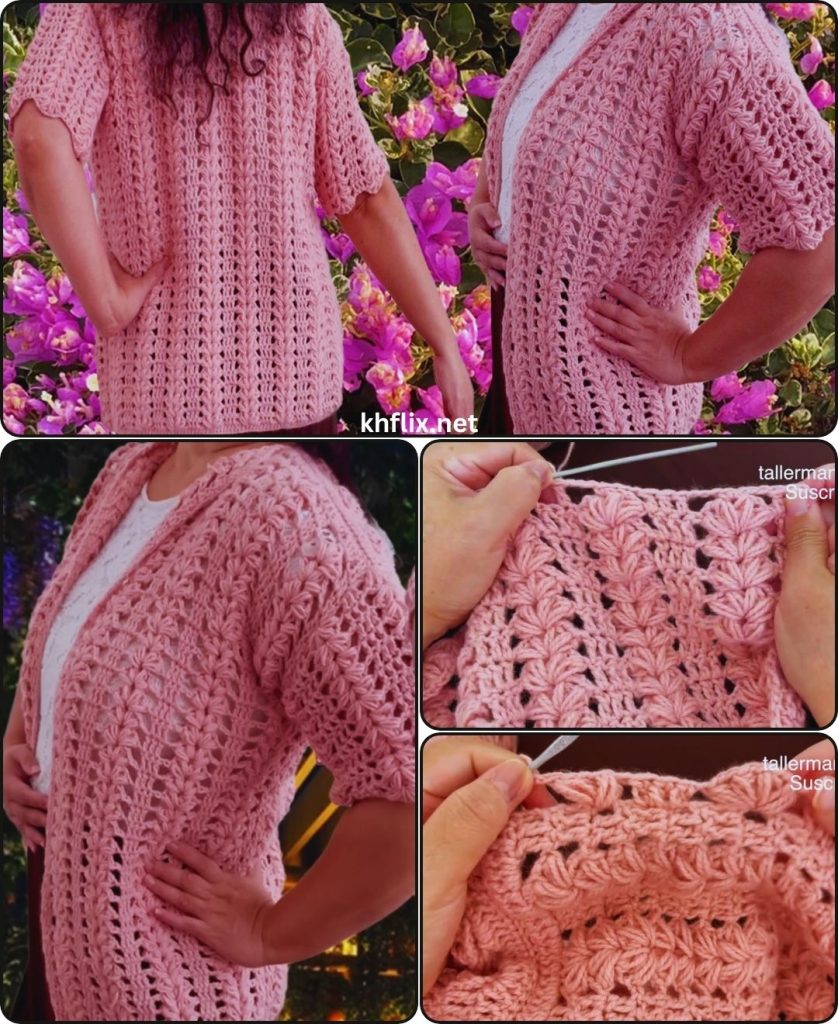
Crochet Cardigan Construction: Simple Rectangles!
This easy cardigan is made from four simple rectangular panels and then assembled. This makes it very beginner-friendly as you’re primarily working in straight rows.
- One Back Panel
- Two Front Panels (each roughly half the width of the back panel)
- Two Sleeve Panels
We’ll primarily use the Double Crochet (dc) stitch for the body of the cardigan as it works up quickly and creates a lovely, soft fabric.
Part 1: The Back Panel
This is the largest piece and forms the back of your cardigan.
- Starting Chain:
- Make a slip knot with your yarn.
- Chain (ch) 65. (This should give you a width of approximately 18-20 inches/45-50 cm, depending on your gauge. Adjust this number if your gauge is different or if you want a wider/narrower cardigan. Always aim for an odd number of chains if you want to end with a dc in the last stitch of the row and start with a dc in the first stitch of the next row, or a number that works with your chosen stitch pattern repeats.)
- Row 1:
- Work 1 double crochet (dc) into the 3rd chain from your hook. (The skipped 2 chains count as your first dc).
- Work 1 dc into each chain across the row. (You should have 64 dc stitches).
- Chain 2 (ch 2) (counts as your first dc of the next row).
- Turn your work.
- Rows Onwards:
- Work 1 dc into each stitch across the row.
- Chain 2 (ch 2), turn your work.
- Repeat this row until your back panel measures approximately 22-24 inches (55-60 cm) in length, or your desired length for the cardigan’s back.
- Fasten Off (FO), leaving a tail of about 6 inches (15 cm).
Part 2: The Front Panels (Make Two)
You’ll create two identical (or very similar) panels for the front of the cardigan. Each should be about half the width of your back panel.
- Starting Chain:
- Make a slip knot.
- Chain (ch) 34. (This should give you a width of approximately 9-10 inches/22-25 cm, half the back panel width. Adjust based on your gauge and desired width.)
- Row 1:
- Work 1 double crochet (dc) into the 3rd chain from your hook.
- Work 1 dc into each chain across the row. (You should have 33 dc stitches).
- Chain 2 (ch 2), turn your work.
- Rows Onwards:
- Work 1 dc into each stitch across the row.
- Chain 2 (ch 2), turn your work.
- Repeat this row until your front panel measures approximately 22-24 inches (55-60 cm) in length, matching the length of your back panel.
- Fasten Off (FO), leaving a tail of about 6 inches (15 cm).
- Repeat steps 1-4 to create your second front panel.

Part 3: The Sleeve Panels (Make Two)
These panels will form the sleeves of your cardigan. We’ll make them straight rectangles and seam them later.
- Starting Chain:
- Make a slip knot.
- Chain (ch) 22. (This should give you an arm opening width of approximately 6-7 inches/15-18 cm when folded. Adjust based on your gauge and desired arm fit.)
- Row 1:
- Work 1 double crochet (dc) into the 3rd chain from your hook.
- Work 1 dc into each chain across the row. (You should have 21 dc stitches).
- Chain 2 (ch 2), turn your work.
- Rows Onwards:
- Work 1 dc into each stitch across the row.
- Chain 2 (ch 2), turn your work.
- Repeat this row until your sleeve panel measures approximately 17-18 inches (43-46 cm) in length, or your desired sleeve length. Remember this is from the underarm to the wrist.
- Fasten Off (FO), leaving a long tail (at least 20 inches / 50 cm) for seaming.
- Repeat steps 1-4 to create your second sleeve panel.
Part 4: Assembling Your Cardigan
This is where your rectangular pieces transform into a wearable garment!
- Lay Out Your Panels:
- Lay your Back Panel flat on a clean surface.
- Place your two Front Panels on top of the back panel, aligning the top and bottom edges. The front panels should cover the outside edges of the back panel, leaving a gap in the middle for the open front.
- Shoulder Seams:
- Fold one front panel over the back panel, aligning the top edge.
- Using your yarn needle and a yarn tail from either the front or back panel, stitch across the top edge to join the shoulder. Use a whip stitch (simple, secure) or a mattress stitch (creates an invisible seam). Sew for approximately 4-5 inches (10-12.5 cm) from the outer edge inward. Leave the center unseamed for the neck opening.
- Repeat for the second shoulder.
- Tips: Don’t pull too tightly, or the seam will pucker. Match stitch for stitch as much as possible for a neat look.
- Side Seams:
- Fold the front panels back open. Your cardigan should now look like a “T” shape.
- Fold the entire piece in half lengthwise, so the front panels are aligned directly over the back panel.
- Starting from the bottom edge of the cardigan, use your yarn needle and a yarn tail to stitch up the side seam. Sew for approximately 14-16 inches (35-40 cm) upwards, leaving an opening of about 8-10 inches (20-25 cm) at the top for the armhole. Use a stitch marker to mark the top of your armhole opening.
- Repeat for the second side seam.
- Attaching Sleeves:
- Take one sleeve panel. Fold it in half lengthwise and stitch the long side seam together using your yarn needle, forming a tube.
- Turn the cardigan inside out.
- Align the sewn sleeve seam with the side seam of the cardigan’s body (this usually sits at the bottom of the armhole). Match the top center of the sleeve opening with the shoulder seam.
- Using your yarn needle and a yarn tail from the sleeve, stitch the sleeve opening evenly around the armhole opening you left on the cardigan. Aim to match stitch for stitch to avoid puckering.
- Repeat for the second sleeve.
Part 5: Finishing Touches (The Polishing Touches!)
These last steps are crucial for making your cardigan look professional and truly finished.
- Weave in All Ends (Meticulously!):
- You’ll have numerous yarn tails from starting and ending panels, and from all your seams. This is often the most time-consuming part, but it’s essential for a clean, durable finish.
- Thread each yarn tail onto your yarn needle.
- How to Weave Neatly: Insert the needle into existing stitches of the same color as the tail. Weave the tail through the fabric for at least 3-4 inches (7.5-10 cm). To ensure it’s extra secure and won’t unravel with use or washing, subtly change direction within the stitches (e.g., weave along a stitch, then turn and weave back through some of the same stitches diagonally or perpendicularly) to “lock” the tail in place.
- Once the tail is securely woven, trim any excess yarn very close to the fabric, being extremely careful not to snip any of your actual crocheted stitches.
- Optional: Add a Border (for a neat edge):
- For a more defined and polished look, you can add a simple border around the entire opening of the cardigan (including the neck and down the front panels) and around the sleeve cuffs.
- Single Crochet Border: Join your yarn with a sl st anywhere on the edge. Chain 1. Work 1 sc evenly around the entire edge, placing 1 sc into each stitch and 2 sc into the side of each dc row. Sl st to join. Fasten off. Repeat for sleeve cuffs.
- Ribbed Border (for cuffs/bottom): This is a bit more advanced but gives a stretchy, professional look. It involves crocheting a separate strip of ribbing (e.g., using front post/back post dc or sc in back loop only) and sewing it to the cardigan, or working it directly onto the cardigan.
- Blocking (Highly Recommended):
- Blocking is a simple but transformative process that can significantly improve the drape, shape, and overall appearance of your finished cardigan. It helps to even out your stitches and makes the garment lie flat and beautifully.
- Method for Acrylic/Cotton Blend Yarn (Wet or Steam Blocking):
- Wet Blocking: Gently mist your entire cardigan evenly with cool water using a spray bottle until it’s damp, but not soaking wet. Lay it flat on a clean surface or blocking mat, gently shaping it to your desired dimensions. Pin it in place if necessary. Allow it to air dry completely and thoroughly in a well-ventilated area. This may take a full day or two.
- Steam Blocking: Gently hover a steam iron over the garment (do NOT touch the iron to the yarn, especially acrylic, as it can melt or scorch). The steam will relax the fibers. Gently pat and shape the garment. Allow it to cool and dry completely.
Congratulations! You’ve successfully crocheted your very own Cute Cardigan Blouse Sweater Jacket! This is a fantastic achievement, especially for a first garment. You now have a cozy, handmade layering piece that’s both functional and stylish.
What other colors will you make your easy cardigan in?