 by
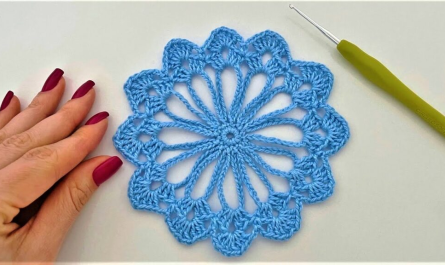
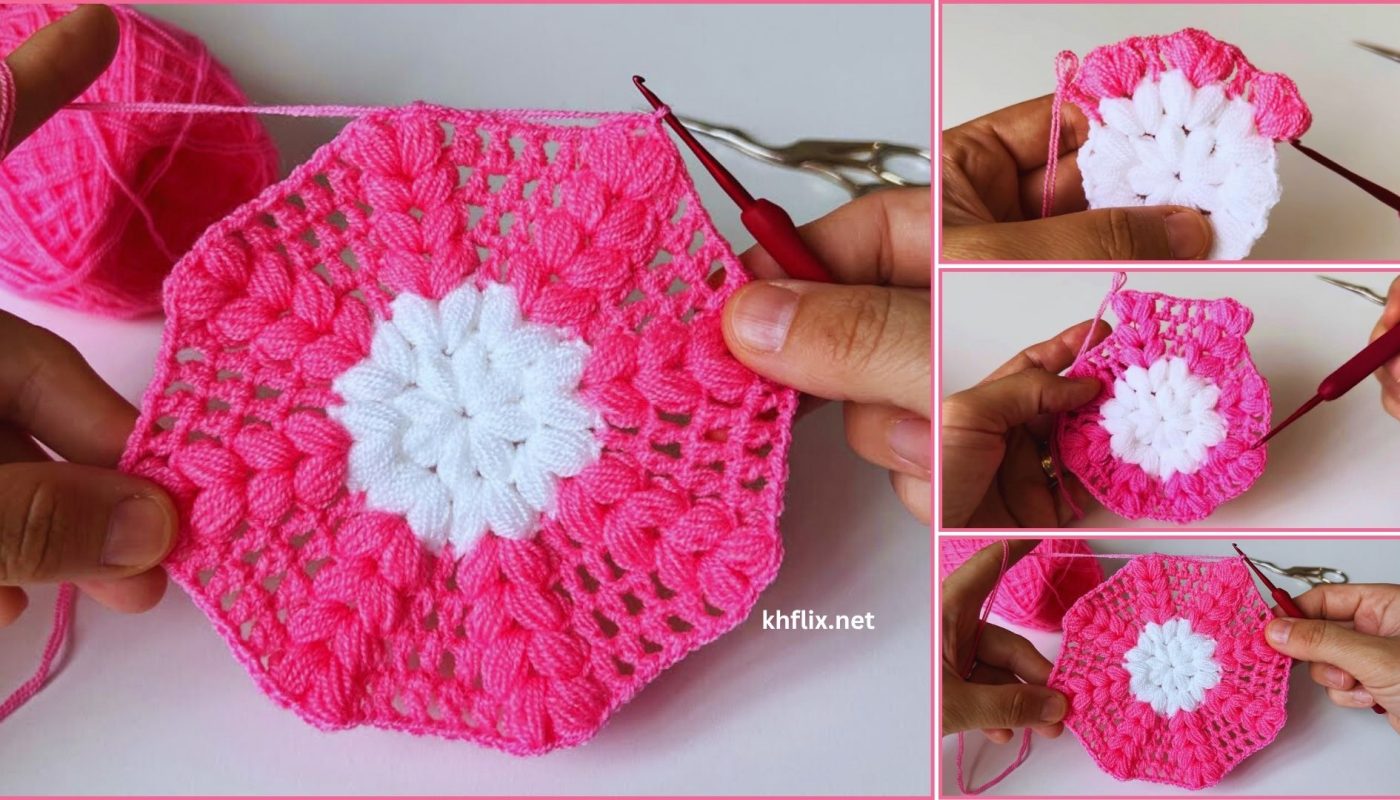
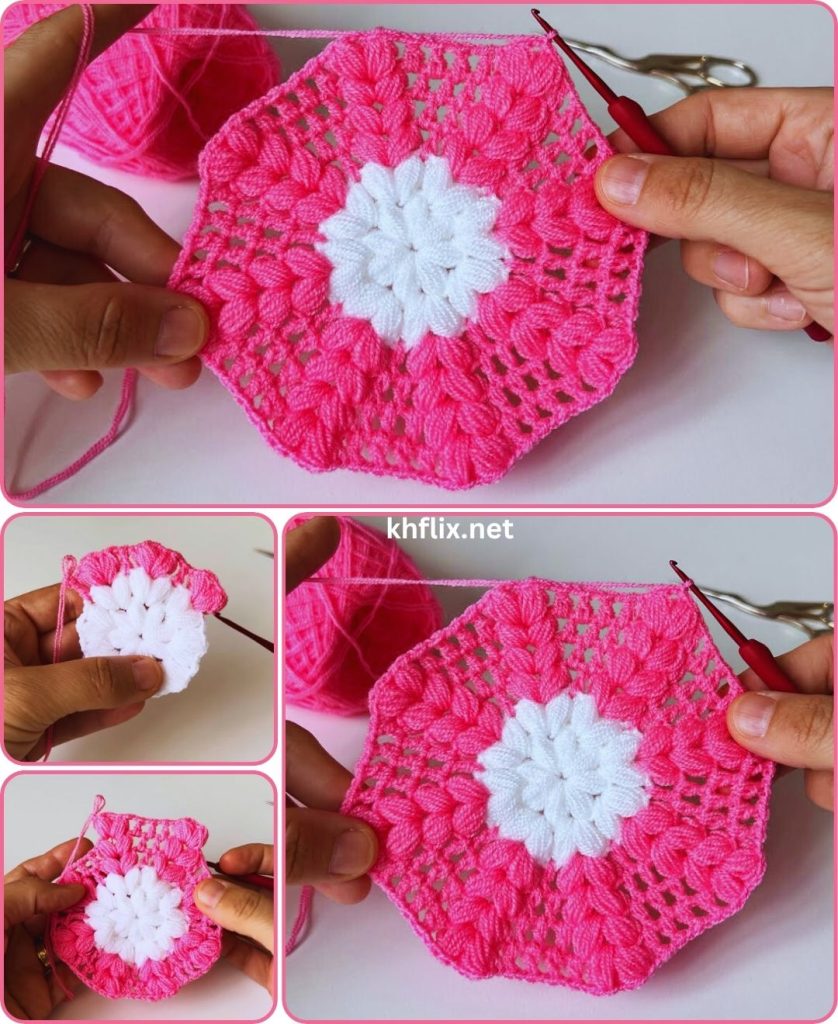
by Let’s create a beautiful and textured two-color puff doily! Doilies are classic crochet projects that are perfect for adding a touch of handmade elegance to your home. Using two colors, especially with puff stitches, will make the texture truly pop and create a lovely visual contrast.
How to Crochet a Beautiful Two-Color Puff Doily: A Detailed Step-by-Step Tutorial
This comprehensive tutorial will guide you through creating a round doily featuring the wonderfully tactile puff stitch, showcasing two distinct colors. We’ll focus on clear stitch definitions, neat color changes, and creating a balanced design.
Skill Level: Intermediate
This project assumes you’re comfortable with:
- Chain (ch): The basic foundation.
- Slip Stitch (sl st): For joining rounds.
- Single Crochet (sc): For borders or subtle texture.
- Double Crochet (dc): A common stitch used in many patterns.
- Puff Stitch (Puff St): The star of this doily! We’ll explain it in detail.
- Working in rounds: Crocheting in a continuous or joined circular manner.
- Joining new yarn colors: Crucial for a two-color design.
- Weaving in ends securely.
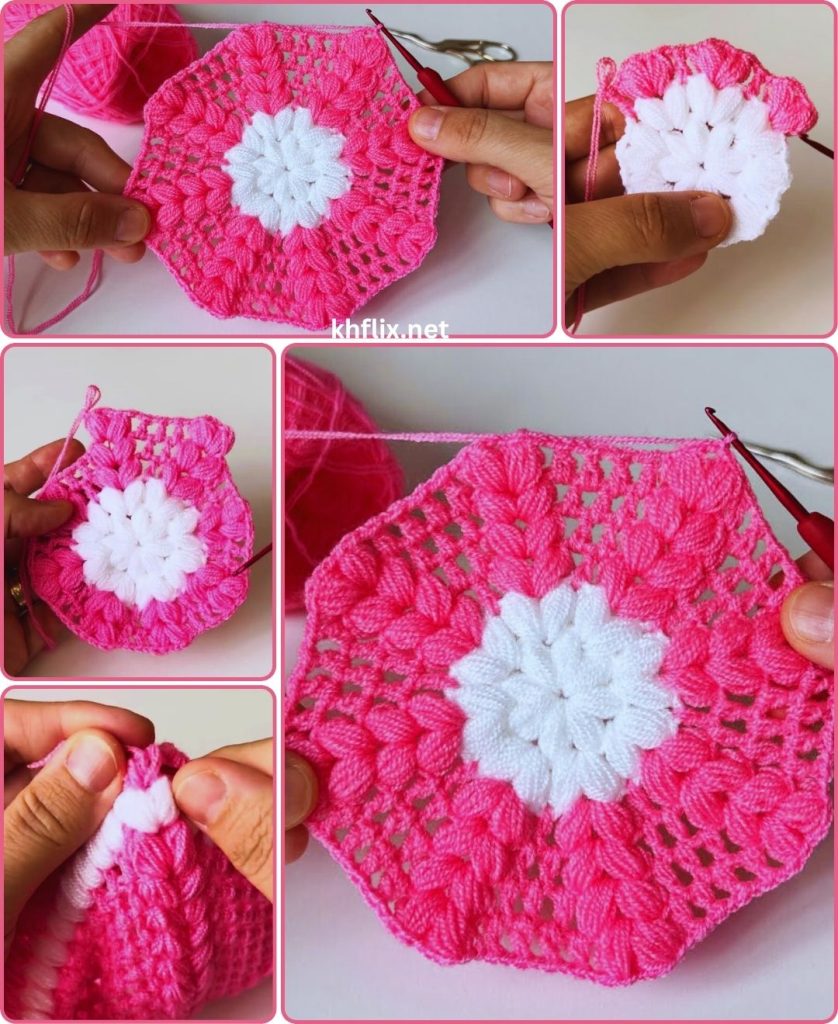
What is a Puff Stitch?
A Puff Stitch is a cluster of stitches that are partially worked and then all loops are pulled through together, creating a beautiful, raised “puff” of texture. It’s often made with half double or double crochet stitches. For this doily, we’ll use a 5-loop Puff Stitch, which is a common and lovely variation:
- Puff Stitch (Puff St): Yarn over, insert hook into designated stitch/space, yarn over, pull up a loop (3 loops on hook). *Yarn over, insert hook into same stitch/space, yarn over, pull up a loop* (Repeat from * to * 3 more times – you will have 5 sets of yarn over/pull up a loop). You now have 11 loops on your hook. Yarn over, pull through all 11 loops on your hook. Ch 1 to secure the puff (this chain often counts as part of the stitch or creates spacing, depending on the pattern).
Finished Doily Dimensions (Approximate):
The finished size will vary depending on your yarn, hook size, and tension, but this pattern generally creates a doily about 8-12 inches (20-30 cm) in diameter.
Materials You’ll Need:
- Yarn: Approximately 50-80 yards (45-73 meters) total of Light Worsted (DK #3) or Worsted Weight (Medium #4) Cotton Yarn.
- Why Cotton? Cotton yarn is ideal for doilies. It has excellent stitch definition, holds its shape well, and is easy to block, which is essential for a beautiful, flat doily.
- Color Choice: Select two contrasting or complementary colors.
- Color A (Main/Center Color): This will be your dominant color.
- Color B (Accent/Puff Color): This color will highlight your puff stitches.
- Think about a classic combination like white and a soft pastel, or something bold like black and a bright jewel tone.
- Crochet Hook: Size G/4.0mm or H/5.0mm. If using DK weight, a 4.0mm might be better. For worsted weight, a 5.0mm is common. Choose a hook that gives you a nice, defined stitch without being too loose or too stiff.
- Yarn Needle (Tapestry Needle): Essential for seamlessly weaving in all your loose yarn tails.
- Scissors: For cutting your yarn.
- Stitch Marker (Optional): Helpful for marking the beginning of rounds if you tend to lose your place.
- Blocking Supplies (Highly Recommended): Blocking mats, rust-proof pins, and a spray bottle (or steamer). Blocking is crucial for doilies to ensure they lie flat and their lace patterns open up beautifully.
Understanding the Doily Construction & Color Changes:
We’ll work this doily in continuous rounds, changing colors at specific points to emphasize the puff stitches.
Color Change Tips:
To ensure your color changes are neat and virtually invisible:
- Invisible Join: When you reach the end of a round and need to change color, complete the last slip stitch (or the last stitch of the round if it’s not a join) with the current color until you have two loops left on your hook. Drop the current color, pick up the new color, yarn over with the new color, and pull through the remaining two loops to complete the stitch. Then, proceed with the start of the new round (e.g., ch 3 for dc, or ch 1 for sc/puff).
- Cutting Yarn: For the cleanest look, especially with puff stitches, it’s often best to cut the old color yarn after each color change, leaving a 4-6 inch (10-15 cm) tail. While it means more ends to weave in, the cleaner result is worth it. Avoid carrying yarn across the back unless the stitches of the next round will fully cover it, as it can show through or create tension issues.
Let’s Crochet Your Two-Color Puff Doily!
Part 1: Starting the Center (Color A)
- Start: With Color A, create a Magic Ring (MR).
- Alternative start: Ch 4, then sl st into the first ch to form a ring.
- Round 1 (Color A):
- Ch 3 (counts as first dc).
- Work 11 dc into the Magic Ring.
- Sl st into the top of the beginning Ch 3 to join the round.
- [Total: 12 dc]
- If using MR, pull the tail tightly to close the center hole.
- Change Color: On the final sl st, drop Color A and join Color B. Cut Color A, leaving a tail.
Part 2: Introducing the Puff Stitches (Color B)
Now for the star of the show! We’ll make our first set of puff stitches in Color B.
- Round 2 (Color B – Puff Stitches):
- Ch 1 (does NOT count as a stitch).
- Work 1 Puff St into the same stitch as your join. (Remember: Yarn over, insert hook, pull up loop 5 times, then yarn over and pull through all 11 loops. Then Ch 1 to secure the puff).
- *Skip next dc. Work 1 Puff St into the next dc (this is where the skipped stitch helps create spacing for the puff to pop). Ch 1 to secure the puff.*
- Repeat from * to * 10 more times around.
- Sl st into the top of the first Puff St (not the Ch 1 that secures it) to join.
- [Total: 12 Puff Sts]
- Change Color: On the final sl st, drop Color B and join Color A. Cut Color B, leaving a tail.
Part 3: Expanding the Doily (Color A)
We’ll use Color A to create a base for the next set of puff stitches and expand the doily.
- Round 3 (Color A – Base for Puffs):
- Ch 3 (counts as first dc).
- Work 1 dc into the Ch 1 space after the first Puff St of the previous round.
- Work 1 dc into the top of the next Puff St.
- *Work 1 dc into the next Ch 1 space.
- Work 1 dc into the top of the next Puff St.*
- Repeat from * to * 10 more times around.
- Sl st into the top of the beginning Ch 3 to join.
- [Total: 24 dc]
- Change Color: On the final sl st, drop Color A and join Color B. Cut Color A, leaving a tail.
Part 4: Second Row of Puff Stitches (Color B)
Time for more beautiful texture!
- Round 4 (Color B – Puff Stitches with Increase):
- Ch 1 (does NOT count as a stitch).
- Work 1 Puff St into the same stitch as your join. Ch 1 to secure.
- Work 1 Puff St into the next dc. Ch 1 to secure.
- *Work 1 Puff St into the next dc. Ch 1 to secure.
- Work 1 Puff St into the next dc. Ch 1 to secure.*
- Repeat from * to * 10 more times around.
- Sl st into the top of the first Puff St to join.
- [Total: 24 Puff Sts]
- Change Color: On the final sl st, drop Color B and join Color A. Cut Color B, leaving a tail.
Part 5: Further Expansion & Lace (Color A)
We’ll continue to expand and start to introduce a more lacy feel with chains.
- Round 5 (Color A – Expansion with Chains):
- Ch 3 (counts as first dc).
- Work 1 dc into the Ch 1 space after the first Puff St.
- Work 1 dc into the top of the next Puff St.
- Ch 2.
- *Work 1 dc into the Ch 1 space after the next Puff St.
- Work 1 dc into the top of the next Puff St.
- Ch 2.*
- Repeat from * to * 10 more times around.
- Sl st into the top of the beginning Ch 3 to join.
- [Total: 24 dc and 12 Ch 2 spaces]
- Change Color: On the final sl st, drop Color A and join Color B. Cut Color A, leaving a tail.
Part 6: Adding More Puffs (Color B)
The final layer of delightful texture.
- Round 6 (Color B – Puff Stitches in Ch-2 Spaces):
- Ch 1 (does NOT count as a stitch).
- Work (1 Puff St, Ch 2, 1 Puff St) into the first Ch 2 space. (This creates a corner-like section for the fan effect).
- Ch 1.
- *Work (1 Puff St, Ch 2, 1 Puff St) into the next Ch 2 space.
- Ch 1.*
- Repeat from * to * 10 more times around.
- Sl st into the top of the first Puff St to join.
- [Total: 24 Puff Sts, 12 Ch 2 sps, 12 Ch 1 sps]
- Change Color: On the final sl st, drop Color B and join Color A. Cut Color B, leaving a tail.
Part 7: Final Border (Color A)
We’ll finish the doily with a neat border in Color A.
- Round 7 (Color A – Final Border):
- Ch 1.
- Work 1 sc into the top of the first Puff St.
- Work 3 sc into the next Ch 2 space (this is the space between the two puffs in the previous round).
- Work 1 sc into the top of the next Puff St.
- Work 1 sc into the next Ch 1 space.
- *Work 1 sc into the top of the next Puff St.
- Work 3 sc into the next Ch 2 space.
- Work 1 sc into the top of the next Puff St.
- Work 1 sc into the next Ch 1 space.*
- Repeat from * to * 10 more times around.
- Sl st into the first sc to join.
- Fasten off, leaving a 6-inch (15 cm) tail for weaving in.
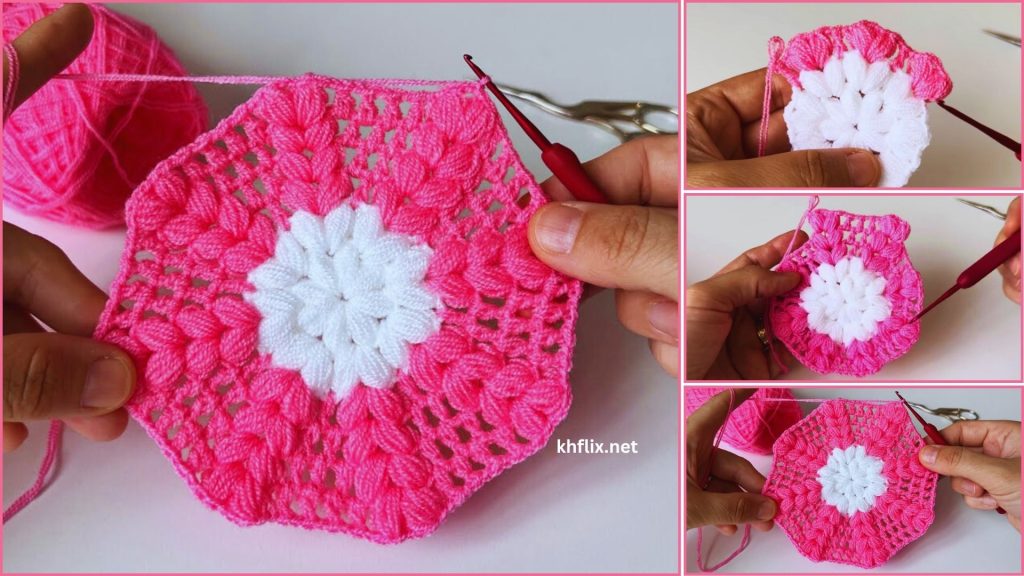
Finishing Touches (Highly Recommended for a Beautiful Doily!)
These final steps are what will truly make your two-color puff doily lie flat and showcase its intricate beauty.
- Weave in ALL Ends: This is absolutely critical for a clean and professional-looking doily. Use your yarn needle to meticulously weave in all remaining tails (from your starting ring and every single color change). Take your time here! For puff stitches, you might need to weave the tails into the body of the stitch itself to make them invisible.
- How to Weave Neatly: Weave tails into stitches of the same color as the tail. Weave in one direction for about 1.5-2 inches (4-5 cm), then subtly change direction and weave back through some of the same stitches. This “locks” the tail in place and prevents it from unraveling.
- Blocking (Essential for Doilies!): Blocking is the process of wetting or steaming your crochet item and then shaping it and pinning it into place while it dries. This opens up the stitches, evens out tension, and makes the doily lie perfectly flat. Doilies always look better after blocking!
- Method 1 (Wet Blocking – Recommended for Cotton):
- Fill a basin with cool water and immerse your doily. Let it soak for 15-20 minutes until thoroughly wet.
- Gently squeeze out excess water (do not wring!). Roll the doily in a clean towel to absorb more moisture.
- Lay your doily flat on a blocking mat or a thick foam board.
- Using rust-proof pins, carefully pin the doily into its desired round shape, stretching it gently to open up the lace and puff stitches. Pin all points and curves.
- Allow the doily to air dry completely (this can take 24-48 hours depending on humidity).
- Method 2 (Steam Blocking):
- Lay your doily flat on a blocking mat or a thick towel.
- Using a steamer or an iron on the steam setting (do NOT touch the iron to the doily!), hover the steam over the doily until it’s damp and pliable.
- Immediately pin the doily into shape as described above.
- Allow to dry completely.
- Method 1 (Wet Blocking – Recommended for Cotton):
Congratulations! You’ve now created a truly beautiful and tactile two-color puff doily! This elegant handmade piece will be a lovely addition to your home decor or a thoughtful gift. Enjoy the wonderful texture and contrasting colors you’ve brought to life!