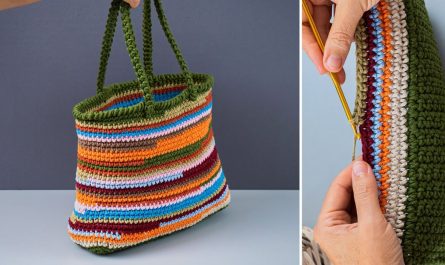
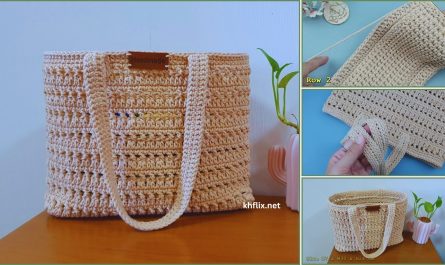
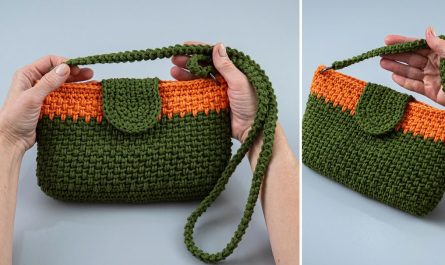
Let’s dive into making a truly impressive and unique Mega Flower Crochet Bag using the “Oreo Model” stitch and sturdy nautical yarn! This project is for those who want to create a statement piece – a bag that’s both functional and a work of art. The “Oreo Model” stitch (likely referring to a specific textured or layered stitch pattern that resembles the cookie’s distinct layers) combined with nautical yarn will give your bag incredible structure and a unique aesthetic.
How to Crochet a Mega Flower Bag with “Oreo Model” Stitch in Nautical Yarn: A Detailed Guide
This comprehensive tutorial will guide you through crafting a large, durable bag featuring a striking flower-like texture. We’ll break down the specific stitch pattern, working with nautical yarn, and assembling your impressive creation.

Skill Level: Advanced Intermediate to Expert
This project is for crocheters with a solid understanding of:
- Basic Stitches: Chain (ch), Slip Stitch (sl st), Single Crochet (sc), Half Double Crochet (hdc), Double Crochet (dc).
- Working in Rounds: Both continuous and joined rounds.
- Increasing and Decreasing: Essential for shaping the base and potentially the bag body.
- Working into Specific Loops: Back Loop Only (BLO) or Front Loop Only (FLO) for creating ridges and texture.
- Working with Thick Yarn: Nautical yarn can be stiff and requires more hand strength.
- Complex Stitch Patterns: Understanding how to follow multi-step stitch instructions.
- Pattern Repetition: Identifying and executing repeating stitch sequences.
- Seamless Joins: For a polished finish.
- Weaving in thick ends securely.
- Understanding stitch gauge for large projects.
What is “Nautical Yarn”?
“Nautical yarn” typically refers to thick, rope-like cords or ropes made from synthetic fibers (like polypropylene or polyester) or sometimes cotton blends. It’s often used for macrame, marine applications, or heavy-duty crafting.
- Characteristics: It’s very durable, water-resistant (depending on fiber), stiff, and can be challenging to work with due to its thickness and lack of elasticity compared to traditional yarn. This stiffness, however, is what gives the bag excellent structure and makes it stand on its own.
- Hook Size: You’ll need a much larger hook than usual, often 10mm (N/P) or even 12mm (P/Q), depending on the thickness of your specific nautical yarn.
What is the “Oreo Model” Stitch?
This term isn’t a standard, universally recognized crochet stitch name. However, given the “Oreo” analogy, it strongly suggests a layered, perhaps ridged, or two-toned stitch pattern that mimics the distinct parts of an Oreo cookie (dark biscuit, white cream, dark biscuit). This could involve:
- Alternating rows of Back Loop Only (BLO) and Front Loop Only (FLO) stitches to create prominent horizontal ridges.
- Using a combination of dense stitches (like single crochet) alternating with taller, puffier stitches (like puff stitches, bobbles, or clusters) to create texture.
- Employing color changes to emphasize the “layers” (e.g., dark yarn, light yarn, dark yarn).
For this tutorial, we will interpret the “Oreo Model” stitch as a pattern that creates distinct, raised horizontal ridges and depth using a combination of BLO/FLO single crochet for the “biscuit” layers and perhaps a textured stitch for the “cream” layer, or simply the prominent ridges created by BLO/FLO. Given the “Mega Flower Bag” aspect, these ridges will likely form the foundation for the petal-like texture. We’ll simplify this to emphasize the structure.
Finished Bag Dimensions (Approximate):
This is a MEGA bag! Expect dimensions around 14-18 inches (35-45 cm) in diameter/width and 12-16 inches (30-40 cm) in height, plus handles. The exact size will greatly depend on your nautical yarn’s thickness and hook size.
Materials You’ll Need:
- Nautical Yarn: Approximately 300-500 yards (275-457 meters). This will be quite a bit of rope! Consider the exact thickness (e.g., 5mm, 7mm, 9mm). Choose a dark color (e.g., black, dark grey, deep navy) for the “biscuit” layers and a lighter color (e.g., white, cream) for the “cream” layer if you’re using two colors for the “Oreo” effect. For a monochrome “Oreo” where the texture is key, one color will suffice. Let’s assume two colors for a more pronounced “Oreo” effect: Main Color (MC – dark) and Accent Color (AC – light).
- Crochet Hook: 10mm (N/P) or 12mm (P/Q). Match the hook size to your nautical yarn’s thickness. You want a fabric that’s dense and stiff, but not impossible to work.
- Very Strong Yarn Needle (Tapestry Needle): Must be able to thread and pull through thick nautical yarn. Metal is preferred over plastic.
- Strong Scissors or Rope Cutter: Regular yarn scissors might not cut nautical yarn easily. A sharp pair of heavy-duty scissors or even a specialized rope cutter might be necessary.
- Stitch Marker (Optional but Highly Recommended): For marking the beginning of rounds.
- Measuring Tape: For checking dimensions.
- Leather or Rope Handles (Optional but Recommended): Pre-made large, sturdy handles will elevate the look and function of this bag. Choose a material that complements your nautical yarn.
- Fabric for Lining (Optional but Highly Recommended): Heavy-duty canvas or duck cloth for a durable lining.
Understanding the Bag Construction:
This bag will be constructed in sections:
- Circular Base: A sturdy, flat circle to give the bag its foundation.
- Bag Body with “Oreo Model” Stitch: Building up the sides of the bag using the distinctive textured stitch.
- “Mega Flower” Shaping: How the bag’s main body will naturally or intentionally form a large, flower-like shape due to stitch placement or shaping. This is often achieved by increasing at specific points or working in a way that encourages a wavy top edge.
- Handle Attachment: Securing robust handles.
- Lining (Optional): Adding a fabric lining for durability and functionality.

Let’s Crochet Your Mega Flower Bag!
Part 1: Crocheting the Circular Base (Main Color – MC)
We’ll start with a flat, circular base using dense single crochet (sc) stitches to provide stability.
- Start: With Main Color (MC), create a Magic Ring (MR).
- Alternative start (if MR is too difficult with thick yarn): Ch 4, then sl st into the first ch to form a ring.
- Round 1:
- Ch 1 (does NOT count as a stitch).
- Work 8 sc into the Magic Ring.
- Sl st into the first sc to join the round.
- [Total: 8 sc]
- If using MR, pull the tail tightly to close the center hole.
- Round 2:
- Ch 1.
- Work 2 sc into each stitch around.
- Sl st into the first sc to join.
- [Total: 16 sc]
- Round 3:
- Ch 1.
- *Work 1 sc into the first stitch, then 2 sc into the next stitch.*
- Repeat from * to * around.
- Sl st into the first sc to join.
- [Total: 24 sc]
- Round 4:
- Ch 1.
- *Work 1 sc into each of the first 2 stitches, then 2 sc into the next stitch.*
- Repeat from * to * around.
- Sl st into the first sc to join.
- [Total: 32 sc]
- Continue Increasing Rounds:
- Continue increasing in this manner (adding 8 sc per round by placing 2 sc into every 8th stitch, or every 9th, 10th, etc. stitch) until your base reaches the desired diameter (e.g., 14-18 inches / 35-45 cm).
- General Increase Pattern for Flat Circle (in sc):
- Round 5: Ch 1, *sc in next 3, 2 sc in next* around. (40 sc)
- Round 6: Ch 1, *sc in next 4, 2 sc in next* around. (48 sc)
- … and so on.
- Crucial Base Check: Ensure your base remains perfectly flat. If it starts to “bowl” (curl up), you need more increases. If it starts to ruffle, you have too many increases. Adjust accordingly. With thick nautical yarn, tension control is vital.
- Fasten off MC once your base is the desired size, leaving a short tail.
Part 2: Building the Bag Body with “Oreo Model” Stitch
This is where the unique texture comes into play. We’ll alternate between Main Color (MC) for the “biscuit” layers and Accent Color (AC) for the “cream” layer, using BLO/FLO to create distinct ridges.
- Transition to Body (First “Biscuit” Layer – MC):
- Join Main Color (MC) with a sl st into any stitch of the last base round.
- Ch 1.
- Work 1 sc in the Back Loop Only (BLO) of each stitch around. (This creates a sharp ridge where the base turns up into the sides of the bag).
- Sl st into the first sc to join.
- [Total: Same as your final base round’s stitch count]
- Second “Biscuit” Layer (MC):
- Ch 1.
- Work 1 sc into both loops of each stitch around.
- Sl st into the first sc to join.
- Fasten off MC, leaving a tail.
- “Cream” Layer (Accent Color – AC):
- Join Accent Color (AC) with a sl st into any stitch of the previous round.
- Ch 1.
- Work 1 sc in the Front Loop Only (FLO) of each stitch around. (This creates another ridge, making the AC layer pop out).
- Sl st into the first sc to join.
- Fasten off AC, leaving a tail.
- Repeat “Oreo Model” Pattern:
- You will now repeat the “biscuit” and “cream” layers. Always join the new color into the first stitch of the previous round.
- Next “Biscuit” Layer (MC): Join MC, Ch 1, 1 sc in BLO of each stitch around. Sl st to join. Fasten off MC.
- Next “Biscuit” Layer (MC): Join MC, Ch 1, 1 sc into both loops of each stitch around. Sl st to join. Fasten off MC.
- Next “Cream” Layer (AC): Join AC, Ch 1, 1 sc in FLO of each stitch around. Sl st to join. Fasten off AC.
- Continue alternating these layers until your bag reaches the desired height (e.g., 12-16 inches / 30-40 cm). Always finish with a Main Color (MC) layer at the top for consistency and handle attachment.
Part 3: “Mega Flower” Shaping (Optional, but enhances the “Flower Bag” aspect)
The “Mega Flower” shape isn’t usually a direct stitch-by-stitch instruction for a bag this large, but rather an outcome of either the “Oreo Model” stitch creating a slight wave, or by strategically adding a few increases/decreases in the top rounds, or by the way the handles pull the bag into shape.
- Option A: Natural Wave (Most likely for “Oreo Model” with BLO/FLO): The alternating BLO/FLO rows combined with the stiffness of nautical yarn can naturally create a slightly wavy, almost scalloped effect at the top edge, resembling large petals. Ensure your stitch count remains consistent throughout the body rounds to maintain this.
- Option B: Intentional Scalloped Edge (More defined “Petals”):
- On your final Main Color (MC) layer, after completing the regular BLO/FLO or both-loop sc round:
- Next Round (MC): Ch 1. *Skip 1 stitch, work (1 sc, 1 hdc, 1 dc, 1 hdc, 1 sc) into the next stitch (this forms a scallop/petal), skip 1 stitch, sl st into the next stitch.* Repeat from * to * around. This will create distinct “petals” around the top edge. The number of skips/sl sts will depend on your total stitch count to make the scallops even.
- This is a more advanced technique and requires careful counting to make sure the scallops are evenly spaced.
- Option C: Embellishment: A large crocheted flower (similar to the motif coaster or smaller rose, but scaled up and flattened) could be sewn onto one side of the finished bag to literally create a “Mega Flower Bag.” This would be made separately using the same nautical yarn.
Let’s assume Option A: Natural Wave is desired, as it’s typically the most straightforward result of this textured stitch with nautical yarn. So, simply continue the “Oreo Model” pattern until your desired height.

Part 4: Attaching Handles
Choosing sturdy handles is essential for a bag of this size and weight.
- Preparation:
- Lay your finished bag body flat. Visually determine the front and back, and where you want your handles to be.
- Measure approximately 3-4 inches (7.5-10 cm) in from each flattened side crease along the top edge of the bag. These are your approximate attachment points for the inner edge of each handle.
- Use stitch markers to precisely mark the beginning and end points where each handle will attach.
- Attaching Purchased Handles:
- Most pre-made handles (leather, rope, etc.) come with holes or loops for attachment.
- Using your very strong yarn needle and a length of Main Color (MC) nautical yarn (or super strong upholstery thread/waxed thread), carefully and securely sew the handles to the bag.
- Go through multiple layers of stitches on the bag’s top border. Pass the needle through the handle’s attachment points and then directly into the bag’s fabric.
- Make several passes, creating strong, even stitches (like an “X” pattern or straight bar stitches) to ensure the handles are incredibly robust. This is the weight-bearing part of the bag, so don’t skimp on the security!
- Repeat for all handle attachment points.
- Weave in ALL Remaining Ends:
- This is crucial for durability and a professional finish. Due to the thickness of nautical yarn, weaving ends requires extra effort.
- Thread your strong yarn needle. Carefully weave each end into the fabric of the bag, going back and forth through the stitches of the same color for at least 2-3 inches (5-7.5 cm).
- For extra security, you might consider melting the very tip of synthetic nautical yarn with a lighter (carefully, in a well-ventilated area, and only if the yarn is synthetic and melts cleanly) to prevent fraying, then pressing it into the woven-in part of the bag. This is an advanced technique and requires caution.
Part 5: Lining the Bag (Highly Recommended for Practicality & Finish)
A fabric lining is almost essential for a bag made with nautical yarn. It prevents items from falling through any gaps in the crochet, provides structure, and gives a finished, professional look.
- Measure Your Bag:
- Measure the circumference of the bag’s opening.
- Measure the height of the bag (from the base’s side ridge to the top edge).
- Measure the diameter of the bag’s base.
- Cut Fabric:
- Body Piece: Cut a rectangle of heavy-duty fabric (like canvas, duck cloth, or denim).
- Length: Bag’s circumference + 1 inch (2.5 cm) for seam allowance.
- Height: Bag’s height + 2 inches (5 cm) for top hem and base seam allowance.
- Base Piece: Cut a circle or oval shape matching your crocheted base, adding 1/2 inch (1.2 cm) seam allowance all around.
- Body Piece: Cut a rectangle of heavy-duty fabric (like canvas, duck cloth, or denim).
- Sew Fabric Lining (using a sewing machine is easiest):
- Fold the body piece in half, right sides together, and sew the side seam to form a tube. Press seam open.
- Pin the fabric base piece to the bottom of the body tube, right sides together, matching edges. Sew around the circle/oval to attach the base.
- Create a top hem: Fold the top raw edge down by 1 inch (2.5 cm) twice, pressing firmly, and stitch down to create a clean, finished hem.
- Optional: Add interior pockets to your lining before assembling it.
- Insert and Secure Lining:
- Carefully place the completed fabric lining inside your crocheted bag.
- Align the top hem of the lining with the top inner edge of the crocheted bag.
- Using strong matching thread and a hand-sewing needle, hand-stitch the lining securely to the inside top border of your crocheted bag. Make your stitches small and neat, catching the crocheted fabric without showing through to the outside. Stitch all the way around.
Congratulations! You’ve now completed an truly amazing and unique Mega Flower Crochet Bag with the distinctive “Oreo Model” stitch using nautical yarn! This bag is a testament to your advanced crochet skills and will undoubtedly be a conversation starter wherever you take it. Enjoy your stunning, handmade creation!


