 by
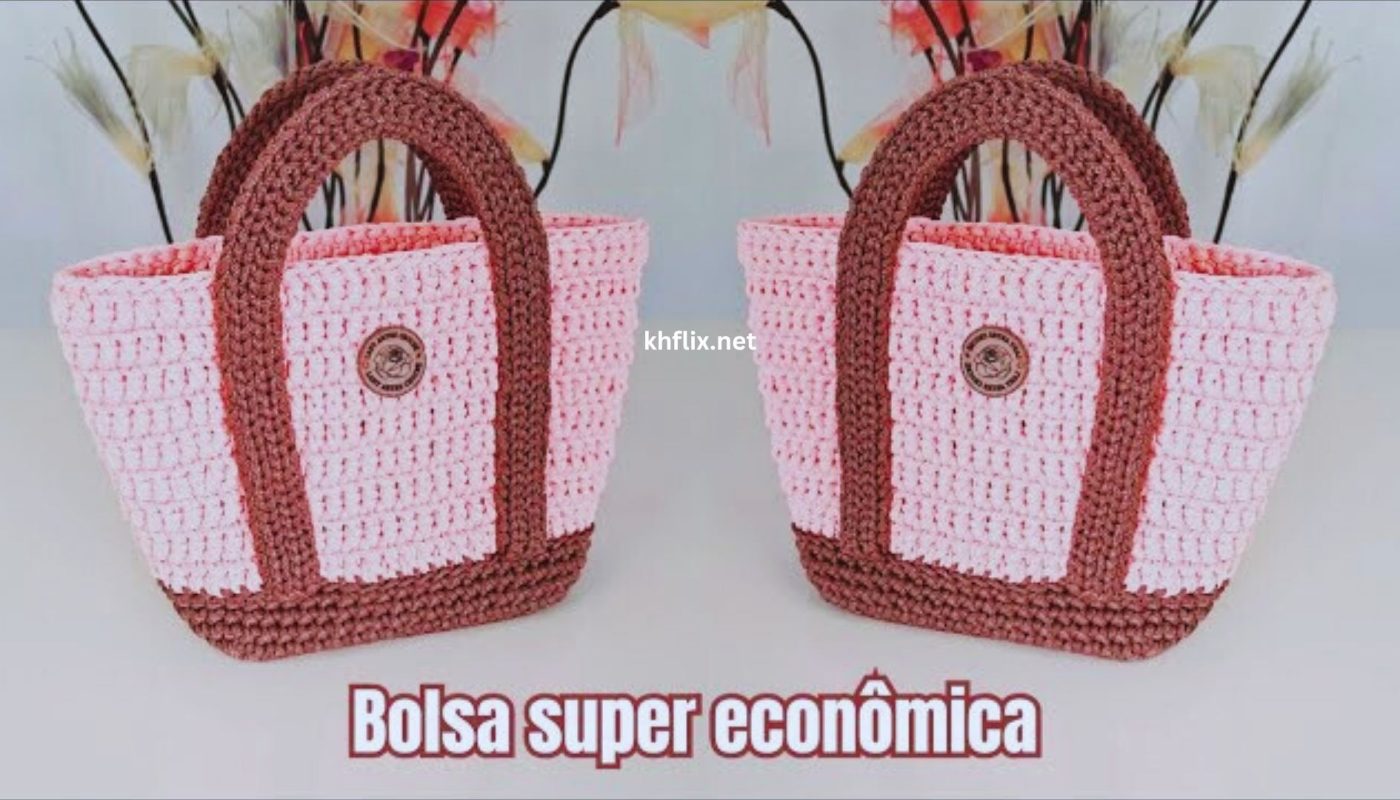
by Let’s turn those yarn scraps into something beautiful and useful! Making an economic crochet tote bag using leftover yarn is not only budget-friendly but also incredibly satisfying. You’ll be reducing waste, using up those odd balls of yarn, and creating a unique, colorful bag that’s truly one-of-a-kind. This tutorial will guide you through making a sturdy, practical tote that celebrates the beauty of mismatched yarn.
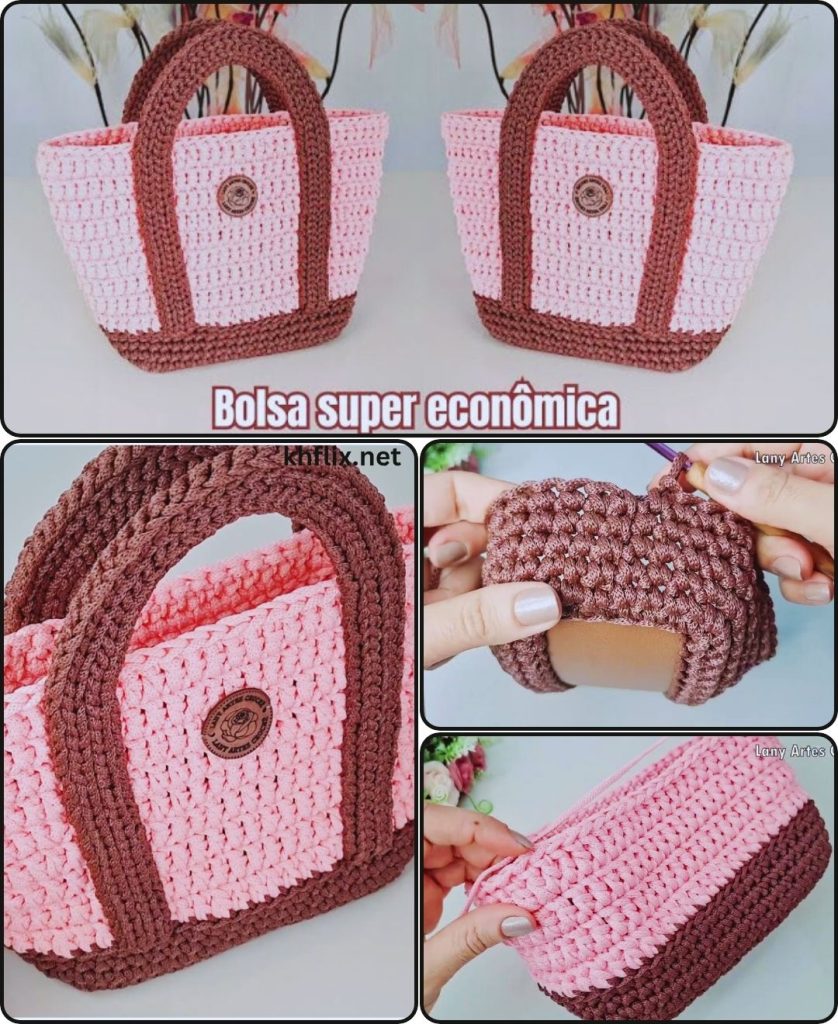
How to Crochet an Economic Tote Bag Using Leftover Yarn: A Step-by-Step Guide
This detailed tutorial will show you how to construct a durable tote bag that’s perfect for groceries, market trips, or just carrying your essentials. We’ll focus on using up those leftover yarn bits, creating a strong structure, and finishing it neatly.
Skill Level: Beginner to Intermediate
This project is great for those who are comfortable with:
- Chain (ch): The basic foundation.
- Slip Stitch (sl st): For joining rounds.
- Single Crochet (sc): A dense stitch, ideal for bags because it creates a sturdy fabric.
- Working in rounds: Crocheting in a continuous or joined circular manner.
- Changing colors: This will be frequent, so neat color changes are key!
- Weaving in ends securely.
What Makes This Bag “Economic” and How to Use Leftover Yarn?
- Scrap Busting: This is the core idea! Instead of buying new skeins, you’ll grab all those partial balls, small remnants, and even tangled bits of yarn you have lying around.
- Mix and Match: Don’t worry about perfectly matching colors or even yarn weights (within reason). The beauty of this bag is its eclectic, patchwork appearance. A truly “economic” bag embraces variety.
- Simple Stitches: We’ll primarily use single crochet, which is yarn-efficient and creates a dense fabric that won’t stretch out easily.
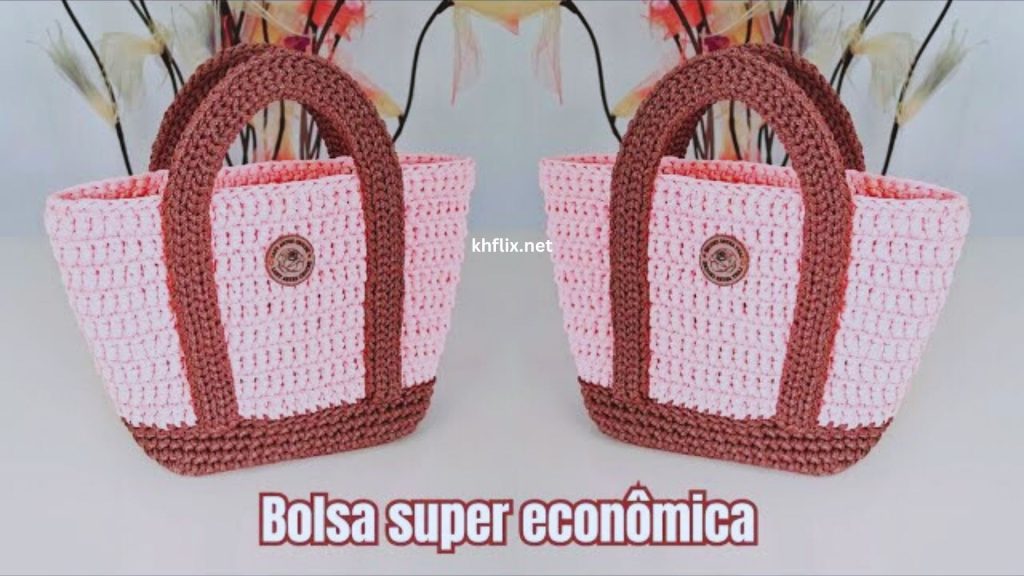
Finished Bag Dimensions (Approximate):
This pattern creates a versatile, medium-sized tote bag, typically around 12-14 inches (30-35 cm) wide and 10-12 inches (25-30 cm) tall (excluding handles). You can easily adjust the size by modifying your starting chain and the number of rounds.
Materials You’ll Need:
- Leftover Yarn: Gather all your Worsted Weight (Medium #4) yarn scraps.
- Prioritize Cotton or Cotton Blends: While you can use acrylic, cotton provides better durability, less stretch, and better washability for a tote bag. If you have mostly cotton scraps, that’s ideal.
- Approximate Total Yardage: You’ll need about 300-500 yards (275-457 meters) in total. This will be made up of many small amounts.
- Varying Weights: Try to stick to similar yarn weights (e.g., all Worsted Weight). Mixing significantly different weights (e.g., super bulky with fingering weight) will make your fabric uneven and less sturdy.
- Crochet Hook: Size H/5.0mm. This size works well for worsted weight yarn and creates a nice, dense fabric suitable for a bag.
- Yarn Needle (Tapestry Needle): Essential for weaving in all your loose yarn tails. (You’ll have a lot!)
- Scissors: For cutting your yarn.
- Stitch Marker (Optional but Recommended): Helpful for marking the beginning of rounds, especially when working in continuous spirals or if your color changes make it hard to see the start.
Understanding the Bag Construction:
We’ll build this tote bag in a seamless manner, starting with the base and working upwards. The key to the “economic” and scrap-friendly aspect is frequent color changes, often at the beginning of each new round or when a yarn color runs out.
The process involves three main stages:
- Creating an Oval Base: This foundation gives your bag stability and shape.
- Building the Body: Working upwards in continuous rounds of single crochet, changing colors as you go.
- Crocheting and Attaching Handles: Adding sturdy carrying straps.
Let’s Crochet Your Economic Tote Bag!
Part 1: Crocheting the Oval Base (Use any starting yarn scrap that’s long enough)
A solid, flat base is crucial for your tote bag to sit upright and hold its contents. We’ll use single crochet (sc) for a dense and sturdy foundation.
- Starting Chain:
- Pick one of your yarn scraps to start. Make a slip knot and place it on your hook.
- Chain (ch) 31. (This chain forms the initial length of your bag’s base. If you want a wider bag, chain more stitches; for a narrower one, chain fewer. Keep the number odd for easier symmetry in later rounds.)
- Round 1:
- Work 2 single crochet (sc) stitches into the 2nd chain from your hook.
- Work 1 sc into each of the next 28 chains across.
- Work 3 sc into the very last chain. (This forms the smooth, curved end of your oval, allowing you to turn your work around the corner.)
- Now, working down the opposite side of the foundation chain (into the bottom loops of the chains you just worked into): Work 1 sc into each of the next 28 chains across.
- Work 1 sc into the very first chain (the same chain where you placed the initial 2 sc).
- Slip stitch (sl st) into the first sc of the round to join.
- [Total: 62 sc] (This completes your first oval base round.)
- Round 2:
- Ch 1 (this chain does NOT count as a stitch, it just gives height).
- Work 2 sc into the first stitch (your first increase on the curve).
- Work 1 sc into the next 29 stitches.
- Work 2 sc into each of the next 3 stitches (increases evenly spaced around the curve).
- Work 1 sc into the next 29 stitches.
- Work 2 sc into each of the last 2 stitches (increases around the final curve).
- Sl st into the first sc to join.
- [Total: 68 sc]
- Round 3:
- Ch 1.
- Work 2 sc into the first stitch.
- Work 1 sc into the next 30 stitches.
- Work 2 sc into each of the next 3 stitches.
- Work 1 sc into the next 30 stitches.
- Work 2 sc into each of the last 2 stitches.
- Sl st into the first sc to join.
- [Total: 74 sc]
- Round 4 (Optional for a larger base):
- Ch 1.
- Work 2 sc into the first stitch.
- Work 1 sc into the next 31 stitches.
- Work 2 sc into each of the next 3 stitches.
- Work 1 sc into the next 31 stitches.
- Work 2 sc into each of the last 2 stitches.
- Sl st into the first sc to join.
- [Total: 80 sc]
- Crucial Base Check: Your base should lie perfectly flat at this point. If it bowls (curls up), you might need one more round of increases following the pattern. If it ruffles, you might have too many increases. Adjust if necessary.
- Do not fasten off your current yarn.
Part 2: Building the Bag Body (Using all your Leftover Yarns!)
Now we’ll transition from the flat base to build the upright sides of your tote bag, changing colors frequently.
- Transition to Body (Establishing Verticality):
- Ch 1 (does NOT count as a stitch).
- Work 1 sc in the Back Loop Only (BLO) of each stitch around. (This is a key step! By working only into the back loop, you create a beautiful, defined ridge where the base seamlessly transitions into the bag’s upright sides. It also helps the bag stand up nicely.)
- Sl st into the first sc to join.
- [Total: 80 sc] (Your stitch count remains exactly the same as your final base round).
- Change to your next yarn color. (See “How to Change Colors Neatly” below.)
- Body Rounds (Continuous Single Crochet):
- With your new yarn color, Ch 1 (does NOT count as a stitch).
- Work 1 sc into each stitch around (now working through both loops as you normally would for sc).
- Sl st into the first sc to join.
- [Total: 80 sc]
- Repeat this Round (Ch 1, sc in each stitch around, sl st to join).
- Change colors whenever:
- You run out of your current yarn scrap.
- You want to introduce a new color.
- You simply feel like it! This is where the “economic” and unique nature of the bag truly shines. Don’t be afraid to combine colors in unexpected ways.
- Continue working these single crochet rounds until your bag reaches the desired height (e.g., 10-12 inches / 25-30 cm). This might be anywhere from 15 to 25 or more rounds depending on your tension and yarn.
- Change colors whenever:
- Finishing the Top Edge:
- After completing your final body round, ensure you’re using a sturdy color (perhaps a slightly darker or thicker scrap if you have one) for the top border.
- Ch 1.
- Work 1 sc in each stitch around.
- Sl st into the first sc to join.
- Repeat this sc round for 2-3 more times. This creates a very tight, dense, and firm top border for your bag. This firmness is crucial to preventing the top of your bag from stretching out over time and provides a solid base for securely attaching your handles.
- Fasten off, leaving a 6-inch (15 cm) tail.
How to Change Colors Neatly:
This is super important for a scrap yarn project!
- When to Change: Work the stitch before the color change point up until the very last yarn over.
- The Actual Change: Drop the old yarn color. Pick up your new yarn color. Yarn over with the new color and pull it through the remaining loops on your hook to complete the stitch.
- Secure: Give both the old and new yarn tails a gentle tug to secure the stitch.
- Cutting Tails: Cut the old yarn color, leaving a 4-6 inch (10-15 cm) tail. You’ll weave this in later.
- Continuing: Work the next stitch and proceed with your new color.
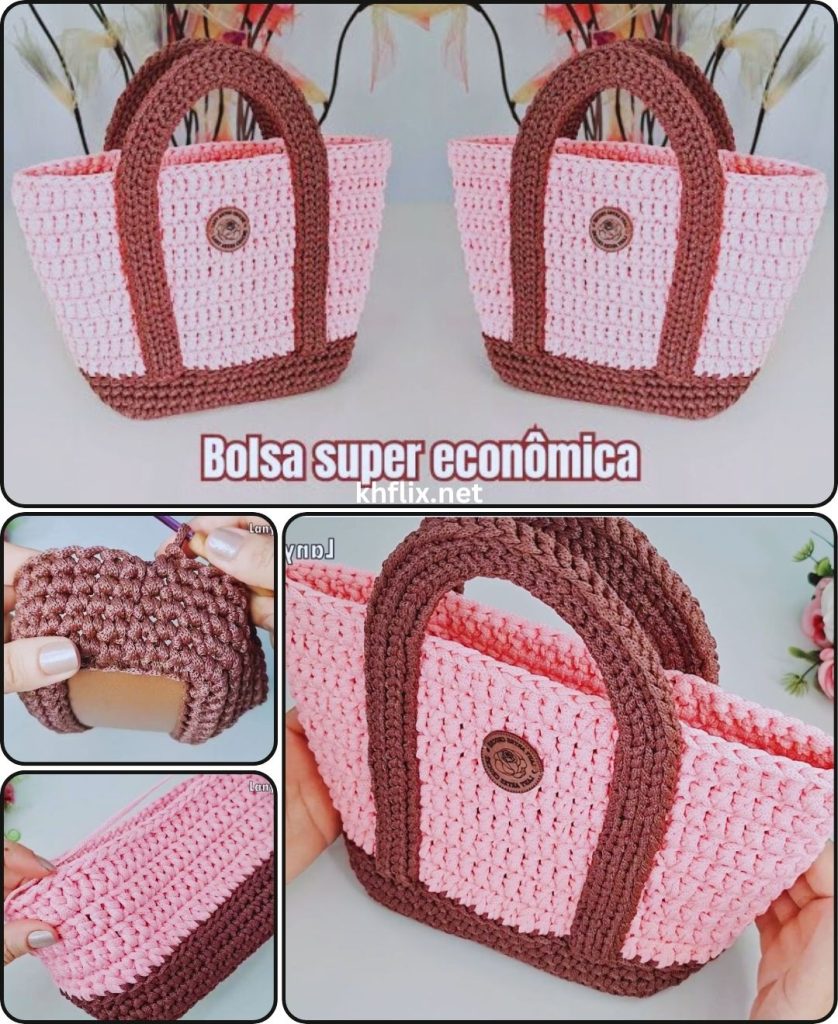
Part 3: Crocheting and Attaching Handles (Use a strong, consistent yarn scrap)
You’ll want your handles to be sturdy and able to withstand the weight of the bag’s contents. Pick a longer, more durable scrap for these if you have it.
- Crocheting the Handles (Make 2):
- Choose a consistent yarn scrap (or join a few if necessary, but try to use a minimal number of joins for strength).
- Chain (ch) 8. (This will be the width of your handle. If you want a wider handle, chain more stitches; for a narrower one, chain fewer.)
- Work 1 sc into the 2nd chain from your hook and in each chain across. (You should now have 7 sc).
- Ch 1, turn (this is your turning chain for the next row).
- Work 1 sc into each of the 7 sc across.
- Repeat the last step (Ch 1, turn, sc across) until your strap reaches the desired length. For a comfortable tote, aim for approximately 18-24 inches (45-60 cm).
- Fasten off, leaving a very long tail (at least 12-18 inches / 30-45 cm) on each end of the handle for sewing.
- Attaching the Handles:
- Lay your completed bag flat and gently flatten it out so the side “creases” are even. This helps ensure your handles are symmetrically placed.
- Position your first handle. On one side of the bag, measure in approximately 3-4 inches (7.5-10 cm) from each flattened side crease along the top edge. These points mark where you’ll attach the handle. You can use stitch markers to temporarily mark these spots.
- Thread one of the long tails of the handle onto your yarn needle.
- Align one end of the handle with one of your marked spots on the inside of the bag’s top border.
- Using your yarn needle, firmly sew the handle end to the bag’s top border. Pass your needle through multiple layers of the bag’s sturdy sc stitches. Make several passes and criss-cross stitches to ensure the handle is incredibly secure and can withstand weight.
- Repeat for the other end of the first handle, attaching it to the second marked spot on the same side of the bag.
- Repeat the entire process for the second handle on the opposite side of the bag, taking care to ensure it is positioned symmetrically to the first.
Part 4: Finishing Touches (The Most Important Part for a Scrap Yarn Project!)
- Weave in ALL Remaining Ends: This is the most critical and time-consuming part of a scrap yarn project, but it’s absolutely essential for a clean, neat, and durable bag. Use your yarn needle to meticulously weave in every single tail from your base, body, and handle attachments.
- How to Weave Neatly: Weave the tails into the stitches of the same color as the tail. Weave in one direction for about 1.5-2 inches (4-5 cm), then subtly change direction and weave back through some of the same stitches. This “locks” the tail in place and prevents it from unraveling. Be patient and thorough; well-woven ends are practically invisible and significantly contribute to your bag’s longevity and appearance.
- Blocking (Optional but Very Helpful): Blocking is a process that sets your stitches, evens out tension, and helps your bag take on its intended shape. It can make a huge difference in the final look and how well the colors settle.
- Gently stuff your bag with towels or crumpled paper to fill it to its desired shape. Ensure it’s plump and even.
- Using a spray bottle, lightly mist the entire bag evenly with water (especially if using cotton yarn).
- Gently shape the bag with your hands while it’s damp, ensuring the base is flat and the sides are even.
- Allow the bag to air dry completely and thoroughly before removing the stuffing. This can take 24-48 hours.
Congratulations! You’ve now completed a truly unique and economic crochet tote bag using leftover yarn! Not only is it a functional and sturdy accessory, but it’s also a beautiful testament to sustainable crafting and your creativity.
What will you carry in your new, one-of-a-kind bag?