 by
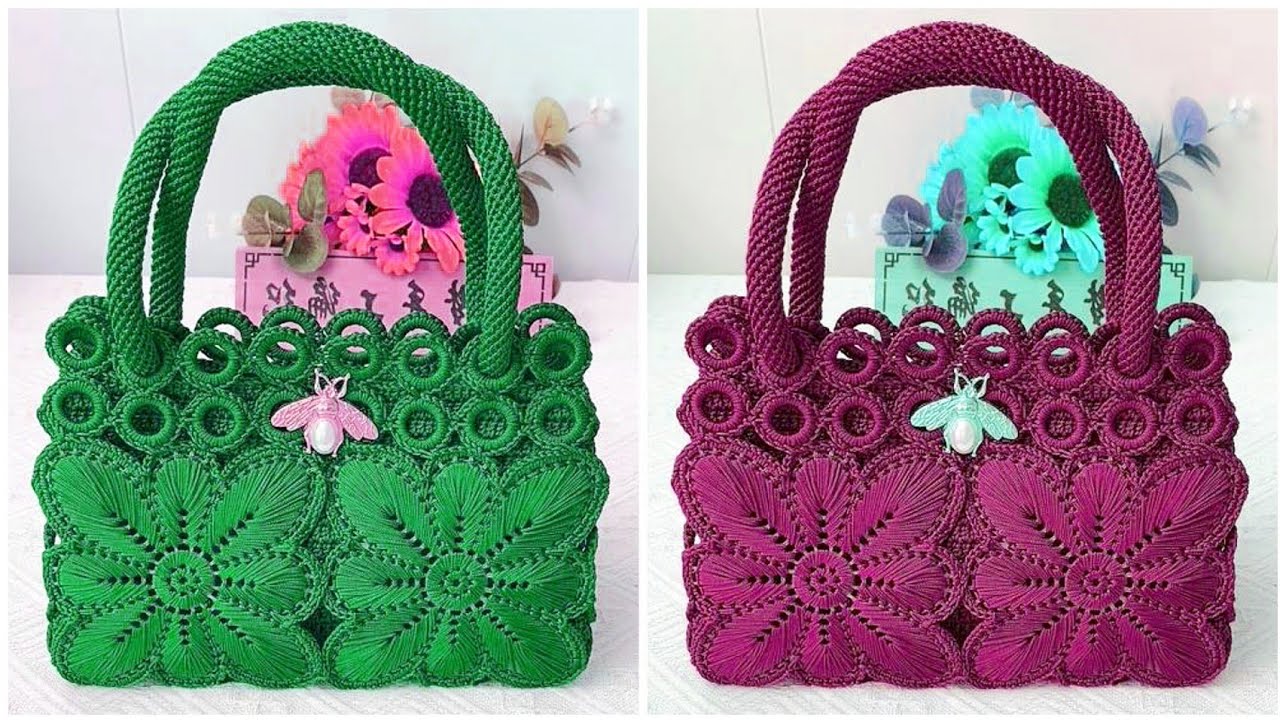
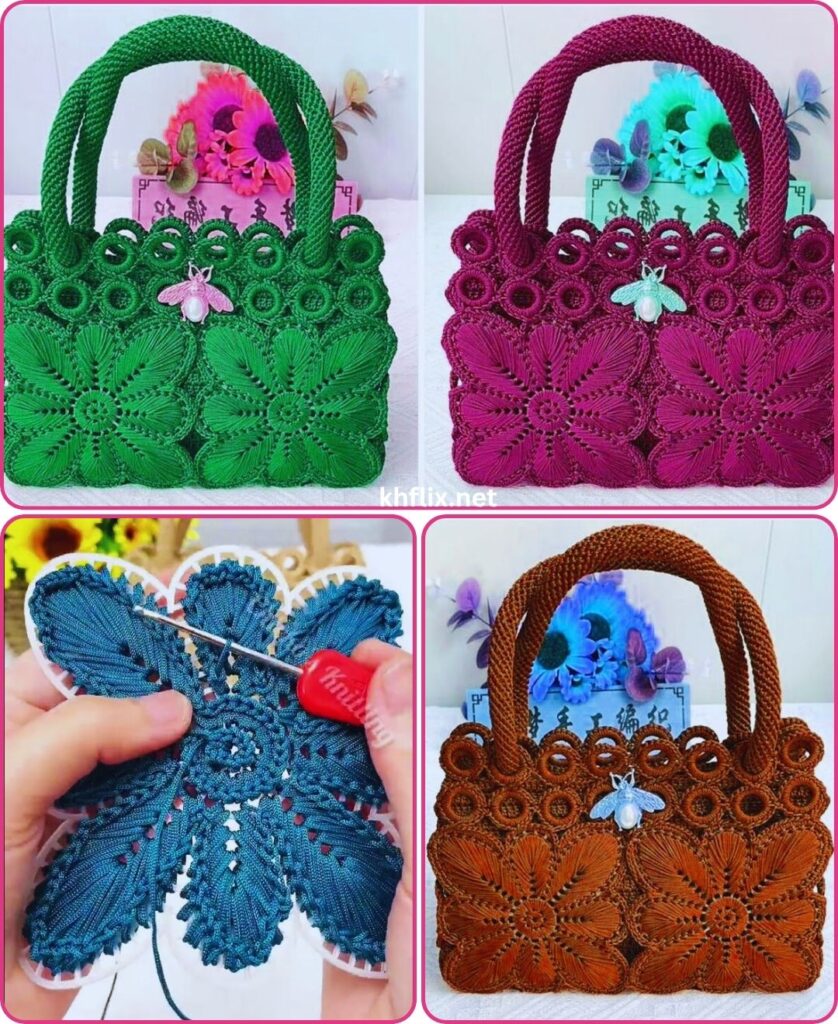
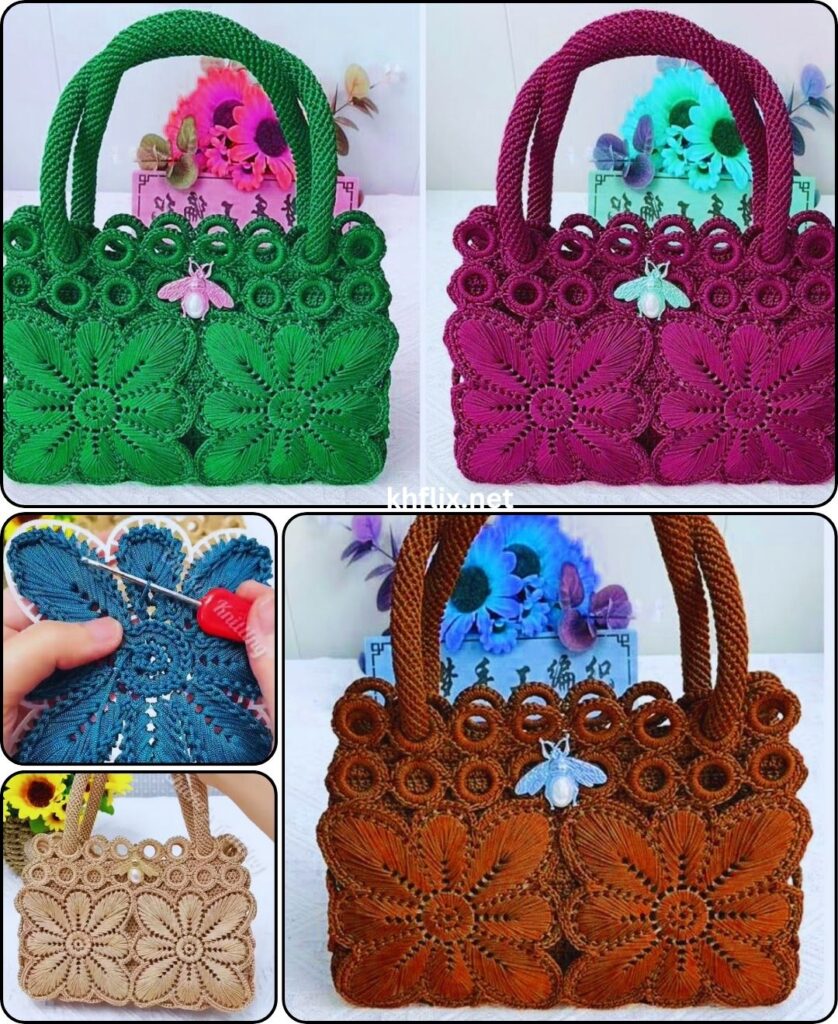
by You’re looking to create a statement piece: a large crochet flower bag! This project is fantastic because it lets the flower itself be the star, forming the main body of the bag. It’s a bit different from a bag with flowers on it; here, the bag is the flower.
This tutorial will guide you through crocheting a large, dimensional flower that then transforms into a functional bag. The core of this design is often based on a “Giant Puff Stitch Flower” or a layered petal design that’s then cinched or seamed to form a bag.
How to Crochet a Large Flower Bag Tutorial Pattern
This pattern creates a unique and eye-catching bag where a prominent, multi-layered flower forms the bag’s main structure. It’s a fun and rewarding project that’s sure to get compliments!
Skill Level: Intermediate to Advanced
You should be comfortable with:
- Basic crochet stitches: (chain, slip stitch, single crochet, half double crochet, double crochet, treble crochet).
- Working in joined rounds and possibly spirals.
- Creating a Magic Ring (or similar starting method).
- Understanding how to change colors neatly for a multi-layered flower.
- Working cluster stitches (like the puff stitch or dc clusters).
- Basic seaming/assembly.
Finished Bag Dimensions (Approximate):
- Flower Diameter (when laid flat): 16-20 inches (40-50 cm)
- Bag Height (once cinched/seamed): 10-12 inches (25-30 cm)
- Bag Width (at widest point): 12-14 inches (30-35 cm)
- Handle Drop: 8-10 inches (20-25 cm)
Materials You’ll Need:
- Yarn:
- Worsted Weight (Medium #4) Cotton or Cotton Blend Yarn: This is highly recommended for bags due to its durability, sturdiness, and stitch definition. It helps the flower maintain its shape when filled.
- Total Yarn: Approximately 400-600 yards (365-550 meters).
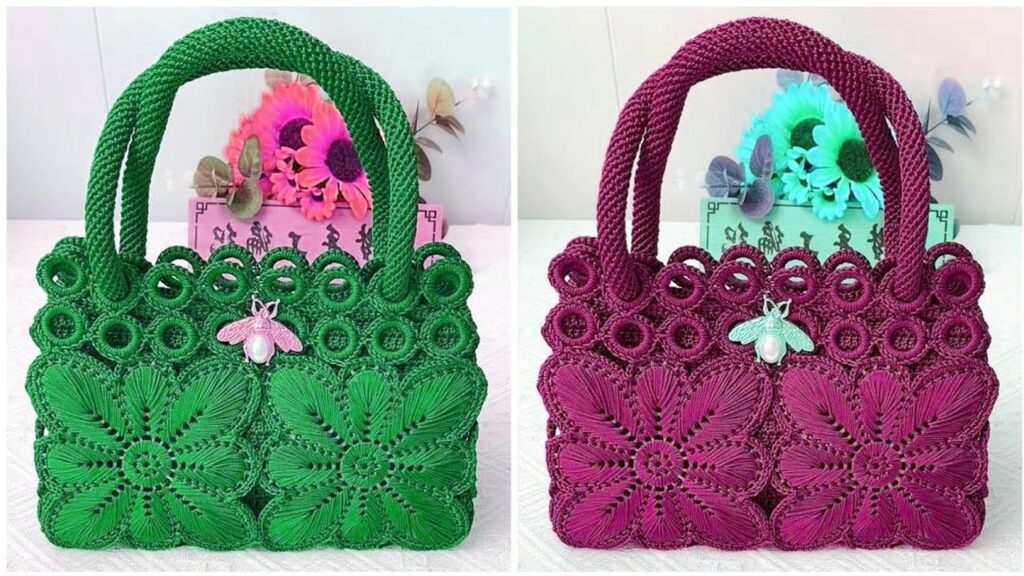
- Colors: Choose 3-4 contrasting or complementary colors to create depth in your flower.
- Color A (Flower Center): Approx. 50-70 yards.
- Color B (Inner Petals): Approx. 100-150 yards.
- Color C (Outer Petals): Approx. 150-200 yards.
- Color D (Bag Base/Accent/Handle): Approx. 100-150 yards.
- Crochet Hook:
- Size H/5.0mm to J/6.0mm: The specific size depends on your tension and desired fabric density. A slightly tighter stitch will make a sturdier bag.
- Yarn Needle (Tapestry Needle): Essential for weaving in ends and seaming.
- Scissors
- Stitch Markers (Recommended): Helpful for marking the beginning of rounds or specific stitches.
- Optional (for structure):
- Fabric for Lining: About 1/2 yard of cotton fabric if you wish to line your bag.
- Magnetic Snap Closure or Zipper: For securing the bag opening.
Gauge (Important for Flower Size!):
The gauge will affect the overall size of your flower and, consequently, your bag.
- After Round 4 of the flower center/inner petals (where petals are formed), your work should measure approximately 4-5 inches (10-12.5 cm) in diameter.
- Adjust your hook size if necessary.
Abbreviations Used:
- ch: chain
- sl st: slip stitch
- sc: single crochet
- hdc: half double crochet
- dc: double crochet
- tr: treble crochet (or triple crochet)
- st(s): stitch(es)
- inc: increase (work 2 stitches into the same stitch)
- MR: Magic Ring (or Magic Circle/Adjustable Ring)
- FO: fasten off
- (\ ): repeat instructions within parentheses a specified number of times.
- [ ]: indicates the total number of stitches at the end of a round.
- Popcorn St (PC): Work 5 dc in the indicated stitch. Remove hook from loop, insert hook into the first dc of the 5-dc group, insert hook back into the dropped loop, yarn over and pull through both loops. Ch 1 to secure.
Part 1: Crocheting the Large Flower Base
We’ll start by making a large, multi-layered flower. This pattern uses a popcorn stitch for the petals, creating a lovely textured look.
Flower Center (Color A):
- Start: Make a Magic Ring (MR).
- Round 1: Ch 2 (does NOT count as a stitch). Work 12 dc into the MR. Pull the tail tight to close the ring. Sl st to the top of the first dc to join. [12 dc]
- FO Color A, leaving a 4-inch tail to weave in.
Inner Petals (Color B):
- Join: Join Color B with a sl st in any dc from Round 1.
- Round 2 (Petals): Ch 3 (counts as 1 dc). Work 4 more dc into the same stitch (total 5 dc). Now, make a Popcorn Stitch (PC). Ch 2.
- (Sl st into the next dc. Work 5 dc in the next dc, then make a PC. Ch 2). Repeat from * to * 10 more times. (You will have 12 popcorn stitches, each followed by Ch 2).
- Sl st to the top of the first PC to join. [12 PC sts, 12 ch-2 spaces]
- FO Color B, leaving a 4-inch tail.
Middle Petals (Color C):
These petals will sit behind the first layer, typically by working into the slip stitches or the spaces between the popcorn stitches of the previous round. This creates depth.
- Join: Join Color C with a sl st into any Ch-2 space from Round 2.
- Round 3 (Petals): Ch 3 (counts as 1 dc). Work 5 more dc into the same Ch-2 space (total 6 dc). Now, make a Popcorn Stitch (PC). Ch 2.
- (Sl st into the next Ch-2 space. Work 6 dc in the same Ch-2 space, then make a PC. Ch 2). Repeat from * to * 10 more times. (You will have 12 popcorn stitches, each followed by Ch 2).
- Sl st to the top of the first PC to join. [12 PC sts, 12 ch-2 spaces]
- FO Color C, leaving a 4-inch tail.
Outer Petals / Bag Shaping (Color D):
This final layer of petals will also serve as the foundation for the bag’s body. We’ll make them larger and then work a round behind them.
- Join: Join Color D with a sl st into any Ch-2 space from Round 3.
- Round 4 (Petals): Ch 4 (counts as 1 tr). Work 5 more tr into the same Ch-2 space (total 6 tr). Now, make a Popcorn Stitch (PC). Ch 2.
- (Sl st into the next Ch-2 space. Work 6 tr in the same Ch-2 space, then make a PC. Ch 2). Repeat from * to * 10 more times. (You will have 12 popcorn stitches, each followed by Ch 2).
- Sl st to the top of the first PC to join. [12 PC sts, 12 ch-2 spaces]
- Do NOT FO Color D yet.
Part 2: Shaping the Flower into a Bag
Now we’ll use the final layer of the flower to create the depth of the bag.
- Round 5 (Bag Sides Foundation):
- Working behind the last set of petals (Round 4), you will now work into the Ch-2 spaces of Round 3. This creates the “bottom” or back of the bag.
- Ch 1. Work 2 sc into each of the 12 Ch-2 spaces from Round 3. Sl st to the first sc to join. [24 sc]
- This round essentially creates a smaller circle behind your large flower, which will become the base of your bag.
- Round 6: Ch 1. Sc in each stitch around. Sl st to join. [24 sc]
- Round 7: Ch 1. (Sc in next st, sc inc in next st) repeat 12 times around. Sl st to join. [36 sc]
- Round 8: Ch 1. Sc in each stitch around. Sl st to join. [36 sc]
- Round 9: Ch 1. (Sc in next 2 sts, sc inc in next st) repeat 12 times around. Sl st to join. [48 sc]
- Round 10-15 (or desired height): Ch 1. Sc in each stitch around. Sl st to join. [48 sc]
- Continue these rounds until your bag reaches the desired depth (e.g., 6-8 inches from the bottom of this base to the top edge).
- Do NOT FO Color D yet.
Part 3: Creating the Bag Opening and Handles
The top of the bag will remain open, but we’ll add a neat border and then the handles.
A. Top Border
- Round (Top Edging 1): With Color D, Ch 1. Hdc in the same stitch. Hdc in each stitch around. Sl st to the first hdc to join. [48 hdc]
- Round (Top Edging 2): Ch 1. Hdc in the same stitch. Hdc in each stitch around. Sl st to the first hdc to join. [48 hdc]
- Do NOT FO Color D.
B. Handles
You will make two sturdy handles, crocheted directly onto the top edge of your bag.
- Handle Placement Preparation:
- Lay your bag flat. Use stitch markers to determine where you want your handles to begin and end on the front and back.
- For 48 stitches, a good placement is:
- Starting from a side seam, count 8 stitches, place a marker.
- From that marker, count 8 stitches, place another marker (this will be the first handle attachment section).
- Count the next 8 stitches, place a marker (this is the bag opening between handles).
- From that marker, count 8 stitches, place another marker (second handle attachment section).
- The remaining 16 stitches are for the back opening.
- Round (Handle Base):
- With Color D, Ch 1. Sc in the same stitch as join and in the next 7 stitches (to the first marker). [8 sc]
- Chain 40 (this creates the length of your first handle strap – adjust up or down for desired handle drop).
- Skip the next 8 stitches along the bag’s top edge (this creates the opening for your arm/hand).
- Sc in the next 8 stitches (to the second marker). [8 sc]
- Chain 40 (for your second handle strap).
- Skip the last 16 stitches along the bag’s top edge.
- Sl st to the first sc of the round to join.
- Round (Handle Reinforcement 1):
- Ch 1. Sc in the same stitch and in the next 7 stitches (working along the top edge of the bag).
- Now, sc in each of the 40 chain stitches you just made (working along the top of your first handle chain).
- Sc in the next 8 stitches (working along the bag’s top edge).
- Sc in each of the 40 chain stitches for your second handle.
- Sl st to the first sc to join. [96 sc total – (8+40+8+40)]
- Round (Handle Reinforcement 2):
- Ch 1. Sc in the same stitch. Sc in each stitch around (working along the bag edge stitches and then around the handle loops).
- Sl st to the first sc to join. [96 sc]
- FO Color D, leaving a long tail for final weaving.
Part 4: Finishing Your Large Flower Bag
- Weave in All Ends: This is a crucial step for a professional-looking and durable bag. Methodically thread each yarn tail onto your yarn needle. Carefully weave them through several stitches on the inside of the bag, making them secure and invisible from the outside.
- Blocking (Recommended!):
- Gently wet your finished bag (mist it thoroughly or submerge briefly and gently squeeze out excess water – do not wring!).
- Gently shape the flower petals and the bag’s body. You can stuff the inside of the bag with towels or pillows to help it maintain its shape while drying. Lay it flat or hang it to dry. Blocking helps define stitches and sets the overall shape.
- Optional: Add a Fabric Lining:
- If you want to add a fabric lining for extra durability, to prevent items from slipping through stitches, or to add pockets, cut and sew a simple cylinder-shaped lining that fits inside your crocheted bag. Hem the top edge of the fabric lining, then hand-sew it securely to the inside top edge of your crocheted bag just below the handles.
- Optional: Add a Closure:
- Sew a magnetic snap closure or a zipper to the inside top edges of the bag if you want to be able to close it.
Your unique and beautiful Large Crochet Flower Bag is now complete! This piece is sure to be a conversation starter and a joy to carry.