 by
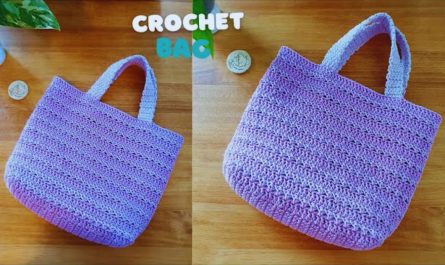
by Let’s crochet a charming and unique Granny Square Handbag! This project is a fantastic way to learn how to make and join classic granny squares, which are incredibly versatile and allow for endless color creativity. By assembling these lovely squares, you’ll create a one-of-a-kind bag that’s both stylish and perfect for carrying your essentials.
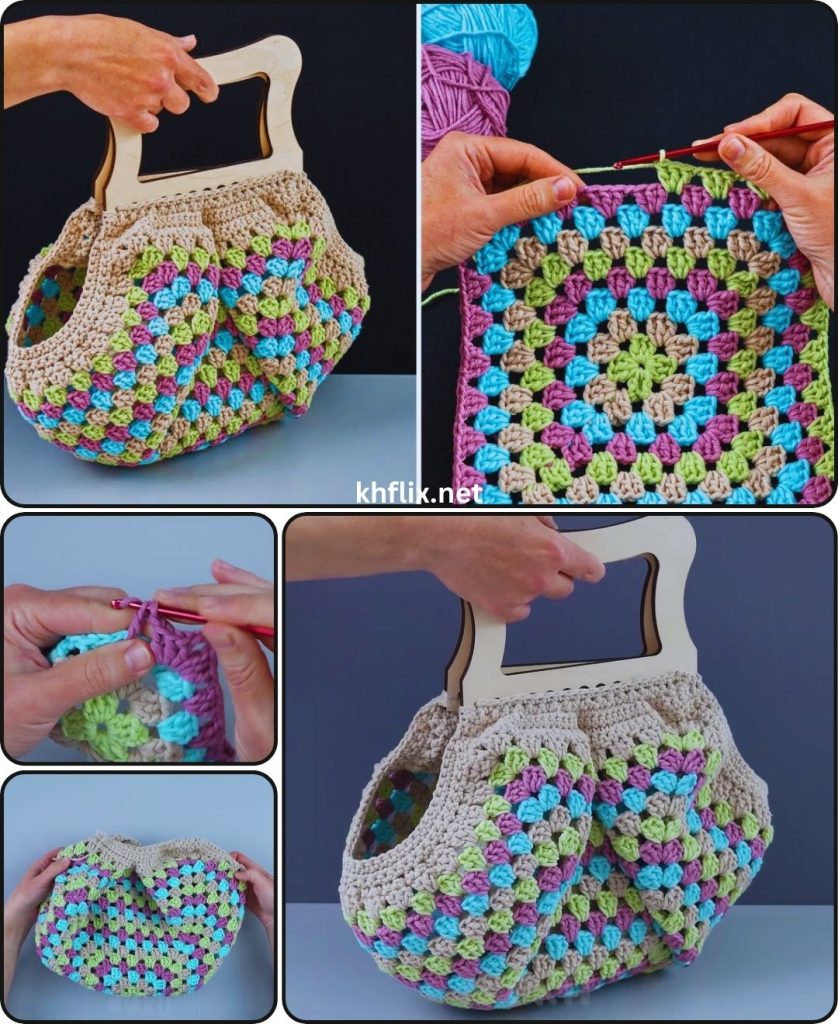
How to Crochet a Granny Square Handbag | Tutorial Pattern
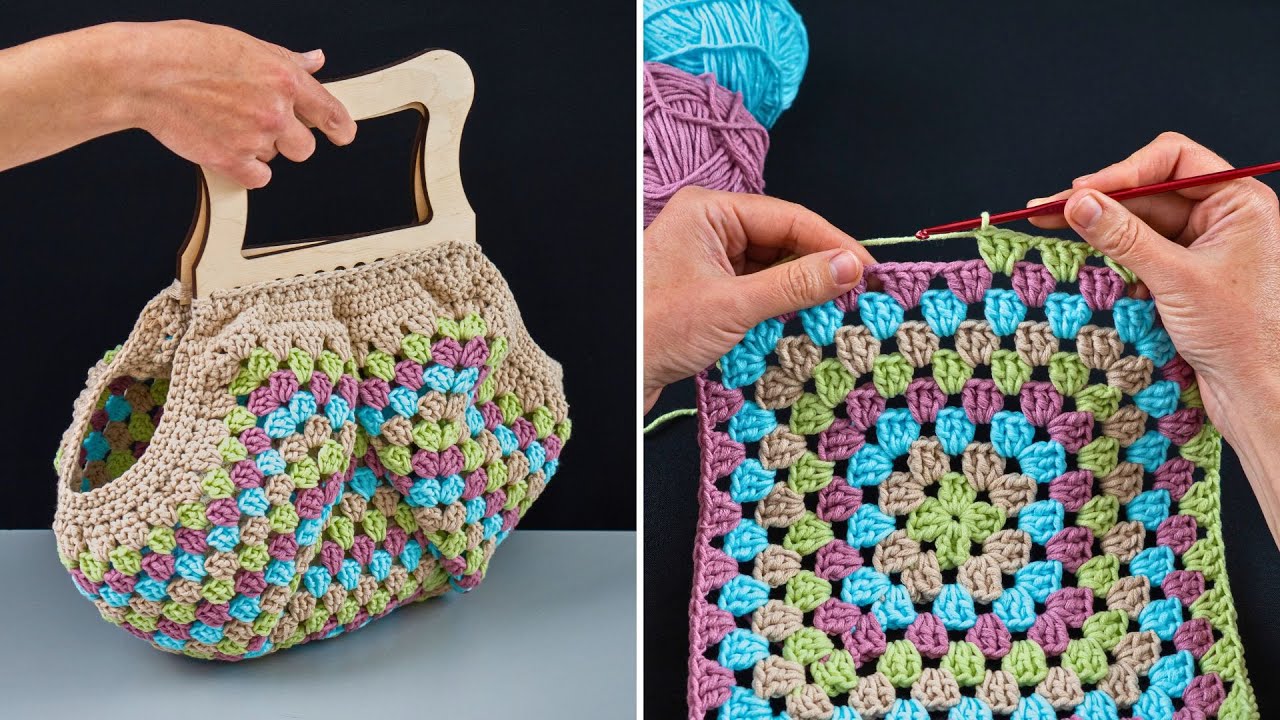
This detailed tutorial will guide you through crocheting individual granny squares (with striped color effects within the squares), strategically joining them to form a sturdy bag, adding a neat top border, and finishing with a comfortable handle. It’s a rewarding project that will truly show off your crochet skills and your love for color!
Skill Level: Advanced Beginner / Intermediate
This project assumes you’re comfortable with basic crochet stitches and are ready to tackle working in rounds and joining multiple pieces. It’s perfect if you know:
- Chain (ch): The foundation of crochet.
- Slip Stitch (sl st): For joining rounds and creating seamless joins.
- Double Crochet (dc): The primary stitch for granny squares.
- Magic Ring (MR) / Chain-2 Start: For a neat center to your squares.
- Working in rounds: Crocheting in a circular motion.
- Color changes: Neatly switching between yarn colors.
- Fastening off & Weaving in ends: Essential for a clean and durable finish.
- Basic seaming: Connecting crocheted pieces together.
Finished Handbag Dimensions (Approximate):
Using worsted weight yarn and the suggested hook, your finished handbag will typically measure around 10-12 inches (25-30 cm) wide and 8-10 inches (20-25 cm) tall (excluding the handle), depending on the size and number of squares you choose to make.
Materials You’ll Need:
Gathering all your materials before you start will make the process much smoother.
- Yarn: Approximately 350-550 yards (320-500 meters) of Worsted Weight (Medium #4) Cotton or Cotton Blend Yarn.
- Why Cotton? Cotton yarn is highly recommended for bags because it’s durable, has minimal stretch (which helps the bag hold its shape), and provides excellent stitch definition. It’s also easy to wash, which is practical for a frequently used item like a bag.
- Color Choices: For a “striped color” effect within your granny squares, pick 2-4 contrasting or complementary colors. You’ll switch colors with each round of the granny square. For example:
- Color A (Center/Round 1): Bright Pink
- Color B (Round 2): Teal Blue
- Color C (Round 3): Sunny Yellow
- Color D (Round 4, Joining/Border/Handle): Cream or Black (a neutral that ties everything together).
- Crochet Hook: Size H/5.0mm. This hook size works well with worsted weight yarn to create a dense, sturdy fabric, which is important for a bag.
- Yarn Needle (Tapestry Needle): Essential for weaving in all your loose yarn tails (and you’ll have quite a few with granny squares!) and for seamlessly joining your squares. It has a blunt tip and a large eye.
- Scissors: Any pair of sharp scissors for cutting yarn.
- Stitch Markers (Optional but Recommended): Very useful for marking corners of the granny squares, especially when you’re first learning, and for holding panels together during seaming.
Understanding the Granny Square Handbag Construction:
This handbag is built from individual granny square motifs that are then assembled into the bag’s structure:
- Individual Granny Squares: You’ll crochet multiple 3 or 4-round granny squares. Each round will use a different color to create the “striped” effect.
- Assembly: The squares will be strategically joined to form the front, back, and optionally, the bottom and sides of the bag.
- Top Border: A final border around the bag’s opening adds structure and a polished finish.
- Handle(s): One or two sturdy crocheted handles will be attached for carrying.
Let’s Crochet Your Granny Square Handbag!
Follow these steps carefully. Consistency in your tension and neat color changes are key for a professional-looking finished bag.
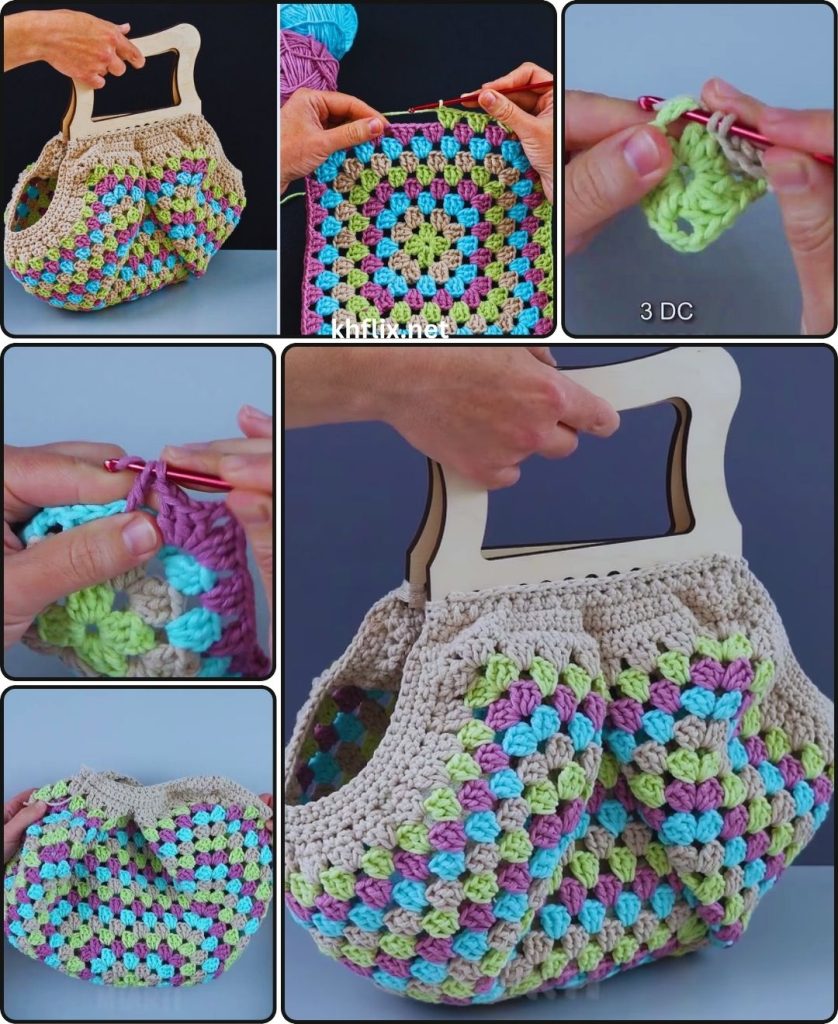
Part 1: Crocheting Your Striped Granny Squares (Make 12-16 squares, or as needed)
The number of squares you make will determine the size of your bag. For a common handbag size, you might make 12 squares (e.g., 3 wide by 2 high for the front, and 3 wide by 2 high for the back). If you want to create side and bottom panels for more depth, you’ll need additional squares.
Pattern for one 4-Colored Granny Square:
- Start with Color A (Center/Round 1):
- Begin with a Magic Ring (MR).
- Alternative start (if MR is tricky): Chain 4, then slip stitch into the first chain to form a ring.
- Round 1: Chain 3 (counts as your first double crochet (dc)). Work 2 dc into the ring. Chain 2, 3 dc into the ring. Repeat from * to * 2 more times. Chain 2. Slip stitch into the top of the beginning Chain 3 to join.
- Gently pull the Magic Ring tail tightly to close the center hole.
- Fasten off Color A, leaving a 4-6 inch (10-15 cm) tail for weaving in.
- Begin with a Magic Ring (MR).
- Join Color B (Round 2):
- Join Color B with a slip stitch into any chain-2 corner space from Round 1.
- Round 2: Chain 3 (counts as first dc). Work (2 dc, ch 2, 3 dc) into the same chain-2 corner space. This forms your first corner.
- *Chain 1. Work (3 dc, ch 2, 3 dc) into the next chain-2 corner space.* Repeat from * to * 2 more times.
- Chain 1. Slip stitch into the top of the beginning Chain 3 to join.
- Fasten off Color B, leaving a 4-6 inch (10-15 cm) tail.
- Join Color C (Round 3):
- Join Color C with a slip stitch into any chain-2 corner space from Round 2.
- Round 3: Chain 3. Work (2 dc, ch 2, 3 dc) into the same chain-2 corner space.
- *Chain 1. Work 3 dc into the next chain-1 space (this is the space between the 3-dc clusters from the previous round, not a corner). Chain 1. Work (3 dc, ch 2, 3 dc) into the next chain-2 corner space.* Repeat from * to * 2 more times.
- Chain 1. Work 3 dc into the last chain-1 space. Chain 1. Slip stitch into the top of the beginning Chain 3 to join.
- Fasten off Color C, leaving a 4-6 inch (10-15 cm) tail.
- Join Color D (Round 4 – Final Round of Square):
- Join Color D with a slip stitch into any chain-2 corner space from Round 3.
- Round 4: Chain 3. Work (2 dc, ch 2, 3 dc) into the same chain-2 corner space.
- *Chain 1. Work 3 dc into the next chain-1 space. Chain 1. Work 3 dc into the next chain-1 space. Chain 1. Work (3 dc, ch 2, 3 dc) into the next chain-2 corner space.* Repeat from * to * 2 more times.
- Chain 1. Work 3 dc into the next chain-1 space. Chain 1. Work 3 dc into the last chain-1 space. Chain 1. Slip stitch into the top of the beginning Chain 3 to join.
- Fasten off Color D, leaving a 4-6 inch (10-15 cm) tail.
Repeat these steps until you have made enough granny squares for your bag design.
- For a flat handbag: Make 12 squares (6 for the front panel, 6 for the back panel) arranged 3 wide x 2 high.
- For a bag with depth (recommended for a handbag): You’ll need additional squares for the bottom and side panels. A common setup could be:
- Front Panel: 6 squares (3 wide x 2 high)
- Back Panel: 6 squares (3 wide x 2 high)
- Bottom Panel: 2 squares (2 wide x 1 high)
- Side Panels: 2 squares (1 wide x 2 high) – or you can make a single long strip for the sides if preferred.
- This setup would require 6 + 6 + 2 + 2 = 16 squares total.

Part 2: Weaving in Ends (The Essential Step!)
- Before joining, weave in every single yarn tail from all your color changes on each individual granny square. This is crucial for a neat and durable finished bag.
- Use your yarn needle. Thread the tail onto the needle. Weave the tail into the stitches of the same color, going in one direction for at least 1.5-2 inches (4-5 cm). Then, subtly change direction (e.g., weave back through some of the same stitches diagonally or perpendicularly) to “lock” the tail in place and prevent it from unraveling. Trim any excess yarn close to the fabric, being careful not to cut your actual stitches.
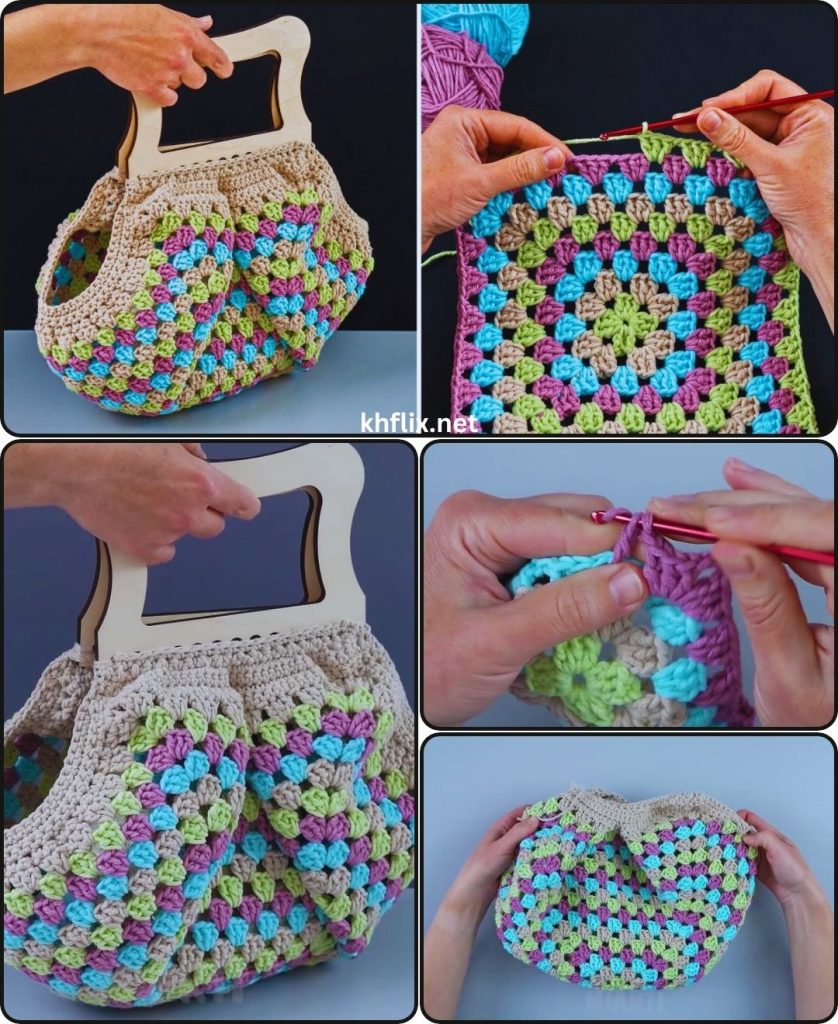
Part 3: Assembling the Bag (Joining Granny Squares)
There are several methods to join granny squares. For a sturdy bag, a single crochet join or a whip stitch join (using a yarn needle) are good choices. Use Color D (your chosen joining/border color) for all joins for a cohesive look.
- Plan Your Layout:
- Lay out all your finished squares on a flat surface. Arrange them exactly how you want them to appear on the front, back, bottom, and sides of your bag. This helps visualize the final product and prevents mistakes.
- Joining Method (Single Crochet Join – recommended for visible, sturdy seams):
- Take two squares with their right sides facing up. Place them side-by-side, aligning the edges you want to join.
- Using Color D and your H/5.0mm hook, insert your hook through both loops of the corresponding stitches on both squares (usually into the chain-1 spaces and the tops of the dc stitches).
- Join yarn with a slip stitch.
- Chain 1.
- Work 1 single crochet (sc) into the first stitch, going through both layers.
- Continue working 1 sc into each corresponding stitch along the edge, going through both layers, until you reach the end of the squares.
- At the corners: When you encounter a corner space, work 1 sc into the corner space of both squares. When joining multiple squares at a central point, work an extra sc into the shared “intersection” to secure it.
- Fasten off, leaving a tail to weave in.
- Repeat this process to join all the squares together to form your front panel (e.g., 3×2), your back panel (3×2), your bottom panel (2×1), and your side panels (1×2).
- Assembling the Bag Body (Seaming the Panels):
- Place your front panel flat.
- Align the bottom panel to the bottom edge of the front panel. Using Color D and your preferred joining method (sc join or whip stitch), join them securely.
- Now, align one of the side panels to the side edge of the front panel, and also to the adjacent side of the bottom panel. Join these edges together.
- Repeat for the other side panel.
- Finally, attach the back panel to the remaining open edges of the side panels and the bottom panel.
- You are essentially creating a 3D box shape from your flat squares.
- Ensure all seams are neat and strong. Fasten off and weave in all tails.
- Turn the bag right side out. Your bag body is now fully formed!
Part 4: Adding a Top Border (Highly Recommended)
A sturdy border around the top opening gives your bag a polished finish and helps reinforce the opening.
- Round 1 (Single Crochet):
- Join Color D with a slip stitch into any stitch along the top opening of your bag (ideally near a side seam).
- Chain 1. Work 1 single crochet (sc) into each stitch evenly around the entire top opening of the bag.
- Tip for even spacing: Work 1 sc into each dc stitch, and 1 sc into each chain-1 space along the sides of the granny squares. When you come to a seam where two squares meet, work 1 sc into the “valley” created by the join to keep it smooth.
- Slip stitch into the first sc to join the round.
- Round 2 (Single Crochet – for thickness):
- Chain 1. Work 1 sc into each sc around the entire top opening.
- Slip stitch into the first sc to join.
- Repeat Round 2 for 1-2 more rounds for a thicker, more reinforced top edge. This will create a nice, solid top rim for your bag.
- Fasten off Color D, leaving a tail to weave in. Weave in the tail securely.
Part 5: Crocheting and Attaching the Handle(s)
You can choose to make one long handle to go over your shoulder, or two shorter handles for carrying in your hand or on your forearm. We’ll outline how to make two sturdy short handles.
- Crocheting the Handles (Make 2 – using Color D):
- Make a slip knot with Color D.
- Chain (ch) 41. (This will create a handle of about 12-15 inches / 30-38 cm. Adjust this chain length for a longer or shorter handle if desired.)
- Row 1: Work 1 sc into the 2nd ch from your hook. Work 1 sc into each remaining ch across. You should have 40 sc.
- Chain 1, turn.
- Rows 2-4: Work 1 sc into each sc across the row. You will still have 40 sc in each row.
- Chain 1, turn. (You can make more rows here if you want an even wider, thicker handle.)
- Fasten off, leaving a very long tail (at least 10-15 inches / 25-38 cm) at each end of the handle for sewing.
- Attaching the Handles to the Bag:
- Lay your bag flat. Decide where you want your handles positioned. For two handles, they are typically placed centered on the front and back panels.
- Position the ends of your crocheted handles on the inside of the bag’s top opening. A good placement is often 2-3 inches (5-7.5 cm) in from each side seam, or centered over the granny squares on the top edge.
- Thread one of the long tails from a handle onto your yarn needle.
- Stitch firmly back and forth, going through the handle end and into the reinforced top border of the bag. Make sure to go through multiple stitches and layers for a very strong attachment, as this area will bear the weight of the bag’s contents. Work your needle in a way that the stitches are discreet from the outside.
- Repeat this process for all four ends of your two handles, ensuring they are evenly spaced and not twisted before you stitch them down.
- Weave in all remaining handle tails very securely into the top edge of the bag.
Part 6: Final Finishing Touches
- Final Weave in Ends:
- Carefully inspect your entire bag and ensure that every single yarn tail has been meticulously woven in. This is the last chance to secure everything for a durable and beautiful finish.
- Blocking (Optional but Highly Recommended):
- Blocking can significantly improve the shape, even out any tension inconsistencies, and give your bag a more polished, professional look. It’s especially beneficial for projects made from joined squares, as it helps the seams lie flat and the overall shape become more uniform.
- Method (Wet Blocking – Ideal for Cotton/Cotton Blends):
- Gently mist your entire bag evenly with cool water using a spray bottle until it’s damp but not soaking wet.
- Carefully stuff your bag with clean towels or crumpled paper to help it hold its desired shape (e.g., a nice rectangular or square form) while drying.
- Smooth out any wrinkles and gently shape the bag, ensuring the seams lay flat and the squares look even.
- Allow the bag to air dry completely and thoroughly in a well-ventilated area. This can take several hours to a full day, depending on humidity and ventilation. Ensure it’s bone dry before handling or using it.
- Add a Fabric Lining (Optional but Highly Recommended):
- A fabric lining provides a smooth interior, hides all your yarn tails, prevents small items from slipping through stitches, and adds significant durability and structure to your bag.
- Measure the inside dimensions of your finished bag precisely. Cut fabric pieces to match your crocheted panels, adding a seam allowance (e.g., 0.5 inches / 1.25 cm) to all edges.
- Sew the fabric pieces together to create an inner lining bag.
- Insert the fabric lining into your crocheted bag.
- Fold over the top raw edge of the fabric lining (using your seam allowance) and hand-stitch it neatly to the inside top border of your crocheted bag using a needle and matching strong thread.
Congratulations! You’ve successfully crocheted a beautiful and functional Granny Square Handbag with a striped color effect! This handmade accessory is not only practical but also a fantastic way to showcase your developing crochet skills and love for color. Enjoy using your vibrant new creation!