by
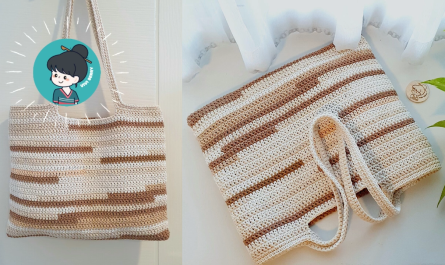
by Let’s get crafty and make a super chic DIY Crochet Handbag featuring Granny Squares in 2 Tones! This project is fantastic because it combines the timeless charm of granny squares with modern two-color design, allowing for endless customization and a truly unique accessory. It’s a great way to showcase your colorwork skills and create something both beautiful and functional.
How to Make a DIY Crochet Handbag with 2-Tone Granny Squares
This detailed guide will walk you through crocheting individual two-tone granny squares, assembling them into a sturdy handbag, and adding finishing touches.
Skill Level: Intermediate
This project assumes you’re comfortable with:
- Basic crochet stitches (ch, sl st, sc, dc).
- Working in rounds.
- Joining new yarn colors.
- Basic seaming techniques for crochet (slip stitch seam, whip stitch, or single crochet seam).
Finished Bag Dimensions (Approximate):
This pattern typically creates a handbag around 10-12 inches (25-30 cm) wide and 8-10 inches (20-25 cm) tall, excluding handles. The final size will depend on your yarn, hook, and the number/size of granny squares you make.
Materials You’ll Need:
- Yarn: Approximately 200-300 yards (180-270 meters) total of Worsted Weight (Medium #4) Cotton or Cotton Blend Yarn.
- Why Cotton? Cotton is durable, holds its shape well, and provides excellent stitch definition, which is perfect for granny squares.
- Color Choice: You’ll need two distinct colors for your granny squares.
- Color 1 (C1): For the center of your squares.
- Color 2 (C2): For the outer rounds of your squares and joining.
- Pro Tip: Choose colors that complement each other well. A classic combination might be a light neutral (like cream) with a bold accent (like teal or mustard), or two shades of the same color for a subtle gradient.
- Crochet Hook: Size H/5.0mm. This size generally works well for worsted weight yarn to create a solid fabric without being too stiff.
- Yarn Needle (Tapestry Needle): Essential for weaving in ends and seaming the squares together.
- Scissors: For cutting yarn.
- Stitch Markers (Optional): Useful for marking corners or keeping track of rounds, especially for beginners.
- Bag Handles (Optional): Purchase pre-made handles (leather, bamboo, plastic, or metal rings) or plan to crochet your own.
- Fabric for Lining (Optional but Recommended): Cotton or poly-cotton fabric to line your bag, matching thread, and a sewing machine or hand-sewing needle.
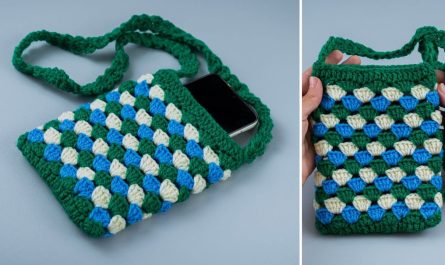
Understanding the 2-Tone Granny Square
We’ll be making a classic solid granny square, but with a color change after the first round (or first few rounds, depending on your preference). This creates a striking visual contrast.
Color Change Tip:
To change colors neatly, work the last stitch of the current round with the current color until you have two loops left on your hook. Drop the current color, pick up the new color, yarn over with the new color, and pull through the remaining two loops to complete the stitch. Then, work your slip stitch to join the round with the new color. Cut the old color yarn, leaving a 4-6 inch tail to weave in later.
Part 1: Crocheting the 2-Tone Granny Squares
You’ll need several of these squares. For a typical handbag, you might need anywhere from 6 to 12 squares, depending on the size of your squares and the desired bag dimensions. A common layout is 2 squares wide by 3 squares high for each side (total 12 squares). Let’s aim for 9 squares initially (3×3 layout for a front, back, and connecting piece).

Instructions for one 2-Tone Granny Square:
- Start (with Color 1 – C1):
- Make a Magic Ring (MR).
- Alternative start: Ch 4, sl st into first ch to form a ring.
- Round 1 (C1 – Center):
- Ch 3 (counts as first dc).
- Work 2 dc into the MR.
- Ch 2 (this is your first corner space).
- *(Work 3 dc into the MR, ch 2).* Repeat from * to * 2 more times. (You will have 4 groups of 3 dc and 4 ch-2 spaces).
- Sl st into the top of the beginning Ch 3 to join the round.
- [12 dc and 4 ch-2 sps]
- If using MR, pull tail tightly to close the center.
- Clean Color Change: On the final sl st, drop C1 and join Color 2 (C2). Cut C1, leaving a tail.
- Round 2 (C2 – First Outer Layer):
- Ch 3 (counts as first dc).
- Work (2 dc, ch 2, 3 dc) into the first ch-2 space (this forms your first corner).
- Ch 1 (this is a side space).
- *(Work (3 dc, ch 2, 3 dc) into the next ch-2 space (next corner), ch 1).* Repeat from * to * 2 more times.
- Sl st into the top of the beginning Ch 3 to join.
- [24 dc, 4 ch-2 sps, 4 ch-1 sps]
- Round 3 (C2 – Second Outer Layer):
- Ch 3 (counts as first dc).
- Work 2 dc into the first ch-1 space.
- Ch 1.
- *(Work (3 dc, ch 2, 3 dc) into the next ch-2 space (corner).
- Ch 1.
- Work 3 dc into the next ch-1 space.
- Ch 1).* Repeat from * to * 2 more times.
- Work (3 dc, ch 2, 3 dc) into the last ch-2 space (corner).
- Ch 1.
- Sl st into the top of the beginning Ch 3 to join.
- [36 dc, 4 ch-2 sps, 8 ch-1 sps]
- You can continue adding more rounds in C2 for larger squares if desired, always working (3dc, ch2, 3dc) in corners and 3dc in side ch-1 spaces, separated by ch-1.
- Fasten Off: Leave a 6-inch tail.
- Repeat: Make as many squares as you need for your desired bag layout. For a basic bag structure (front, back, and a bottom/side strip), a minimum of 9 squares is a good start. For a larger bag or more complex shape, you’ll need more.
Part 2: Planning Your Bag Layout & Assembling Squares
The most common way to assemble a granny square bag is to create two large panels (front and back) and then a strip for the bottom and sides.
- Layout Planning:
- Decide how many squares you want for the front panel (e.g., 3 squares wide by 3 squares high = 9 squares).
- Decide how many for the back panel (e.g., another 9 squares).
- For the bottom and side strip, you can make a single long strip of squares (e.g., 1 square wide by 7-9 squares long). Or, you can crochet a single long rectangle in plain sc or dc if you prefer not to use more squares for the base. For simplicity in this pattern, we’ll assume you’re making a simple rectangular bag using the granny squares for front and back, and then seaming them.
- Seaming Techniques (Choose one):
- Slip Stitch Seam (Neat & Flat): Place two squares right sides together. Insert hook through both top loops of a stitch on the first square and both top loops of the corresponding stitch on the second square. Sl st. Repeat across the row. This creates a flat, almost invisible seam from the right side.
- Single Crochet Seam (Durable & Textured): Similar to sl st seam, but use sc. This creates a more visible, raised seam that adds a bit of texture.
- Whip Stitch (Hand Sewing with Yarn Needle): Place squares right sides together. Use your yarn needle and a long piece of C2 yarn (or a contrasting color for a design element). Pass the needle over the top edge and through both loops of both squares, repeating across. This also creates a neat, flat seam.
- Assemble Front and Back Panels:
- Lay out your chosen number of squares for one side (e.g., 3×3).
- Seam the squares together in rows, then seam the rows together to form one large rectangular panel.
- Repeat for the second panel.
- Join Front and Back Panels:
- Place your two large granny square panels together, right sides facing out. This type of bag usually has the seams on the outside.
- Start at one bottom corner. Using your preferred seaming method (sl st seam is good here for clean lines, using C2), seam the bottom edge together.
- Continue seaming up one side.
- Repeat for the other side.
- Do not seam the top edge. This will be the opening of your bag.
Part 3: Adding the Top Edge & Handles
This section finishes the bag’s opening and provides a way to carry it.
- Top Edge Reinforcement (Optional but Recommended):
- With Color 2, join yarn to any stitch at the top edge of your bag opening.
- Ch 1. Work 1 sc in each stitch and into each ch-1 space around the entire top opening of the bag. Aim for consistent spacing across the corners and granny square joins.
- Sl st to join the round.
- Repeat for 1-2 more rounds of sc for a sturdy top edge.
- Fasten off.
- Attaching Handles (Choose one option):
- Option A: Crocheted Straps:
- With Color 2, make two straps. For each: Ch 6 (or more for a wider strap). Sc in 2nd ch from hook and across. Ch 1, turn, sc in each st across. Repeat for desired length (e.g., 18-24 inches for shoulder straps, 10-12 inches for hand straps).
- Attach: Position each strap evenly on the inside of the bag’s top edge (about 2-3 inches from the side seams). Use your yarn needle and matching C2 yarn to firmly sew them in place, going through multiple layers of stitches for durability.
- Option B: Purchased Handles:
- Follow the specific instructions for your purchased handles. Most will have small holes for sewing.
- Position them evenly on the top edge of your bag. Use strong sewing thread (matching C2 or clear) and a regular sewing needle to firmly stitch them to the top edge of the crochet fabric. Stitch through multiple times for security.
- Option A: Crocheted Straps:
Part 4: Finishing Touches (Highly Recommended)
- Weave in All Ends: This is the most tedious but crucial step! For a clean, professional, and durable bag, use your yarn needle to meticulously weave in all the tails from your granny square beginnings, color changes, and seams. Weave them securely into the same color section of the fabric to hide them effectively.
- Lining the Bag: A fabric lining makes your bag much sturdier, prevents stretching, and stops small items from falling through crochet gaps.
- Measure: Measure the dimensions of your finished crochet bag (height, width, and depth). You’ll need to account for the assembled granny squares.
- Cut Fabric: Cut fabric pieces to match the inside dimensions of your bag, adding a seam allowance (e.g., 1/2 inch or 1.2 cm) to all edges.
- Sew Fabric Lining: Stitch the fabric pieces together (right sides together) to create a bag shape that fits snugly inside your crochet bag. Press seams open. Create a neat hem around the top edge of the lining.
- Insert and Secure: Place the fabric lining inside your crochet bag. Align the top edges. Fold the hemmed top edge of the lining over the top edge of the crochet bag slightly (if needed) and hand-stitch the lining securely to the inside top edge of the crochet bag using matching thread and a hand-sewing needle. Stitch carefully so the stitches aren’t visible from the outside.
- Blocking (Optional): Gently block your finished bag. You can stuff it lightly with towels or tissue paper to help it take shape. Use a light mist of water (for cotton yarn) or a steam iron (hovering, not touching) to relax the fibers and help the bag hold its form. Let it dry completely.
You’ve now created a fabulous DIY Crochet Handbag with 2-Tone Granny Squares! This unique accessory is not only practical but also a wonderful expression of your creativity. Enjoy carrying your handmade masterpiece!