 by
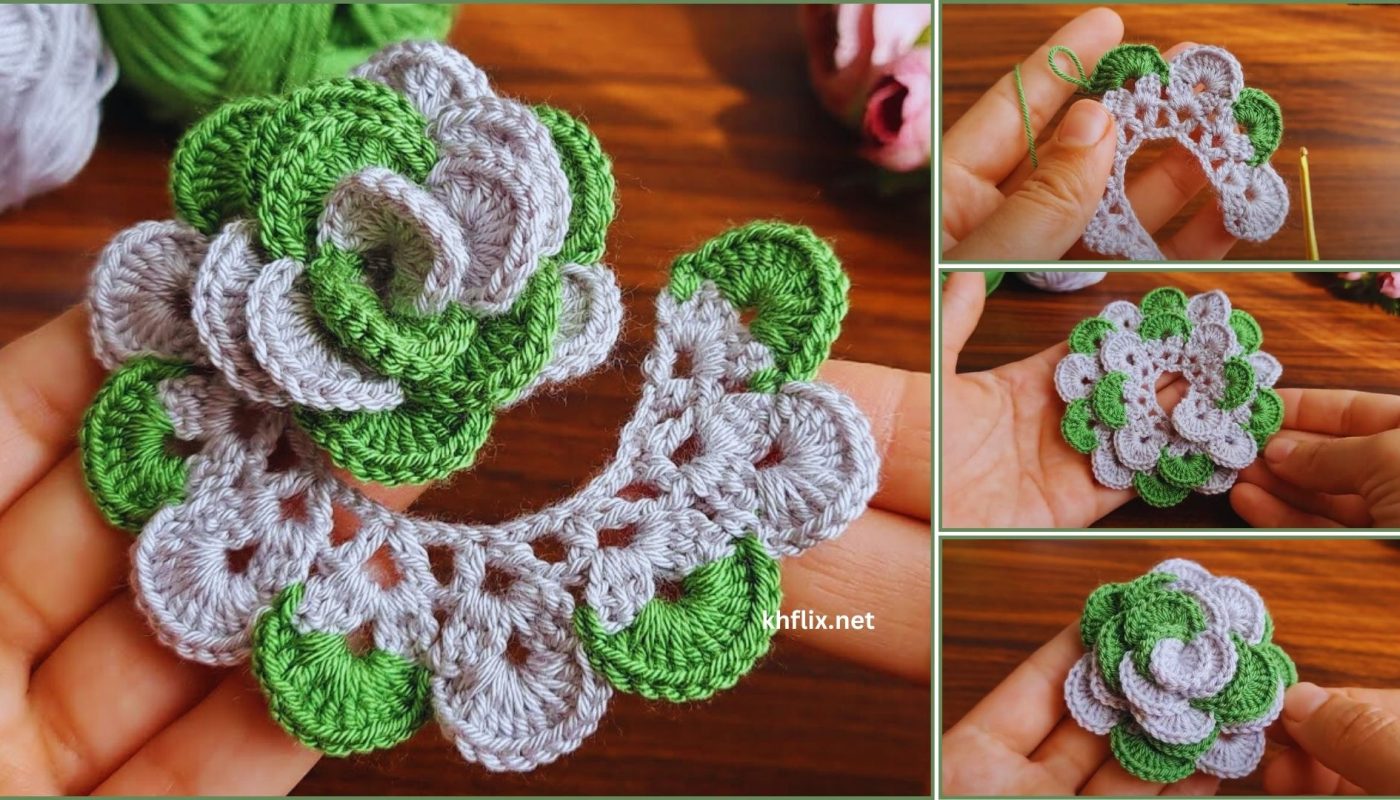
by Let’s crochet a stunning and elegant two-color crochet rose flower! This project allows you to create a beautiful, dimensional bloom with added depth and visual interest by using two contrasting or complementary yarn colors. It’s a satisfying way to use up yarn scraps and add a handmade touch to almost anything you can imagine.
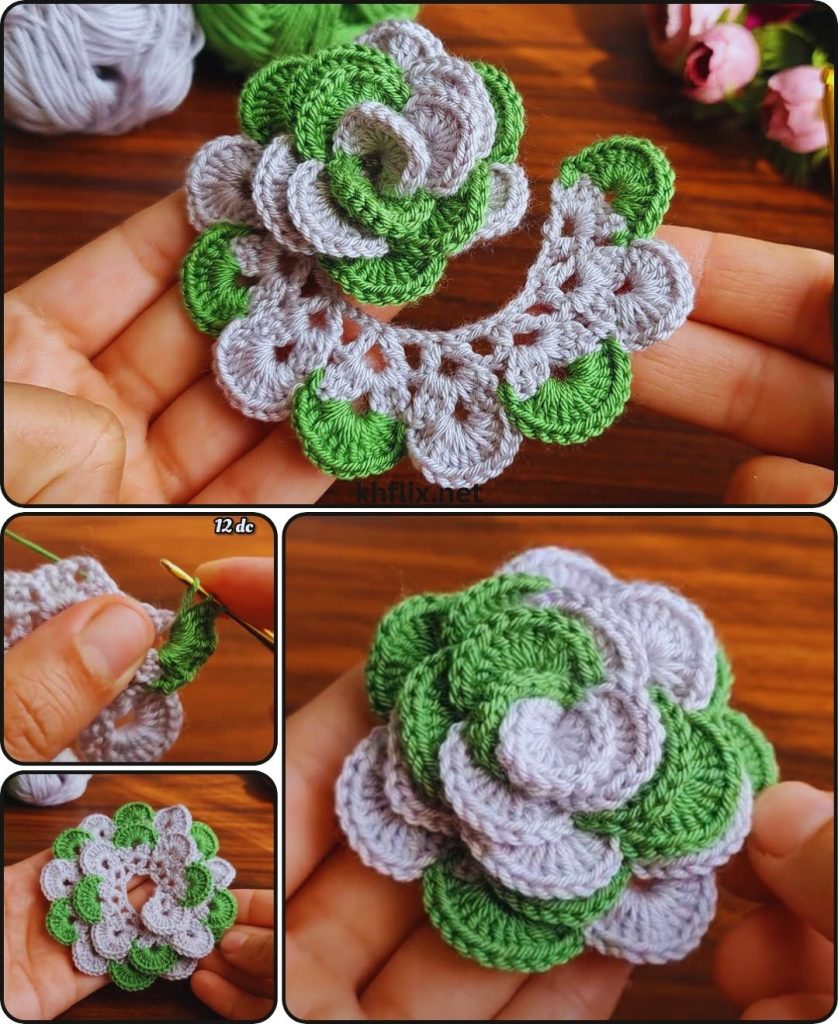
How to Make a Beautiful, Easy Crochet Rose Flower with Two Colors
This detailed guide will walk you through crocheting a lovely multi-layered rose, utilizing a straightforward spiral technique. We’ll specifically focus on how to seamlessly incorporate a second color to highlight the petals and add an extra touch of sophistication to your floral creation.
Skill Level: Beginner-Intermediate
This project is perfect if you’re comfortable with (or ready to learn!):
- Chain (ch): The basic foundation stitch.
- Slip Stitch (sl st): For joining and neatening.
- Single Crochet (sc): A dense stitch, great for the base.
- Half Double Crochet (hdc): A versatile stitch for height.
- Double Crochet (dc): A common stitch for taller petals.
- Fastening off: Securing your work.
- Changing colors: The key to this two-color design.
- Weaving in ends: The essential finishing touch.
Finished Rose Dimensions (Approximate):
Using worsted weight yarn and the suggested hook, your finished two-color rose will typically measure approximately 2 to 3.5 inches (5 to 9 cm) in diameter, depending on how tightly you roll it and your personal tension.
Materials You’ll Need:
Gathering your materials before you begin makes for a smoother crocheting experience.
- Yarn: Small amounts of Worsted Weight (Medium #4) Yarn in two colors.
- Color A (Inner Petals/Core): Approximately 10-15 yards (9-14 meters). This will be the color that forms the tight center and base of your rose. Consider a darker or more muted tone for a realistic effect, or a vibrant one for contrast.
- Color B (Outer Petals/Highlight): Approximately 15-25 yards (14-23 meters). This will be the color that highlights the main petals of your rose. Choose a color that contrasts nicely or beautifully complements Color A.
- Why Worsted Weight? It’s a versatile choice that creates a nice size flower without being too fiddly, making it ideal for beginners. Cotton or acrylic yarn will work well.
- Crochet Hook: Size H/5.0mm. This hook size is a versatile choice for worsted weight yarn, creating a fabric that holds its shape well.
- Yarn Needle (Tapestry Needle): Absolutely essential for seamlessly weaving in all your loose yarn tails and for securing the rolled rose. It has a blunt tip and a large eye, making it easy to thread yarn.
- Scissors: Any pair of sharp scissors for cutting your yarn.
Understanding the Two-Color Rose Construction: The Layered Spiral Method
This rose is constructed by crocheting a flat, rectangular strip of fabric. The magic happens by gradually increasing the height of the stitches in the strip, and crucially, by changing colors mid-way through to give the “petals” a distinct two-tone appearance. This strip is then rolled up and secured to form the characteristic spiral of a rose.
- Foundation Chain: Determines the initial length of your rose strip.
- Inner Petal Rows (Color A): Creating the tighter, inner part of the rose.
- Color Change: Seamlessly switching to your second color.
- Outer Petal Rows (Color B): Building taller stitches to form the more open outer petals, now in your highlight color.
- Rolling and Securing: The final step to transform your strip into a beautiful 3D rose.

Let’s Crochet Your Beautiful Two-Color Rose Flower!
Follow these detailed steps carefully. The key to a beautiful two-color rose lies in the structure of the rows, the precise color change, and how you roll and secure the final piece.
Part 1: Crocheting the Rose Strip
This strip will be the foundation of your rose. We’ll use a mix of half double crochet (hdc) and double crochet (dc) stitches to create varying heights for the petals and introduce your second color.
- Starting Chain (Color A):
- Make a slip knot with Color A yarn and place it onto your H/5.0mm crochet hook.
- Chain (ch) 30. (This will create a medium-sized rose. For a smaller rose, chain about 20-25. For a larger rose, chain 35-40. The number of chains needs to be long enough to create enough “petals” when rolled.)
- Row 1 (Foundation – Color A):
- Work 1 single crochet (sc) into the 2nd chain from your hook.
- Work 1 sc into each remaining chain across.
- You should have 29 single crochet stitches.
- Chain 1 (ch 1) (this turning chain does NOT count as a stitch).
- Turn your work. This means flipping your crochet piece over so your hook is ready to work into the first stitch of the new row.
- Row 2 (Inner Petal Formation – Color A):
- Work 1 half double crochet (hdc) into the first stitch.
- Work 2 hdc into the next stitch.
- Repeat this pattern: *1 hdc into the next stitch, 2 hdc into the next stitch* across the row.
- This row will create a wavy effect, forming the smaller, tighter petals of the rose’s center, all in Color A.
- Do NOT chain 1 and turn yet. We will change colors on the very last stitch of this row.
Part 2: Changing Colors and Crocheting Outer Petals (Color B)
This is the magic part where your rose gets its two-color appeal!
- Change Color to Color B:
- When you are about to complete the very last hdc stitch of Row 2, work it almost completely with Color A:
- Insert your hook into the stitch.
- Yarn over with Color A and pull up a loop (you now have 2 loops on your hook).
- Now, drop Color A. Pick up your new color (Color B).
- With Color B, yarn over and pull through both loops on your hook to complete the hdc stitch. Color A is now dropped, and Color B is on your hook.
- With Color B, Chain 2 (ch 2) (this turning chain does NOT count as a stitch).
- Turn your work.
- When you are about to complete the very last hdc stitch of Row 2, work it almost completely with Color A:
- Row 3 (Outer Petal Formation – Color B):
- Work 1 double crochet (dc) into the first stitch.
- Work 2 dc into the next stitch.
- Repeat this pattern: *1 dc into the next stitch, 2 dc into the next stitch* across the row.
- This row creates taller stitches in your new color, forming the larger, more prominent petals of the rose.
- Chain 1 (ch 1) (this turning chain does NOT count as a stitch).
- Turn your work.
- Row 4 (Base Edge – Color B):
- Work 1 single crochet (sc) into the first stitch.
- Work 1 sc into each stitch across the row. This creates a clean, straight edge on one side of your strip, which will be the bottom base of your rose when rolled.
- Fasten off Color B, leaving a very long tail (at least 15-20 inches / 38-50 cm) for assembling the rose. This long tail is crucial for sewing.

Part 3: Assembling Your Two-Color Rose
This is where your flat strip magically transforms into a beautiful 3D rose!
- Prepare for Rolling:
- Lay your crocheted strip flat. You’ll notice one side (the side with the
scborder from Row 4) is relatively straight, and the other side (from Rows 2 and 3) is wavy and uneven—these are your petals! - Locate the end of the strip where you started your foundation chain (the opposite end from where you fastened off). This end will become the very center of your rose.
- Lay your crocheted strip flat. You’ll notice one side (the side with the
- Start Rolling:
- Take the starting end of the strip (the Color A end) and begin to tightly roll it inward towards the first few stitches. This forms the very tight central bud of your rose. The Color A sections will form the inner, more tightly coiled petals. Roll it for about 1-1.5 inches (2.5-4 cm).
- As you continue to roll, loosen your tension slightly. You want the outer layers (now with Color B visible) to be a bit looser and more open, like natural rose petals. Keep rolling the strip around the central bud, allowing the wavy edges to naturally create the petal layers. The
scedge (Row 4, in Color B) should form the bottom base of your rose as you roll.
- Secure the Rose (Crucial Step):
- Once you’ve rolled the entire strip into a rose shape, hold it firmly with one hand so it doesn’t unravel.
- Thread the long tail you left from Color B (from fastening off) onto your yarn needle.
- Now, you need to stitch through all the layers of the rose at its base to secure them. Insert your needle from one side of the base of the rose, pass it through all the layers, and bring it out the other side.
- Continue stitching back and forth through the base of the rose, going through all the layers. Do this multiple times (5-7 stitches) in different directions across the base to ensure it’s very firmly secured and won’t come apart. The stitches should be on the underside of the rose, out of sight.
- Weave in Remaining Ends:
- Once the rose is securely sewn together, weave any remaining part of the long tail into the base of the rose.
- Locate the short tail from where you cut Color A after Row 2. Weave this tail into the base of the rose, trying to keep it within the Color A section for neatness.
- Weave in the very short starting tail from your foundation chain into the base as well. Ensure all ends are neatly tucked away and invisible.
Tips for a Perfect Two-Color Rose:
- Tension Matters: Consistent tension throughout crocheting the strip will lead to more even petals.
- Rolling Technique: The way you roll is key! Start tight for the bud (emphasizing Color A), then loosen as you go for the outer petals (showcasing Color B). Don’t be afraid to unroll and re-roll until you like the shape.
- Color Placement: Consider which color you want to be more prominent. If you want the inner color to show more, use taller stitches in the Color A section. If you want the outer color to dominate, make the Color B section much taller.
- Adding Leaves (Optional): To make your rose even more realistic, you can crochet small green leaves and stitch them to the base of the rose. A simple leaf can be made by chaining 6-8, then working sc, hdc, dc, hdc, sc back down the chain, then ch 1 and repeat on the other side of the chain.
- Embellishment Ideas: Once finished, you can hot glue or stitch your crochet rose onto:
- Hats, headbands, or hair clips
- Bags, purses, or pouches
- Scarves or sweaters
- Pillows or blankets
- As part of a brooch or corsage
- Gift wrapping
Congratulations! You’ve successfully crocheted a beautiful two-color rose flower! This charming handmade bloom, with its lovely layered appearance and vibrant colors, is now ready to add a touch of personality and handmade beauty to any project or item.