 by
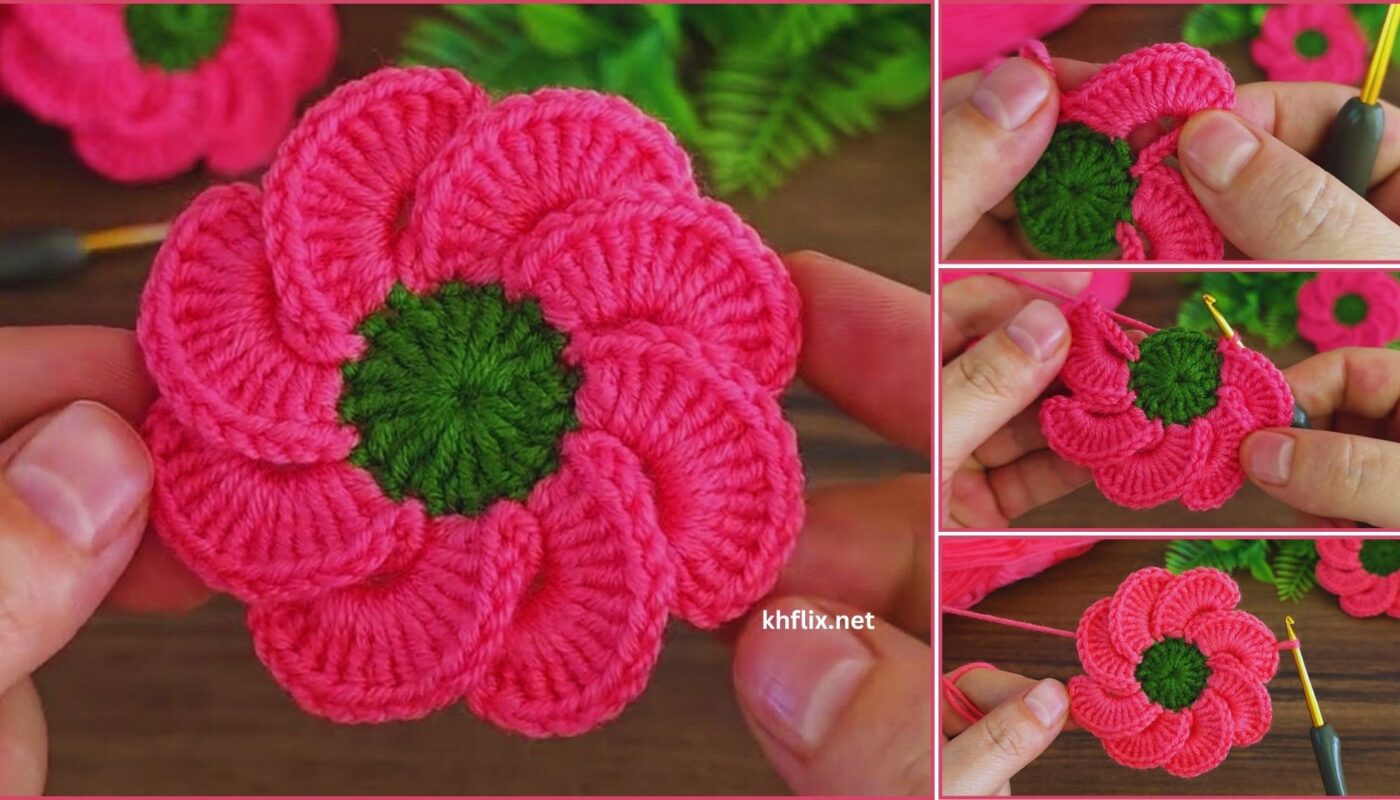
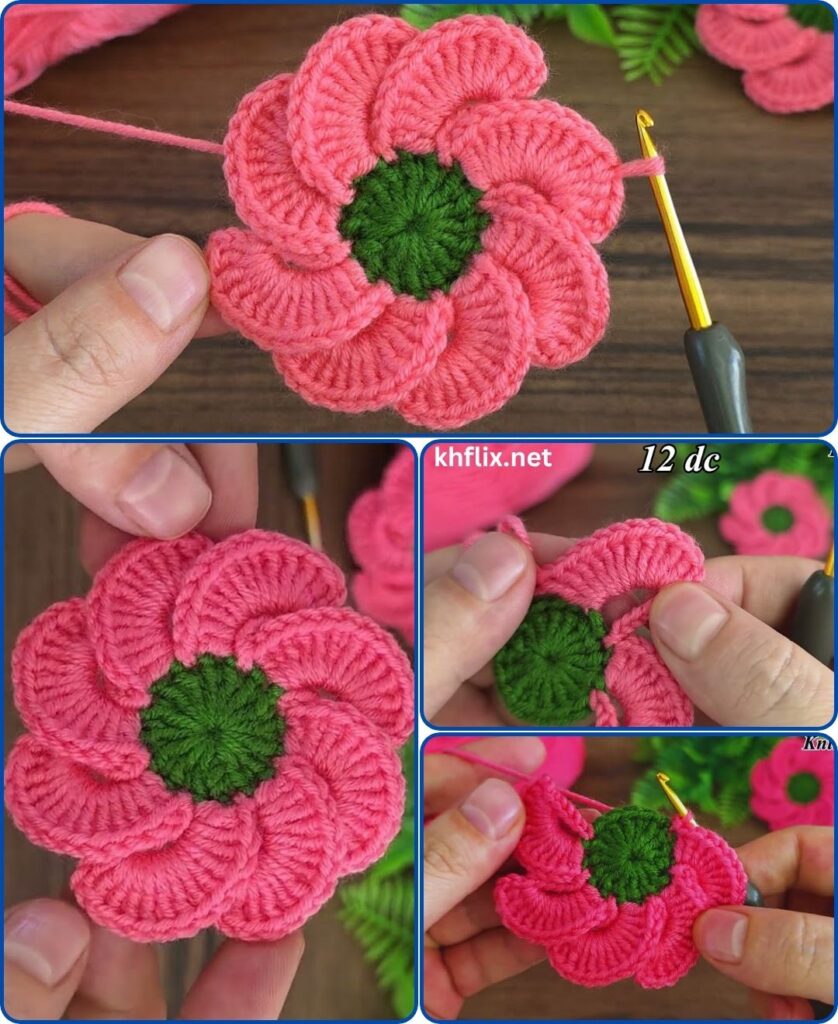
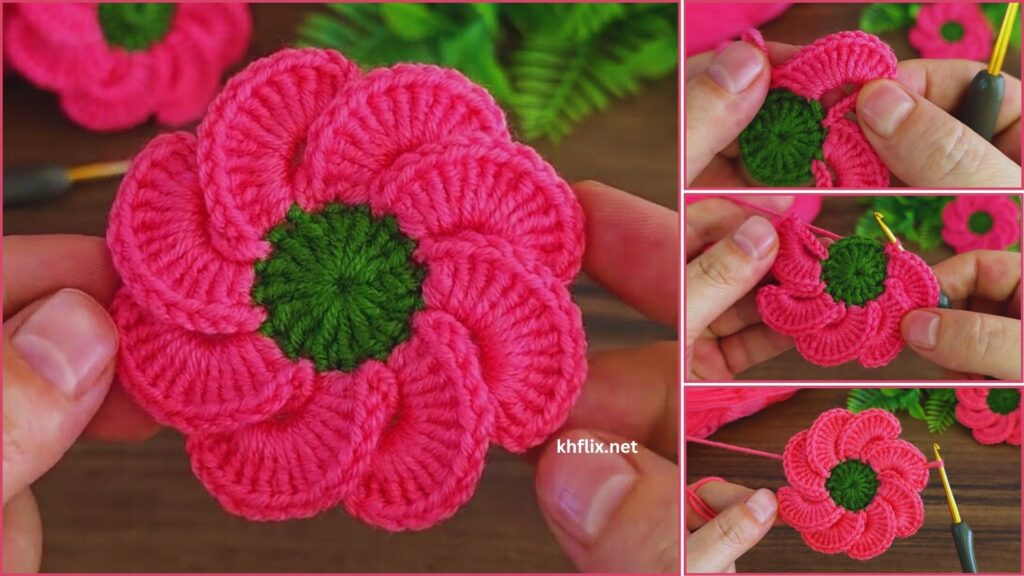
by Let’s create a beautiful and intricate pink 3D crochet flower! This project is fantastic for adding a touch of dimensional beauty to any item, whether it’s an accessory, a garment, or a home decor piece. Using a single color like pink will allow the stunning 3D texture and the interplay of light and shadow on the petals to truly shine.
How to Make a Beautiful Pink 3D Crochet Flower: Detailed Tutorial
This pattern will guide you through building a multi-layered flower that stands out, giving your creation a gorgeous, realistic effect. You’ll work in layers, starting with a base and then adding petals using strategic techniques to create depth.
Skill Level: Intermediate
You’ll need to be comfortable with:
- Chain (ch): The basic foundation.
- Slip Stitch (sl st): For joining rounds and neatening.
- Single Crochet (sc): A compact, dense stitch.
- Half Double Crochet (hdc): A medium-height stitch.
- Double Crochet (dc): A taller stitch.
- Treble Crochet (tr): An even taller stitch (sometimes called triple crochet).
- Working in rounds: Crocheting in a circular motion.
- Increasing: Adding stitches to expand your work.
- Magic Ring (MR) or Adjustable Ring: Highly recommended for a tight center.
- Working into front loops only (FLO) and back loops only (BLO): This technique is crucial for creating distinct layers of petals.
- Working into chain spaces and skipped stitches: For precise petal placement.
Finished Flower Dimensions (Approximate):
Your finished 3D flower will typically measure around 3-5 inches (7.5-12.5 cm) in diameter, depending on your yarn weight and tension. You can adjust the size by using different yarn weights and hook sizes.
Materials You’ll Need:
- Yarn: Approximately 30-50 yards (27-46 meters) of Worsted Weight (Medium #4) Yarn in Pink.
- Yarn Fiber: Acrylic is versatile, comes in many beautiful shades of pink, and holds shape well. Cotton yarn offers great stitch definition and a slightly firmer structure. Both are suitable for this project.
- Color Choice: Choose any lovely shade of pink you desire, from a pale blush to a vibrant fuchsia!
- Crochet Hook: Size G/4.0mm or H/5.0mm. A slightly smaller hook will create denser petals and a firmer flower, which holds its shape better. A larger hook will result in a softer, more flexible flower.
- Yarn Needle (Tapestry Needle): Essential for seamlessly weaving in all your loose yarn tails.
- Scissors: For cutting yarn.
Gauge:
While gauge isn’t critical for a flower motif, consistent tension is paramount. It ensures your flower lies flat in the center and that your petals are evenly sized and well-defined, contributing to the overall 3D effect. If your stitches are too loose, the petals might be floppy; too tight, and the center might pucker.
Abbreviations Used in This Pattern:
- ch: chain
- sl st: slip stitch
- sc: single crochet
- hdc: half double crochet
- dc: double crochet
- tr: treble crochet (yarn over twice before inserting hook)
- st(s): stitch(es)
- sp: space
- ch-sp: chain space
- MR: Magic Ring (also called Magic Circle or Adjustable Ring)
- FLO: Front Loop Only (work into the loop closest to you)
- BLO: Back Loop Only (work into the loop furthest from you)
- rep: repeat
- FO: Fasten Off
- (): repeat instructions within parentheses a specified number of times.
- []: indicates the total number of stitches at the end of a specific round.
The Secret to 3D Flowers: Layering with FLO/BLO
The magic behind a 3D crochet flower lies in strategically using the front loop only (FLO) or back loop only (BLO) of a stitch. When you work into only one loop, the other loop remains unworked. This unworked loop then becomes a perfect foundation for crocheting a new layer of petals behind or in front of the previous one, creating incredible depth and dimension in your flower.
Let’s Crochet Your Beautiful Pink 3D Flower!
This pattern builds the flower from the center outwards, adding multiple layers of petals.
Part 1: Flower Center & Base for Petals
- Start: Make a Magic Ring (MR).
- Alternative Start (if you prefer not to use a MR): Chain 4, then sl st into the first ch to form a ring.
- Round 1:
- Ch 1 (does NOT count as a stitch).
- Work 10 sc into the MR.
- Pull the tail tightly to close the center hole.
- Sl st into the first sc to join the round.
- [10 sc]
- Round 2 (Base for First Petals):
- Ch 2 (does NOT count as a stitch, but gives height).
- Work 2 dc into each stitch around.
- Sl st into the top of the first dc to join.
- [20 dc]
Part 2: First Layer of 3D Petals (Inner Petals)
This layer will form your beautiful, slightly cupped, innermost petals. We’ll work into the front loops only (FLO) from Round 2.
- Round 3 (Inner Petals – working into FLO of Round 2):
- Ch 1 (does NOT count as a stitch).
- *(Sl st into the FLO of the current stitch.
- Ch 2.
- Work 3 dc into the FLO of the next stitch.
- Ch 2.
- Sl st into the FLO of the next stitch).*
- Repeat from * to * around the entire circle. You will create 7 petals total.
- Note: Your 20 FLO stitches from Round 2 are what you’re working into. Each petal uses 3 FLOs (sl st, dc group in one, sl st). You’ll have a few FLOs left over (7 petals x 3 FLOs = 21, but you only have 20. Just distribute your petals as evenly as possible around the circle, you might skip an FLO somewhere or work a sl st into the same FLO as a previous petal’s sl st).*
- After your last petal, sl st into the very first sl st you made in this round (the one that started your first petal) to securely finish the round.
- Do NOT Fasten off.
Part 3: Second Layer of 3D Petals (Middle Petals)
Now for the next layer of petals. You’ll work behind the first set of petals, into the unworked back loops from Round 2.
- Round 4 (Petal Base – working into BLO of Round 2):
- Turn your flower over slightly. You’ll see a distinct ridge of unworked Back Loops (BLO) from Round 2 (these are directly behind your first set of petals).
- Ch 1 (does NOT count as a stitch).
- Work sc in the first BLO.
- Work sc in the next 19 BLOs around.
- Sl st into the first sc to join the round.
- [20 sc] (These 20 sc stitches form the base for your second layer of petals.)
- Round 5 (Second Petal Layer):
- Ch 1 (does NOT count as a stitch).
- *(Sl st into the next sc (from Round 4).
- Ch 3.
- Work 1 dc into the next sc, 2 tr (treble crochet) into the next sc, 1 dc into the next sc.
- Ch 3.
- Sl st into the next sc).* This creates one large petal.
- Repeat from * to * 4 more times around. You will create 5 petals total.
- Each petal cluster uses 4 sc stitches from Round 4 (sl st, dc, 2tr, dc, sl st). To get 5 petals from 20 sc, you’ll use all stitches directly.
- After your last petal, sl st into the first sl st you made in this round to securely finish.
- Do NOT Fasten off.
Part 4: Third Layer of 3D Petals (Outer Petals)
For the final, largest layer of petals, we’ll create a new foundation behind the second layer.
- Round 6 (Petal Base – working behind Round 4):
- Turn your flower over slightly again. You’ll work into the remaining unworked loops or the spaces behind the stitches of Round 4. A simple way is to work into the “post” or “bar” of the sc stitches from Round 4, or just through both loops of the sc stitches of Round 4, making sure you work behind the previous petals.
- Ch 1 (does NOT count as a stitch).
- Work 2 sc into each stitch (or behind each stitch) from Round 4.
- Sl st into the first sc to join.
- [40 sc] (You’re doubling the stitch count here to create a wider base for larger petals).
- Round 7 (Third Petal Layer):
- Ch 1 (does NOT count as a stitch).
- *(Sl st into the next sc (from Round 6).
- Ch 3.
- Work 2 tr (treble crochet) into the next sc, 1 dtr (double treble crochet – yarn over 3 times) into the next sc, 2 tr into the next sc.
- Ch 3.
- Sl st into the next sc, sl st into the next sc).* This creates one very large petal.
- Repeat from * to * 6 more times around. You will create 7 petals total.
- Each petal cluster uses 6 sc stitches from Round 6. You have 40 sc, so 6 petals * 6 sts = 36 sts. You might have a few stitches left over. Just ensure you space your petals as evenly as possible.
- After your last petal, sl st into the first sl st you made in this round to securely finish.
- Fasten off (FO), leaving a 6-inch tail.
Part 5: Finishing Your 3D Flower
- Weave in All Ends:
- This is crucial for a neat and beautiful finish. Thread each yarn tail onto your yarn needle.
- Carefully weave them into the stitches on the back side of your flower. Try to go through the middle of the stitches to fully hide the tails. Weave in one direction for a few stitches, then change direction slightly and weave back for a few stitches (this “locks” the tail in place and prevents it from unraveling).
- Take your time with this to ensure your flower looks impeccable.
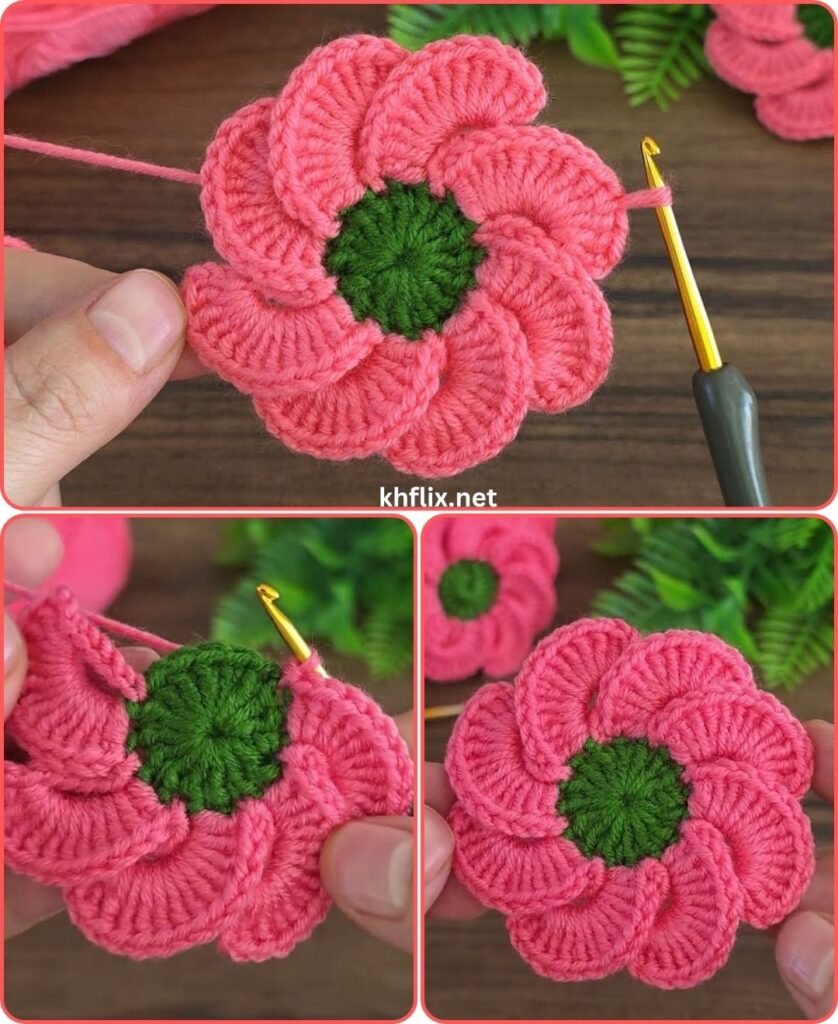
- Shape:
- Gently use your fingers to manipulate and shape the petals. The inner petals should be more cupped, while the outer petals should naturally flare out. You can gently bend or cup them forward to enhance the 3D effect.
- A light steam block can be very beneficial for helping the flower hold its shape. To do this, hover a steamer or an iron (on a low, steam setting) over the flower without touching the fabric. Then, gently shape the petals with your hands while the yarn is warm and pliable. Allow it to air dry completely. Be careful not to flatten the 3D petals too much if you want them to remain prominent.
You’ve now created a truly gorgeous and intricate pink 3D crochet flower! This dimensional beauty is perfect for embellishing accessories, clothing, home decor, or as a standalone gift. What beautiful project will you adorn with your blooming masterpiece?