 by
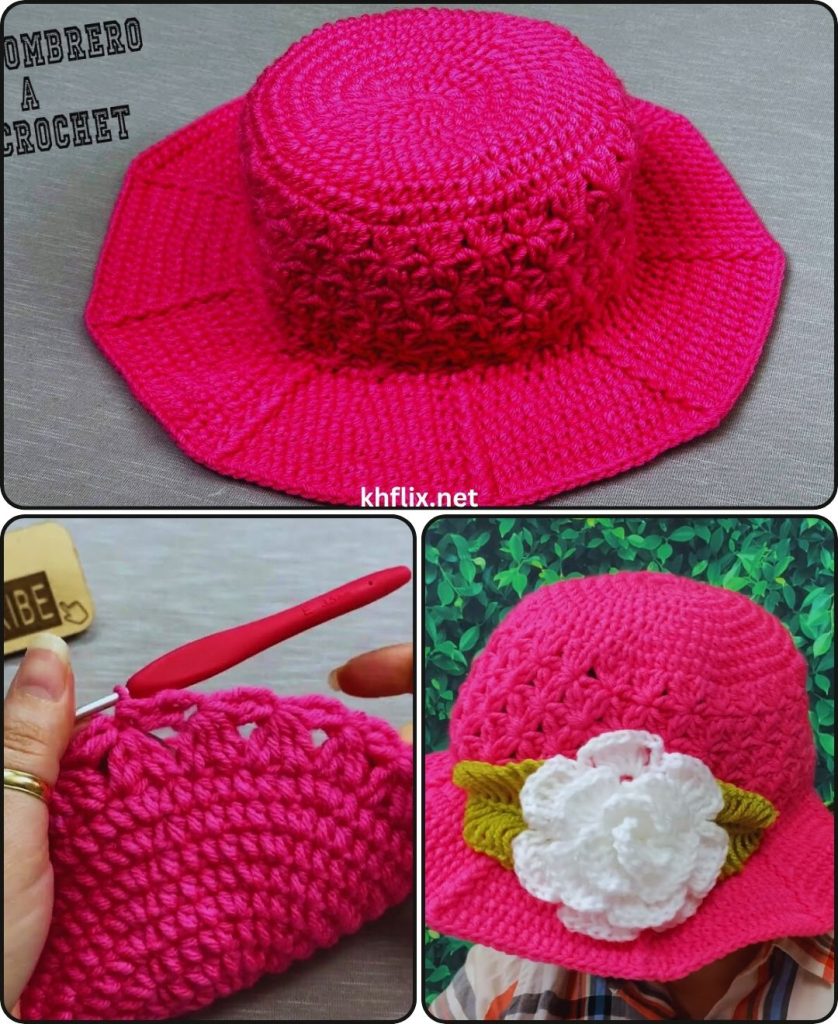
by You’re ready to create a beautiful and personalized crochet hat with a striking red flower! This tutorial will guide you through making a cozy beanie-style hat from the top down and then crocheting a lovely layered red flower to adorn it.
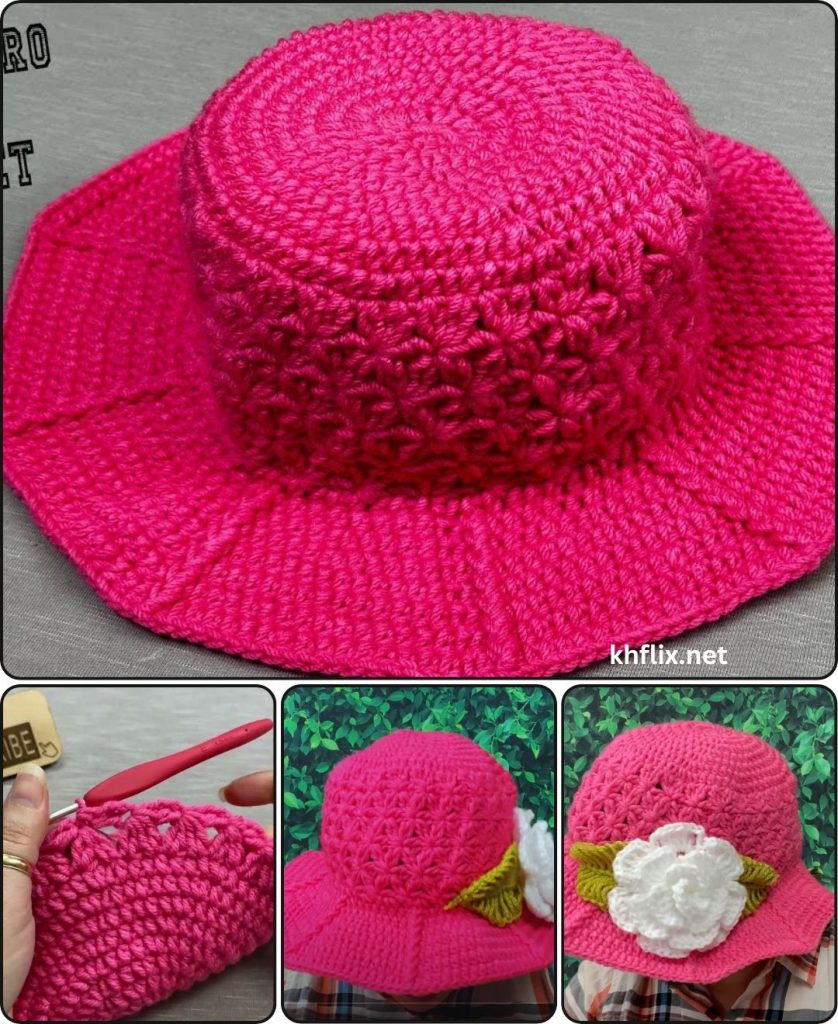
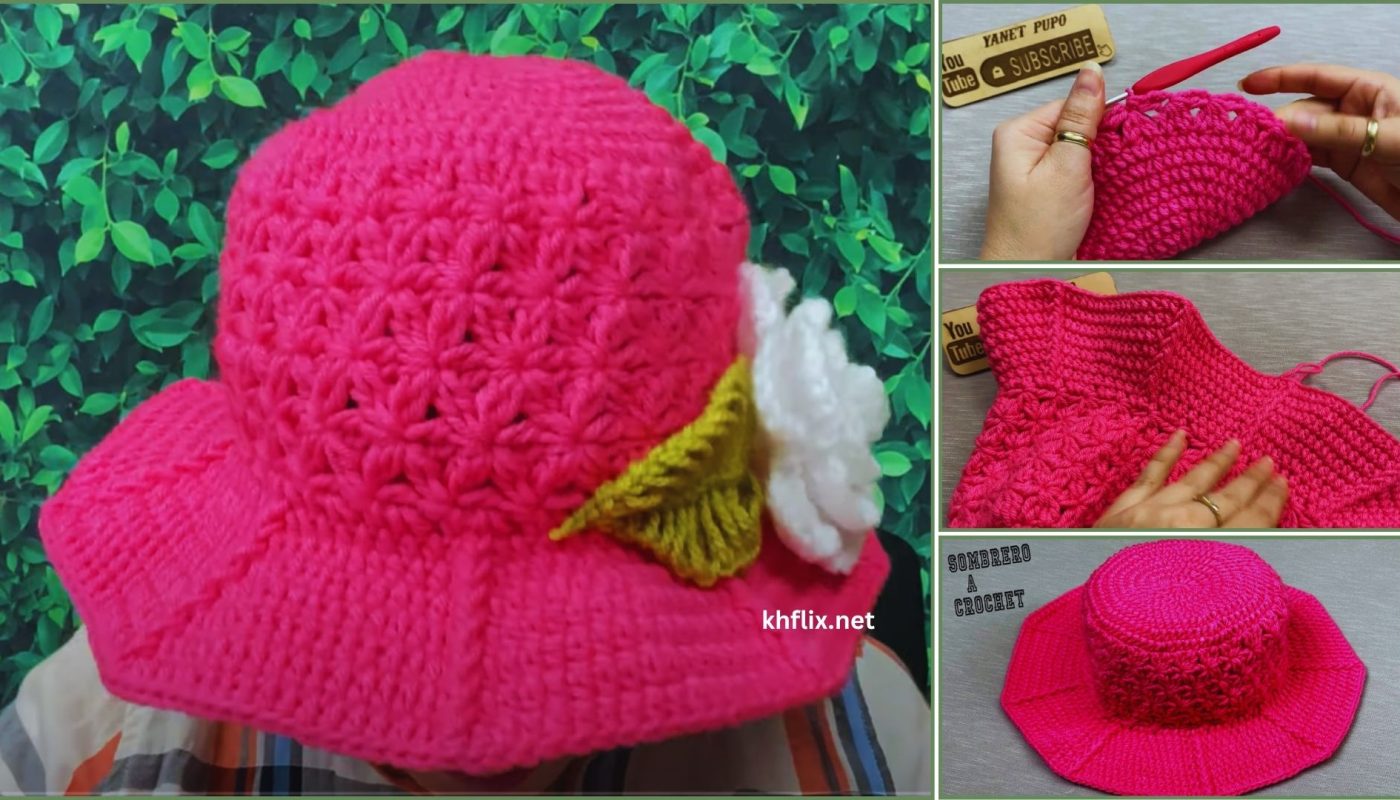
How to Crochet a Hat and a Red Flower (Step-by-Step Tutorial)
We’ll make a classic beanie hat, perfect for adults, and then a pretty, multi-layered flower that will really stand out.
Skill Level: Beginner / Advanced Beginner
This project is ideal if you’re comfortable with:
- Chain (ch): The basic foundation.
- Slip Stitch (sl st): For joining rounds.
- Single Crochet (sc): A dense stitch.
- Half Double Crochet (hdc): A stitch taller than sc.
- Double Crochet (dc): A common, taller stitch.
- Magic Ring (MR) / Chain-2 Start: For a neat center hole.
- Working in rounds: Crocheting in a circular manner.
- Fastening off: Securing your yarn.
- Weaving in ends: The essential finishing touch.
Finished Dimensions (Approximate):
- Hat (Adult Small/Medium): Approximately 20-22 inches (51-56 cm) circumference, 8-9 inches (20-23 cm) tall.
- Red Flower: Approximately 3-4 inches (7.5-10 cm) in diameter.
Materials You’ll Need:
Gathering your materials beforehand ensures a smooth crocheting session.
- Yarn for Hat: Approximately 200-250 yards (180-230 meters) of Worsted Weight (Medium #4) Yarn. Choose any color you like for your hat. Acrylic yarn is a great choice for hats as it’s soft, warm, and easy to care for.
- Yarn for Flower: Approximately 20-30 yards (18-27 meters) of Worsted Weight (Medium #4) Yarn in Red. You might also want a small amount (5-10 yards) of green for optional leaves, and a tiny bit of yellow or orange for the flower center if you choose to add one.
- Crochet Hook: Size H/5.0mm. This is a versatile hook size for worsted weight yarn, creating a good fabric for both the hat and flower.
- Yarn Needle (Tapestry Needle): Essential for seamlessly weaving in all your loose yarn tails and for attaching the flower to the hat.
- Scissors: Any sharp pair of scissors.
- Stitch Marker (Optional but Recommended for Hat): Helps you keep track of the beginning of each round when working in the round.
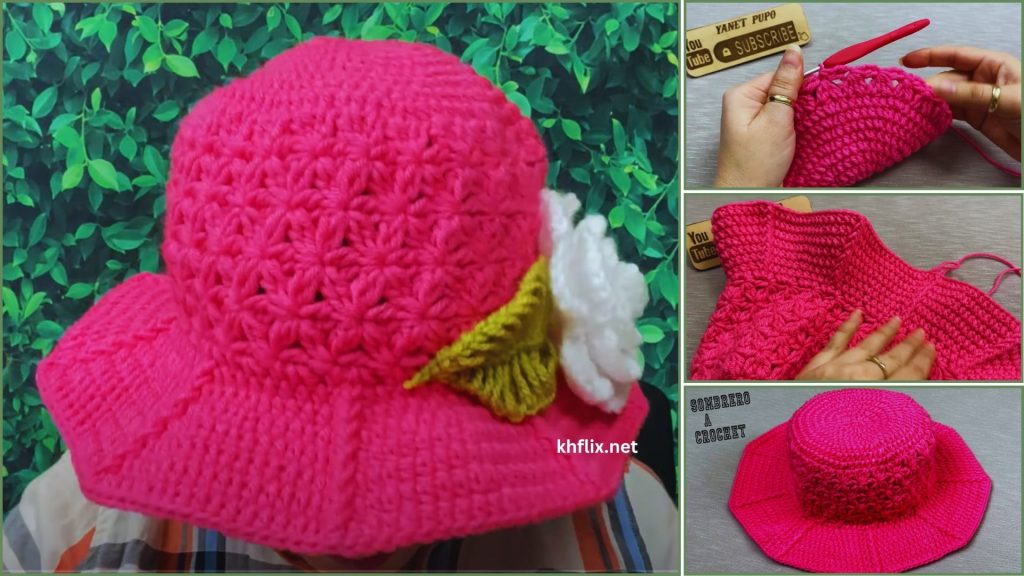
Part 1: How to Crochet the Beanie Hat
We’ll crochet this hat from the top down, meaning you’ll start at the crown and work your way down to the brim. This method is great for adjusting the size as you go.
Hat Construction: Working in Rounds, Top-Down
The hat begins with a small circle and increases evenly in each round until the desired circumference for the head is reached. Then, you’ll work straight rows without increases to create the height of the hat.
Let’s Crochet the Hat!
- Starting the Crown (Magic Ring Method – Recommended for a neat top):
- Make a Magic Ring (MR).
- Round 1: Chain 2 (ch 2 – counts as your first double crochet (dc)). Work 10 more dc stitches into the magic ring. (Total 11 dc stitches including the ch 2).
- Gently pull the tail of the magic ring tight to close the center hole.
- Slip stitch (sl st) into the top of the beginning ch 2 to join the round.
- If Magic Ring is too tricky: Chain 4, then sl st into the first chain to form a ring. Ch 2, then work 10 dc into the center of the ring. Sl st to join.
- Increasing for the Crown:
- Round 2: Chain 2 (counts as first dc). Work 1 dc in the same stitch (this is your first increase). Work 2 dc in each stitch around the round. (Total 22 dc stitches). Sl st to join.
- Round 3: Chain 2. Work 1 dc in the same stitch. Work 1 dc in the next stitch, then 2 dc in the next stitch. Repeat from * to * around the round. (Total 33 dc stitches). Sl st to join.
- Round 4: Chain 2. Work 1 dc in the same stitch. Work 1 dc in the next 2 stitches, then 2 dc in the next stitch. Repeat from * to * around the round. (Total 44 dc stitches). Sl st to join.
- Round 5: Chain 2. Work 1 dc in the same stitch. Work 1 dc in the next 3 stitches, then 2 dc in the next stitch. Repeat from * to * around the round. (Total 55 dc stitches). Sl st to join.
- Round 6: Chain 2. Work 1 dc in the same stitch. Work 1 dc in the next 4 stitches, then 2 dc in the next stitch. Repeat from * to * around the round. (Total 66 dc stitches). Sl st to join.
- Round 7: Chain 2. Work 1 dc in the same stitch. Work 1 dc in the next 5 stitches, then 2 dc in the next stitch. Repeat from * to * around the round. (Total 77 dc stitches). Sl st to join.
- Check Hat Diameter: At the end of Round 7, your hat should measure approximately 6.5-7 inches (16.5-18 cm) in diameter when laid flat. This is generally suitable for an adult small/medium. If you need a larger hat, continue increasing:
- Round 8 (if needed): Ch 2. Work 1 dc in the same stitch. Work 1 dc in the next 6 stitches, then 2 dc in the next stitch. Repeat from * to * around. (Total 88 dc stitches). Sl st to join. (Diameter will be around 7.5-8 inches / 19-20 cm).
- Working the Body of the Hat (No More Increases):
- Now that you’ve reached your desired diameter, you’ll work straight rounds to build the height of the hat.
- Round 8 (or your first non-increase round): Chain 2. Work 1 dc in each stitch around the round. Sl st to join.
- Repeat this round (working 1 dc in each stitch around) until your hat measures approximately 8-9 inches (20-23 cm) from the very top (crown) to the current edge. This will create a classic beanie length. Try it on as you go to ensure it’s the right fit!
- Finishing the Brim (Optional – for a slightly firmer edge):
- For a neater and slightly more defined brim, you can switch to single crochet (sc) or half double crochet (hdc) for the last 1-2 rounds.
- Final Round(s): Chain 1 (does not count as a stitch). Work 1 sc into each stitch around the round. Sl st to join. (Repeat for a second sc round if desired).
- Fasten Off:
- Cut your yarn, leaving a tail about 6 inches (15 cm) long.
- Yarn over with your hook, pull the cut tail completely through the loop left on your hook, and gently tug to secure the knot.
- Weave in all remaining yarn tails from your hat using your yarn needle.
Part 2: How to Crochet the Layered Red Flower
This flower uses simple stitches but layered construction to create a lovely, full bloom. We’ll use red yarn for the petals.
Flower Construction: Layered Petals
This flower is built in layers, with each layer creating a distinct set of petals that stack on top of each other for a 3D effect.
Let’s Crochet the Red Flower!
- Starting the Flower Center (with Red Yarn):
- Make a Magic Ring (MR).
- Round 1: Chain 1 (ch 1 – does NOT count as a stitch). Work 10 single crochet (sc) stitches into the magic ring.
- Gently pull the tail tight to close the center hole.
- Slip stitch (sl st) into the first sc to join the round. (10 sc)
- First Layer of Petals:
- Round 2: *Chain 2. Work 2 double crochet (dc) stitches into the same stitch where you just joined. Chain 2. Slip stitch into the same stitch.* (This completes one petal).
- *Slip stitch into the next sc stitch. Repeat from * to * around the entire round. You will create 10 petals.
- After the last petal, slip stitch into the base of the very first petal to secure the round. (10 petals)
- Fasten off Red yarn, leaving a 4-inch (10 cm) tail. Weave in the starting tail of the magic ring on the back of the flower.
- Second Layer of Petals (creating larger petals behind the first):
- Turn your flower over to the back side slightly. You will see 10 “back bars” or unused loops from the single crochet stitches of Round 1. These are directly behind the stitches of Round 2.
- Join your Red yarn with a slip stitch into any of these back bars from Round 1.
- Round 3: *Chain 3. Work 3 triple/treble crochet (tr) stitches into the same back bar where you just joined. Chain 3. Slip stitch into the same back bar.* (This completes one larger petal).
- *Slip stitch into the next back bar from Round 1. Repeat from * to * around the entire round. You will create 10 larger petals.
- After the last petal, slip stitch into the base of the very first petal (where you joined the yarn) to secure the round. (10 petals)
- Fasten off Red yarn, leaving a 6-8 inch (15-20 cm) tail for attaching to the hat.
Optional: Adding a Green Leaf (or two!)
A simple leaf can add a lovely touch to your flower.
- With Green Yarn:
- Chain 8.
- Starting in the 2nd chain from hook: Sl st in next ch, sc in next ch, hdc in next ch, dc in next 2 ch, hdc in next ch, sc in last ch.
- Fasten off, leaving a 6-inch (15 cm) tail. You can make two if you like!
Part 3: Assembling Your Hat and Flower
Now for the final touch – bringing your hat and flower together!
- Weave in Remaining Ends:
- Before attaching, make sure all short tails from your hat and flower (except the long tail from the flower you saved for attaching) are securely woven into their respective pieces. Use your yarn needle to thread the tail through several stitches of the same color, changing direction once or twice to lock it in place, then trim neatly.
- Position the Flower:
- Place your crocheted red flower (and any optional leaves) on the hat to decide where you want it positioned. Typically, it looks nice slightly off-center on the front of the hat, but it’s entirely up to you!
- Attach the Flower:
- Thread the long yarn tail from your flower onto your yarn needle.
- Holding the flower firmly in place on the hat, begin stitching through the bottom layers of the flower and through the fabric of the hat. Make small, neat stitches from the back of the flower, ensuring they don’t show through too much on the hat’s exterior.
- Go all the way around the base of the flower, securing it firmly. If you added leaves, stitch them on at the same time, tucking them slightly under the flower’s base.
- Once the flower is securely attached, weave the remaining tail into the inside of the hat to hide it.
Congratulations! You’ve successfully crocheted a cozy hat and adorned it with a beautiful red 3D flower! This project showcases your ability to create both functional and decorative crochet pieces. Enjoy wearing your handmade creation or gifting it to someone special!
Video Tutorial 👇