 by
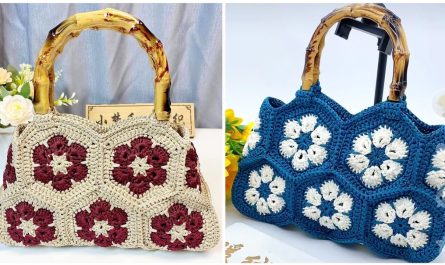
by That’s a fantastic project! A Granny Square Crochet Bag is not only stylish and customizable but also a great way for beginners to master the classic granny square and learn how to assemble multiple pieces into a functional item. This tutorial will walk you through making individual granny squares and then joining them to create a chic and practical tote.
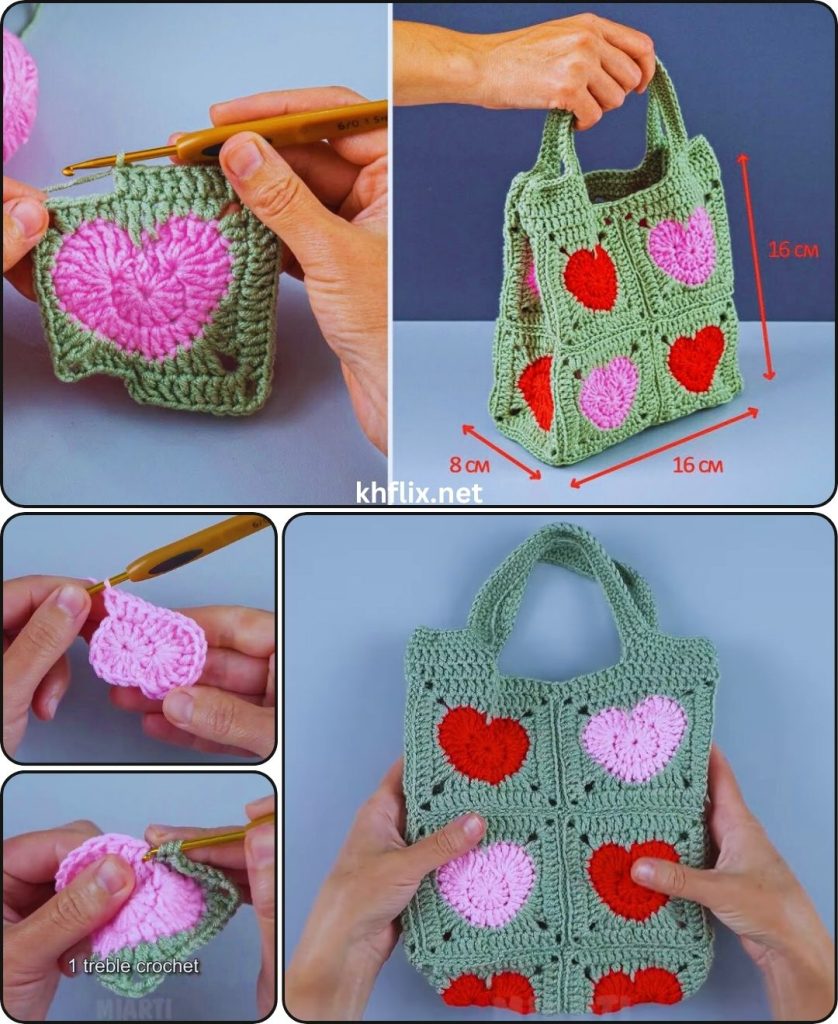
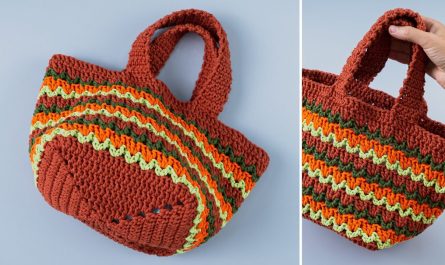
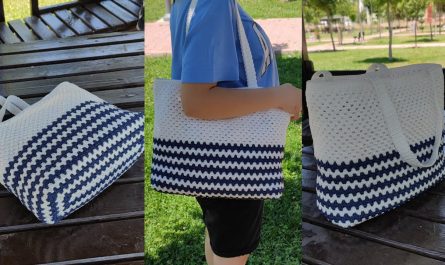
How to Make an Easy Granny Square Crochet Bag
This detailed guide will cover everything from crocheting your very first granny square to stitching them together into a beautiful bag. You’ll be amazed at how quickly these come together!
Skill Level: Beginner
This project is ideal if you’re comfortable with (or ready to learn!):
- Chain (ch): The basic foundation.
- Slip Stitch (sl st): For joining rounds.
- Double Crochet (dc): The primary stitch for granny squares.
- Working in rounds: Crocheting in a circular fashion.
- Magic Ring (MR) / Chain-3 Start: For a neat center hole.
- Changing colors (optional): For multi-colored squares.
- Fastening off: Securing your yarn.
- Weaving in ends: The essential finishing touch.
- Basic seaming: Joining squares with a yarn needle or slip stitch.
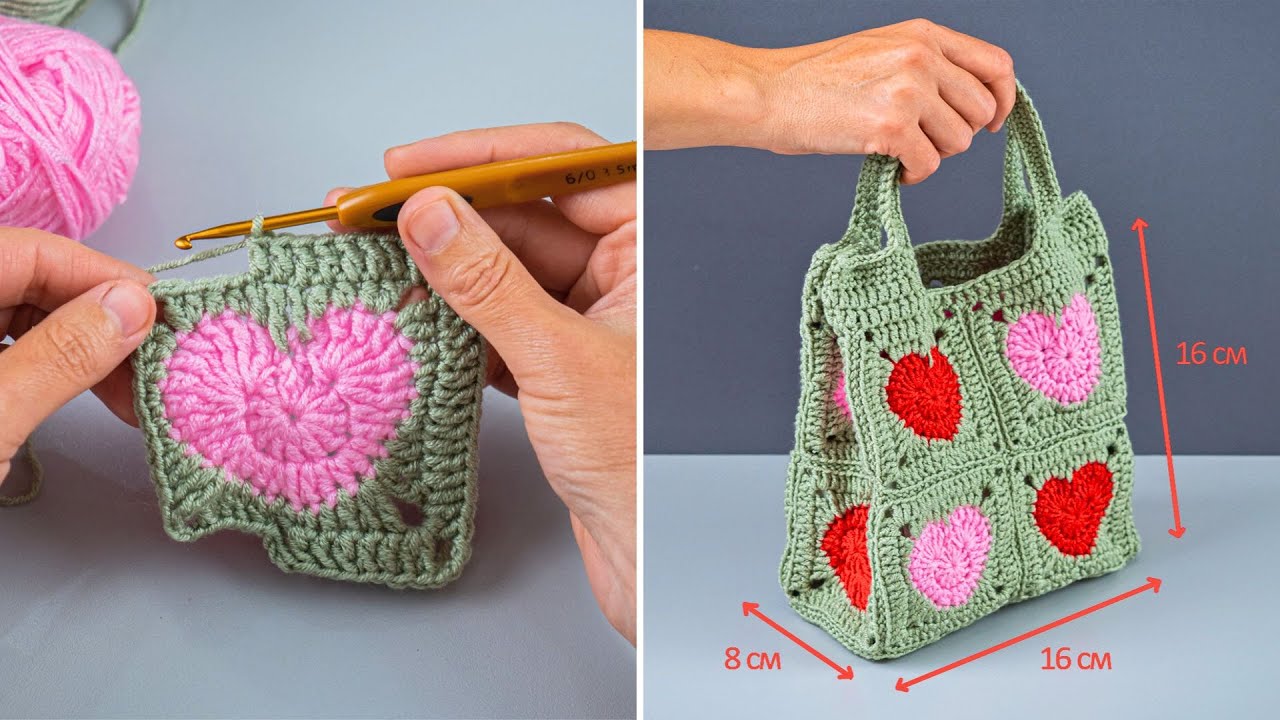
Finished Bag Dimensions (Approximate):
A bag made with 13 squares (9 for the body, 4 for the strap) and 4-inch (10 cm) granny squares will be roughly:
- Body: 12 inches (30 cm) wide by 8 inches (20 cm) tall (excluding the strap).
- Strap: Adjustable length.
You can easily adjust the size of your bag by making more or fewer squares, or by making larger or smaller squares.
Materials You’ll Need:
Gathering your materials beforehand ensures a smooth and enjoyable crocheting session.
- Yarn: Approximately 300-400 yards (275-365 meters) of Worsted Weight (Medium #4) Cotton or Acrylic Yarn.
- Why Cotton/Acrylic? Cotton provides good structure and durability for a bag, while acrylic is widely available, easy to work with, and comes in many colors.
- Color Choices: This is where you can get creative! You can make all your squares the same color, use a different color for each round of a square, or make each square a completely different color. For a multi-color look, you’ll need several skeins (50-100 yards each) in your chosen palette.
- Crochet Hook: Size H/5.0mm. This is a versatile hook size for worsted weight yarn, creating a good, sturdy fabric for your bag.
- Yarn Needle (Tapestry Needle): Essential for seamlessly weaving in all your loose yarn tails and for joining the granny squares. It has a blunt tip and a large eye.
- Scissors: Any sharp pair of scissors.
- Stitch Markers (Optional): Helpful for marking corners or specific stitches if you find your place easily.
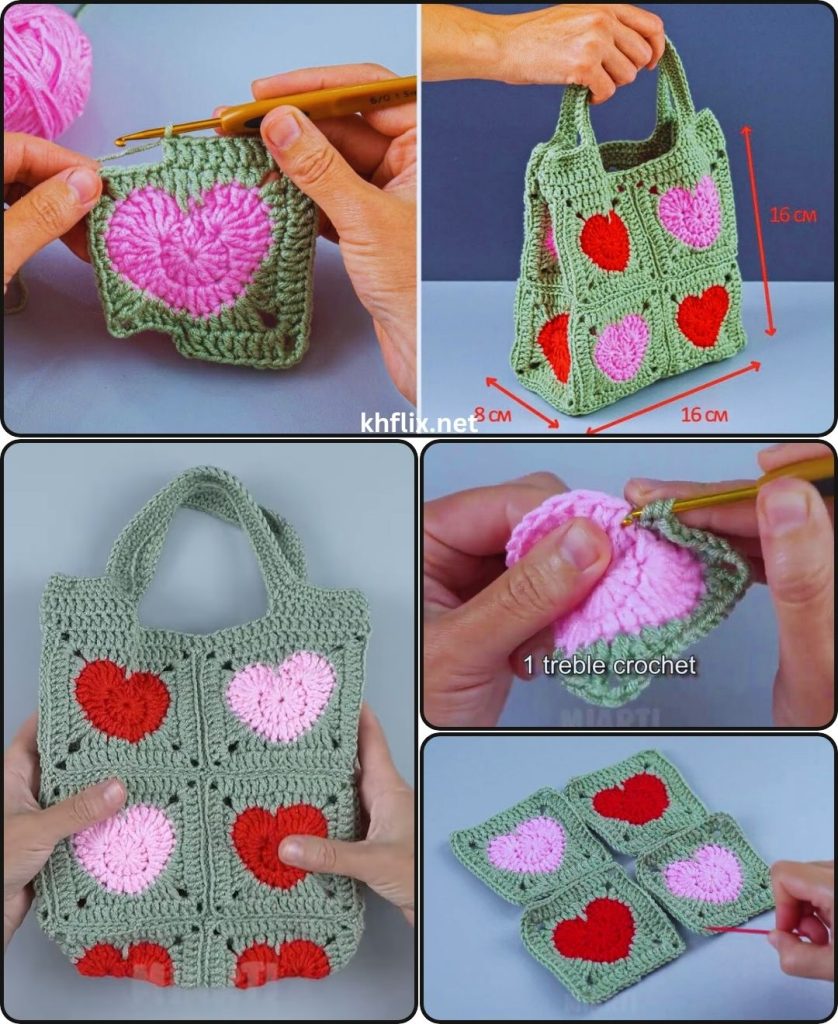
Part 1: How to Crochet a Classic Granny Square
The heart of your bag! We’ll make a standard 3-round granny square. You will need a total of 9 squares for the bag body and 4 squares for the strap (adjust as needed for your desired bag and strap size).
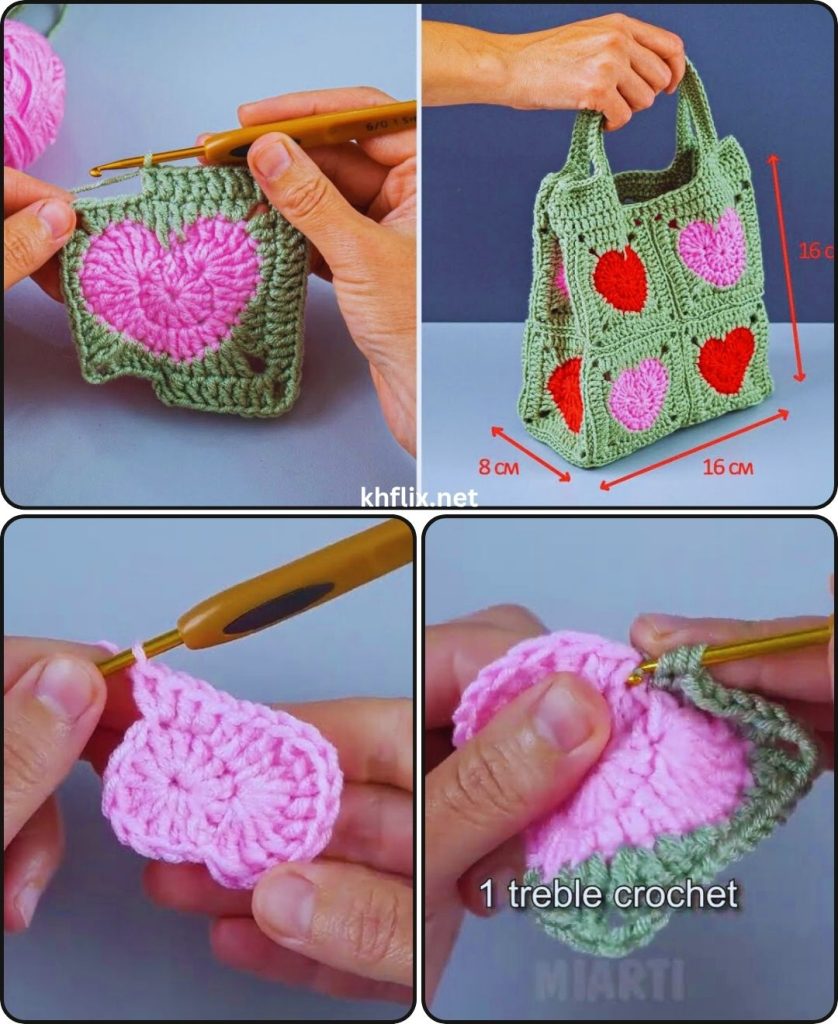
Granny Square Construction: Working in Rounds, Corner to Corner
Granny squares are built by working clusters of stitches (usually 3 double crochets) into chain spaces, creating a distinctive lacy, square fabric.
Let’s Crochet a Granny Square!
- Starting the Square (with Color 1):
- Make a slip knot and place it onto your H/5.0mm crochet hook.
- Magic Ring (MR) Method (Recommended for a neat center): Create a magic ring.
- (Alternative start if Magic Ring is tricky): Chain 4, then slip stitch (sl st) into the first chain to form a ring.
- Round 1: Chain 3 (ch 3 – counts as your first double crochet (dc)). Work 2 dc into the ring. (This is your first 3-dc cluster).
- Chain 3 (ch 3 – this creates your first corner space).
- Work 3 dc into the ring. (Second 3-dc cluster).
- Chain 3 (ch 3 – second corner space).
- Work 3 dc into the ring. (Third 3-dc cluster).
- Chain 3 (ch 3 – third corner space).
- Work 3 dc into the ring. (Fourth 3-dc cluster).
- Chain 3 (ch 3 – fourth corner space).
- If using a magic ring, gently pull the tail tight to close the center hole.
- Slip stitch (sl st) into the top of the beginning ch 3 to join the round. You should have 4 clusters of 3 dc stitches and 4 chain-3 corner spaces.
- Fasten off Color 1, leaving a 4-inch (10 cm) tail for weaving in.
- Round 2 (Joining New Color / Expanding the Square – with Color 2):
- Join Color 2 with a slip stitch (sl st) into any of the chain-3 corner spaces from Round 1.
- Chain 3 (ch 3 – counts as first dc). Work 2 dc into the same corner space. (First 3-dc cluster for this round).
- Chain 3 (ch 3 – this is the new corner space).
- Work 3 dc into the same corner space. (This completes the first corner of Round 2).
- *Chain 1 (ch 1 – this creates the side space between clusters).
- In the next chain-3 corner space: Work (3 dc, ch 3, 3 dc).* (This completes a corner).
- Repeat from * to * around the remaining two corner spaces.
- Chain 1 (ch 1 – for the last side space).
- Slip stitch (sl st) into the top of the beginning ch 3 to join the round. You should now have 8 clusters of 3 dc stitches, 4 chain-3 corner spaces, and 4 chain-1 side spaces.
- Fasten off Color 2, leaving a 4-inch (10 cm) tail.
- Round 3 (Adding More Detail – with Color 3 or repeat Color 1):
- Join Color 3 (or the same as Color 1) with a slip stitch (sl st) into any of the chain-3 corner spaces from Round 2.
- Chain 3 (ch 3 – counts as first dc). Work 2 dc into the same corner space.
- Chain 3 (ch 3 – new corner space).
- Work 3 dc into the same corner space. (Completes first corner).
- *Chain 1 (ch 1 – side space).
- Work 3 dc into the next chain-1 side space from Round 2. (This is a side cluster).
- Chain 1 (ch 1 – side space).
- In the next chain-3 corner space: Work (3 dc, ch 3, 3 dc).* (Completes a corner).
- Repeat from * to * around the remaining two sides and corners.
- Chain 1 (ch 1 – for the last side space).
- Slip stitch (sl st) into the top of the beginning ch 3 to join the round.
- Fasten off, leaving a 4-inch (10 cm) tail.
- Repeat!
- Make a total of 13 granny squares (or your desired number). This usually means 9 for the main bag body and 4 for the strap.
- Weave in all ends for each square as you finish them. This is crucial for a tidy project! Use your yarn needle to thread each tail through several stitches on the back of the square, changing direction once or twice to secure, then trim neatly.
Part 2: Assembling Your Granny Square Bag
Now for the fun part: bringing your squares to life! There are many ways to arrange them, but a classic layout works perfectly for a simple tote.
Bag Layout (for a 3×3 square front/back + strap)
- Front Panel: 3 squares wide x 3 squares tall
- Back Panel: 3 squares wide x 3 squares tall
- Bottom: The bottom of the bag is formed by joining the front and back panels.
- Strap: 4 squares joined in a line.
Joining the Squares: The Whip Stitch Method (Beginner-Friendly)
The whip stitch is a simple and effective way to seam crochet pieces together.
- Arrange Your Squares:
- Lay out your 9 body squares on a flat surface in a 3×3 grid. This helps visualize the front and back of your bag. Decide which sides will face out.
- Lay out your 4 strap squares in a single line.
- Seaming the Squares for the Panels:
- Take two squares you want to join. Place them right sides facing each other (so the backs are facing out). Align the stitches along the edge you want to join.
- Cut a long piece of yarn (about 3 times the length of the edge you’re joining) in a color that matches your squares or a contrasting color for a design feature. Thread it onto your yarn needle.
- To whip stitch: Insert your needle from back to front through both loops of the first stitch on both squares. Pull the yarn through, leaving a tail to weave in later.
- Insert your needle from back to front through both loops of the next stitch on both squares. Pull the yarn through.
- Repeat this process, always going in the same direction, through both loops of each corresponding stitch along the edge. Keep your tension consistent but not too tight, or it will pucker.
- Continue joining squares side-by-side until you have a 3×3 grid (your front panel).
- Repeat to create a second 3×3 grid (your back panel).
- Seaming the Strap:
- Join your 4 strap squares in a straight line using the same whip stitch method. You’ll end up with a long strip.
- Assembling the Bag Body:
- Place your front panel on top of your back panel, with right sides facing each other.
- Align the edges:
- Join the bottom edge of the front panel to the bottom edge of the back panel using the whip stitch.
- Join the two side edges of the front panel to the two side edges of the back panel, leaving the top open.
- Once joined, turn the bag right side out. You now have a basic pouch!
- Attaching the Strap:
- Locate the top corners of your bag.
- Place one end of your strap on the inside of one top corner of the bag, aligning the edges.
- Using your yarn needle and a new piece of yarn, securely stitch the strap end to the bag corner. Go through multiple times for strength.
- Repeat for the other end of the strap, attaching it to the opposite top corner of the bag. Ensure the strap isn’t twisted before you sew it down.
Part 3: Final Finishing Touches
- Weave in Any Remaining Ends:
- Double-check that all your loose yarn tails from joining the squares and attaching the strap are securely woven in. This is crucial for a clean and durable finished bag.
- Optional: Bag Lining (for added durability and neatness):
- If you want your bag to be extra sturdy and prevent stretching, you can sew a fabric lining. This is a separate sewing project, but it will significantly enhance the bag’s longevity and appearance.
- Measure the finished dimensions of your bag.
- Cut two pieces of fabric for the main body (same size as your crochet panels, plus seam allowance).
- Cut two pieces for the strap (same size as your crochet strap, plus seam allowance).
- Sew the fabric pieces together to form a fabric bag, then hand-stitch or machine-stitch it inside your crocheted bag.
- Optional: Buttons or Closures:
- You can crochet a simple loop and sew on a decorative button for closure, or add a magnetic snap for security.
Congratulations! You’ve successfully crocheted and assembled an Easy Granny Square Crochet Bag! This project is a fantastic way to develop your crochet skills, particularly in modular construction. Your new bag is a stylish accessory that showcases your creativity and craftsmanship. What beautiful colors will you choose for your next one?