 by
by Here is a detailed, long-form article on how to crochet a minimal and exceptionally neat tote bag, complete with a step-by-step pattern. This guide focuses on techniques that produce a clean, modern, and professional-looking finished product.

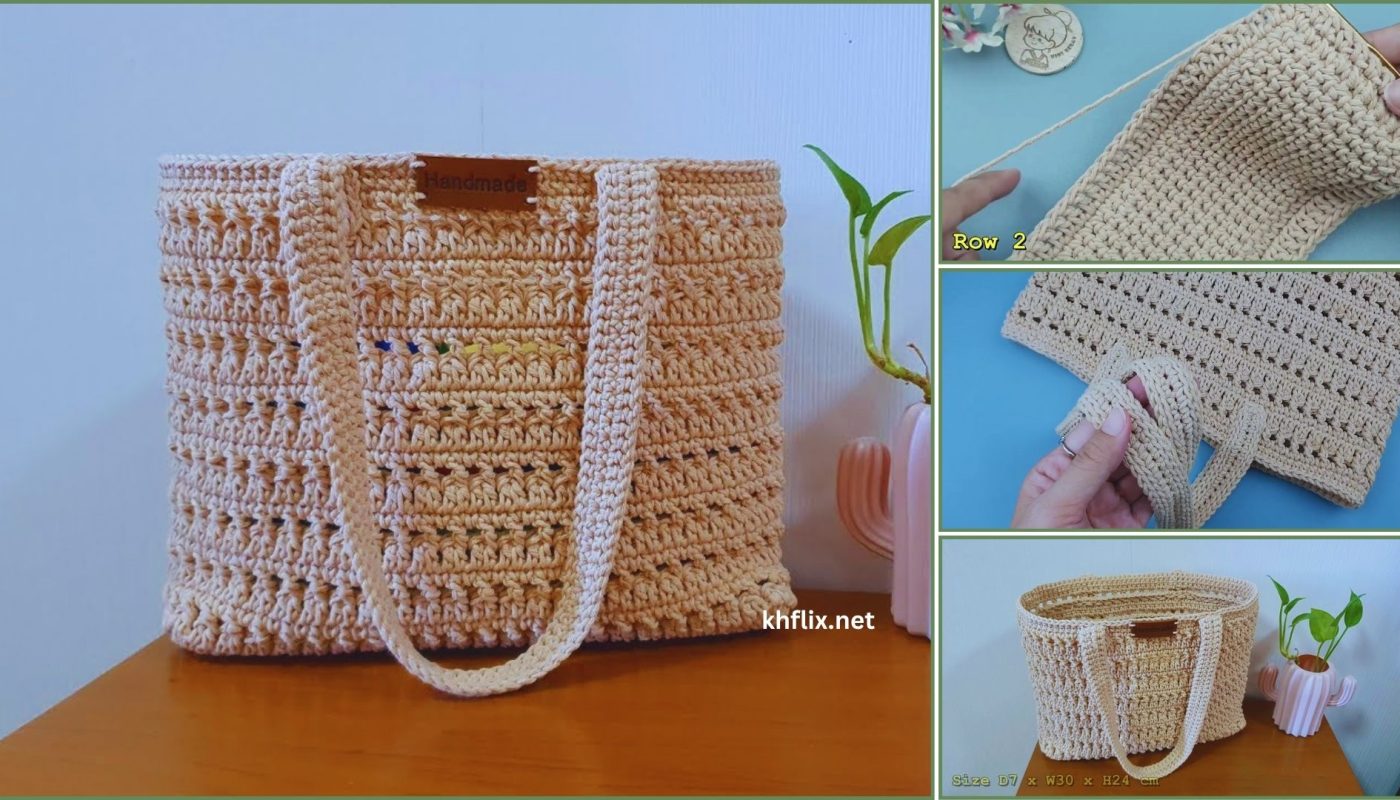
The Minimalist’s Dream: How to Crochet a Super Neat Tote Bag
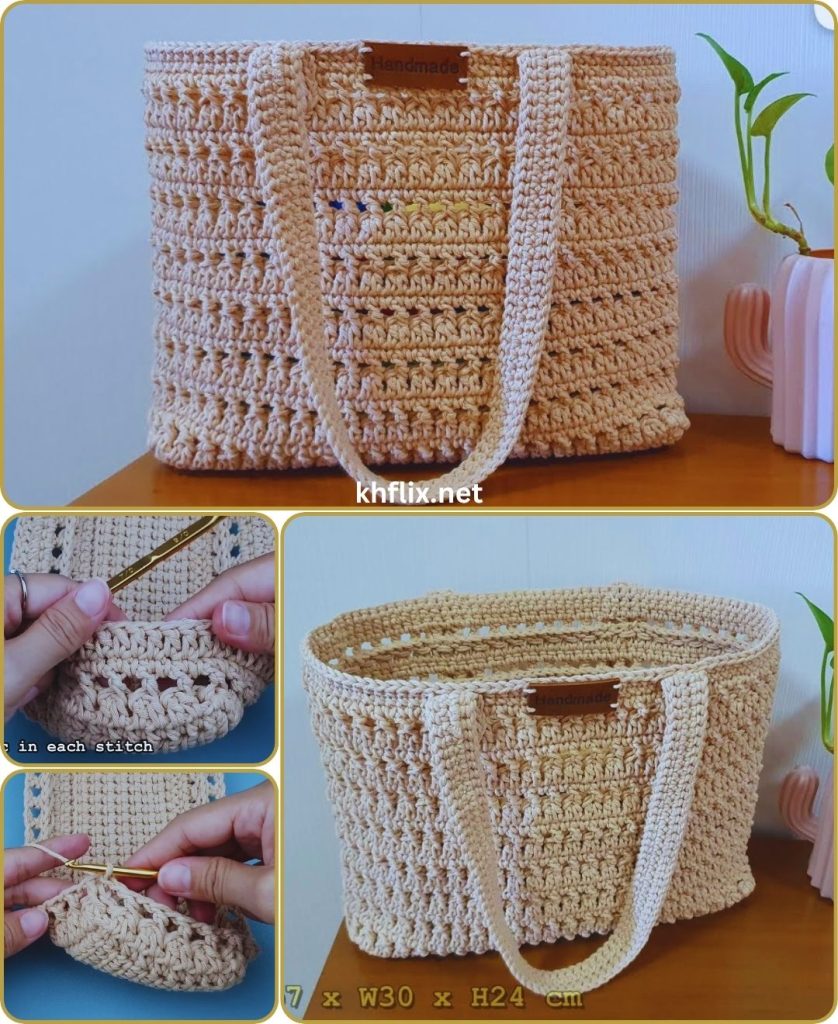
In a world of fast fashion, there is a quiet luxury in carrying something timeless, functional, and created with intention. This Minimal Crochet Tote Bag is the epitome of that philosophy. It’s a shoulder bag designed not with intricate lace or loud colors, but with a focus on perfect, uniform stitches that create a dense, high-quality fabric. Its beauty lies in its simplicity and its impeccable construction.
This comprehensive guide will walk you through every step of creating this elegant and sturdy tote. The secret to its “super neat” appearance lies in a special stitch—the Waistcoat Stitch—which mimics the look of knitting and produces a fabric with virtually no gaps. This project is perfect for an advanced beginner ready to master a new technique or an intermediate crocheter who appreciates clean lines and a polished finish.
The Secret to a “Super Neat” Look: The Three Pillars
What elevates this bag from a simple crochet project to a professional-looking accessory? It comes down to three key elements:
- The Yarn Choice: We’ll be using a smooth, plied cotton or T-shirt yarn. These yarns don’t have the “halo” or fuzz of wool or acrylics, which means every stitch is clearly defined. The structure of these yarns contributes to a very clean and modern look.
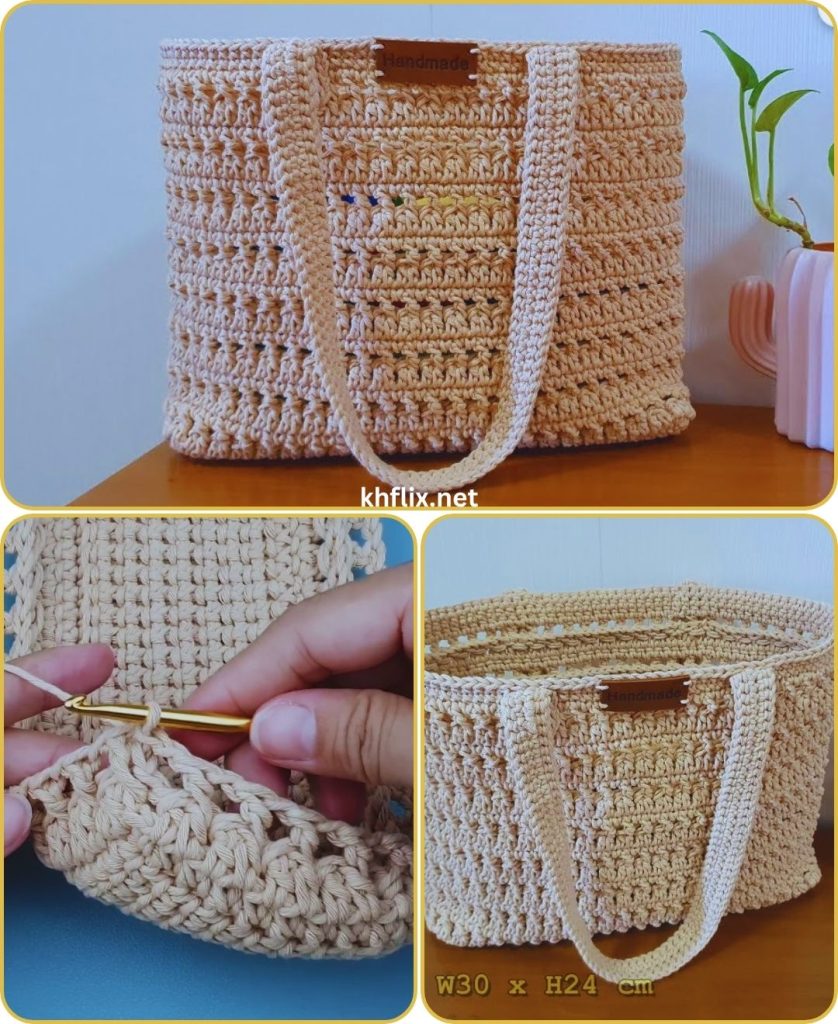
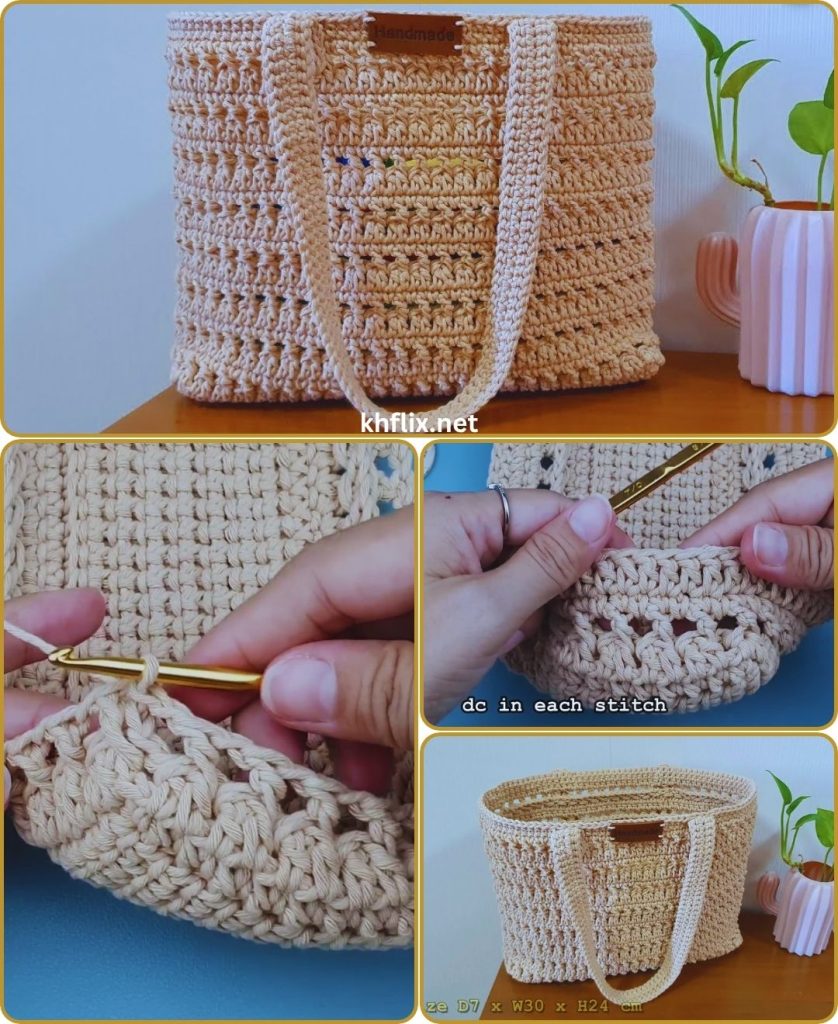
- The Stitch: The Waistcoat Stitch (Center Single Crochet): This is the star of the show. Instead of working a standard single crochet under the top two loops, you insert your hook into the very center of the “V” of the stitch from the row below. This stacks the stitches perfectly on top of one another, creating a dense, non-stretchy, and beautifully woven fabric.
- The Construction: Seamlessly in the Round: The entire bag, from the base to the handles, is worked continuously in the round. This means no unsightly seams running up the side of your bag, contributing to its flawless, minimalist aesthetic.
Project Overview & Specifications
- Skill Level: Advanced Beginner / Intermediate (must be comfortable with working in the round and have consistent tension).
- Finished Dimensions (Approximate):
- Base Diameter: 10 inches (25.5 cm)
- Height: 12 inches (30.5 cm)
- Strap Drop: 10 inches (25.5 cm)
- Gauge: Approximately 12 Waistcoat stitches and 14 rows = 4 inches x 4 inches (10 cm x 10 cm). Consistent tension is more important than exact gauge.
Materials & Tools
- Yarn: Approx. 450-500 yards of a smooth, sturdy yarn.
- Recommended: Worsted weight (Category 4) Mercerized Cotton, a Cotton/Linen blend, or T-shirt yarn. Choose a yarn that is plied (twisted) rather than a single strand for best stitch definition.
- Crochet Hook: 5.0mm (H−8). You may need to go up or down a size to achieve a stiff fabric with your chosen yarn. It’s better to work this stitch a bit looser than your normal tension.
- Stitch Marker: Essential for tracking the beginning of your rounds.
- Scissors: Sharp scissors for a clean cut.
- Tapestry Needle: For weaving in ends seamlessly.
- Measuring Tape: To check the size of your base and height.
Stitches & Abbreviations (US Crochet Terms)
- ch: chain
- st(s): stitch(es)
- sl st: slip stitch
- sc: single crochet
- inc: increase (work 2 stitches in the same stitch)
- wst (Waistcoat Stitch / Center Single Crochet): Insert your hook into the center of the “V” of the post of the stitch from the round below, then complete a single crochet as normal (yarn over, pull up a loop, yarn over, pull through both loops).
- wst-inc: Waistcoat Stitch Increase (work 2 waistcoat stitches in the same stitch).
- BLO: back loop only
- […]: repeat instructions within brackets as directed.
The Pattern: Step-by-Step Instructions
Part 1: The Circular Base
We will create a perfectly flat circular base working in a continuous spiral. Place your stitch marker in the first stitch of each round and move it up as you go.
Start: Create a magic ring (magic circle).
Rnd 1: Work 6 sc into the magic ring. Pull the tail to close the ring tightly. (6 sts)
Rnd 2: Inc in each stitch around. (12 sts)
Rnd 3: [Sc in the next st, inc] repeat 6 times. (18 sts)
Rnd 4: [Sc in the next 2 sts, inc] repeat 6 times. (24 sts)
Rnd 5: [Sc in the next 3 sts, inc] repeat 6 times. (30 sts)
Rnd 6: [Sc in the next 4 sts, inc] repeat 6 times. (36 sts)
Rnd 7: [Sc in the next 5 sts, inc] repeat 6 times. (42 sts)
Rnd 8: [Sc in the next 6 sts, inc] repeat 6 times. (48 sts)
Continue this pattern of increases (adding one more single crochet between increases each round) until your circular base reaches the desired diameter. For this pattern, continue until you have completed the round: [Sc in the next 14 sts, inc] repeat 6 times.
- This will be Rnd 16 and will result in a total of 96 stitches. Your base should measure approximately 10 inches (25.5 cm) in diameter and should lay completely flat.
Part 2: Building the Body with the Waistcoat Stitch
Now we transition from the base to the walls of the bag.
Rnd 17 (Transition Round):
- To create a defined edge, work 1 sc in the back loop only (BLO) of every stitch around. Do not increase. (96 sts)
Rnd 18 (Begin Waistcoat Stitch):
- Now, we begin the signature stitch. Work 1 wst in every stitch around. Remember to insert your hook directly into the center of the ‘V’ of the stitch below.
- Tip: It’s easier to work the waistcoat stitch if your tension is slightly looser than normal. Try to pull up your first loop a little higher. (96 sts)
Rnd 19 and beyond:
- Continue working rounds of wst in every stitch. Because you are working in a continuous spiral, the stitches will stack beautifully.
- Continue until the body of the bag measures approximately 11-12 inches (28-30.5 cm) high from the base, or your desired height. Do not fasten off.
Part 3: Creating the Integrated Shoulder Straps
For a truly minimal and strong design, we will build the straps directly out of the bag’s body.
Step 1: Mark the Strap Placement
- Your bag has 96 stitches. We will divide this into four equal sections of 24 stitches.
- From your beginning-of-round marker, count 12 stitches and place a marker (Marker A).
- From Marker A, count 24 stitches and place another marker (Marker B). This 24-stitch section will be one side of the bag.
- From Marker B, count 24 stitches and place another marker (Marker C). This 24-stitch section will be the first handle opening.
- From Marker C, count 24 stitches and place another marker (Marker D). This is the other side of the bag.
- The remaining 24 stitches (between Marker D and your start-of-round marker) will be the second handle opening.
Step 2: The Handle Foundation Round
- Continue working in wst from your start-of-round marker until you reach Marker B.
- At Marker B, chain 60 (or your desired strap length; 60 chains will create a comfortable shoulder strap). Be careful not to twist your chain.
- Skip all 24 stitches between Marker B and Marker C.
- Work a wst in the stitch at Marker C and continue working in wst until you reach Marker D.
- At Marker D, chain 60 again.
- Skip the final 24 stitches between Marker D and the start of the round.
- Join with a slip stitch to the first stitch of the round. For this round only, we join to stabilize the structure before building up the handles.
Step 3: Reinforcing the Straps
- Next Round: Chain 1. Work 1 sc in each wst across the side of the bag. When you reach the chain-60 strap, work 1 sc in each chain. Continue with sc across the other side of the bag and in each chain of the second strap. Join with a sl st to the first sc.
- Following 3 Rounds: Chain 1. Work 1 sc in every single stitch around the entire top of the bag, including the straps. This builds a sturdy, comfortable strap that won’t dig into your shoulder. Join with a sl st at the end of each round.
Part 4: The Final Finishing Edge
A clean edge is non-negotiable for a minimalist bag.
Final Round:
- To create a crisp, professional top edge, work one final round of slip stitches in every stitch around the top opening and straps.
- Keep your tension for these slip stitches even and not too tight, as this can cause the opening to pucker.
- Once you’ve slip stitched all the way around, cut your yarn, leaving a 6-inch tail. Fasten off.
Finishing & Professional Touches
Don’t rush this final stage; it’s what makes your project shine.
- Weave in Your Ends: Using your tapestry needle, meticulously weave in the starting and ending tails. For the waistcoat stitch fabric, it’s best to weave the ends vertically, following the path of the stitches on the inside of the bag. This makes them virtually invisible.
- Add a Lining (Optional): For ultimate durability and a luxurious feel, you can add a fabric lining. Cut two pieces of canvas or cotton to the shape of your bag, sew them together, and hand-stitch the lining to the inside of the bag just below the top edge.
- Add a Closure (Optional): A magnetic snap sewn onto the top inside edges can provide extra security.
- Add a Tag: A small leather or cork tag stitched onto the side adds a touch of bespoke branding to your handmade item.
Enjoy your beautiful, super neat, and incredibly versatile crochet tote bag. Its understated elegance is a testament to your skill and patience, and it’s sure to be a cherished accessory for years to come.