 by
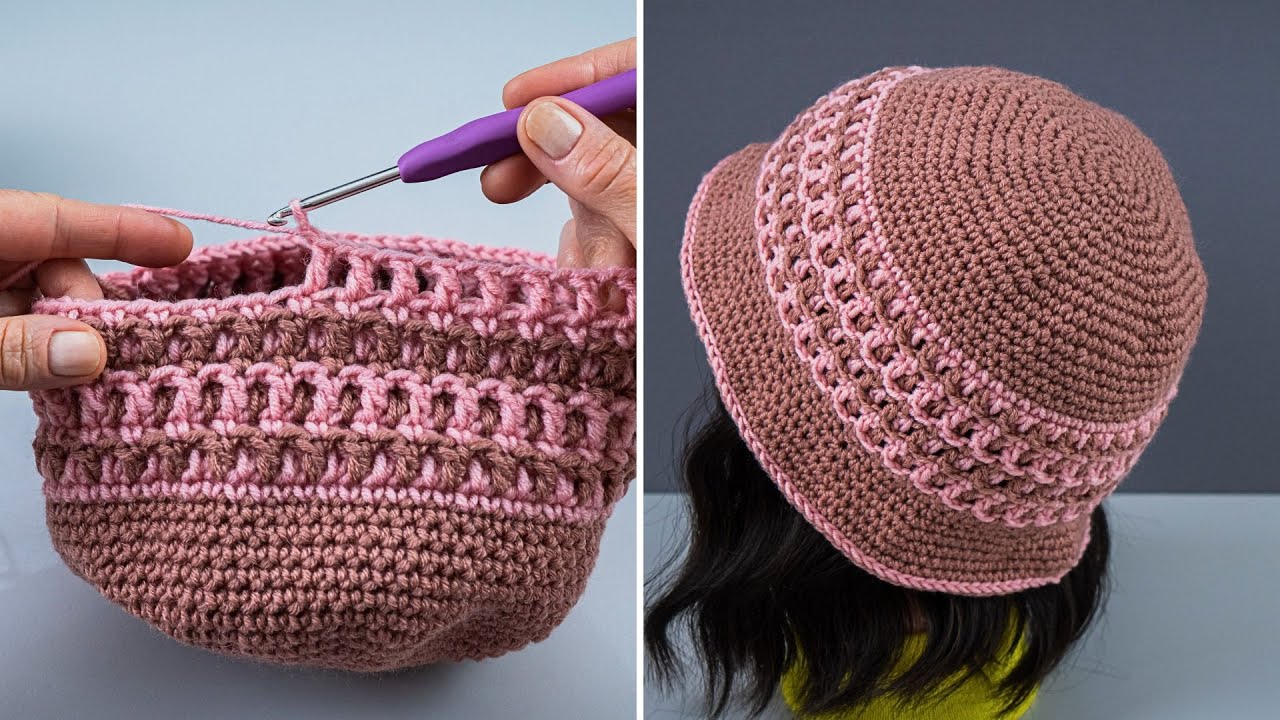
by Welcome! Here’s a in-depth, step-by-step tutorial on how to crochet an amazing striped bucket hat, perfect for all skill levels—from confident beginners to experienced crocheters looking for a creative, fashionable project.
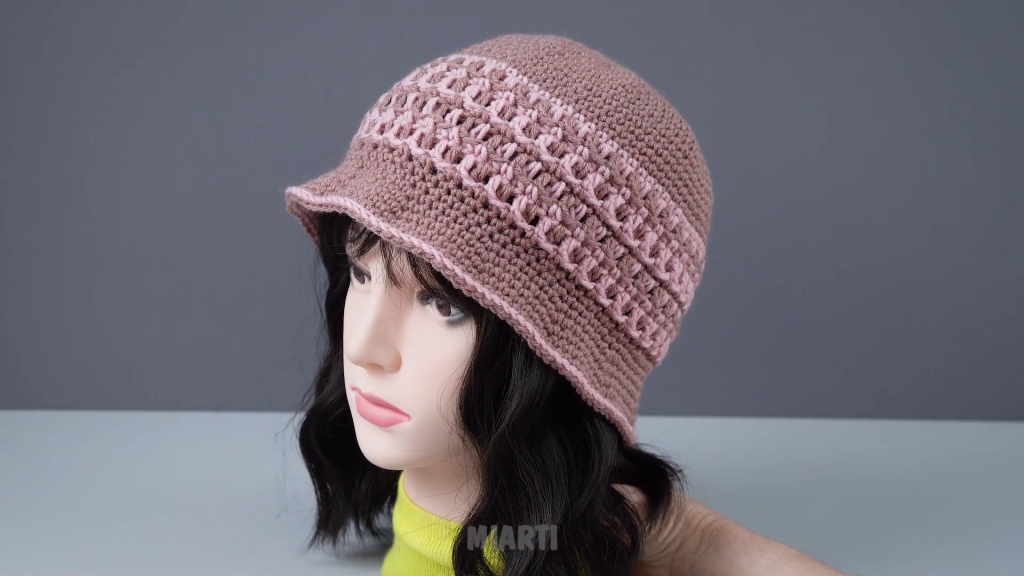
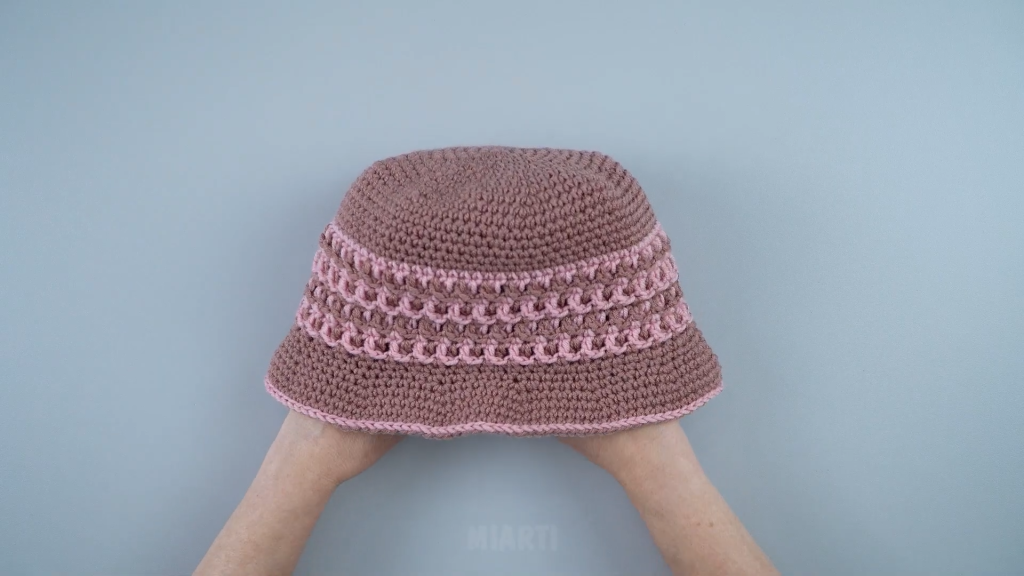
Crocheting a bucket hat with colorful stripes is not only fun but also results in a fashionable and functional accessory. Bucket hats are practical for all seasons, and with the right yarn and colors, they can become a true statement piece. In this tutorial, you’ll learn how to crochet a bucket hat with beautiful, bold striped colors, using simple stitches and techniques that give amazing results.
🧶 Why You’ll Love This Project
✔️ Trendy and stylish
✔️ Customizable color combinations
✔️ Beginner-friendly pattern
✔️ Great stash-busting project
✔️ Perfect for festivals, beach days, or everyday wear
🧵 Materials You’ll Need
| Item | Description |
|---|---|
| Yarn | Worsted weight cotton or cotton blend yarn in 2–4 colors |
| Hook | 4.0 mm (G-6) crochet hook |
| Tapestry needle | For weaving in ends |
| Scissors | To cut yarn |
| Measuring tape | To check hat size |
| Stitch marker (optional) | Helps track round starts |
✅ Yarn Note: Cotton yarn holds structure well and is ideal for summer. Try brands like Lily Sugar’n Cream, Paintbox Cotton Aran, or Premier Home Cotton.
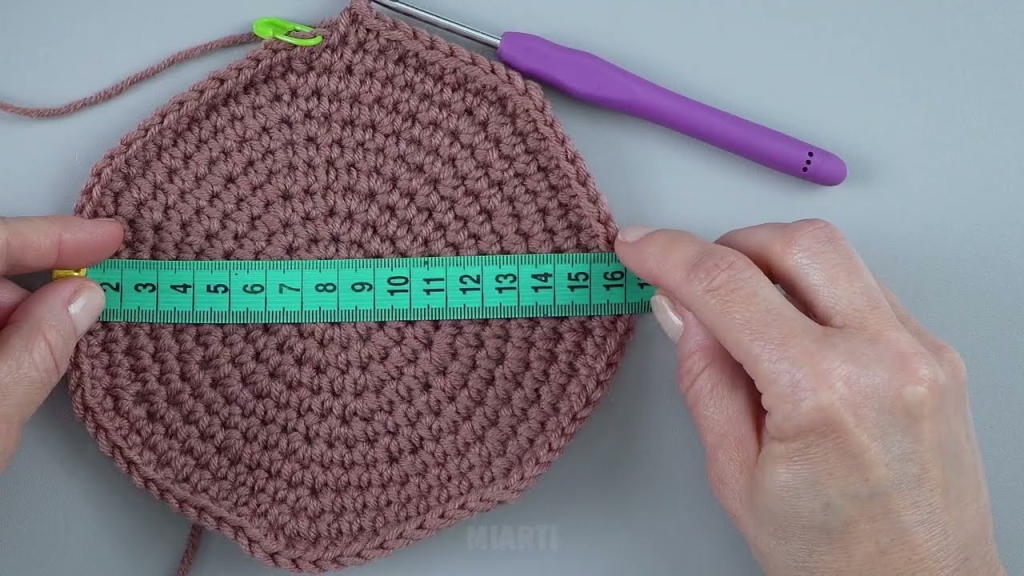
📏 Size Guide
This pattern makes a standard adult-size hat that fits most heads (21–23” circumference). You can easily adjust sizing using more or fewer increase rounds.
| Hat Part | Measurement |
|---|---|
| Crown Diameter | ~6.5–7 inches |
| Side Height | ~3.5–4 inches |
| Brim Length | ~2.5–3 inches |
| Total Hat Height | ~7–8 inches |
🧠 Skill Level: Confident Beginner
You should know how to:
- Work in the round
- Do basic stitches (especially single crochet)
- Change colors cleanly
- Increase evenly
🧵 Abbreviations (US Terms)
| Abbreviation | Meaning |
|---|---|
| ch | chain |
| sc | single crochet |
| sl st | slip stitch |
| st | stitch |
| inc | increase (2 sc in 1 stitch) |
🧶 Gauge
15 sc and 16 rows = 4″ x 4″ (10 cm x 10 cm)
(Not critical for this project, but helpful for sizing.)
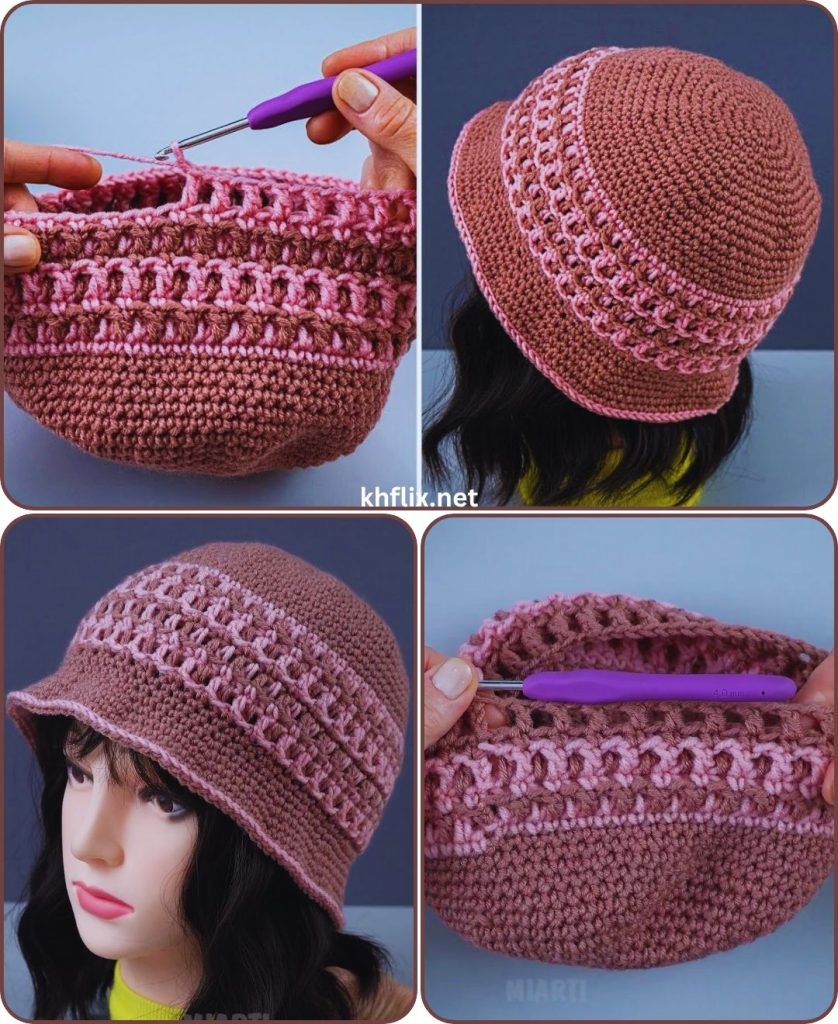
🎩 Pattern Breakdown
The hat is worked from the top down in three main sections:
- Crown (top of the hat)
- Body/Sides
- Brim
We’ll be changing colors every few rounds to create eye-catching stripes.
🌈 Color Planning
Pick 2 to 4 contrasting colors (e.g. white, black, yellow, red). You can do thick stripes (2 rows per color) or thinner ones (1 row per color). Plan ahead by sketching or arranging yarn before you start.
🪡 Step-by-Step Pattern
🎯 Step 1: Start the Crown (Top Circle)
Using Color A (e.g. white)
Round 1: Make a magic ring. Ch 1, work 6 sc into the ring. Pull tight, join with sl st. (6 sts)

Round 2: Ch 1, 2 sc in each st around. Join. (12 sts)

Round 3: Ch 1, *1 sc, inc* repeat around. Join. (18 sts)

Round 4: Ch 1, *2 sc, inc* repeat. Join. (24 sts)

Round 5: Ch 1, *3 sc, inc* repeat. Join. (30 sts)

Round 6: Ch 1, *4 sc, inc* repeat. Join. (36 sts)

Round 7: Ch 1, *5 sc, inc* repeat. Join. (42 sts)

Round 8: Ch 1, *6 sc, inc* repeat. Join. (48 sts)

Round 9: Ch 1, *7 sc, inc* repeat. Join. (54 sts)

Round 10: Ch 1, *8 sc, inc* repeat. Join. (60 sts)

Round 11: Ch 1, *9 sc, inc* repeat. Join. (66 sts)
🧠 Stop increasing when your crown reaches about 6.5–7 inches in diameter for adult size.
🎯 Step 2: Create the Hat Body (Sides)
Start shaping the downward wall of the bucket hat.
Change to Color B (e.g. black)
Round 12: Ch 1, sc in each st around. Join. (66 sts)
Add Stripes!
Alternate between Color A, Color C, and Color D every 1–2 rounds to create stripes.
Example:
Rounds 13–14: Color C – sc around, join. (66 sts)
Rounds 15–16: Color A – sc around, join. (66 sts)
Rounds 17–18: Color D – sc around, join. (66 sts)
Rounds 19–20: Color A – sc around, join. (66 sts)
Continue until the body measures about 3.5 to 4 inches tall from the crown’s edge.
🧶 You can mix thick and thin stripes (e.g. 1-row, 2-row, or even 3-row stripes) for a unique pattern!
🎯 Step 3: Shape the Brim
The brim will gently flare out using increases.
Continue in your stripe pattern or switch to one solid color for the brim.
Round 21: Ch 1, *10 sc, inc*, repeat around. Join. (72 sts)

Round 22: Ch 1, sc in each st around. Join. (72 sts)

Round 23: Ch 1, *11 sc, inc*, repeat around. Join. (78 sts)

Round 24: Ch 1, sc in each st around. Join. (78 sts)

Round 25: Ch 1, *12 sc, inc*, repeat around. Join. (84 sts)

Round 26: Ch 1, sc in each st around. Join. (84 sts)
Continue adding a few more rounds if you want a wider brim.
✂️ Step 4: Finish Off
- Fasten off and weave in all loose ends with your tapestry needle.
- Use steam blocking or lightly shape your hat to make the brim curve naturally.
🎨 Stripe Ideas & Color Combinations
| Theme | Color A | Color B | Color C | Color D |
|---|---|---|---|---|
| Sunset | Yellow | Orange | Pink | Red |
| Monochrome | Black | White | Gray | – |
| Retro | Mustard | Teal | Burgundy | Cream |
| Candy | Light Pink | Sky Blue | Mint | White |
| Pride | Red | Orange | Yellow | Green, Blue, Purple |
💡 Tip: Use leftover yarn scraps for fun rainbow or pastel designs!
🧼 Care Instructions
- Cotton: Hand wash or machine wash cold, gentle cycle.
- Lay flat to dry to keep shape.
- Avoid high heat drying.
🧶 Customization Tips
| Option | How to Do It |
|---|---|
| Make it slouchy | Add extra body rounds |
| Add lining | Sew in a lightweight fabric lining for comfort |
| Embellishments | Add patches, embroidery, or buttons |
| Pom-pom top | Add a pom-pom to the crown (optional, for playful style) |
| Chin strap | Add two braided ties on the sides |
📷 Show Off Your Work!
Finished your bucket hat? Take a photo and share it on social media with hashtags like:
- #CrochetBucketHat
- #StripedBucketHat
- #HandmadeStyle
- #CrochetFashion
You’ll inspire others and keep track of your handmade journey.
🧶 Final Thoughts
Creating your own striped crochet bucket hat is a fantastic way to combine creativity, fashion, and function. With endless color combinations and a simple structure, it’s a project you can repeat again and again with different results every time.
Whether you’re making it for yourself, a friend, or to sell at craft markets, this pattern delivers a fun, trendy, and personalized accessory that turns heads and keeps you cool.