by
by Welcome! Here’s a detailed, step-by-step guide on how to crochet a bucket hat with striped colors—perfect for all seasons and a fun way to play with color. This pattern is beginner-to-intermediate friendly and comes with plenty of tips for customization.
🎨 How to Crochet a Bucket Hat with Striped Color | Step-by-Step Pattern
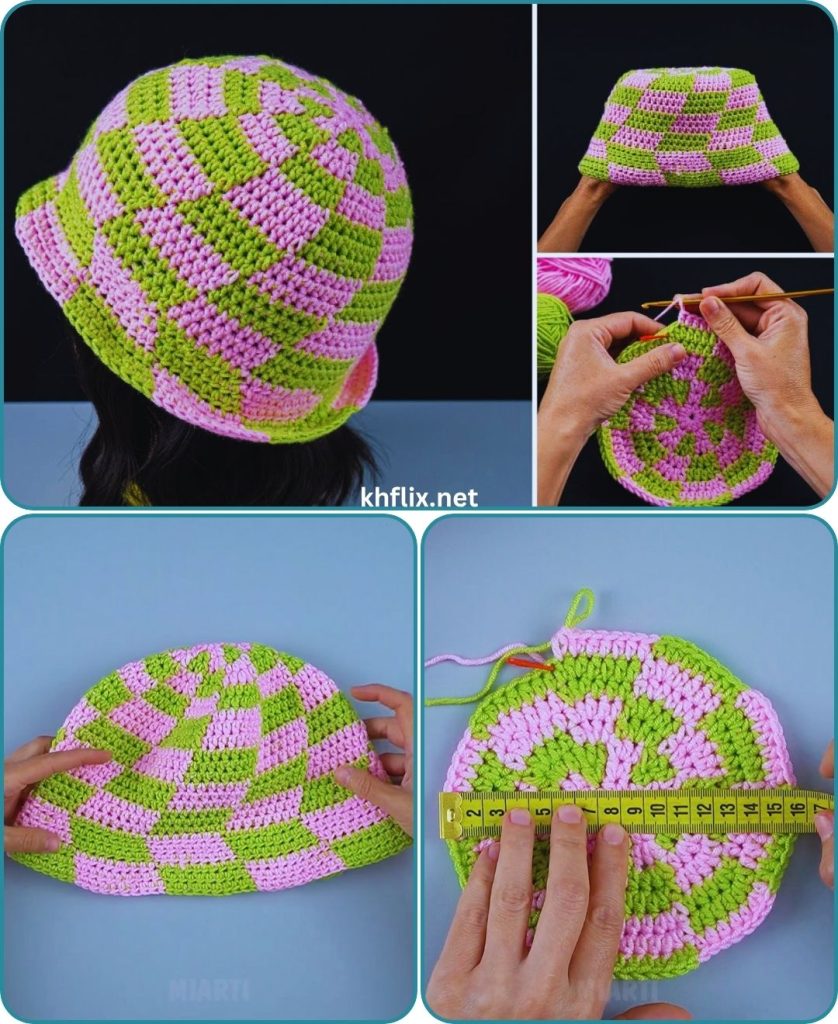
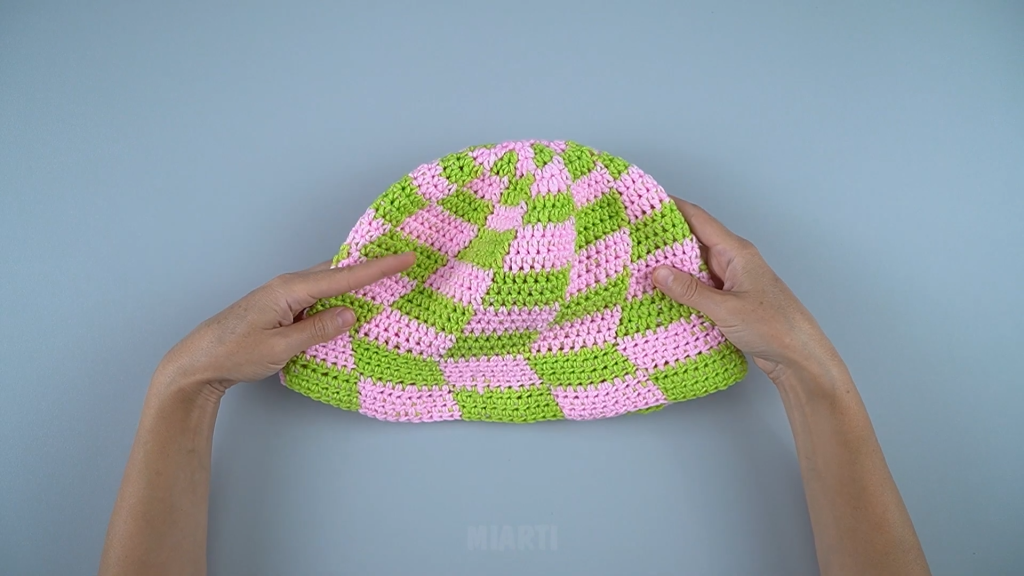
Crochet bucket hats are stylish, versatile, and easy to make. They’ve made a huge comeback in fashion, and adding striped colors gives them a vibrant, trendy twist. Whether you’re heading to a music festival, the beach, or just want a cool accessory for your outfit, a crochet bucket hat is the perfect project.
This step-by-step tutorial will guide you through making a striped crochet bucket hat using simple stitches. It’s suitable for confident beginners who are comfortable with the single crochet stitch and working in the round.
🧵 Materials Needed
| Item | Description |
|---|---|
| Yarn | Worsted weight cotton or cotton blend yarn in at least 2-3 colors |
| Hook | 4.0 mm (G-6) crochet hook |
| Stitch Marker | To mark beginning of rounds |
| Scissors | For trimming yarn |
| Tapestry Needle | For weaving in ends |
| Measuring Tape | To measure head size |
🧶 Yarn Suggestions:
- Lily Sugar’n Cream (cotton)
- Paintbox Cotton Aran
- Bernat Handicrafter Cotton
Cotton is preferred for structure and breathability, especially for summer wear.
🧠 Skill Level: Confident Beginner
You should be familiar with:
- Working in the round
- Single crochet (sc)
- Color changes
- Increasing evenly
📏 Sizing Guide
This pattern creates a standard adult-size bucket hat (approx. 21–23” head circumference). You can easily adjust it for smaller or larger sizes by changing the number of rounds or stitch count.
| Size | Hat Crown Diameter | Hat Height |
|---|---|---|
| Adult | 6.5 – 7 inches | 7 – 8 inches |
🔄 Crochet Abbreviations (US Terms)
| Abbreviation | Meaning |
|---|---|
| ch | Chain |
| sc | Single Crochet |
| sl st | Slip Stitch |
| st | Stitch |
| inc | Increase (2 sc in same stitch) |
🧶 Gauge (optional)
15 sc x 15 rows = 4” (10 cm) in single crochet. Check your gauge if you want a precise fit.
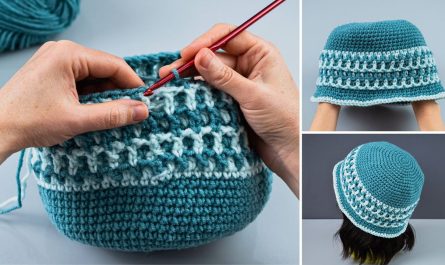
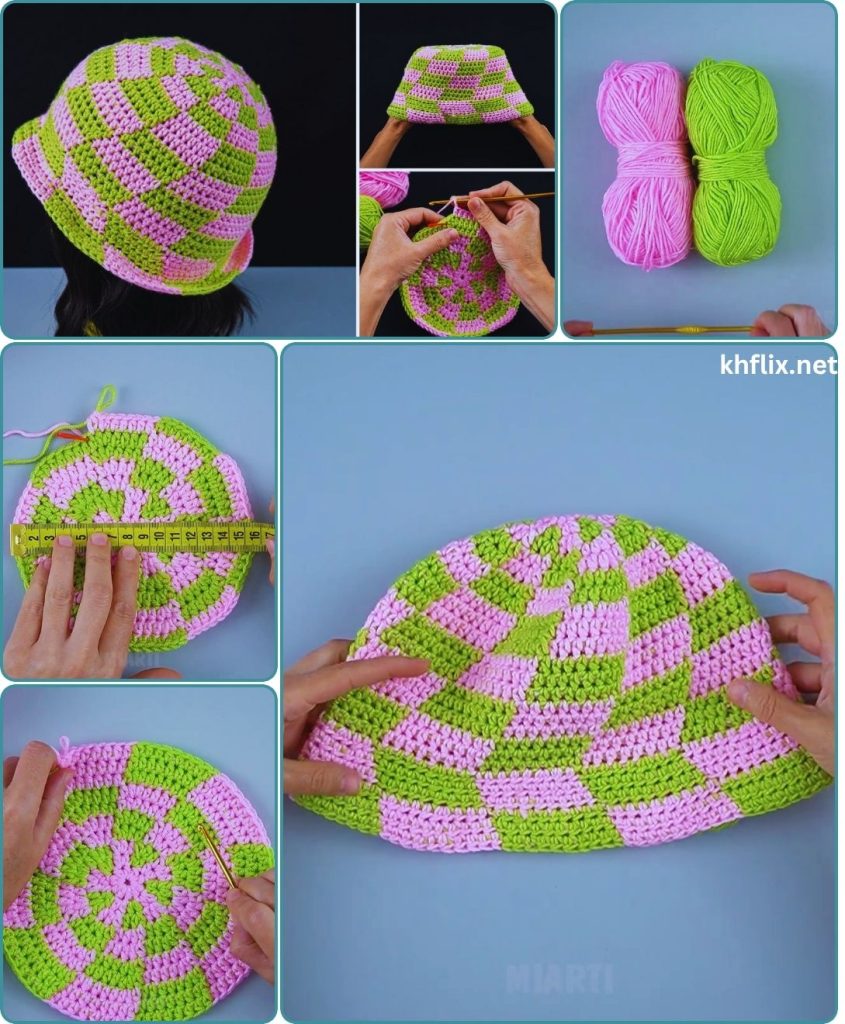
👒 Crochet Striped Bucket Hat Pattern
This hat is worked in 3 main sections:
- Crown
- Body (Sides)
- Brim
We’ll alternate colors every few rows to create stripes.
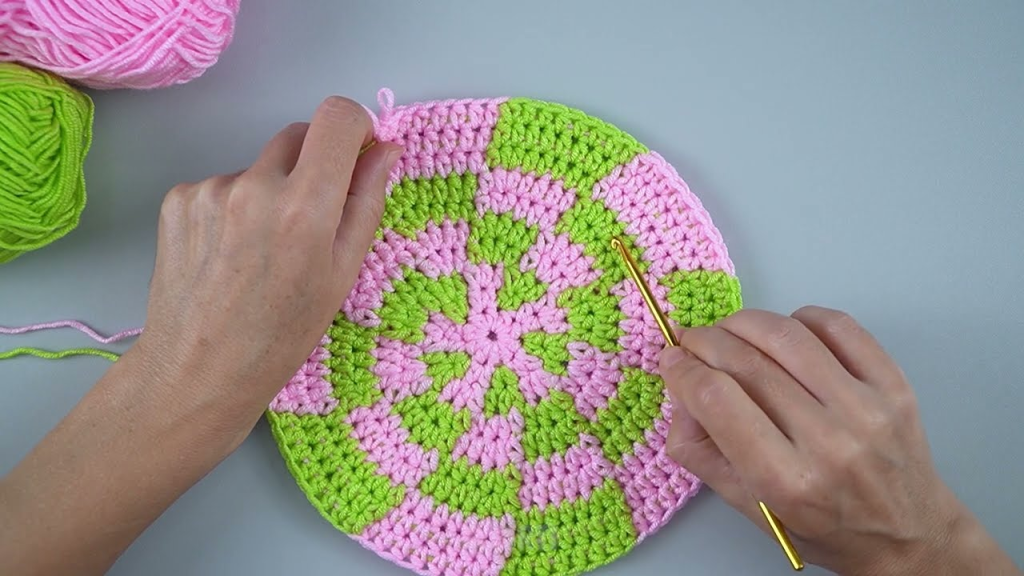
🪡 Step 1: Create the Crown (Top Circle)
Start with Color A (main or base color).
Round 1: Make a magic ring, ch 1, work 6 sc into the ring. Pull tight and join with sl st to first sc. (6 sts)

Round 2: Ch 1, 2 sc in each st around. Join. (12 sts)

Round 3: Ch 1, *1 sc in next st, 2 sc in next st*, repeat around. Join. (18 sts)

Round 4: Ch 1, *1 sc in next 2 sts, 2 sc in next st*, repeat. Join. (24 sts)

Round 5: Ch 1, *1 sc in next 3 sts, 2 sc in next st*, repeat. Join. (30 sts)

Round 6: Ch 1, *1 sc in next 4 sts, 2 sc in next st*, repeat. Join. (36 sts)

Round 7: Ch 1, *1 sc in next 5 sts, 2 sc in next st*, repeat. Join. (42 sts)

Round 8: Ch 1, *1 sc in next 6 sts, 2 sc in next st*, repeat. Join. (48 sts)

Round 9: Ch 1, *1 sc in next 7 sts, 2 sc in next st*, repeat. Join. (54 sts)

Round 10: Ch 1, *1 sc in next 8 sts, 2 sc in next st*, repeat. Join. (60 sts)
🧠 TIP: Adjust the number of rounds based on your gauge. Stop when your crown reaches about 6.5 to 7 inches in diameter for adult size.
🎨 Step 2: Start the Body (Straight Sides)
The body is worked without increasing, so the hat begins to form a downward shape.
Change to Color B:
Round 11: Ch 1, sc in each st around. Join. (60 sts)
Change to Color C:
Round 12: Repeat Round 11.
Change to Color A:
Round 13: Repeat Round 11.
🌀 Continue changing colors every 1-2 rows, depending on the stripe width you want. You can use:
- Thin stripes: Change color every row
- Thick stripes: Change every 2-3 rows
Repeat sc in each st and change color for a total of 8–10 rounds, or until the side of the hat measures about 3.5 to 4 inches tall.
Use invisible color changes by joining the new color in the sl st and pulling it through at the beginning of a round.
🧢 Step 3: Create the Brim
The brim will be slightly flared to create the classic bucket hat silhouette.
Continue in striped colors, or go with a single color for the brim.
Round 1:
Ch 1, *1 sc in next 4 sts, 2 sc in next st*, repeat around. Join. (72 sts)
Round 2:
Ch 1, sc in each st around. Join. (72 sts)
Round 3:
Ch 1, *1 sc in next 5 sts, 2 sc in next st*, repeat. Join. (84 sts)
Round 4:
Ch 1, sc in each st around. Join. (84 sts)
Optional Round 5 (Wider Brim):
Ch 1, *1 sc in next 6 sts, 2 sc in next st*, repeat. Join. (96 sts)
You can continue adding rounds with no increase to add length to the brim.
✂️ Step 4: Finish Off
- Fasten off.
- Use the tapestry needle to weave in all ends neatly on the inside.
- Block the hat lightly by wetting it and shaping it to your head or a bowl for a smooth finish.
🧵 Customization Tips
| Customization | How to Do It |
|---|---|
| Add a Chin Strap | Crochet a chain and tie to both sides |
| Embroider Designs | Use surface crochet or embroidery |
| Mix Yarn Types | Combine cotton with acrylic for a unique texture |
| Add a Logo Patch | Sew on fabric or leather tag |
🧼 Care Instructions
- For cotton hats: Hand wash or machine wash on gentle cycle with cold water.
- Lay flat to dry to avoid stretching.
💡 Pro Tips
- Use stitch markers: Especially to mark your beginning stitch in each round.
- Keep tension even: Especially when changing colors.
- Hide ends as you go: Crochet over the yarn tails when you switch colors to save time.
🧢 Why You’ll Love This Pattern
- Beginner friendly – Simple stitches, no shaping beyond basic increases.
- Customizable – Choose your colors, stripe widths, and brim length.
- Trendy – Perfect for Instagram-worthy photos and gifts.
- Fast project – You can complete it in a few hours!
📸 Show Off Your Hat!
Once you’re done, take a picture and tag your creations with hashtags like #CrochetBucketHat or #StripedBucketHat. Handmade accessories are always in style, and your colorful hat is sure to turn heads!
And there you have it! A stylish, custom-made striped bucket hat ready to wear. This pattern is easily customizable—try different stripe widths, add more colors, or make the brim wider by continuing the increase pattern. Enjoy your beautiful handmade creation!