 by
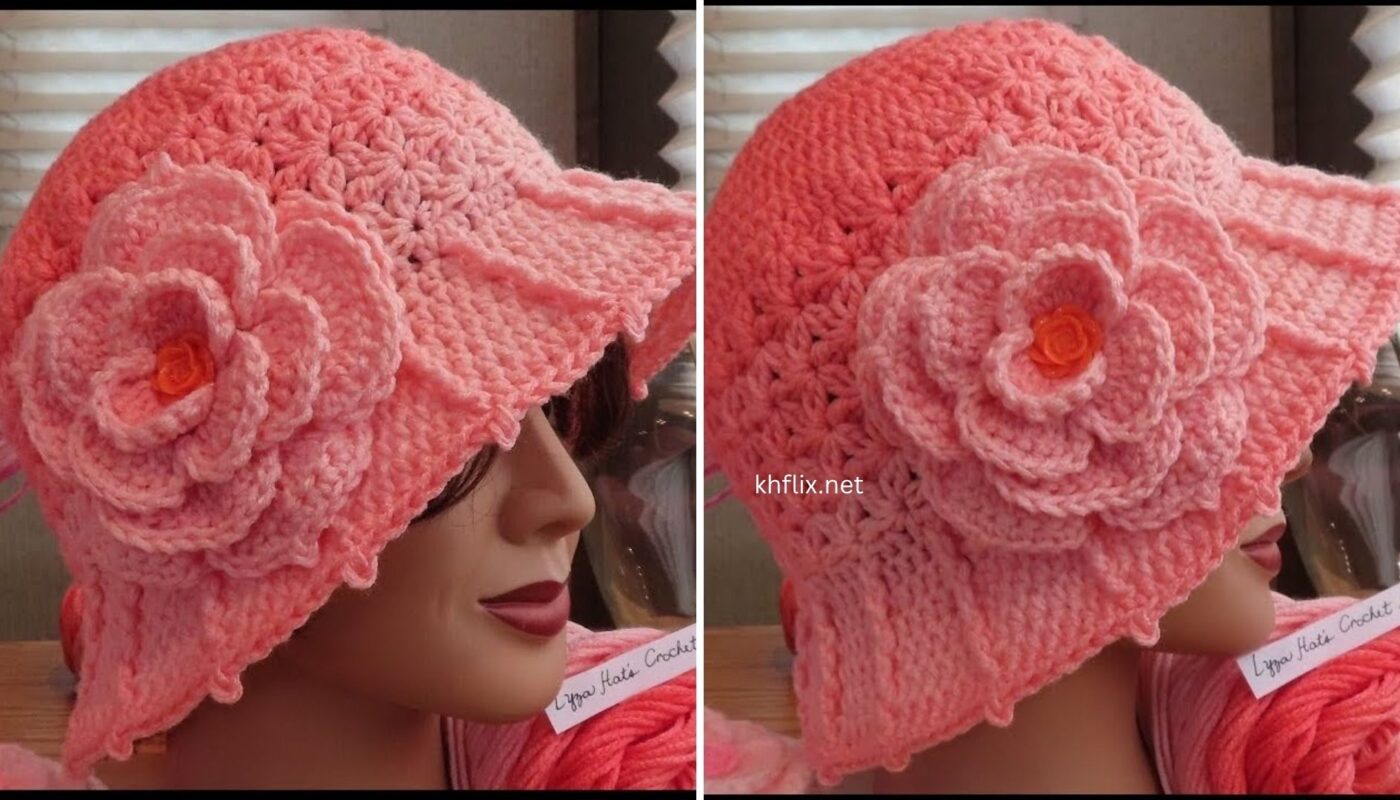
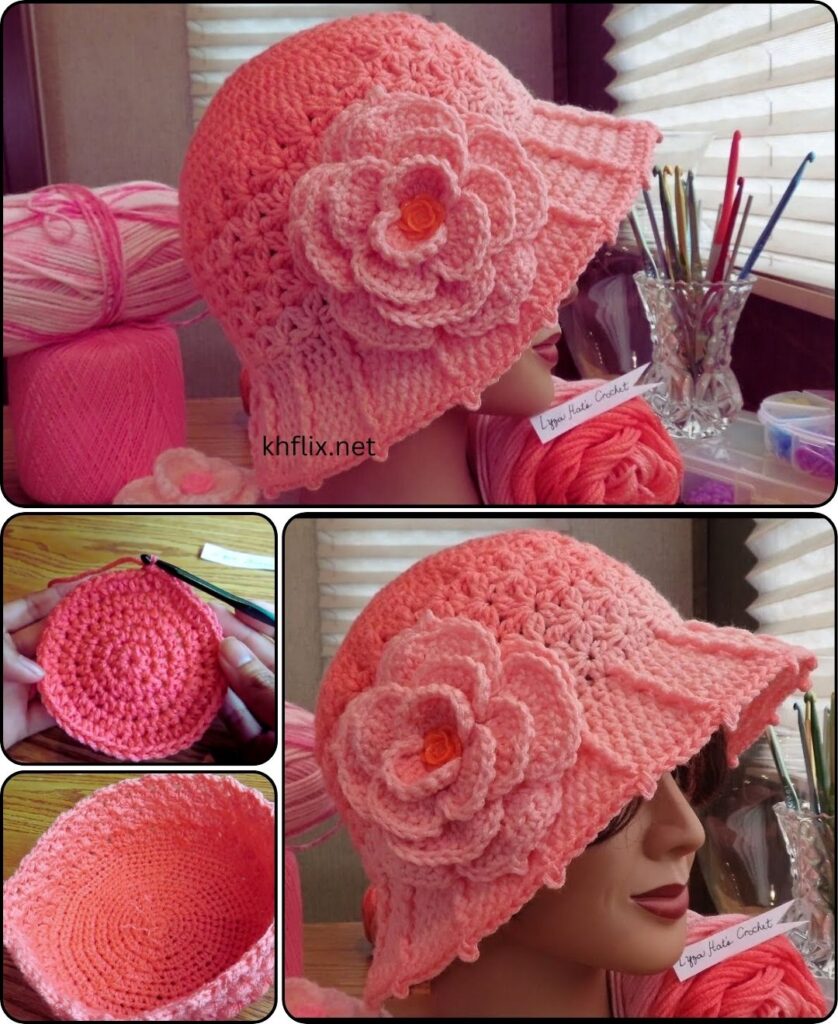
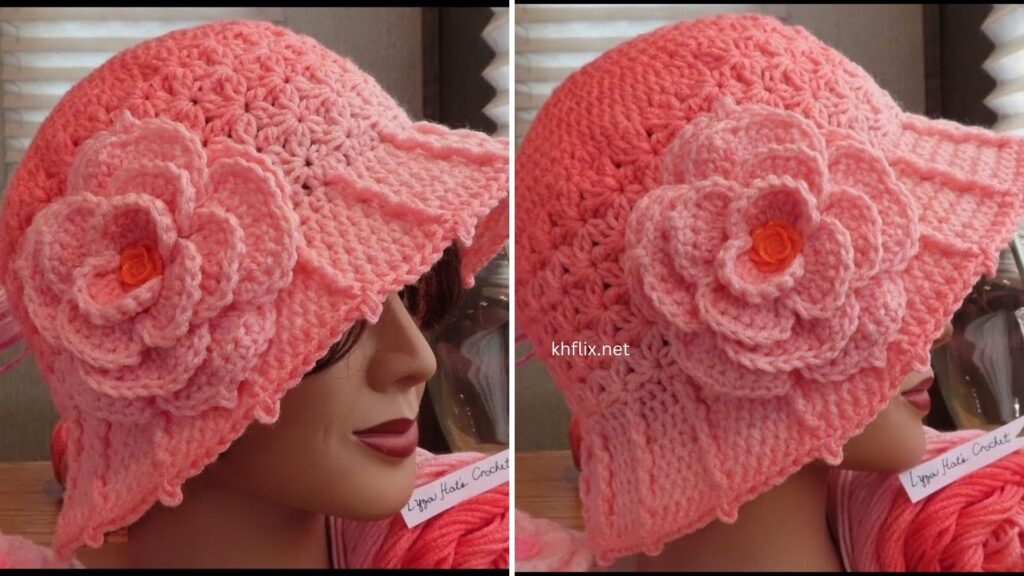
by Okay, let’s create a beautiful and elegant Crochet Camellia Rose Cloche Hat in a lovely Pink Color! This project combines a classic cloche hat shape with a stunning, multi-layered Camellia Rose motif, perfect for adding a touch of vintage charm.
This pattern is suitable for Intermediate Beginners or Advanced Beginners who are comfortable with basic stitches, working in the round, and following detailed instructions.
Pattern: Crochet Hat – Camellia Rose Cloche Hat (Pink Color)
Project Overview: This cloche hat is worked from the top down, creating a fitted crown and a straight body, with a subtle brim. The showstopper is a separately crocheted, layered Camellia Rose appliqué, which will be sewn onto the hat.
Skill Level: Intermediate Beginner / Advanced Beginner
Finished Size: Adult Medium (approx. 21-22 inches head circumference)
- Crown Diameter: Approx. 7 inches (before sides)
- Hat Height: Approx. 7.5 – 8 inches (before brim)
- Brim Depth: Approx. 1.5 inches
Materials You’ll Need:
- Yarn:
- Worsted Weight (Medium #4) Yarn: Approximately 150-200 yards (137-183 meters) for the hat.
- Main Color: Pink Yarn (Choose your favorite shade of pink – dusty rose, soft pink, fuchsia, etc.).
- Small amount of Green Worsted Weight Yarn (Optional): For leaves for the Camellia Rose.
- Recommended Yarn Type: Soft acrylic or a wool blend for warmth and drape.
- Crochet Hook:
- Size I/5.5mm (or size needed to obtain gauge).
- Size H/5.0mm (or one size smaller than main hook, for the flower details).
- Yarn Needle (Tapestry Needle): For weaving in ends and sewing the rose to the hat.
- Scissors
- Measuring Tape: Crucial for checking gauge and hat size.
- Stitch Marker (Optional): To mark the beginning of rounds.
Gauge (Crucial for Sizing!)
With I/5.5mm hook and Pink Yarn: Work in hdc in the round. After Round 3, your circle should measure approximately 2.5 inches (6.5 cm) in diameter. After Round 5, your circle should measure approximately 4 inches (10 cm) in diameter.
- If your circle is too small, go up a hook size. If too large, go down a hook size. Consistency is key for a well-fitting hat.
Abbreviations Used:
- ch: chain
- sl st: slip stitch
- sc: single crochet
- hdc: half double crochet
- dc: double crochet
- tr: treble crochet (or triple crochet)
- st(s): stitch(es)
- sp: space
- ch-sp: chain space
- MR: magic ring (or magic circle)
- FO: fasten off
- inc: increase (usually by working 2 stitches into the same stitch)
- BLO: back loop only
Understanding the Hat Structure
The cloche hat is worked in continuous rounds (or seamlessly joined rounds using sl st and ch 2/3).
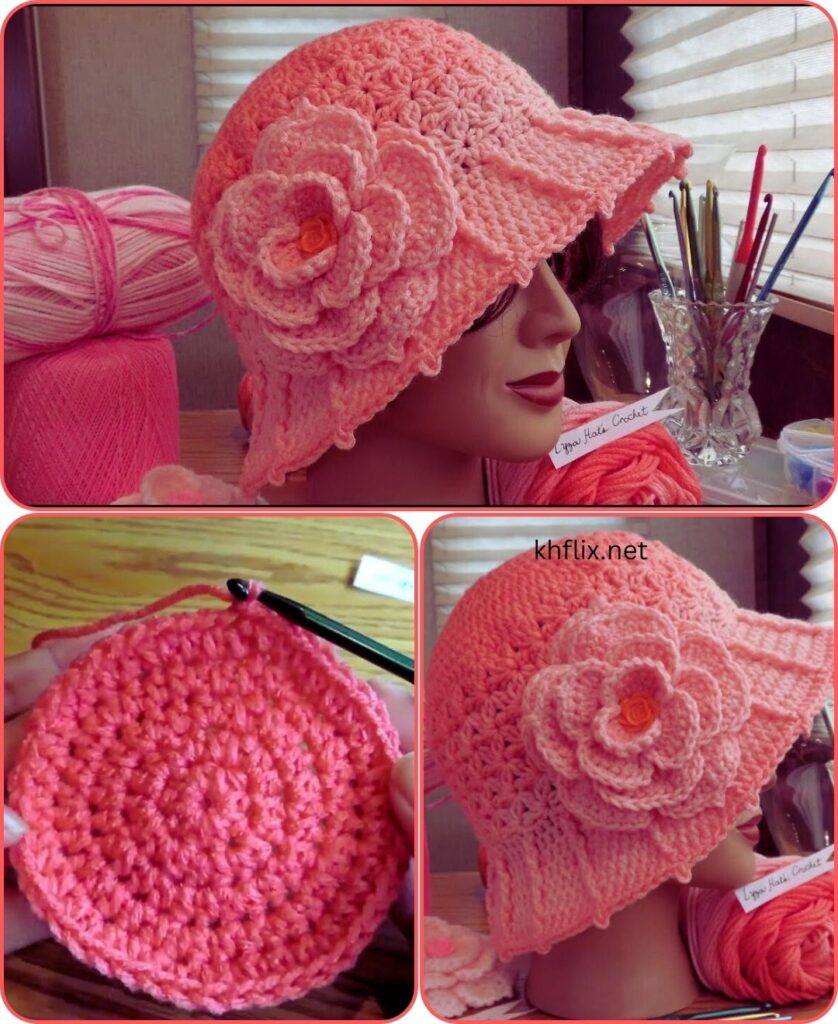
- Crown: We start with a flat circle, gradually increasing stitches to form the top of the head.
- Sides: Once the crown reaches the desired diameter (matching the widest part of your head), we stop increasing and work even rounds to create the straight sides.
- Brim: A few final rounds to form the brim, which can be straight or have a slight flare.
Part 1: The Cloche Hat Body (Pink Yarn)
We’ll use Half Double Crochet (hdc) for the main body for a nice dense fabric and good stretch.
Start: With Pink Yarn and I/5.5mm hook.
Crown (Increasing Rounds):
- Round 1: Create a Magic Ring (MR). Ch 2 (does NOT count as a st here). Work 10 hdc into the MR. Sl st to the first hdc to join. (10 hdc)
- If you prefer not to use MR: Ch 3, sl st to first ch to form a ring. Ch 2, work 10 hdc into the ring. Sl st to first hdc to join.
- Round 2: Ch 2. Work 2 hdc in each hdc around. Sl st to the first hdc to join. (20 hdc)
- Round 3: Ch 2. 1 hdc in the first st, 2 hdc in the next st (inc). Repeat from * to * around. Sl st to the first hdc to join. (30 hdc)
- Check your gauge here. Your circle should be approx. 2.5 inches.
- Round 4: Ch 2. 1 hdc in each of the first 2 sts, 2 hdc in the next st (inc). Repeat from * to * around. Sl st to the first hdc to join. (40 hdc)
- Round 5: Ch 2. 1 hdc in each of the first 3 sts, 2 hdc in the next st (inc). Repeat from * to * around. Sl st to the first hdc to join. (50 hdc)
- Check your gauge here. Your circle should be approx. 4 inches.
- Round 6: Ch 2. 1 hdc in each of the first 4 sts, 2 hdc in the next st (inc). Repeat from * to * around. Sl st to the first hdc to join. (60 hdc)
- Round 7: Ch 2. 1 hdc in each of the first 5 sts, 2 hdc in the next st (inc). Repeat from * to * around. Sl st to the first hdc to join. (70 hdc)
- Round 8: Ch 2. 1 hdc in each of the first 6 sts, 2 hdc in the next st (inc). Repeat from * to * around. Sl st to the first hdc to join. (80 hdc)
- Measure your crown diameter. It should be approx. 7 inches (18 cm). If it’s too small/large, adjust your hook size or add/remove an increase round.
Sides (Working Even Rounds):
- Round 9: Ch 2. Work 1 hdc in each hdc around. Sl st to the first hdc to join. (80 hdc)
- Repeat Round 9 for 10-12 more rounds (or until the hat measures approximately 7.5 – 8 inches from the top of the crown to the current edge).
- Try the hat on occasionally to check length. You want it to reach just above your eyebrows and cover your ears.
Brim (Optional Shaping):
- Round 20 (or your final side round + 1): Ch 1 (does NOT count as a st). Work 1 sc in each hdc around. Sl st to the first sc to join. (80 sc)
- This round helps tighten the brim edge slightly.
- Round 21: Ch 1. Work 1 sc in each sc around. Sl st to the first sc to join. (80 sc)
- Round 22 (Slight Flare – Optional): Ch 1. 1 sc in each of the first 9 sts, 2 sc in the next st (inc). Repeat from * to * around. Sl st to the first sc to join. (88 sc)
- If you want a straight brim, just continue with Round 21’s pattern for 2-3 more rounds.
- Final Round: Ch 1. Work 1 sc in each sc around. Sl st to the first sc to join. (88 sc or your final stitch count).
Finishing Hat Body:
- FO (Fasten Off) your Pink Yarn, leaving a tail.
- Weave in all ends neatly on the inside of the hat using your yarn needle.
Part 2: The Camellia Rose Motif (Pink Yarn)
We’ll use a smaller hook (H/5.0mm) for the rose to create tighter, more defined petals. This flower is crocheted in a spiraling strip and then rolled.
Start: With Pink Yarn and H/5.0mm hook.
- Ch 31.
- Row 1 (Foundation): Work 1 hdc into the 2nd ch from your hook. Work 1 hdc into each remaining ch across. (30 hdc).
- You now have a long, straight strip. Do NOT turn your work.
Petals (Working into the Back Loops Only – BLO):
- Row 2 (Petal Formation): Ch 2 (does NOT count as a st).
- We will work into the BLO of each hdc stitch from Row 1. The increases will create the ruffles.
- Petal Section 1 (Inner Petals – Tighter):
- In the first BLO hdc, work (1 sc, ch 1, 1 hdc, ch 1, 1 sc).
- Sl st into the next BLO hdc.
- Repeat these 2 steps (working into the next BLO hdc then sl st into the following BLO hdc) for a total of 5 times.
- (You should have 5 small petal sections formed over 10 BLO hdc stitches).
- Petal Section 2 (Mid-Petals – Medium Fullness):
- In the next BLO hdc, work (1 sc, ch 1, 1 dc, ch 1, 1 sc).
- Sl st into the next BLO hdc.
- Repeat these 2 steps (working into the next BLO hdc then sl st into the following BLO hdc) for a total of 5 times.
- (You should have 5 medium petal sections formed over 10 BLO hdc stitches).
- Petal Section 3 (Outer Petals – Fullest):
- In the next BLO hdc, work (1 hdc, ch 1, 1 tr, ch 1, 1 hdc).
- Sl st into the next BLO hdc.
- Repeat these 2 steps (working into the next BLO hdc then sl st into the following BLO hdc) for a total of 5 times.
- (You should have 5 large petal sections formed over the final 10 BLO hdc stitches).
- FO, leaving a very long tail (at least 15-20 inches) for sewing the rose together.
- You will now have a long, ruffled strip. The unworked front loops from Row 1 will form the flat base of the rose as you roll it.
Part 3: Shaping and Sewing the Camellia Rose
This is where your beautiful flower comes to life!
- Roll the Center: Take the end of the strip where you started (Section 1 with the smaller stitches). With the “right side” (the ruffled side) facing you, begin rolling the strip tightly inwards, forming the very center bud of your rose. The unworked front loops should form a relatively flat base as you roll.
- Continue Rolling and Shaping: As you continue to roll the strip, gently encourage the ruffles (the petals) to fan out. Allow them to create natural, layered folds like a real camellia. The larger stitches (dc and tr sections) will naturally form the bigger, outer petals. Try to keep the bottom edge of the rolled strip as even as possible.
- Secure with Pins (Optional): Once you’re satisfied with the rose’s shape, use a few sewing pins through the bottom layers to temporarily hold it in place.
- Sewing the Rose:
- Thread the long tail you left onto your yarn needle.
- Starting from the bottom of the rose (the rolled-up base), begin sewing through all layers of the rolled strip.
- Make strong, wide stitches that go from one side of the base to the other, catching all the layers firmly.
- Work your way around the entire bottom of the rose, pulling the yarn snugly (but not so tight it distorts the shape) to secure all the layers together. Aim to catch a bit of every “roll” to ensure it’s sturdy.
- Make several passes, back and forth, to really secure it. The goal is to sew the bottom edges of the spiral together so the rose holds its shape permanently.
- When finished, weave in the remaining tail on the back of the rose.
Part 4: Optional Leaves (Green Yarn)
Simple leaves add a realistic touch to your camellia rose. Use H/5.0mm hook.
- Leaf 1: Ch 8. Sl st in 2nd ch from hook, sc in next ch, hdc in next ch, dc in next 2 ch, hdc in next ch, sc in last ch. Sl st into a nearby stitch at the base to anchor.
- Leaf 2: Ch 8. Sl st in 2nd ch from hook, sc in next ch, hdc in next ch, dc in next 2 ch, hdc in next ch, sc in last ch. Sl st into a nearby stitch at the base to anchor.
- FO Green Yarn, leaving a tail for sewing.
- Sew the leaves securely to the back of your crocheted camellia rose. Weave in ends.
Part 5: Assembly (Attaching the Rose to the Hat)
- Decide on the placement of your camellia rose on the hat. A classic placement is slightly to one side, above the brim.
- Using your yarn needle and the tail from the rose (or a new piece of pink yarn), carefully sew the rose onto the hat. Make small, neat stitches from the back of the rose into the hat fabric, ensuring your stitches don’t show through on the front of the hat. Sew around the entire base of the rose until it is firmly attached.
- Weave in any remaining ends securely on the inside of the hat.
Finishing Touches:
- Weave in all remaining ends on both the hat and the flower.
- Blocking (Recommended for Hat & Flower): Gently wet the hat and rose. Pin the hat to a head-shaped form or a balloon to achieve the desired cloche shape. Pin the flower’s petals if needed to open them up. Let air dry completely. Blocking will help the hat maintain its shape and give the stitches a polished look.
Enjoy your beautiful and stylish Crochet Camellia Rose Cloche Hat in Pink!