 by
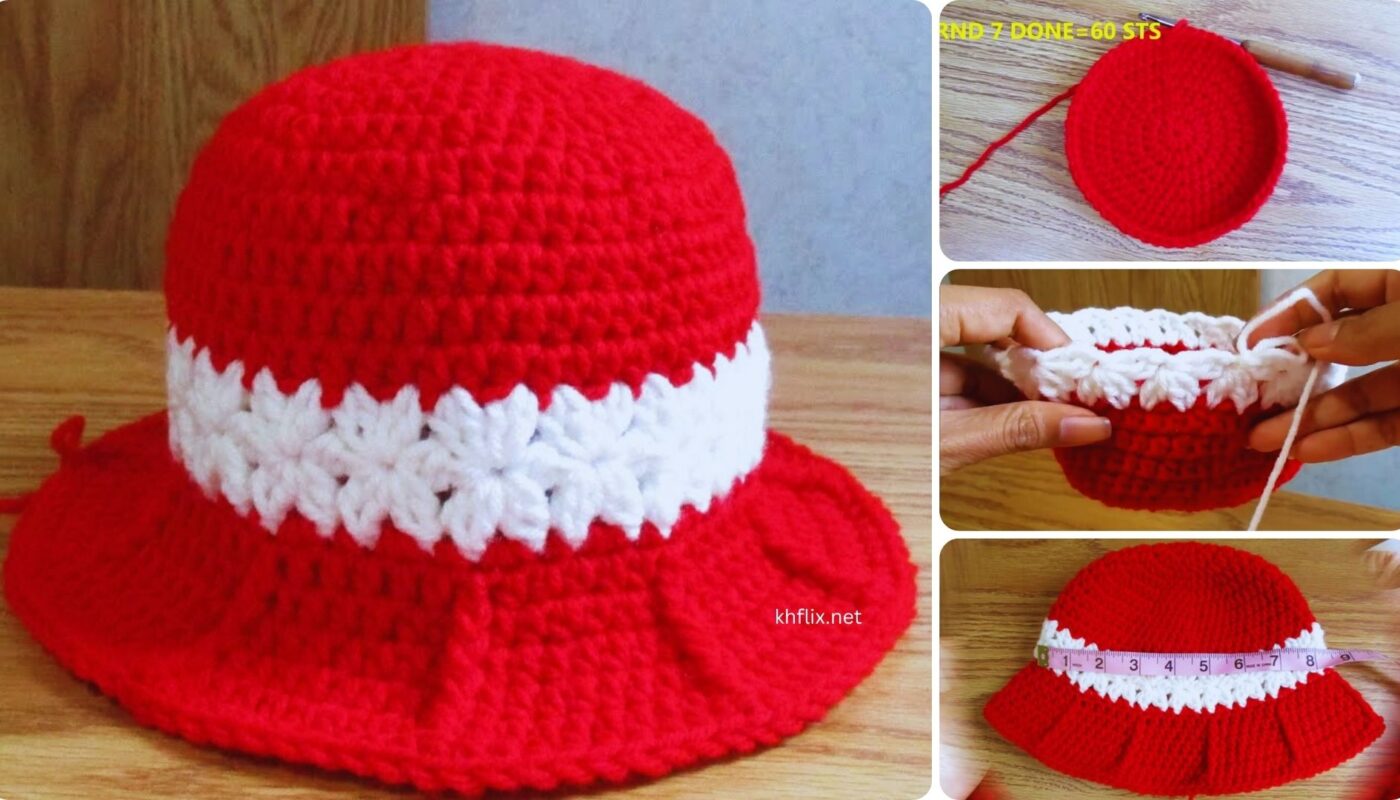
by Certainly! Here’s a very detailed step-by-step guide for making a crochet baby girl hat in red and white colors, suitable for beginners. This guide includes materials, measurements, abbreviations, stitch instructions, and color-change tips. Let’s dive in!
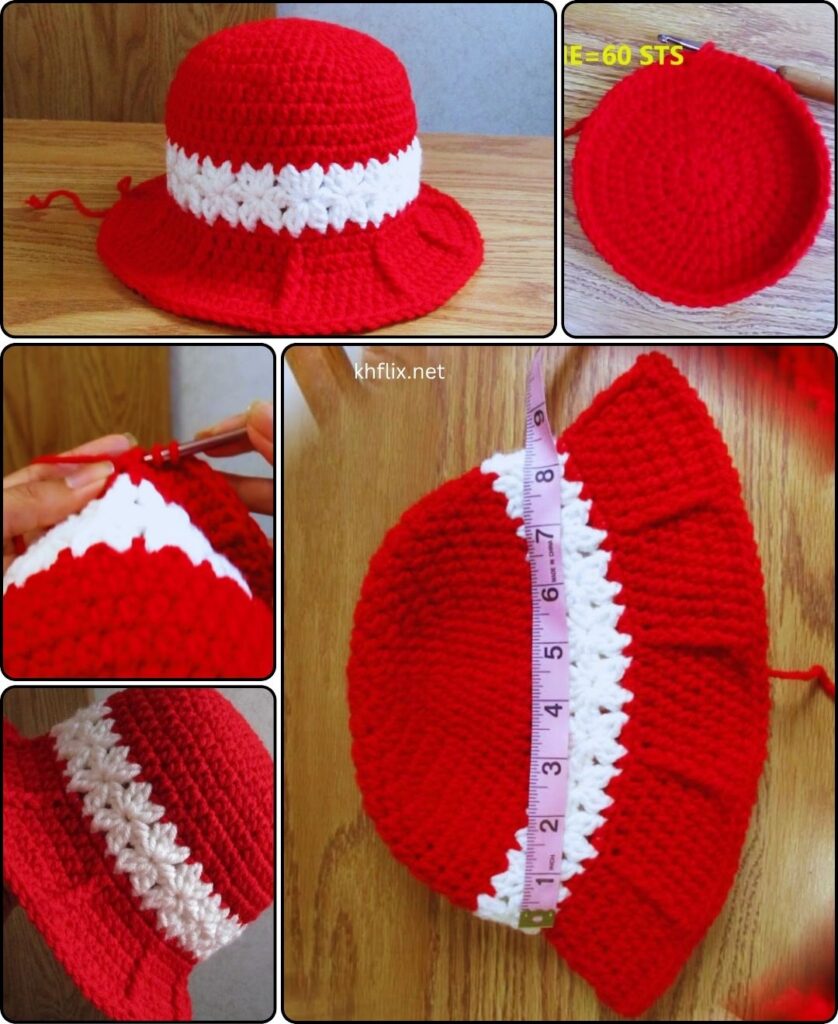
🎀 Detailed Crochet Pattern: Baby Girl Hat (Red and White)
👶 Size:
- Age: 0–6 months baby
- Finished Circumference: 13–14 inches
- Hat Height: Around 5.5 inches
🧶 Materials Needed:
- Yarn: Medium weight yarn (Category 4 – Worsted weight)
- Color A: Red
- Color B: White
- Crochet Hook: Size 5.0 mm (H/8)
- Scissors
- Tapestry Needle
- Stitch Marker (optional but helpful)
🔡 Abbreviations (US Terms):
- ch = chain
- sl st = slip stitch
- sc = single crochet
- dc = double crochet
- st(s) = stitch(es)
- inc = increase (2 stitches in the same stitch)
- rep = repeat
🧵 Crochet Instructions
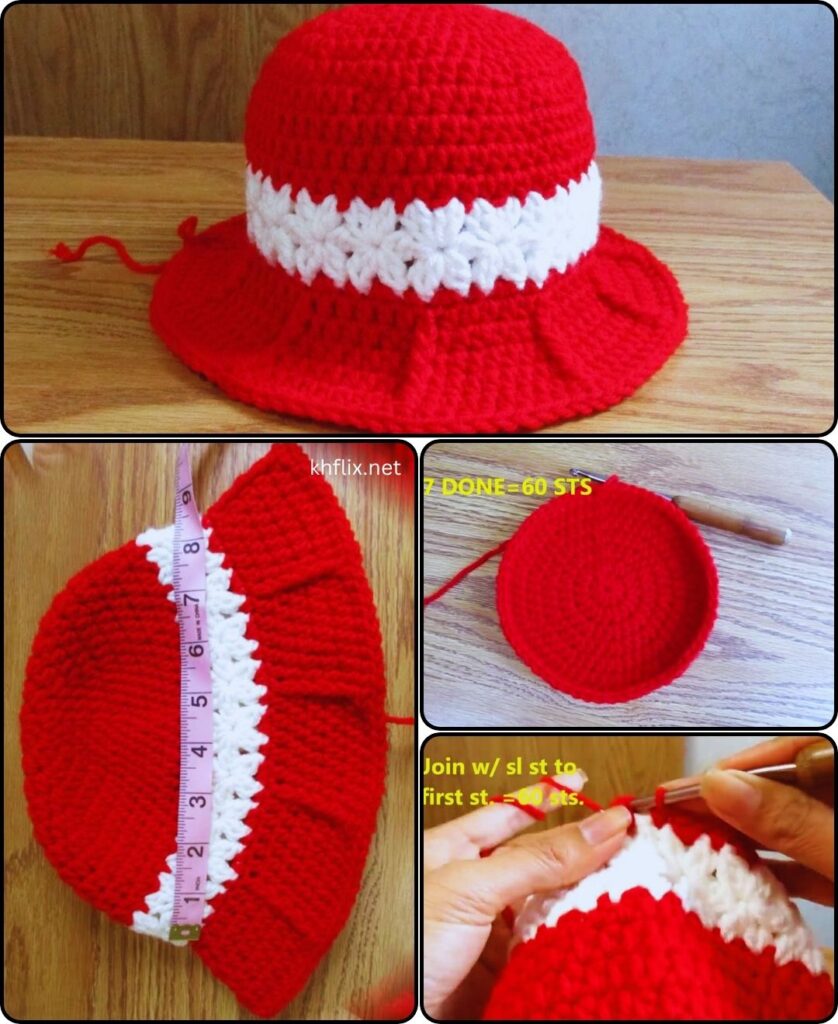
🎯 Step 1: Create the Crown (Top of Hat)
Start with WHITE yarn (Color B)
Round 1 – Magic Circle
- Make a magic ring, ch 2 (counts as 1 dc),
- Work 11 dc into the ring (12 total including ch-2).
- Pull ring tight, sl st to top of ch-2 to close the round. (12 dc)
Round 2
- Ch 2, 1 dc in same st, 2 dc in each st around.
- Join with sl st to top of ch-2. (24 dc)
Round 3
- Ch 2, 1 dc in next st, 2 dc in next st, rep around.
- Join. (36 dc)
Round 4
- Ch 2, 1 dc in next 2 sts, 2 dc in next st, rep around.
- Join. (48 dc)
✅ You now have the crown size needed for a 0–6 month baby. If you want a larger hat, continue increasing using the same pattern.
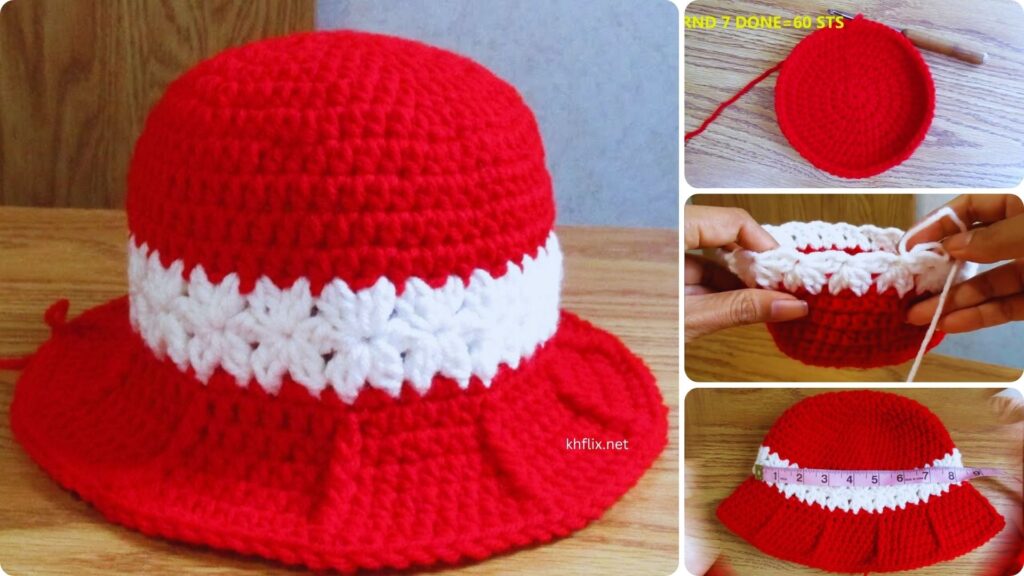
🎯 Step 2: Create the Body of the Hat
Rounds 5–10 (or until hat is desired height)
Now we stop increasing and just work evenly around.
- Change to RED (Color A)
(Fasten off White, attach Red yarn with sl st) - Ch 2, 1 dc in each st around (no increases). Join. (48 dc)
You will work 6 rounds total for the body. Alternate colors like this:
- Rounds 5–6: Red
- Rounds 7–8: White
- Rounds 9–10: Red
(If you want a slightly longer hat, add one more round in white.)
🎯 Step 3: Add a Decorative Brim (Scalloped Edge)
Switch to WHITE (Color B)
Round 11 – Scallop Edge
- Skip 1 st, 5 dc in next st, skip 1 st, sl st in next st, rep around.
- End with sl st, fasten off, weave in the ends.
🌸 This creates a cute frilly brim that looks very sweet on a baby girl.
🎀 Optional: Crochet Flower Decoration
Use RED center with WHITE petals or vice versa.
Step-by-Step for Flower:
Round 1:
- Start with a magic ring, ch 1, make 10 sc in ring, sl st to first sc.
Round 2 (petals):
- (Ch 2, 3 dc in next st, ch 2, sl st in same st) — repeat in each st to make 10 petals.
- Fasten off, leave a tail for sewing.
Attach flower to the side of the hat using the yarn tail and tapestry needle.
✅ Finishing Touches
- Weave in all loose ends with the tapestry needle.
- Gently shape the hat with your hands.
- If needed, block lightly by dampening the hat and letting it dry in shape.
🧼 Care Instructions
- Hand wash in lukewarm water with gentle baby-safe detergent.
- Lay flat to dry (do not wring or tumble dry).
📌 Summary of Color Rounds:
| Round | Color | Stitches |
|---|---|---|
| 1–4 | White | Crown (increase) |
| 5–6 | Red | Hat body |
| 7–8 | White | Hat body |
| 9–10 | Red | Hat body |
| 11 | White | Scalloped brim |
🎥Video Tutorial
🧶 Thanks for Reading My Crochet Ideas! 🌸
I truly appreciate you taking the time to explore my crochet creations and ideas. Whether you’re here for inspiration, learning, or just for the love of yarn, I’m so glad you stopped by!
If you enjoyed this post, feel free to share it with fellow crocheters, leave a comment, or save it for your next project. Your support means the world and helps keep the creativity flowing!