 by
by Here is an exceptionally detailed, beginner-friendly guide to crocheting your very first striped bucket hat. This long-form article is designed to walk you through every single step, from choosing your yarn to weaving in the final end.
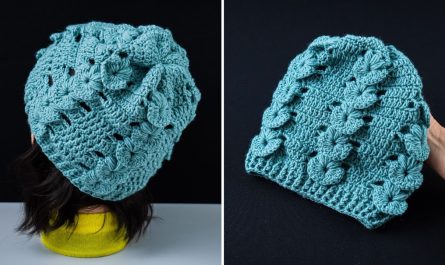
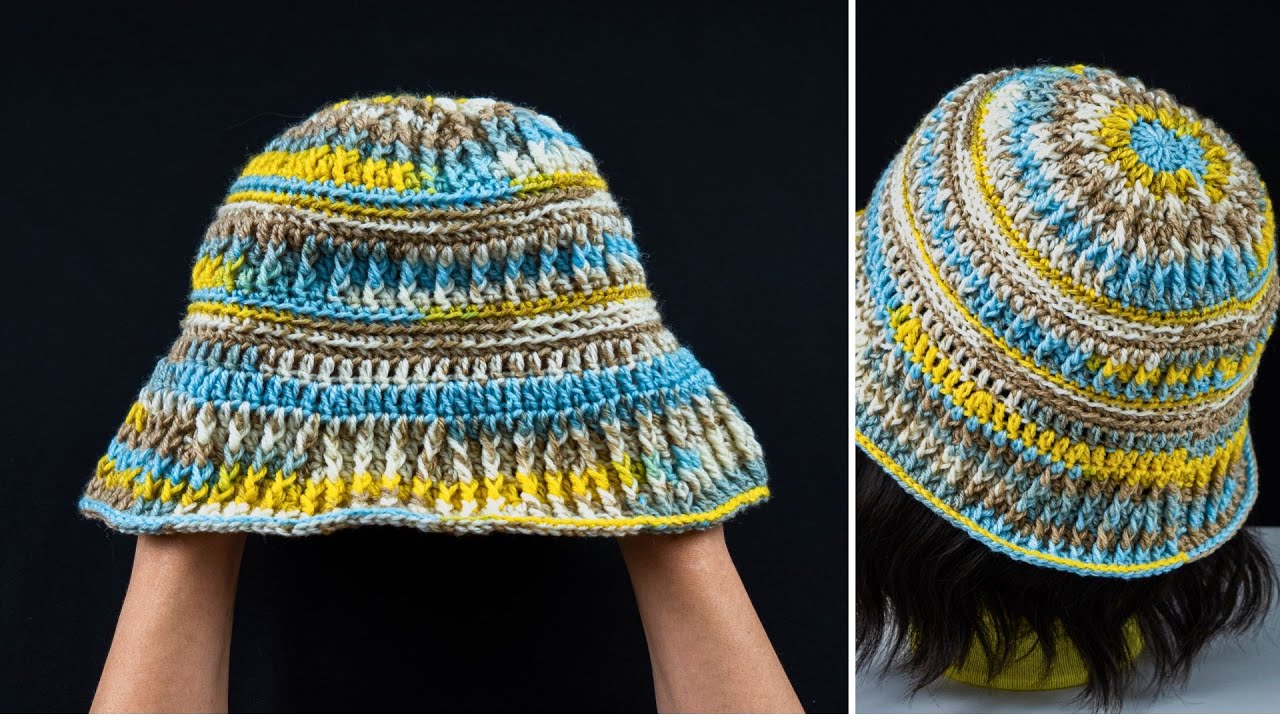
How to Crochet a Striped Bucket Hat: The Ultimate Beginner’s Tutorial
Welcome to the world of crochet! You’ve chosen one of the most fun and rewarding first projects: the bucket hat. It’s stylish, practical, and a fantastic way to master the fundamental skills of crocheting in the round. This tutorial is designed specifically for beginners, using simple stitches and a clear, step-by-step process. We’ll also tackle one of the most exciting techniques: creating clean, beautiful stripes with color changes.
Don’t be intimidated! We will break down the hat into three simple parts: the flat top (crown), the straight sides (body), and the angled brim. By the end of this guide, you’ll have a fashionable, handmade accessory to be proud of.
I. Why This is a Perfect Beginner Project
- Simple Stitches: We will primarily use Double Crochet (dc) and Single Crochet (sc), two of the first stitches every crocheter learns.
- Basic Construction: The hat is made of a flat circle, a simple tube, and a slightly wider circle. There’s no complex shaping involved.
- It’s Forgiving: A slightly imperfect stitch here or there will be hardly noticeable in the final product.
- Quick Gratification: Unlike a large blanket, a hat works up relatively quickly, keeping you motivated to finish.
II. Materials and Tools
Gathering your supplies is the first step to success.
- Yarn: Worsted weight (Category 4 or Aran weight) yarn is perfect for beginners. It’s easy to see your stitches and creates a sturdy fabric. 100% cotton is an excellent choice for a breathable summer hat, but a soft acrylic works just as well.
- Color A (Main Color): ~120 yards (110 meters)
- Color B (Stripe Color): ~80 yards (75 meters)
- Crochet Hook: A 5.00 mm (US size H-8) hook pairs perfectly with worsted weight yarn.
- Stitch Marker: This is your most important tool as a beginner! It’s used to mark the beginning of each round so you don’t lose your place. A simple safety pin or a scrap piece of contrasting yarn will also work.
- Scissors: For cutting your yarn.
- Yarn Needle (or Darning Needle): This is a blunt-tipped needle with a large eye, essential for weaving in your yarn ends for a clean, professional finish.
- Measuring Tape: To check your sizing as you go.
III. Essential Skills & Abbreviations (US Terminology)
This pattern uses standard US crochet terms.
- ch: chain
- sl st: slip stitch
- sc: single crochet
- dc: double crochet
- inc: increase (meaning to work 2 stitches into the same stitch)
- st(s): stitch(es)
- MR: Magic Ring (also called a Magic Circle). This is the best way to start a project in the round to avoid a hole in the center.
How to Change Colors for Clean Stripes: This is the secret to stripes that don’t look jagged. You will always prepare for the color change in the very last step of the stitch before the new color is needed. For a double crochet (dc):
- Yarn over, insert your hook, yarn over, pull up a loop (3 loops on hook).
- Yarn over, pull through the first 2 loops (2 loops on hook). STOP HERE.
- Drop your current color. Pick up your new color and yarn over with it.
- Pull the new color through the remaining 2 loops on your hook. You have now completed the double crochet and your hook is ready to work the next stitch with the new color.
IV. Gauge and Sizing
Gauge refers to how many stitches and rows fit into a certain measurement. It’s important for ensuring your hat fits!
- Gauge Check: After completing Round 4 of the crown pattern below, your flat circle should measure approximately 4 inches (10 cm) in diameter.
- If it’s bigger, your tension is loose. Try again with a smaller hook (e.g., 4.5 mm).
- If it’s smaller, your tension is tight. Try again with a larger hook (e.g., 5.5 mm).
- Sizing: The fit is determined by the diameter of the crown (the flat circle).
- Small/Teen: Crown diameter ~6.5 inches.
- Medium/Adult: Crown diameter ~7 inches.
- Large/Adult: Crown diameter ~7.5 inches.
We will crochet the crown until it reaches your desired diameter. This pattern is written for a size Medium.

V. The Bucket Hat Pattern: Step-by-Step
Let’s begin! We’ll start with the crown.
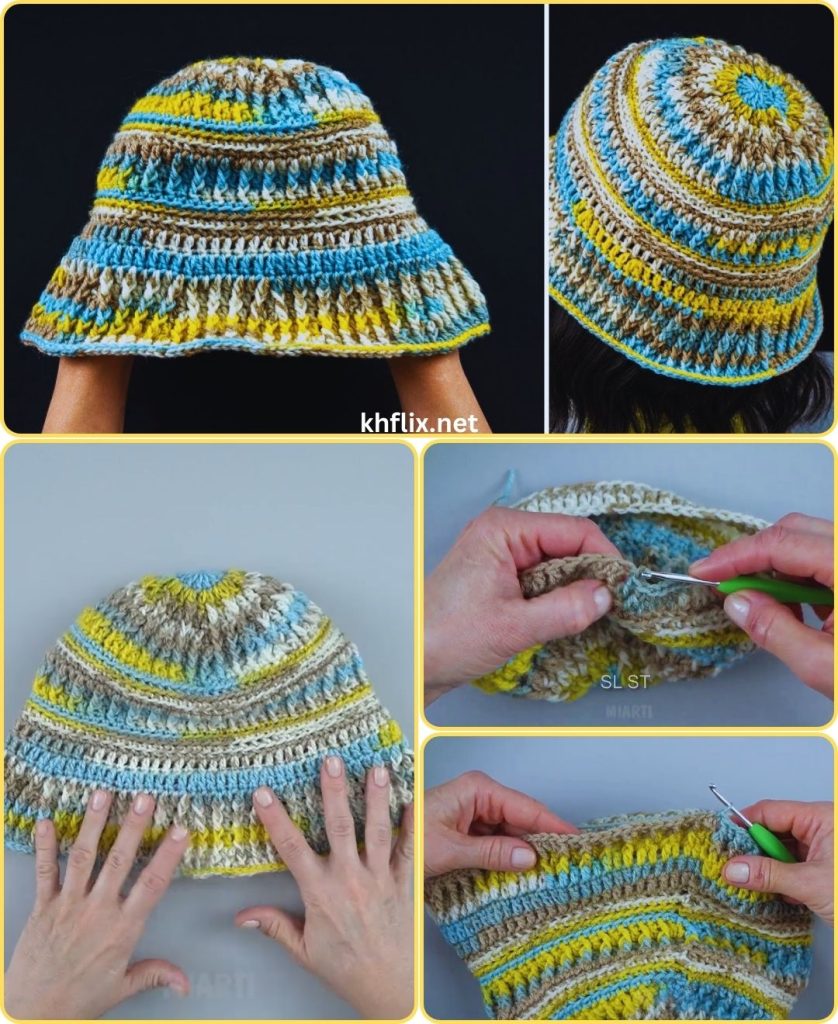
Part 1: The Crown (The Flat Top)
Start with Color A. Place a stitch marker in the first stitch of every round and move it up as you work.
Round 1: Start with a Magic Ring (MR). ch 3 (this counts as your first dc). Work 11 dc into the ring. Join to the top of the beginning ch-3 with a sl st. Pull the tail to close the ring tightly. (12 sts).
Round 2: ch 3 (counts as first dc). Work 1 dc into the same stitch. Work a dc increase (2 dc in each stitch) all the way around. Join with a sl st. (24 sts).
Round 3: ch 3. Work 2 dc in the next stitch. 1 dc in the next stitch, 2 dc in the next. Repeat from * to * all the way around. Join with a sl st. (36 sts).
Round 4: ch 3. Work 1 dc in the next stitch, then 2 dc in the next. 1 dc in each of the next 2 stitches, 2 dc in the next. Repeat from * to * around. Join with a sl st. (48 sts). Pause and check your gauge here. Your circle should be about 4 inches across.
Round 5: ch 3. Work 1 dc in each of the next 2 stitches, then 2 dc in the next. 1 dc in each of the next 3 stitches, 2 dc in the next. Repeat from * to * around. On the last yarn over of the final stitch, change to Color B. Join with a sl st. (60 sts).
Round 6: (Using Color B) ch 3. Work 1 dc in each of the next 3 stitches, then 2 dc in the next. 1 dc in each of the next 4 stitches, 2 dc in the next. Repeat from * to * around. Join with a sl st. (72 sts). Pause and measure your crown diameter. For a size M, it should be about 7 inches. If you need a smaller hat, you could stop at Round 5. For a larger hat, continue the increase pattern for one more round (e.g., 1 dc in next 5, then inc).
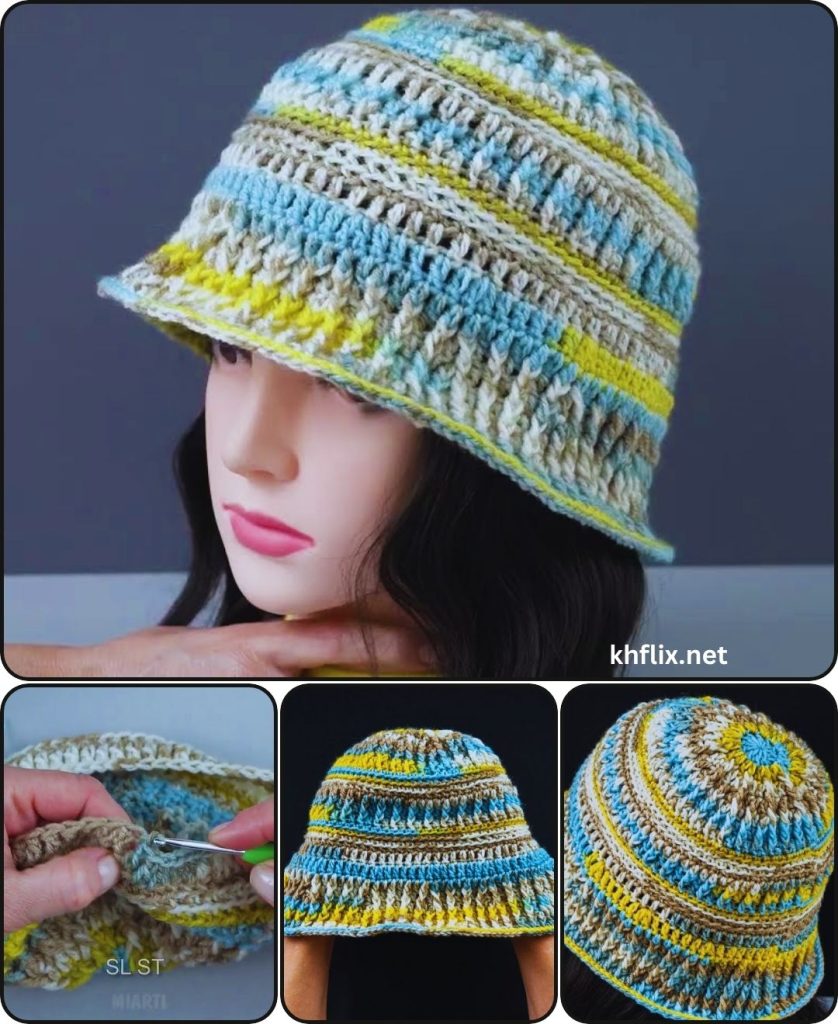
Part 2: The Body (The Straight Sides)
Now we stop increasing, which will cause the project to form the sides of the hat.
Round 7: (Still with Color B) ch 3. Work 1 dc in every stitch around. On the last yarn over of the final stitch, change back to Color A. Join with a sl st. (72 sts).
Round 8-9: (Using Color A) ch 3. Work 1 dc in every stitch around. Join with a sl st. At the end of Round 9, change to Color B. (72 sts).
Round 10-11: (Using Color B) ch 3. Work 1 dc in every stitch around. Join with a sl st. At the end of Round 11, change to Color A. (72 sts).
Round 12-13: (Using Color A) ch 3. Work 1 dc in every stitch around. Join with a sl st. At the end of Round 13, change to Color B. (72 sts).
Try the hat on. The edge should sit just above your eyebrows. If you want a deeper hat, add more rounds, continuing the stripe pattern.
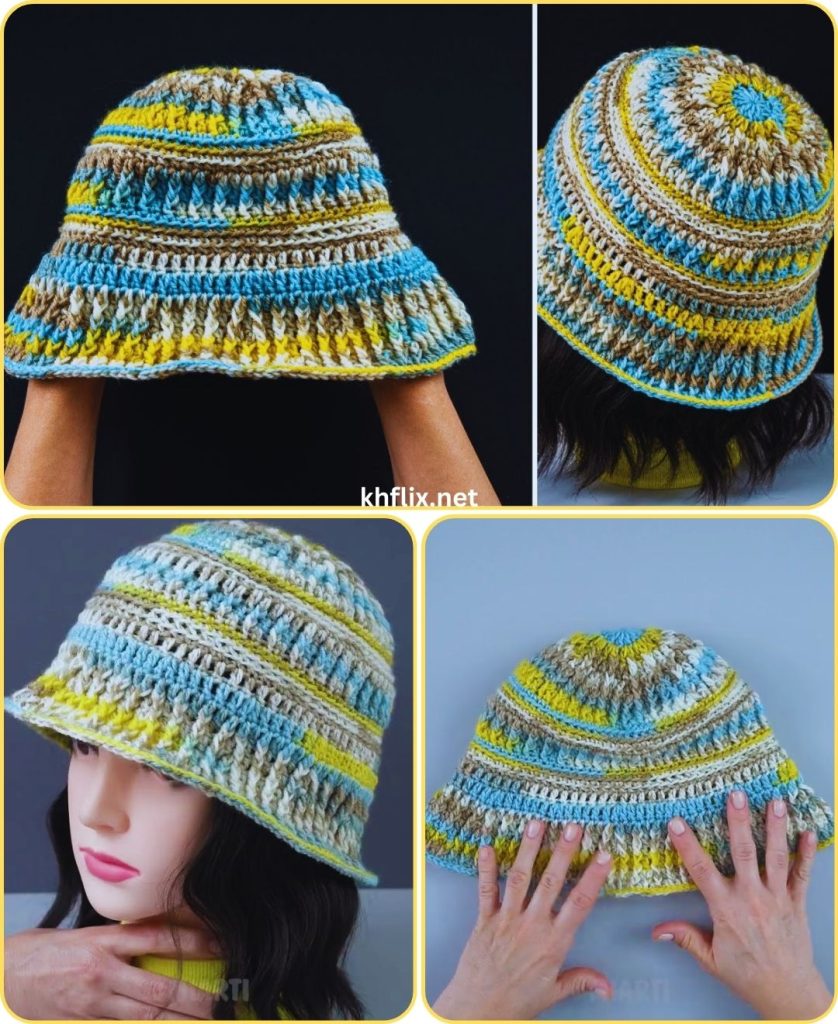
Part 3: The Brim
For a sturdier brim, we will switch to Single Crochet (sc). The increases will make the brim flare out.
Round 14: (Using Color B) ch 1 (does not count as a stitch). Work 1 sc in the same stitch. Work 1 sc in each of the next 4 stitches. Work a sc increase (2 sc in the next stitch). 1 sc in each of the next 5 stitches, then 2 sc in the next. Repeat from * to * around. Join with a sl st. (84 sts).
Round 15: (Still with Color B) ch 1. Work 1 sc in every stitch around. On the last step of the final stitch, change to Color A. Join with a sl st. (84 sts).
Round 16: (Using Color A) ch 1. Work 1 sc in the same stitch. Work 1 sc in each of the next 5 stitches. Work a sc increase. 1 sc in each of the next 6 stitches, then 2 sc in the next. Repeat from * to * around. Join with a sl st. (96 sts).
Round 17: (Still with Color A) ch 1. Work 1 sc in every stitch around. Join with a sl st. (96 sts).
Round 18: (Still with Color A) ch 1. Work 1 sc in the same stitch. Work 1 sc in each of the next 6 stitches. Work a sc increase. 1 sc in each of the next 7 stitches, then 2 sc in the next. Repeat from * to * around. Join with a sl st. (108 sts).
Round 19: (Still with Color A) ch 1. Work 1 sc in every stitch around. Join with a sl st. (108 sts).
You can make the brim wider by continuing this pattern: one round of increases followed by a plain round, adding one more stitch between increases each time.
Final Round: To give the brim a nice, clean edge, work one final round of slip stitches (sl st) loosely in every stitch around.
Fasten off your yarn, leaving a 6-inch tail.
VI. Finishing Touches (The Professional Look)
You’re almost done! This last step is what separates a good project from a great one.
- Fasten Off: After your last slip stitch, cut the yarn, leaving a 6-inch tail. Yarn over and pull the tail all the way through the loop on your hook to create a secure knot.
- Weave In ALL Ends: Thread a yarn tail onto your yarn needle. Weave the needle back and forth through the back of the stitches of the same color for about an inch. Change direction once or twice to lock it in place. Trim the excess yarn close to your work. Repeat for every single yarn tail, especially where you changed colors.
Your striped crochet bucket hat is now complete! Wear it with pride, knowing you made it from scratch. This project has taught you how to work in the round, increase stitches, change colors, and create a 3D object—all essential skills for your crochet journey.