 by
by Absolutely! Here’s a long, detailed tutorial on how to make a crochet bag with a 3D flower design, perfect for intermediate beginners or experienced crocheters looking for a fun and fashionable project.
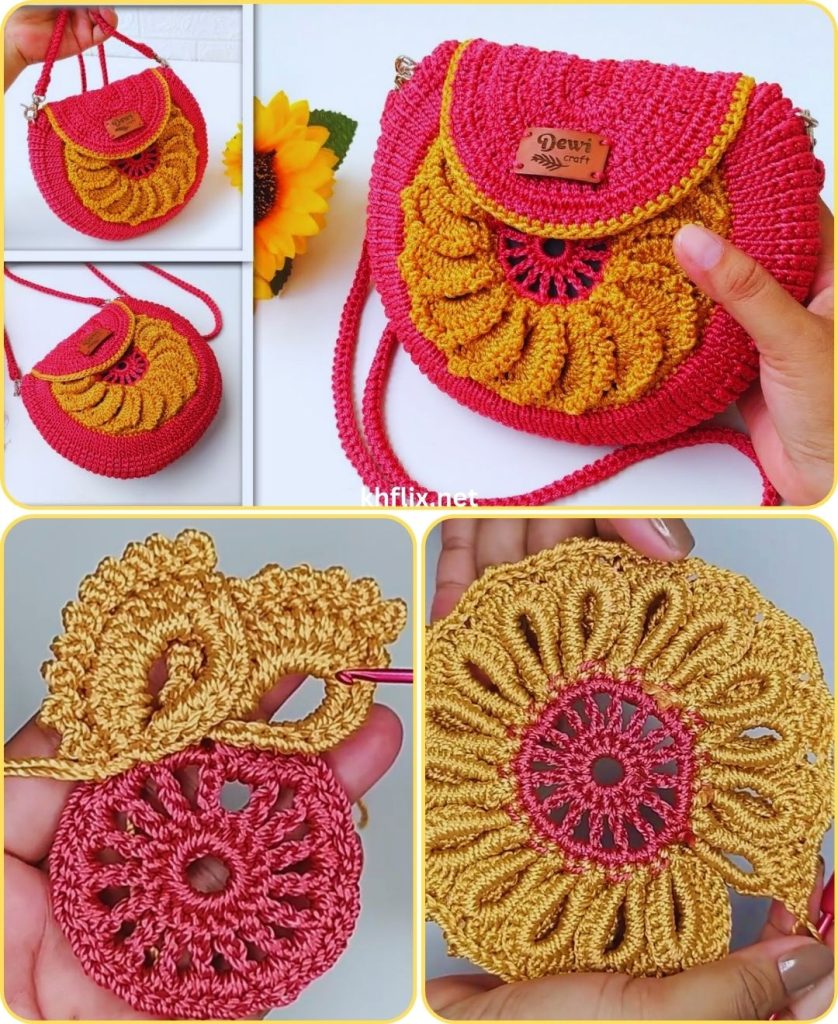
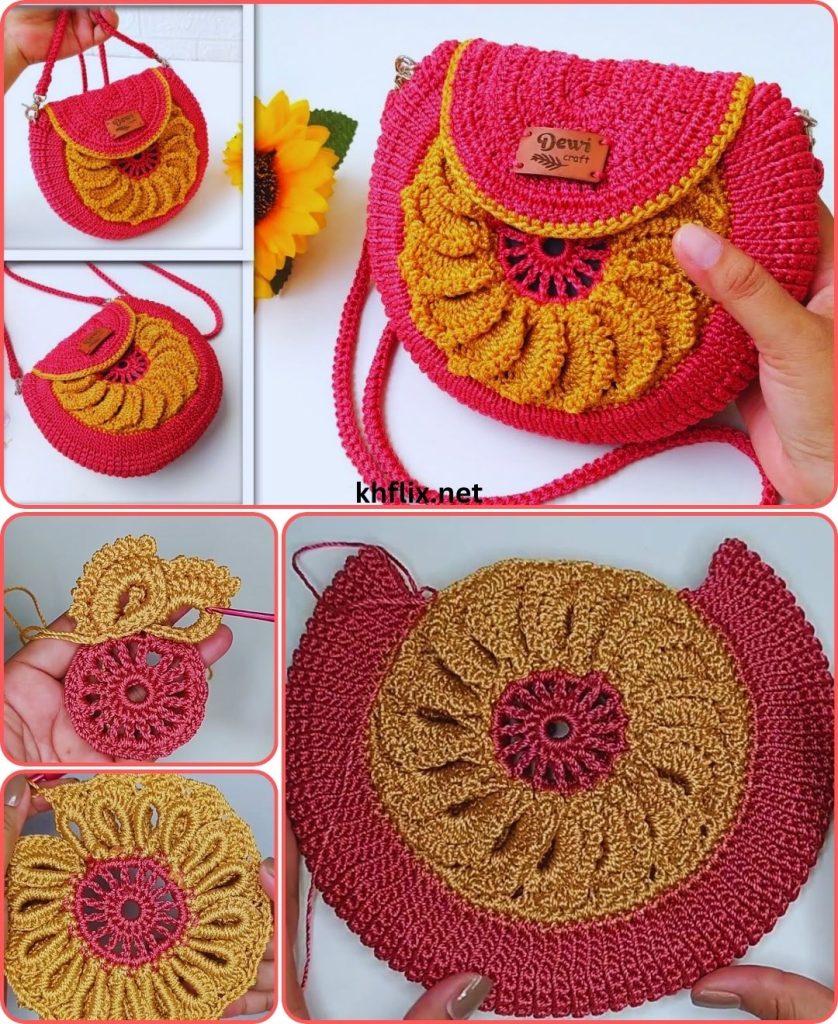
Creating a crochet bag adorned with three-dimensional flowers is a rewarding project that combines two popular crochet techniques: bag construction and amigurumi-style flower making. This guide will walk you through the essential steps, from gathering your materials to assembling the final product.

🪡 Introduction
Crochet bags are one of the most functional and stylish projects you can make with yarn. Add a 3D flower design to your bag, and it instantly becomes a statement piece!
In this comprehensive guide, you’ll learn how to crochet a bag with a built-in or appliquéd 3D flower motif, with step-by-step instructions for both the flower square and bag assembly. This project blends beauty with utility — perfect for gifting or upgrading your wardrobe.
Part 1: Understanding the Components and Gathering Your Materials
Before you begin, it’s crucial to understand the two main parts of this project: the bag and the 3D flowers.
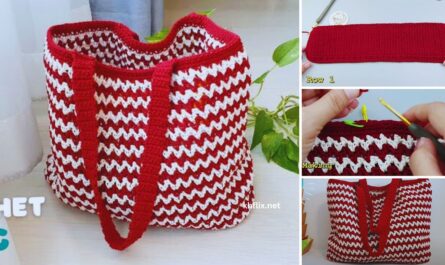
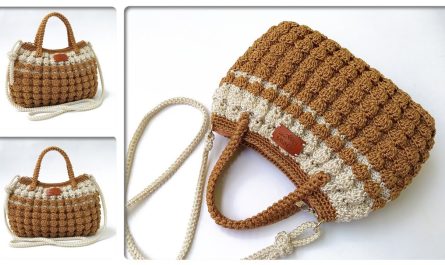
The Bag: This is the main structure. It can be a simple tote, a clutch, a drawstring bag, or a shoulder bag. The stitch you choose for the bag will determine its texture and durability.
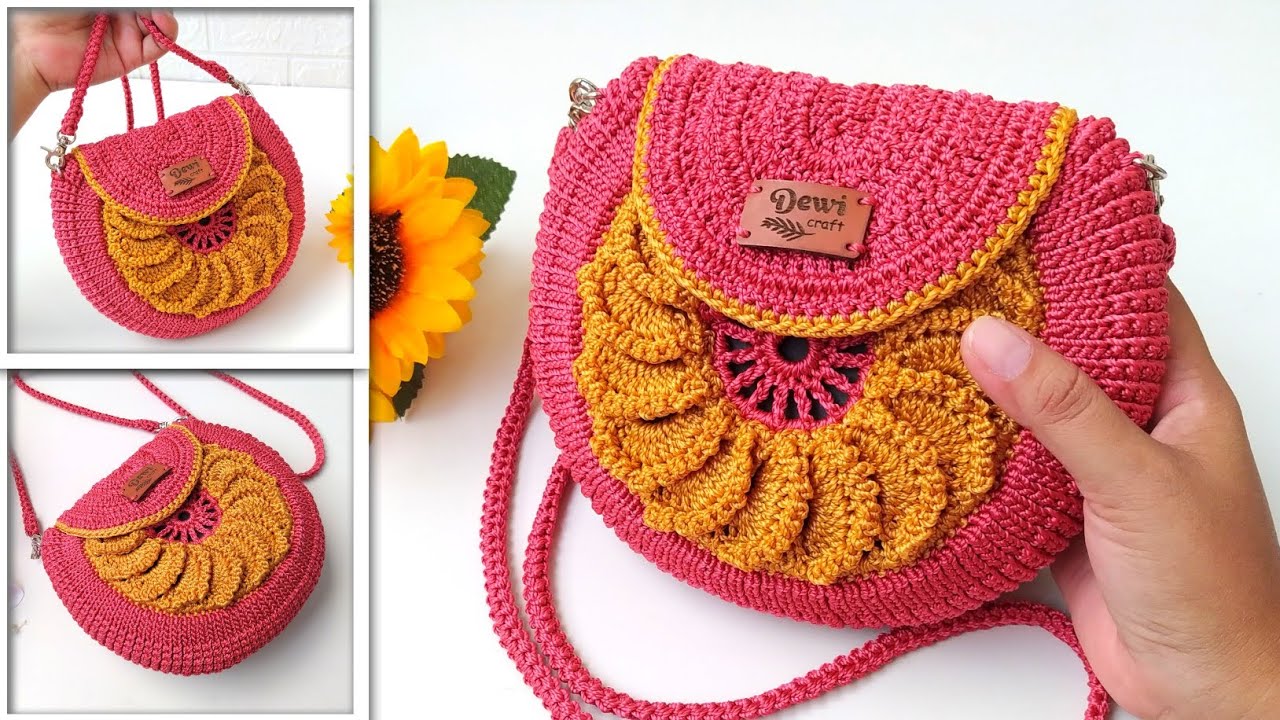
The 3D Flowers: These are the embellishments that bring the bag to life. They are typically worked in separate pieces and then sewn onto the finished bag. Common 3D flower techniques include layered petals, ruffled petals, or simple motifs that pop out from the surface.
Materials You Will Need:
- Yarn:
- For the Bag: Choose a sturdy yarn that will hold its shape. Cotton, t-shirt yarn, and acrylic blends are excellent choices. Consider the weight (e.g., worsted, chunky) based on the size and stiffness you desire.
- For the Flowers: Use a yarn that complements the bag yarn. You might use the same type or a different one for contrast. Worsted-weight acrylic or cotton is a good, versatile choice for amigurumi-style flowers. You’ll need a variety of colors for the petals and a contrasting color for the center (e.g., yellow for a sunflower, black for a poppy center).
- Crochet Hooks:
- For the Bag: The hook size should match the yarn weight. Check the yarn label for the recommended size.
- For the Flowers: A slightly smaller hook than the one for the bag can help create tighter stitches, which is ideal for amigurumi and helps the flowers hold their shape.
- Other Supplies:
- Yarn Needle (tapestry needle): Essential for weaving in ends and sewing the flowers onto the bag.
- Scissors: For cutting yarn.
- Stitch Markers: To help you keep track of rounds and stitches, especially for the bag’s base.
- Lining Fabric (Optional): For a more professional finish and to prevent small items from falling through the stitches.
- Handles (Optional): Pre-made leather or wooden handles can elevate the look of your bag.
Part 2: The Bag Pattern (The Foundation)
For a beginner, a simple rectangular or circular base is the easiest place to start. A single crochet (SC) or half-double crochet (HDC) stitch is a great choice for the main body of the bag as they create a dense, durable fabric.
Step-by-Step Bag Construction (Example: Simple Rectangular Tote)
- Create the Base:
- Chain: Start with a chain of the desired width of your bag.
- Work in Rows (or Rounds): Crochet a few rows in your chosen stitch (e.g., SC or HDC).
- Turn and Work Around: Instead of turning at the end of the row, you will now work around the entire rectangle to create the base. Work stitches down the long side, then around the end, then up the other long side, and finally around the other end. This will create a flat, oval-like shape. Use stitch markers to mark the corners.
- Build the Sides:
- Join and Work in the Round: Once the base is complete, you will stop turning and start working in continuous rounds, without increasing.
- Stitch Choice: Continue with your chosen stitch (SC or HDC) to create the walls of the bag.
- Height: Work in rounds until the bag reaches your desired height.
- Create the Handles:
- Method 1 (Attached Handles): At the top of the bag, you will create a chain for the handle, skip a number of stitches on the bag’s body, and then continue crocheting. In the next round, you’ll crochet into the chain stitches to form the handle.
- Method 2 (Separate Handles): Crochet two long, flat strips in your chosen stitch. Once the bag is finished, you will sew these strips onto the inside of the bag.
- Method 3 (Pre-made Handles): Simply sew the pre-made handles onto the top of the finished bag.
Part 3: The 3D Flower Pattern (The Embellishment)
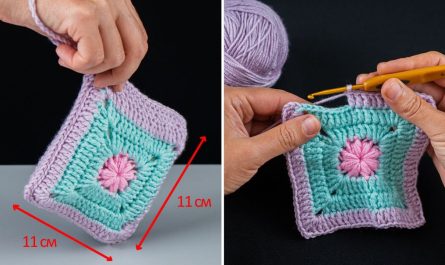
There are countless patterns for 3D flowers. A simple but effective one is a layered rosette.
Step-by-Step 3D Flower Construction (Example: Layered Rosette)
- Center Petal Ring:
- Magic Ring: Start with a magic ring. This is a crucial technique for making tight, no-hole centers for amigurumi.
- Round 1: Chain a few stitches (counts as a double crochet, DC) and then DC into the magic ring. Continue with a number of DC stitches. Join the round.
- Round 2: In each stitch of the previous round, you will create a petal. A simple petal can be made by working a series of stitches in the same stitch (e.g.,
(DC, chain 2, slip stitch)). This will create a little hump. Repeat this for each stitch around the ring.
- Adding Layers:
- Work Behind the First Layer: To add a new layer of petals, you will work your next round behind the first layer. This is often done by slip stitching into the back loops of the stitches from the previous round or by working into the gaps between the petals.
- Larger Petals: For each new layer, you will increase the size of your petals. For instance, you might use a
(treble crochet, chain 2, slip stitch)or a longer series of stitches to make the petals bigger and more prominent.
- Finishing the Flowers:
- Weave in Ends: Once the flower is the size you want, cut the yarn and weave in the ends securely.
- Make More: Repeat the process to create as many flowers as you need for your design.
Part 4: Assembly and Finishing Touches
- Blocking (Optional but Recommended): Blocking helps your finished crochet pieces lay flat and retain their shape. Lightly mist the bag and flowers with water and gently shape them with your hands, then let them dry completely.
- Sewing the Flowers:
- Placement: Arrange the flowers on the bag to create your desired design. You can cluster them, create a diagonal line, or sprinkle them randomly.
- Secure: Using your yarn needle and a long strand of yarn that matches the flower, sew each flower securely to the bag. Work your needle in and out of the bag’s fabric, making sure your stitches are hidden on the back of the flower.
- Adding a Lining (Optional):
- Cut Fabric: Cut a piece of fabric slightly larger than the dimensions of your bag.
- Sew: Sew the fabric together to create a bag-shaped lining.
- Insert and Sew: Insert the lining into the crochet bag and use a slip stitch or a running stitch to sew the top edge of the lining to the inside top of the bag.
With these steps, you are well-equipped to embark on your crochet bag journey. Remember that the best way to learn is to practice. Don’t be afraid to experiment with different yarn colors, flower designs, and bag shapes to create a truly unique and beautiful accessory.