 by
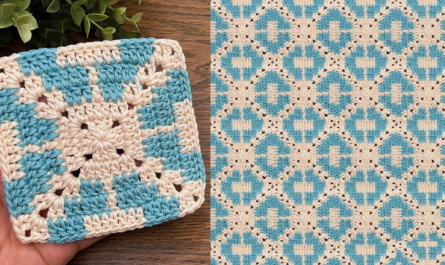
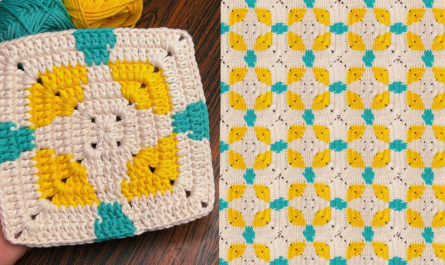
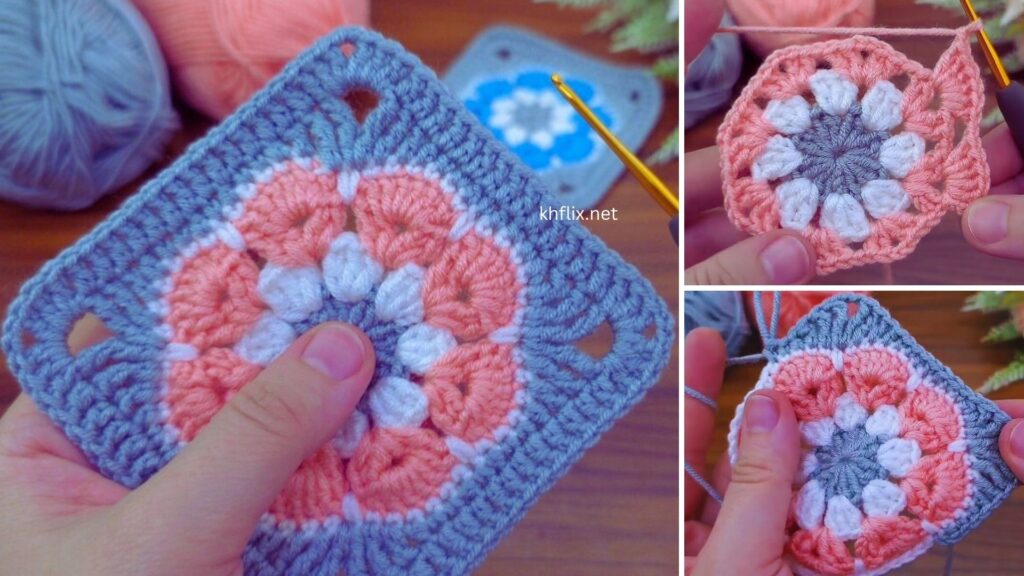
by Creating a “Beautiful Flower Square” is a wonderful way to combine the charm of a floral motif with the versatility of a granny square. These squares are perfect for blankets, bags, garments, or even as decorative coasters. This tutorial will guide you through making a popular and lovely Puff Stitch Flower Granny Square, which starts with a distinct flower and then builds outwards to form a perfect square.
Pattern: How to Make a Beautiful Crochet Flower Square
Project Overview: This pattern creates a square motif with a prominent, dimensional puff stitch flower in the center, surrounded by rounds that “square off” the circular flower into a classic granny square shape.
Skill Level: Intermediate (Requires comfortable knowledge of basic stitches, working in the round, puff stitches, and understanding how to square off a circle).
Finished Square Size (Approximate):
- Using Worsted Weight yarn and H/5.0mm hook: Approx. 6 inches x 6 inches (15 cm x 15 cm).
- Size will vary based on your gauge and chosen yarn/hook.
Materials You’ll Need:
- Yarn:
- Worsted Weight (Medium #4) Yarn: Small amounts of several colors are ideal for a multi-colored flower square.
- Color A: For the flower center (e.g., Yellow, Brown).
- Color B: For the flower petals (e.g., Pink, Red, Blue, Purple).
- Color C: For the “leaves” or connecting round (e.g., Green, or a neutral color like cream).
- Color D: For the squaring-off and outer rounds (e.g., White, Cream, Grey, or any contrasting color).
- Recommended Yarn Type: Cotton or acrylic for good stitch definition and ease of care.
- Worsted Weight (Medium #4) Yarn: Small amounts of several colors are ideal for a multi-colored flower square.
- Crochet Hook:
- Size H/5.0mm (or a size that works well with your chosen yarn to create a firm but not stiff fabric).
- Yarn Needle (Tapestry Needle): For weaving in ends.
- Scissors
- Stitch Marker (Optional): To mark the beginning of rounds.
Gauge (Crucial for Consistent Square Size!)
- Make one complete square.
- Measure its side length. It should be approximately 6 inches (15 cm).
- Adjust your hook size if your square is significantly larger or smaller to achieve a consistent size if you plan to make multiple squares for a project.
Abbreviations Used:
- ch: chain
- sl st: slip stitch
- sc: single crochet
- hdc: half double crochet
- dc: double crochet
- tr: treble crochet (or triple crochet)
- sk: skip
- sp: space
- ch-sp: chain space
- MR: magic ring (or magic circle)
- Puff St: Puff Stitch (yarn over, insert hook into stitch, yarn over, pull up a loop (3 loops on hook); [yarn over, insert hook into same stitch, yarn over, pull up a loop] 2 more times (7 loops on hook); yarn over, pull through all 7 loops on hook. Ch 1 to close the puff stitch – this closing chain is sometimes counted as part of the stitch, sometimes not depending on pattern, here it IS part of the puff stitch structure).
- FO: fasten off
Understanding the Flower Square Structure
This square builds in distinct phases:
- Flower Center: The very core of the flower.
- Petals: Dimensional puff stitches form the main petals.
- Connecting/Squaring Off: A round that starts to create the “corners” and transition from a circle to a square.
- Outer Rounds: Final rounds that define the square shape and bring it to the desired size.
Let’s Start Crocheting Your Beautiful Flower Square!

Part 1: The Flower Center (Color A)
Start: With Color A and H/5.0mm hook.
- Round 1: Create a Magic Ring (MR). Ch 1 (does NOT count as a st). Work 8 sc into the MR. Sl st to the first sc to join. (8 sc)
- If you prefer not to use MR: Ch 3, sl st to first ch to form a ring. Ch 1, work 8 sc into the ring. Sl st to first sc to join.
- FO Color A, leaving a tail to weave in.
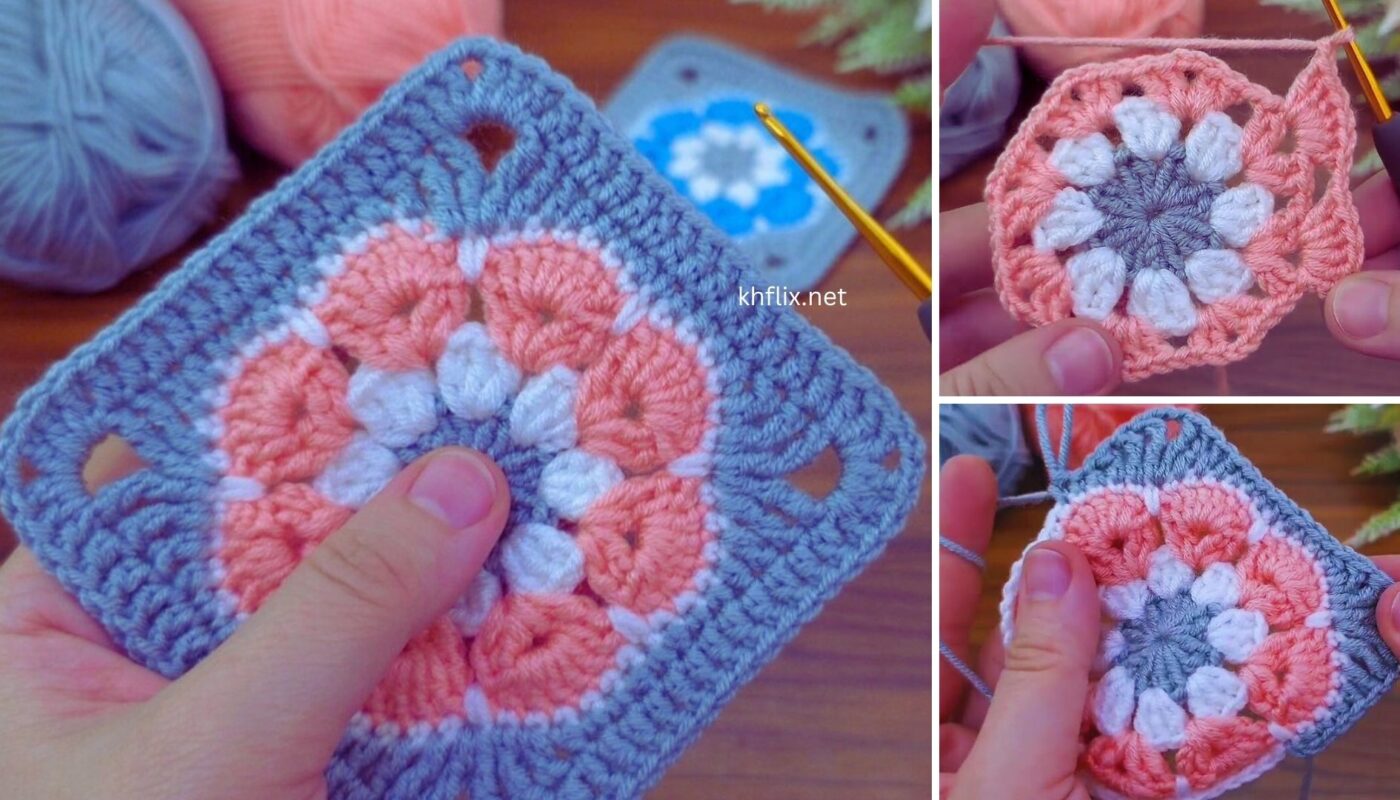
Part 2: The Petals (Color B)
This round creates the beautiful, dimensional puff stitch petals.
Change to Color B.
- Round 2: Join Color B with a sl st into any sc from Round 1. Ch 1. Work Puff St into the same st. Ch 2.
- Sk 1 sc, Puff St into the next sc, Ch 2. Repeat from * to * around.
- You will have 8 Puff Stiches separated by Ch 2 spaces.
- Sl st into the top of the first Puff St to join the round. (8 Puff St, 8 ch-2 sp).
- FO Color B, leaving a tail to weave in.
- Your flower center should now be surrounded by lovely, puffy petals!
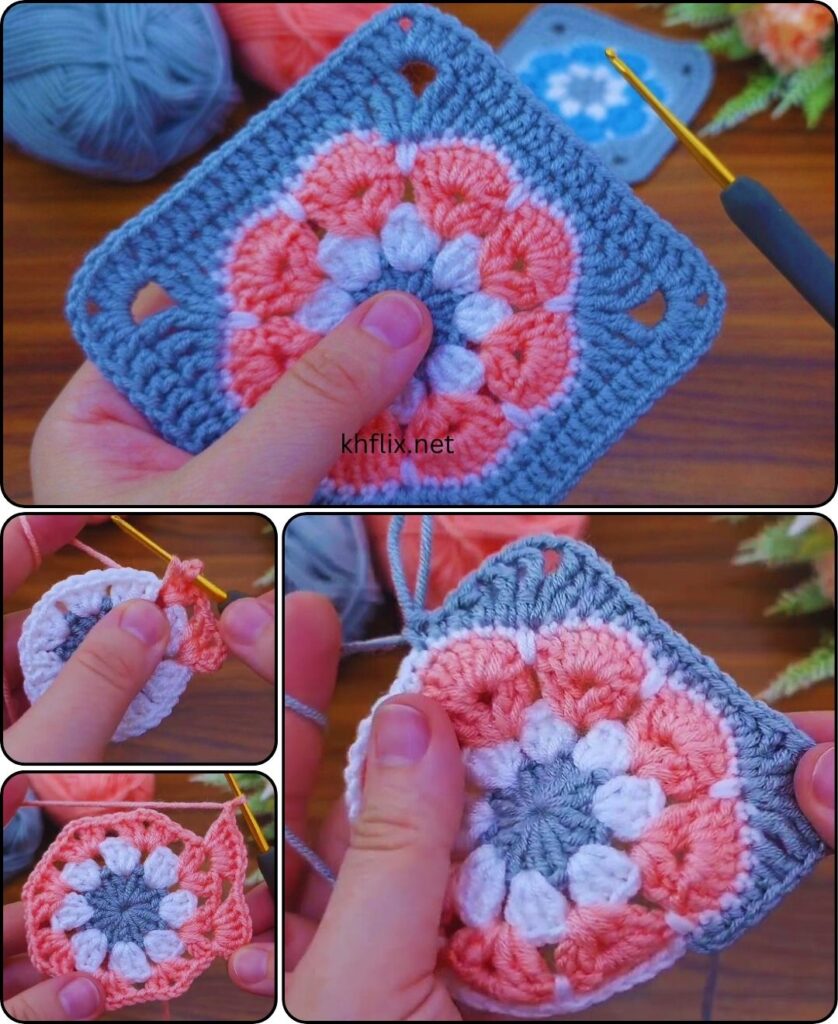
Part 3: The Connecting & Squaring Off Round (Color C)
This round is crucial as it begins to transform your circular flower into a square.
Change to Color C.
- Round 3: Join Color C with a sl st into any ch-2 space (between the petals). Ch 1.
- In the same ch-2 space, work (1 sc, ch 1, 1 hdc). (This forms a “side” sequence).
- In the next ch-2 space, work (2 dc, ch 2, 2 dc). (This forms a “corner” sequence).
- In the next ch-2 space, work (1 hdc, ch 1, 1 sc). (This forms a “side” sequence).
- In the next ch-2 space, work (2 dc, ch 2, 2 dc). (This forms a “corner” sequence).
- Repeat the pattern of (side sequence, corner sequence) two more times to complete the square.
- Sl st into the first sc to join the round.
- (4 “side” sequences of (sc, ch 1, hdc) or (hdc, ch 1, sc), 4 “corner” sequences of (2dc, ch2, 2dc))
- FO Color C, leaving a tail to weave in.
- You should now clearly see the flower in the center and the beginnings of a square shape.
Part 4: Outer Rounds of the Square (Color D)
These final rounds build out the square to your desired size, using the classic granny square pattern.
Change to Color D.
- Round 4: Join Color D with a sl st into any ch-2 corner space. Ch 3 (counts as 1st dc).
- Work (2 dc, ch 2, 3 dc) into the same ch-2 corner space.
- Now, working along the side: Ch 1. 3 dc into the next ch-1 space (from Round 3’s side sequence). Ch 1.
- Now, working to the next corner: Work (3 dc, ch 2, 3 dc) into the next ch-2 corner space.
- Repeat the sequence of (side sequence, corner sequence) two more times to complete the square.
- Ch 1. 3 dc into the last ch-1 space. Ch 1.
- Sl st into the top of the beginning ch 3 to join.
- (4 corners of (3dc, ch2, 3dc), 8 side groups of 3 dc, 12 ch-1 spaces)
- Round 5: Ch 3 (counts as 1st dc).
- Work (2 dc, ch 2, 3 dc) into the same ch-2 corner space.
- Now, working along the side: Ch 1. 3 dc into the next ch-1 space. Ch 1. 3 dc into the next ch-1 space. Ch 1.
- Now, working to the next corner: Work (3 dc, ch 2, 3 dc) into the next ch-2 corner space.
- Repeat the sequence of (side groups, corner sequence) two more times to complete the square.
- Ch 1. 3 dc into the next ch-1 space. Ch 1. 3 dc into the last ch-1 space. Ch 1.
- Sl st into the top of the beginning ch 3 to join.
- (4 corners of (3dc, ch2, 3dc), 12 side groups of 3 dc, 16 ch-1 spaces)
- FO Color D, leaving a tail to weave in.
- At this point, your square should be approximately 6 inches (15 cm) and beautifully defined! You can add more rounds if you want a larger square, simply by repeating the pattern of (Ch 1, 3 dc into each side ch-1 space, Ch 1) between corners.
Finishing Your Beautiful Flower Square
- Weave in All Ends: This is essential for a clean and durable square. Thread each yarn tail onto your yarn needle and carefully weave it into the stitches on the back of the square. Try to hide it securely so it doesn’t unravel.
- Blocking (Highly Recommended):
- Gently wet your finished square (or spray it with water until it’s damp).
- Pin the square onto a foam blocking mat or a towel-covered surface. Gently stretch and shape it into a perfect square, making sure your corners are pointed and the sides are straight.
- Let it air dry completely. Blocking makes a huge difference in opening up the stitches, giving the square a professional finish, and ensuring consistent sizing if you’re making multiple squares for a larger project.
Tips for Success:
- Color Contrast: Choose colors that pop! A light center with dark petals, or vice-versa, can create a striking effect. Using a contrasting color for the squaring-off round (Color C) really highlights the flower.
- Puff Stitch Consistency: Try to make your puff stitches relatively uniform in size for a neat look. Don’t pull too tightly when closing the puff, or it might become too small.
- Tension Control: Maintain even tension throughout to keep your square flat and prevent it from buckling or cupping.
- Counting: Always count your chain spaces and stitch groups in each round to ensure you have the correct number for the corners and sides.
- Uses: These beautiful flower squares are perfect for:
- Blankets and afghans
- Pillows
- Tote bags or pouches
- Coasters or hot pads
- Garments (vests, sweaters)
- Wall hangings
Enjoy creating your lovely crochet flower squares!