by
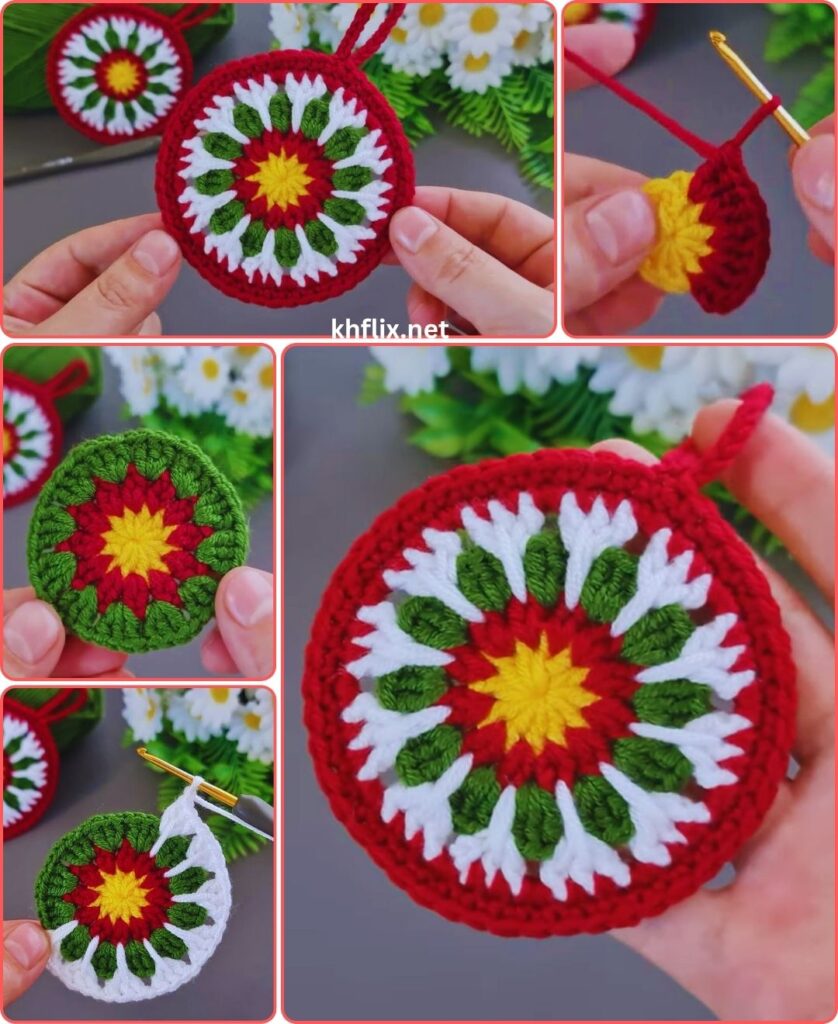
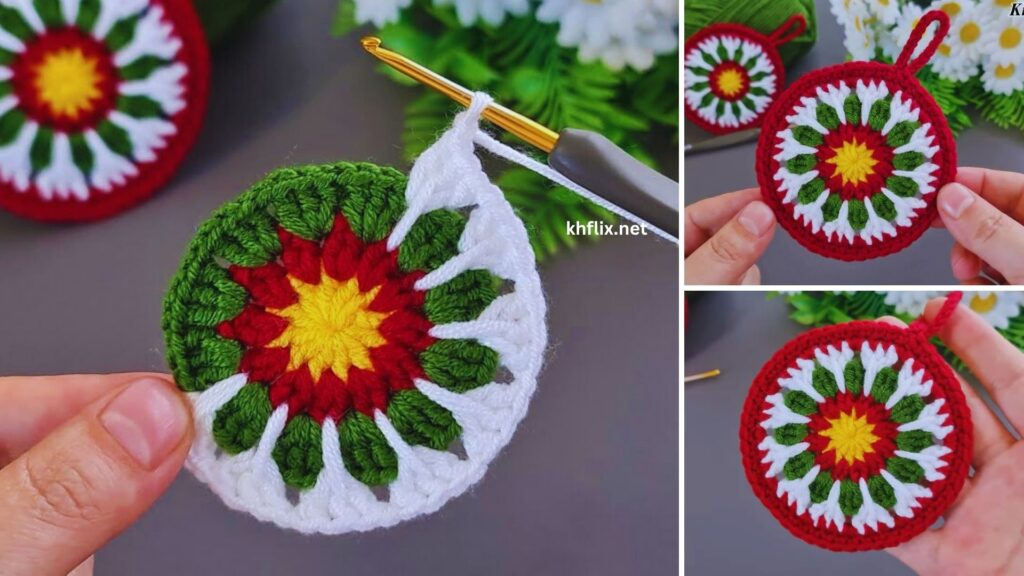
by Let’s get into the festive spirit and crochet some adorable mini Christmas wreaths! These charming little wreaths are perfect for ornaments, gift toppers, garland accents, or even strung together as mini bunting. They’re quick to make and a fantastic way to use up those holiday-colored yarn scraps.
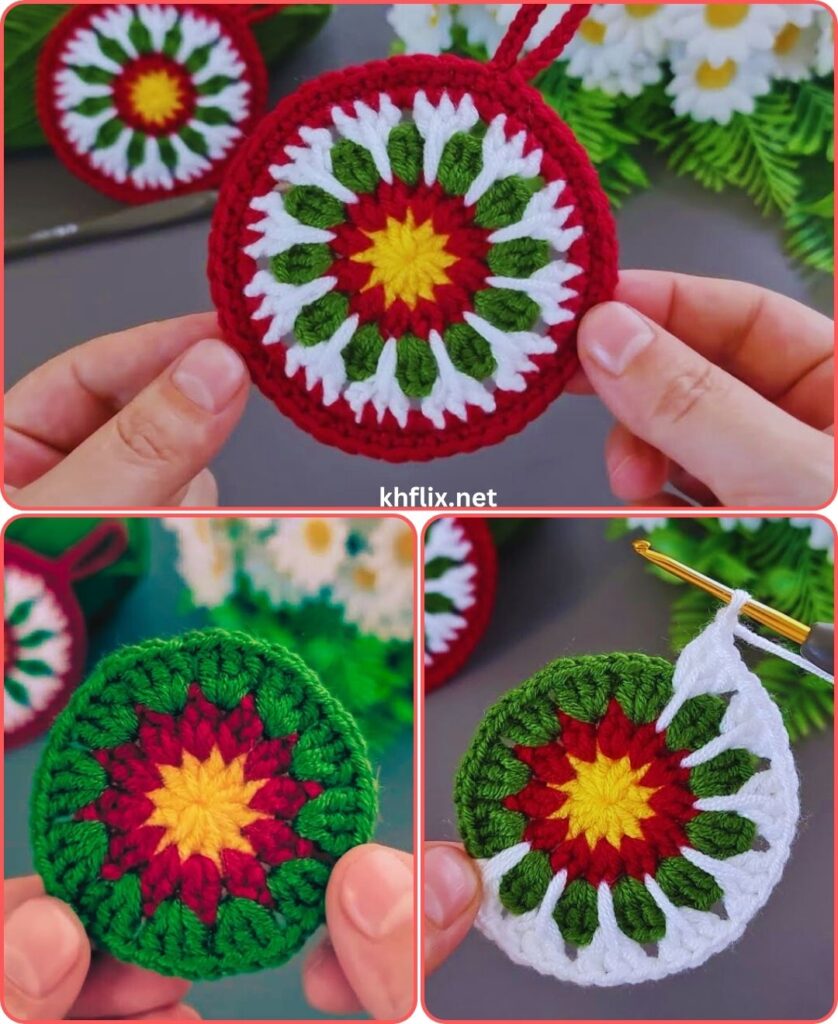
How to Make Mini Christmas Wreaths: A Detailed Crochet Tutorial
This pattern will guide you through creating a sturdy yet delicate mini crochet wreath, perfect for adding a handmade touch to your holiday decor.
Skill Level: Easy
You’ll need to know:
- Chain (ch): The foundation of most crochet projects.
- Slip Stitch (sl st): Used for joining and finishing.
- Single Crochet (sc): A compact, dense stitch.
- Half Double Crochet (hdc): A stitch taller than sc but shorter than dc.
- Working in rounds: Crocheting in a continuous spiral or joined circles.
Finished Mini Wreath Dimensions (Approximate):
- Diameter: 3-4 inches (7.5-10 cm), depending on your yarn, hook, and how tightly you stuff/wrap it.
Materials You’ll Need:
To make your mini Christmas wreaths, gather the following:
- Yarn: Approximately 10-20 yards (9-18 meters) of Worsted Weight (Medium #4) Yarn per wreath.
- Colors: Traditional Christmas colors like green (for the wreath itself), red, white, or gold (for berries, bows, or accents). Cotton or acrylic yarn will work well. Cotton provides good stitch definition, while acrylic is soft and readily available.
- Crochet Hook: Size G/4.0mm or H/5.0mm. The smaller hook will create a denser fabric, which is good for holding shape. Adjust based on your yarn and desired firmness.
- Yarn Needle (Tapestry Needle): Essential for weaving in ends and sewing on embellishments.
- Scissors: For cutting yarn.
- Pipe Cleaner (Chenille Stem): One per wreath, standard size (approx. 12 inches / 30 cm long). This forms the core of your wreath, giving it structure and making it easy to shape. Choose a color that blends with your yarn (e.g., green for a green wreath).
- Optional Embellishments:
- Small beads (red for berries)
- Small jingle bells
- Tiny buttons
- Thin ribbon for bows
- Embroidery floss for details
- Hot glue gun (for securing embellishments quickly, use sparingly)
Gauge:
Gauge isn’t critical for this project, as long as your stitches are tight enough to comfortably wrap around the pipe cleaner without showing through too much. Aim for a dense fabric.
Abbreviations Used in This Pattern:
- ch: chain
- sl st: slip stitch
- sc: single crochet
- hdc: half double crochet
- st(s): stitch(es)
- rep: repeat
- FO: fasten off
Let’s Crochet Your Mini Christmas Wreaths!
This pattern involves crocheting a long strip that will then be wrapped around a pipe cleaner to form the wreath shape.
Part 1: Crocheting the Wreath Strip (Use Green Yarn for the Wreath Base)
- Foundation Chain:Ch 60.
- This chain length will determine the circumference of your mini wreath. 60 chains is a good starting point for a 3-4 inch wreath when wrapped around a pipe cleaner. If you want a larger or smaller wreath, adjust this number.
- Row 1:
- Sc in the 2nd chain from your hook.
- Sc in each chain across to the end of the row.
- [You should have 59 sc stitches.]
- Row 2:
- Ch 1 (does NOT count as a stitch).
- Turn your work.
- Sc in each stitch across to the end of the row.
- [You should have 59 sc stitches.]
- Repeat Rows:
- Repeat Row 2 until your strip measures approximately 1-1.5 inches (2.5-4 cm) in width. This usually takes about 5-7 rows total, depending on your hook size and tension. The wider the strip, the “fuller” your wreath will appear.
- After your last row, do NOT fasten off.
Part 2: Assembling the Wreath
Now we’ll use the pipe cleaner to give your crocheted strip its wreath shape and firmness.
- Insert Pipe Cleaner:
- Take your crocheted strip and lay it flat.
- Take your pipe cleaner and place it along one of the long edges of your crocheted strip. The goal is to crochet around the pipe cleaner to embed it inside the strip.
- Joining the Strip Around the Pipe Cleaner:
- With your yarn still attached from Part 1, fold your crocheted strip in half lengthwise, bringing the unworked long edge to meet the edge with the pipe cleaner.
- You will now work through both layers of the strip (the current row and the stitches of the foundation chain or first row) with the pipe cleaner enclosed inside.
- Ch 1 (does NOT count as a stitch).
- Sc through both layers of the strip (inserting your hook through the stitch on your hook’s side and a corresponding stitch on the other side) AND around the pipe cleaner. This means the pipe cleaner should be inside the stitch as you work it.
- Continue working sc stitches through both layers and around the pipe cleaner all the way down the strip. Make sure the pipe cleaner stays snugly inside.
- [You should have 59 sc stitches, forming a long, stuffed tube.]
- Forming the Wreath Shape:
- Once you’ve crocheted all the way down the strip, sl st into the very first sc stitch you made in this joining round to connect the two ends of your strip. This forms a continuous circle.
- Gently bend and shape the pipe cleaner inside the crocheted tube into a circular wreath shape. The pipe cleaner makes this very easy and allows it to hold its form.
- Fasten off (FO), leaving a 6-inch tail for sewing.
Part 3: Weaving in Ends and Embellishing
This is where your mini wreath truly comes to life!
- Weave in Ends:
- Thread any loose yarn tails onto your yarn needle.
- Carefully weave them into the stitches of the wreath, making them invisible. Pay attention to the starting and ending tails, ensuring they’re securely hidden within the crocheted fabric.
- Add a Hanging Loop:
- If you want to hang your wreath, use a small piece of yarn (or a narrow ribbon) about 5-6 inches long. Fold it in half to create a loop.
- Insert your crochet hook or yarn needle through the top center of the wreath, pull the folded end of the yarn through, then thread the two loose ends through the loop and pull tight. Tie a secure knot.
- Embellish Your Wreath (Get Creative!):
- Berries: Use red yarn to embroider small “French knots” directly onto the wreath, or thread small red beads onto your yarn needle and sew them onto the wreath in clusters.
- Bow: Tie a tiny bow from thin red, gold, or striped ribbon. Sew it securely onto the top or bottom of the wreath using your yarn needle. A dab of hot glue can also secure it quickly.
- Jingle Bell: Thread a small jingle bell onto a piece of yarn and tie it securely to the bottom of the wreath.
- Snowflakes/Stars: Crochet tiny white snowflakes or stars (using sc or sl st in a round) and sew them onto the wreath.
- Sparkle: If your yarn isn’t sparkly, you can lightly mist the wreath with clear glitter spray for a touch of festive shimmer once it’s completely finished.
Tips for Success:
- Consistent Tension: Try to maintain even tension throughout your crocheting, especially when working the strip, so your wreath looks uniform.
- Hiding Ends: Take your time to weave in all ends securely. A well-hidden end makes all the difference in the finished appearance.
- Customization: Don’t be afraid to experiment with different yarn colors, embellishments, and strip widths to create a variety of unique mini wreaths!
You’ve now created a delightful mini Christmas wreath! These little festive ornaments are so versatile and add a wonderful handmade touch to your holiday celebrations. Enjoy making a whole collection!