by
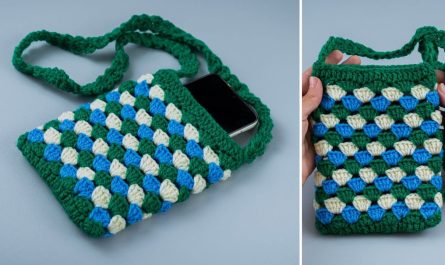
by Let’s create an absolutely stunning crochet handbag adorned with a beautiful 3D flower motif! This project combines practical functionality with eye-catching design, making a truly unique accessory. It’s a fantastic way to showcase your crochet skills and add a touch of handmade elegance to your style.
How to Crochet a Beautiful Handbag with a 3D Flower Motif: A Detailed Step-by-Step Tutorial
This comprehensive guide will walk you through crocheting a sturdy and stylish handbag, focusing on the techniques for creating a prominent 3D flower to embellish it. We’ll cover everything from the bag’s construction to attaching the flower and finishing touches.
Skill Level: Intermediate to Advanced Intermediate
This project assumes you’re comfortable with:
- Chain (ch): The basic foundation.
- Slip Stitch (sl st): For joining rounds and neatening.
- Single Crochet (sc): A dense, sturdy stitch, great for bags.
- Half Double Crochet (hdc): A slightly taller stitch that builds fabric quickly.
- Double Crochet (dc): A common stitch for height and texture.
- Treble Crochet (tr) / Triple Crochet: A taller stitch for certain flower elements.
- Magic Ring (MR): A common starting method for working in the round.
- Working in rounds: Crocheting in a continuous or joined circular manner.
- Increasing and Decreasing: Shaping the bag and flower.
- Working into specific loops (BLO/FLO): For creating defined edges.
- Working into stitch spaces: Creating stitches into the chain spaces of previous rounds.
- Weaving in ends securely.
- Basic hand sewing (for lining and attaching the flower).
Finished Bag Dimensions (Approximate):
This pattern creates a versatile, medium-sized handbag, typically around 10-12 inches (25-30 cm) wide and 8-10 inches (20-25 cm) tall (excluding handles and flower). You can easily adjust the size by modifying your starting chain and the number of rounds for the bag body. The 3D flower will be about 4-5 inches (10-12.5 cm) in diameter.
Materials You’ll Need:
- Yarn: Approximately 400-500 yards (365-457 meters) total of Worsted Weight (Medium #4) Cotton or Cotton Blend Yarn.
- Why Cotton? Cotton yarn is highly recommended for bags due to its exceptional durability, minimal stretch (which helps the bag maintain its shape), and excellent stitch definition. These properties are perfect for creating a sturdy bag and defined stitches for your flower.
- Color Choice:
- Main Bag Color (Color A): A solid color for your bag (e.g., beige, black, navy, grey, or a jewel tone).
- Flower Colors (Color B, C, D): You’ll need 2-3 colors for your 3D flower.
- Flower Center (Color B): A bright yellow, cream, or light green.
- Inner Petals (Color C): A lighter shade of your main flower color or a contrasting color.
- Outer Petals (Color D): The main color for your flower petals (e.g., pink, red, purple, blue, or a darker shade of your flower center).
- Crochet Hook: Size H/5.0mm or I/5.5mm. A 5.0mm hook generally creates a denser fabric, which is ideal for a sturdy bag. If your tension is very tight, you might prefer a 5.5mm.
- Yarn Needle (Tapestry Needle): Essential for seamlessly weaving in all your loose yarn tails and sewing the flower to the bag.
- Scissors: For cutting your yarn.
- Stitch Marker (Optional but Highly Recommended): These are incredibly helpful for marking the beginning of your rounds.
- Bag Handles (Optional): You can crochet your own handles (basic instructions provided) or purchase pre-made handles (like leather, bamboo, or sturdy metal rings) for a professional touch.
- Fabric for Lining (Optional but Highly Recommended): A piece of cotton or poly-cotton fabric in a matching or complementary color, along with matching thread and a sewing machine or hand-sewing needle. A lining adds significant structure, prevents stretching, and ensures small items don’t slip through any stitch gaps.
Understanding the Bag Construction:
We’ll build this handbag in a seamless, continuous manner for maximum durability and a clean finish. The process involves four main stages:
- Creating an Oval Base: This foundation gives your bag stability and shape.
- Building the Body: Working upwards in rounds to form the main structure of the bag.
- Crocheting the 3D Flower Motif: A separate, multi-layered piece that will be sewn onto the bag.
- Attaching Handles and Finishing: Adding the carrying straps and putting all the final touches.
Let’s Crochet Your Beautiful Handbag!
Part 1: Crocheting the Oval Base (Main Bag Color A)
A solid, flat base is crucial for your handbag to sit upright and hold its contents without sagging. We’ll use single crochet (sc) for a dense and sturdy foundation.
- Starting Chain:
- With Color A, make a slip knot and place it on your hook.
- Chain (ch) 31. (This chain forms the initial length of your bag’s base. If you want a wider bag, chain more stitches; for a narrower one, chain fewer. Keep the number odd for easier symmetry in later rounds.)
- Round 1:
- Work 2 single crochet (sc) stitches into the 2nd chain from your hook.
- Work 1 sc into each of the next 28 chains across.
- Work 3 sc into the very last chain. (This forms the smooth, curved end of your oval, turning your work around the corner.)
- Now, working down the opposite side of the foundation chain (into the bottom loops of the chains you just worked into): Work 1 sc into each of the next 28 chains across.
- Work 1 sc into the very first chain (the same chain where you placed the initial 2 sc).
- Slip stitch (sl st) into the first sc of the round to join.
- [Total: 62 sc] (This completes your first oval base round.)
- Round 2:
- Ch 1 (this chain does NOT count as a stitch, it just gives height).
- Work 2 sc into the first stitch (this is your first increase on the curve).
- Work 1 sc into the next 29 stitches.
- Work 2 sc into each of the next 3 stitches (these are increases evenly spaced around the curve).
- Work 1 sc into the next 29 stitches.
- Work 2 sc into each of the last 2 stitches (increases around the final curve to complete the oval shape).
- Sl st into the first sc to join.
- [Total: 68 sc]
- Round 3:
- Ch 1.
- Work 2 sc into the first stitch.
- Work 1 sc into the next 30 stitches.
- Work 2 sc into each of the next 3 stitches.
- Work 1 sc into the next 30 stitches.
- Work 2 sc into each of the last 2 stitches.
- Sl st into the first sc to join.
- [Total: 74 sc]
- Round 4 (Optional for a larger base):
- Ch 1.
- Work 2 sc into the first stitch.
- Work 1 sc into the next 31 stitches.
- Work 2 sc into each of the next 3 stitches.
- Work 1 sc into the next 31 stitches.
- Work 2 sc into each of the last 2 stitches.
- Sl st into the first sc to join.
- [Total: 80 sc]
- Important Base Check: At this point, your base should be a flat oval that lies nicely without curling up or ruffling excessively. If it curls, you might need to add one more round of increases following the established pattern. If it ruffles, you’ve likely increased too much in a previous round, and you may need to undo that round and adjust. The goal is a perfectly flat, stable foundation for your bag.
Part 2: Building the Bag Body (Main Bag Color A)
Now we’ll transition from the flat base to build the upright sides of your handbag. We’ll use half double crochet (hdc) for this section. Hdc creates a fabric that’s dense and sturdy, but it works up a bit faster than single crochet.
- Round (Transition to Body – Creating the Defined Edge):
- Ch 1 (does NOT count as a stitch).
- Work 1 hdc in the back loop only (BLO) of each stitch around. (This is a crucial step for a neat finish! By working only into the back loop, you create a beautiful, defined ridge where the base seamlessly transitions into the bag’s upright sides. It gives your bag a professional, structured look.)
- Sl st into the first hdc to join.
- [Total: 80 hdc] (Your stitch count will remain exactly the same as your final base round, but the fabric will now start to turn upwards.)
- Round onwards (Building the Bag Sides):
- Ch 1 (does NOT count as a stitch).
- Work 1 hdc into each stitch around (now working through both loops as you normally would for hdc).
- Sl st into the first hdc to join.
- [Total: 80 hdc]
- Repeat this Round until your bag reaches the desired height. For a typical handbag, aim for approximately 15-20 additional rounds of hdc from the BLO ridge, which should result in a bag about 8-10 inches (20-25 cm) tall. Adjust the number of rounds to make your bag taller or shorter as you prefer.
- Finishing the Top Edge:
- After completing your final hdc body round, Ch 1 (does NOT count as a stitch).
- Work 1 sc in each stitch around.
- Sl st into the first sc to join.
- [Total: 80 sc]
- Repeat this sc round for 2-3 more times. This creates a very tight, dense, and firm top border. This firmness is key to preventing the top of your bag from stretching out over time and provides a solid base for securely attaching your handles.
- Fasten off, leaving a 6-inch (15 cm) tail for weaving in later.
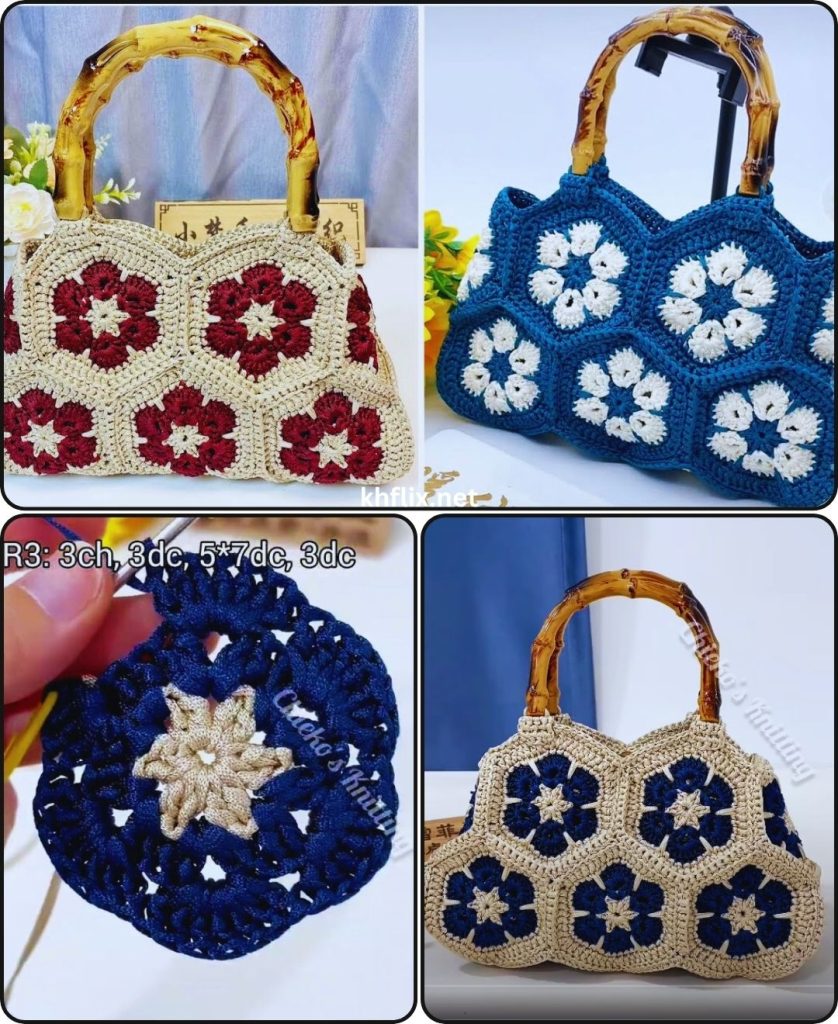
Part 3: Crocheting the 3D Flower Motif (Flower Colors B, C, D)
This is the eye-catching centerpiece of your handbag! We’ll build this flower in layers.
What is a 3D Flower Motif?
For this project, the “3D flower” will be created by layering petals of different heights and textures, building outwards from a central core. The key to the 3D effect involves working stitches into the same space multiple times or using taller stitches to make the petals stand out.
- For the petals, we’ll mostly use variations of the (dc, ch 2, dc) pattern, which creates a slight ‘point’ and separation, making them pop.
- Flower Center (Color B):
- With Color B (e.g., Yellow), create a Magic Ring (MR).
- Round 1:
- Ch 2 (does NOT count as a stitch).
- Work 10 hdc into the Magic Ring.
- Sl st into the first hdc to join the round.
- [Total: 10 hdc]
- If using MR, pull the tail tightly to close the center hole.
- Fasten off, leaving a tail for weaving in.
- Inner Petals (Color C):
- Join Color C (e.g., White) with a sl st into any space between two hdc stitches from Round 1 (Flower Center).
- Round 2 (Inner Petals):
- Ch 2 (does NOT count as a stitch).
- In the same space where you joined: Work (1 dc, 1 hdc, 1 sc).
- In the next space between hdc stitches: Work (1 sc, 1 hdc, 1 dc).
- *(In the next space between hdc stitches: Work (1 dc, 1 hdc, 1 sc).
- In the next space between hdc stitches: Work (1 sc, 1 hdc, 1 dc)).*
- Repeat from * to * 3 more times around. You should have created 5 groups of (dc, hdc, sc) and 5 groups of (sc, hdc, dc). These will form 10 individual smaller petals.
- Sl st into the base of the first petal (the first ch 2) to join.
- [Total: 10 petals]
- Fasten off, leaving a tail for weaving in.
- Outer Petals (Color D):
- Join Color D (e.g., Yellow, same as Color B) with a sl st into any hdc stitch from Round 1 (Flower Center), behind the petals of Round 2. (You’re basically working under the white petals of Round 2).
- Round 3 (Outer Petals):
- Ch 3 (counts as first dc).
- In the same hdc stitch from Round 1 where you joined: Work (2 dc, ch 2, 3 dc). (This creates your first large petal group.)
- *(Skip 1 hdc from Round 1. In the next hdc from Round 1: Work (3 dc, ch 2, 3 dc)).*
- Repeat from * to * 3 more times. You will have 5 large petal groups.
- Sl st into the top of the beginning Ch 3 to join.
- [Total: 5 large petal groups]
- Fasten off, leaving a very long tail (at least 12 inches / 30 cm) for attaching the flower to the bag.

Part 4: Attaching Handles and Finishing Touches
Now we bring all the pieces together to complete your beautiful handbag.
- Create and Attach Handles (Main Bag Color A):
- Crocheting the Handles (Make 2):
- With Color A, Ch 8. (This will be the width of your handle. If you want a wider handle, chain more stitches; for a narrower one, chain fewer.)
- Work 1 sc into the 2nd chain from your hook and in each chain across. (You should now have 7 sc).
- Ch 1, turn (this is your turning chain for the next row).
- Work 1 sc into each of the 7 sc across.
- Repeat the last step (Ch 1, turn, sc across) until your strap reaches the desired length. For a typical handbag, aim for approximately 16-20 inches (40-50 cm).
- Fasten off, leaving a very long tail (at least 12-18 inches / 30-45 cm) on each end of the handle for sewing.
- Attaching the Handles:
- Lay your completed bag flat and gently flatten it out so the side “creases” are even. This helps ensure your handles are symmetrically placed.
- Position your first handle. On one side of the bag, measure in approximately 2-3 inches (5-7.5 cm) from each flattened side crease along the top edge. These points mark where you’ll attach the handle. You can use stitch markers to temporarily mark these spots.
- Thread one of the long tails of the handle onto your yarn needle.
- Align one end of the handle with one of your marked spots on the inside of the bag’s top border.
- Using your yarn needle, firmly sew the handle end to the bag’s top border. Pass your needle through multiple layers of the bag’s sturdy sc stitches. Make several passes and criss-cross stitches to ensure the handle is incredibly secure and can withstand weight.
- Repeat for the other end of the first handle, attaching it to the second marked spot on the same side of the bag.
- Repeat the entire process for the second handle on the opposite side of the bag, taking care to ensure it is positioned symmetrically to the first.
- Option: Purchased Handles: If you opt for pre-made handles (e.g., wooden, metal, or leather), follow their specific attachment instructions. Usually, they involve sewing them securely to the top border of your bag with strong thread.
- Crocheting the Handles (Make 2):
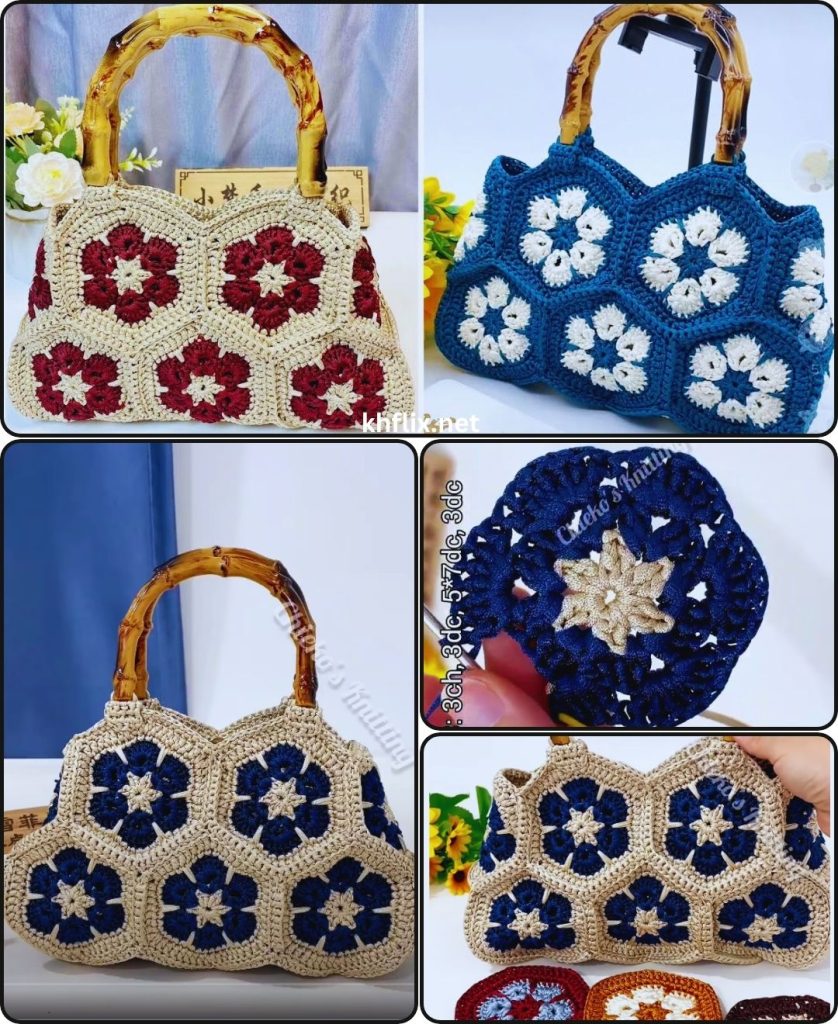
- Attach the 3D Flower Motif:
- Decide where you want to place your flower on the front of your bag. Typically, it looks best centered, either slightly above the middle or in the upper half.
- Position the flower on the bag.
- Using the long tail from your flower (Color D) and your yarn needle, begin sewing the flower firmly to the bag. Stitch through the base of the flower and into the stitches of the bag, making sure your stitches are secure and invisible from the front of the flower. Go around the entire outer edge of the flower’s base.
- Weave in any remaining tail securely on the inside of the bag.
- Weave in ALL Remaining Ends: This is often the least favorite part of crocheting, but it’s absolutely critical for a clean, neat, and durable bag. Use your yarn needle to meticulously weave in all remaining tails from your bag body, base, and flower color changes.
- How to Weave Neatly: Weave the tails into the stitches of the same color as the tail. Weave in one direction for about 1.5-2 inches (4-5 cm), then subtly change direction and weave back through some of the same stitches. This “locks” the tail in place and prevents it from unraveling. Be patient and thorough; well-woven ends are practically invisible and significantly contribute to your bag’s longevity and appearance.
- Lining the Bag (Highly Recommended for Durability & Functionality): A fabric lining dramatically improves the functionality and longevity of any crochet bag. It provides significant structure, prevents the bag from stretching out, helps it hold its shape even when filled, and, crucially, ensures small items (like keys, pens, or coins) don’t slip through any tiny gaps in your crochet stitches.
- Measure: Carefully measure the finished dimensions of your crochet bag: its height, its width, and the length/width of its oval base.
- Cut Fabric: Cut fabric pieces to match the inside dimensions of your bag. You’ll typically need a main body piece (a large rectangle that will wrap around the inside) and a separate oval piece for the bottom, mirroring your crocheted base. Remember to add a generous seam allowance (e.g., 1/2 inch or 1.2 cm) to all edges of your fabric pieces.
- Sew Fabric Lining: Stitch the fabric pieces together (right sides facing each other) to create a fabric “bag” that will fit snugly inside your crochet bag. Press all seams open for a neat finish. Create a neat hem around the top edge of the fabric lining.
- Insert and Secure: Carefully place the completed fabric lining inside your crochet bag. Align the top edges of both the crochet bag and the lining. Fold the hemmed top edge of the lining over the top edge of the crochet bag slightly (if needed) to create a clean finish. Then, using matching thread and a hand-sewing needle, hand-stitch the lining securely to the inside top edge of the crochet bag. Stitch carefully so the stitches are not visible from the outside of your beautiful bag.
- Blocking (Optional but Very Helpful): Blocking is a process that sets your stitches, evens out tension, and helps your bag take on its intended shape. It can make a huge difference in the final look.
- Gently stuff your bag with towels or crumpled paper to fill it to its desired shape. Ensure it’s plump and even.
- Using a spray bottle, lightly mist the entire bag evenly with water (if using cotton yarn). For some synthetic fibers, you can gently hover a steamer or an iron (on a low, steam setting) over the fabric without touching it.
- Gently shape the bag with your hands while it’s damp, ensuring the base is flat, the sides are even, and the flower lies nicely.
- Allow the bag to air dry completely and thoroughly before removing the stuffing. This can take 24-48 hours.
Congratulations! You’ve now created a truly beautiful, sturdy, and unique crochet handbag with a 3D flower motif! This handmade accessory is a wonderful testament to your creativity and will surely turn heads. Enjoy carrying your stunning creation!