 by
by Crocheting a Strawberry Flower Tote Bag with Striped Colors is a delightful project that combines charming floral motifs with vibrant stripes, resulting in a unique and eye-catching accessory. This tutorial will guide you through creating individual strawberry flower motifs, joining them into panels, adding a striped body, and finishing with comfortable handles. It’s a fantastic project for those looking to expand their skills and create something truly special.
Skill Level: Intermediate
This project is best suited for crocheters who are comfortable with basic stitches and are ready to tackle motif work, color changes, and joining techniques. You’ll practice:
- Magic Ring (MR) / Adjustable Ring: For a tight, seamless flower center.
- Chain (ch): Fundamental for starting, spacing, and handles.
- Slip Stitch (sl st): For joining stitches and rounds neatly.
- Single Crochet (sc): A compact, sturdy stitch (used for joining and handles).
- Half Double Crochet (hdc): A versatile, medium-height stitch.
- Double Crochet (dc): A taller stitch (used for flower petals and bag body).
- Popcorn Stitch (PC): For the textured “strawberry” center of the flower.
- Working in the Round: For the flower motifs.
- Working in Rows: For the striped bag body.
- Joining Motifs: Seaming individual flower squares.
- Changing Colors: Seamlessly switching yarns for stripes and flower details.
- Fastening Off: Securely ending your yarn.
- Weaving in Ends: The crucial final step for a polished and durable bag.
Finished Tote Bag Dimensions (Approximate):
Using worsted weight yarn (Medium #4) and the suggested hook, your finished tote bag will typically be:
- Width: 12-14 inches (30-35 cm)
- Height: 12-14 inches (30-35 cm) (excluding handles)
- Handles: 18-22 inches (45-56 cm) tall loop (from bag edge to top of handle, for shoulder carry)
These dimensions are based on making a certain number of motifs. You can adjust the size by making more or fewer motifs, or by adding more rows to the striped body.
Materials You’ll Need:
Gathering your supplies beforehand ensures a smooth and enjoyable crocheting session!
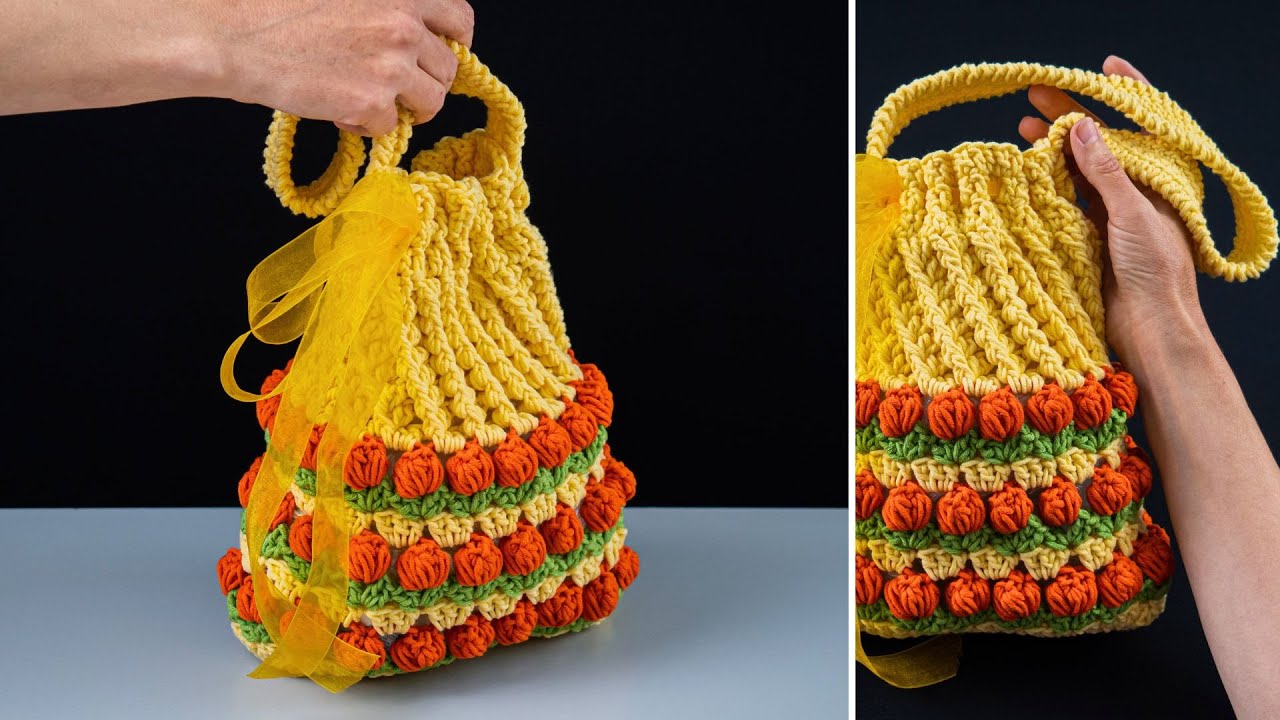
- Yarn:Worsted Weight (Medium #4) Cotton or Cotton Blend Yarn is highly recommended. Cotton is durable, holds its shape well, and is great for bags.
- Color A (Strawberry Center): Small amount of bright red (for the popcorn stitch).
- Color B (Flower Petals): Small amount of white or cream (for the main flower petals).
- Color C (Flower Background / Leaves): Small amount of green (for squaring off the flower motif, acting as leaves).
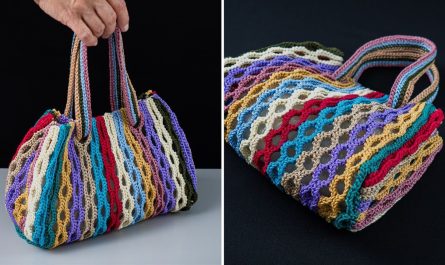
- Colors D, E, F, etc. (Stripes): Your chosen stripe colors. Pick 2-4 complementary colors (e.g., navy blue, light blue, yellow, and white for a nautical theme, or pastels for a softer look).
- Color G (Handles / Optional Border): A sturdy contrasting or matching color for the handles (e.g., white, navy, or a dark green).
- Quantity: You’ll need about 50-70 yards of each motif color (A, B, C) for approximately 10-12 motifs. For the striped body and handles, estimate 300-500 yards depending on your chosen height and number of stripe colors. It’s always a good idea to buy a bit extra!
- Crochet Hook: Size H/5.0mm. This size creates a dense enough fabric for a bag.
- Yarn Needle (Tapestry Needle): Essential for weaving in ends and joining motifs.
- Scissors: For cutting yarn.
- Stitch Markers (Optional but Recommended): Helpful for marking the first stitch of a round or corner stitches when joining.
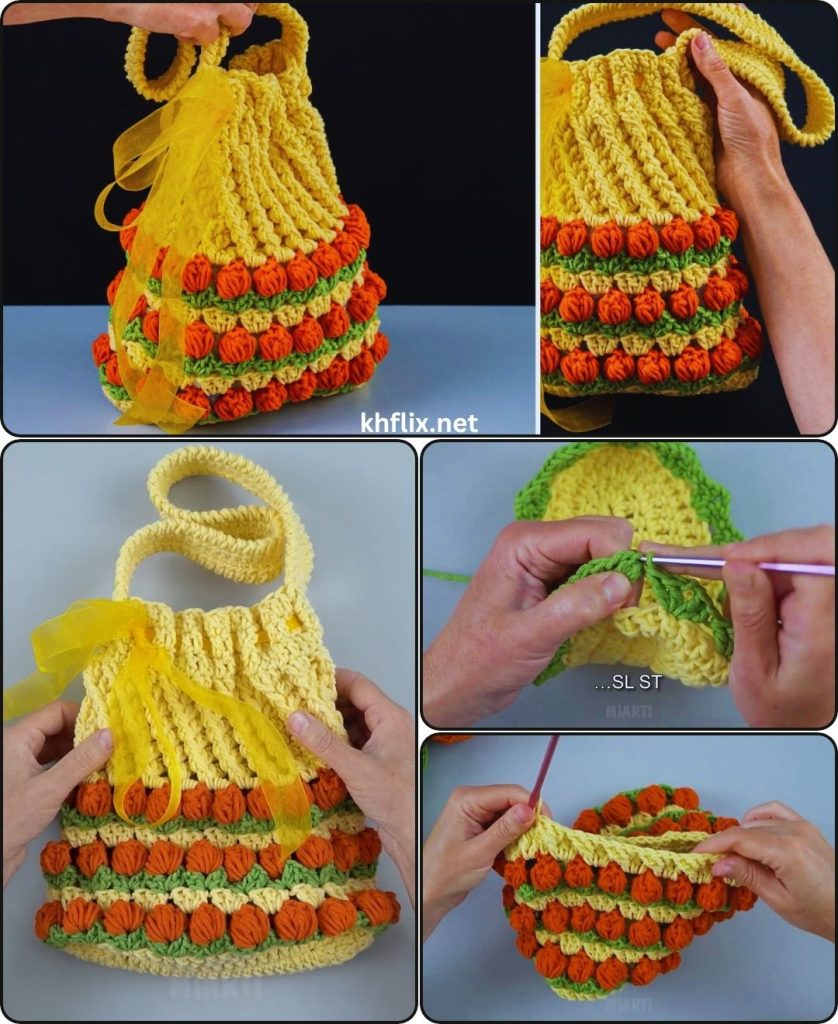
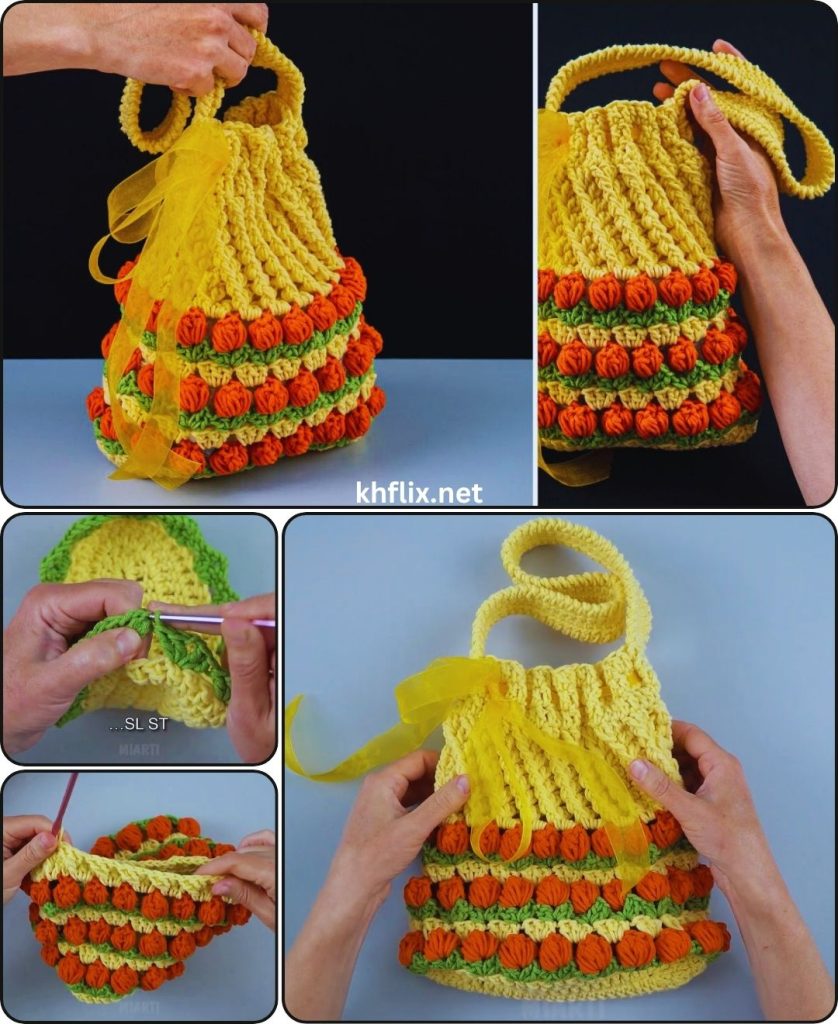
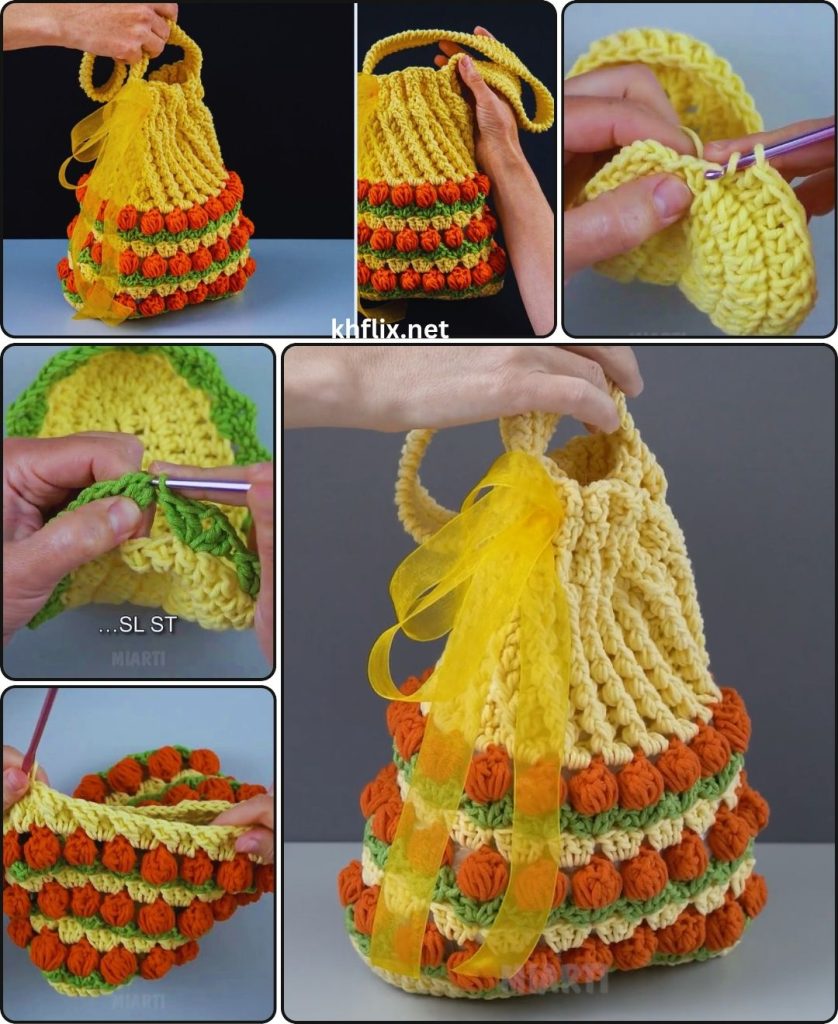
Understanding the Popcorn Stitch (PC) for the Strawberry Center
The popcorn stitch gives the strawberry its characteristic bumpy texture.
How to make a Popcorn Stitch (PC):
- Work 5 double crochet (dc) stitches into the same stitch or space.
- Remove your hook from the loop on your hook.
- Insert your hook into the first dc of the 5-dc cluster (the very first dc you made).
- Reinsert your hook into the loop you just removed.
- Yarn over and pull that loop through the first dc.
- Chain 1 (ch 1) to secure the popcorn. (This chain is part of the stitch and makes it “pop”).
Let’s Crochet Your Strawberry Flower Tote Bag!
We’ll break this down into four main parts:
- Making the individual Strawberry Flower Motif.
- Creating the Front and Back Panels by joining motifs.
- Crocheting the Striped Side/Bottom Panel.
- Assembling the Bag and Adding Handles.
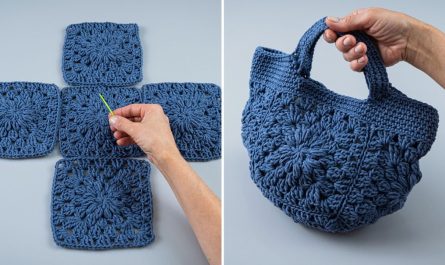
Part 1: Crocheting the Individual Strawberry Flower Motif
Each motif will be worked in rounds, starting with the red strawberry popcorn center, then white petals, and finally squared off with green. You’ll need to make at least 10-12 motifs (e.g., 2 rows of 3-4 motifs for the front, and 2 rows of 3-4 for the back).
Abbreviations Used:
- MR: Magic Ring
- ch: chain
- sl st: slip stitch
- sc: single crochet
- dc: double crochet
- tr: treble crochet (yarn over twice, insert hook, yarn over, pull up loop, [yarn over, pull through 2 loops] 3 times)
- PC: Popcorn Stitch (as described above)
- FO: fasten off
Strawberry Flower Motif Pattern (Make your desired quantity)
Start with Color A (Red – for the Strawberry Center)
- Round 1 (Strawberry Popcorn Center):
- Create a Magic Ring (MR).
- Chain 3 (ch 3) (counts as first dc).
- Work 1 Popcorn Stitch (PC) into the MR.
- Chain 2 (ch 2).
- *Work 1 PC into the MR. Chain 2 (ch 2).*
- Repeat from * to * 3 more times. You should have 5 popcorn stitches separated by ch-2 spaces.
- Pull the Magic Ring tail tightly to close the hole.
- Join with a sl st to the top of the beginning ch 3. (5 PC, 5 ch-2 spaces)
- Fasten Off (FO) Color A, leaving a 4-inch tail.
Switch to Color B (White/Cream – for Flower Petals)
- Round 2 (First Petal Layer):
- Join Color B with a sl st into any ch-2 space from Round 1.
- Chain 1 (ch 1) (does NOT count as a stitch).
- Work (1 sc, 1 hdc, 1 sc) into the same ch-2 space. (This forms your first small petal).
- * Sl st into the top of the next Popcorn Stitch.
- Work (1 sc, 1 hdc, 1 sc) into the next ch-2 space.*
- Repeat from * to * 3 more times.
- After the last petal, sl st into the top of the last Popcorn Stitch.
- Join with a sl st to the first sc you made in this round. (5 petals of (sc, hdc, sc)).
- Fasten Off (FO) Color B, leaving a 4-inch tail.
- Round 3 (Second Petal Layer):
- Join Color B again (or a slightly different shade of white/cream for more depth) with a sl st into the hdc stitch at the top of any petal from Round 2.
- Chain 2 (ch 2) (counts as first hdc).
- Work (1 dc, 1 tr, 1 dc, 1 hdc) into the same hdc stitch. (This creates your first larger petal).
- * Sl st into the next sl st (the one between the petals from Round 2).
- Work (1 hdc, 1 dc, 1 tr, 1 dc, 1 hdc) into the hdc stitch at the top of the next petal.*
- Repeat from * to * 3 more times.
- After the last petal, sl st into the next sl st.
- Join with a sl st to the top of the beginning ch 2. (5 large petals).
- Fasten Off (FO) Color B, leaving a 4-inch tail.
Switch to Color C (Green – for Squaring Off / Leaves)
- Round 4 (Squaring Off the Motif):
- Join Color C with a sl st into the tr stitch (the tallest stitch) of any large petal from Round 3. This is where your corners will be.
- Chain 3 (ch 3) (counts as first dc).
- Work (2 dc, ch 2, 3 dc) into the same tr stitch. (This is your first corner).
- * 3 dc into the next sl st (the one between petals from Round 3).
- 3 dc into the tr stitch of the next large petal.
- Chain 2 (ch 2) (this forms a corner).
- 3 dc into the same tr stitch.*
- Repeat from * to * 3 more times (for a total of 4 corners).
- Join with a sl st to the top of the beginning ch 3.
- Fasten Off (FO) Color C, leaving a 6-inch tail.
- Round 5 (Final Squaring/Size Round):
- Join Color C (or a darker green if you want more depth) with a sl st into any ch-2 corner space from Round 4.
- Chain 3 (ch 3) (counts as first dc).
- Work (2 dc, ch 2, 3 dc) into the same corner space. (Your first new corner).
- *Work 3 dc into each of the next two 3-dc clusters (these are the sides of your square).
- Work (3 dc, ch 2, 3 dc) into the next ch-2 corner space.*
- Repeat from * to * 2 more times.
- Work 3 dc into each of the last two 3-dc clusters.
- Join with a sl st to the top of the beginning ch 3.
- Fasten Off (FO) Color C, leaving a 6-inch tail.
You have now completed one Strawberry Flower Motif! Repeat this process for all the motifs you need (e.g., 6-8 for the front, 6-8 for the back).

Part 2: Creating the Front and Back Panels (Joining Motifs)
You’ll join your individual flower motifs into two larger panels that will form the front and back of your tote bag. A simple slip stitch join or single crochet join are great for beginners.
Method: Single Crochet Join (Creates a visible, neat ridge)
- Layout: Lay out your finished motifs on a flat surface in the desired arrangement for your bag panels (e.g., 2 rows of 3-4 motifs for each panel).
- First Row Join:
- Take two motifs you want to join side-by-side. Place them right sides facing up.
- Join Color C (or your chosen joining color) with a sl st into the corner stitch (the middle dc of the 3-dc corner cluster) of both motifs.
- Chain 1 (ch 1).
- Working through both loops of both motifs simultaneously, single crochet across the edges, matching stitch for stitch.
- When you reach the next inner corner where two motifs meet, put 1 sc through both motif’s corner stitches, then continue sc across the next motif.
- Continue joining all motifs into long horizontal strips.
- Joining Rows:
- Once you have your horizontal strips, lay them out again.
- Now, join the strips together vertically using the same single crochet join method. Align the edges, and sc through both loops, matching stitches along the seam.
Repeat this process to create two identical (or mirror-image) panels for the front and back of your bag.
Part 3: Crocheting the Striped Side/Bottom Panel
This piece will form the bottom and sides of your tote bag, connecting the two flower motif panels. It’s crocheted in rows.
- Determine Length: Measure the perimeter of one of your finished motif panels (the total length around all four sides). This will be the approximate length you need for your striped panel.
- For a 12-14 inch wide bag, if each motif is 6×6 inches, and you have 2×3 motifs, your panel might be 12 inches wide and 18 inches long. The perimeter would then be (12+18)×2=60 inches. You’ll need to chain enough to make a strip that long.
- Starting Chain (Color D):
- With Color D (your first stripe color), chain approximately 180-200 stitches. This will create a long strip that wraps around the bottom and sides. Adjust the chain length to match the perimeter of your joined motif panels.
- Row 1 (Color D):
- Work 1 sc in the 2nd chain from hook and in each chain across. (Approx. 179-199 sc)
- Changing Colors for Stripes:
- At the end of Row 1, when you make the last sc, work it until you have two loops left on your hook.
- Drop Color D, pick up Color E (your next stripe color), yarn over with Color E, and pull through the last two loops on your hook. Color E is now on your hook.
- Chain 1 (ch 1), turn your work.
- Row 2 (Color E):
- Work 1 sc in each stitch across.
- Change to Color F at the end of the row.
- Continue Striping:
- Repeat Row 2, changing colors after each row, or after every 2-3 rows, depending on how thick you want your stripes to be. You can cycle through Colors D, E, F, etc.
- Continue until your striped panel reaches a height of about 3-4 inches (7.5-10 cm). This will be the depth of your bag’s base and sides.
- Fasten Off (FO), leaving a long tail (at least 20-30 inches) of your last stripe color for seaming.
Part 4: Assembling the Bag and Adding Handles
This is where your individual components come together to form the finished tote bag.
- Seaming the Striped Panel to the Motif Panels:
- Take one motif panel and your long striped panel. Align one short end of the striped panel with the bottom edge of your motif panel.
- Using your yarn needle and the long tail from the striped panel, begin to sew the two pieces together using a whip stitch or mattress stitch for a clean seam. Sew along one short side, then along one long side, then the other short side of the motif panel.
- Repeat with the second motif panel on the other side of the striped panel.
- Finally, sew the two remaining short ends of the striped panel together to complete the loop, forming the full side and bottom of the bag.
- Creating the Handles (Color G):
- With Color G (or a sturdy matching/contrasting color), decide where you want your handles to be placed on the top edge of your bag (front and back motif panels). You’ll typically leave a gap in the center for the bag opening.
- Handle 1:
- Join Color G with a sl st into a stitch where you want the handle to start.
- Chain approximately 60-80 stitches (adjust for desired handle length). This will be one half of the handle.
- Sl st into the stitch on the other side of your handle placement on the bag’s top edge. This creates the first loop.
- Chain 1 (ch 1).
- Work 1 sc into the very first chain of your chain-60/80 loop. Then work 1 sc into each chain across the loop.
- When you reach the other side, continue working 1 sc along the top edge of the bag towards where your handle started, going into the stitches of the bag itself.
- When you reach the other side of the handle base, continue to work sc into the chains of the handle loop again.
- Repeat working sc stitches around the entire handle loop (going into the previous sc stitches) for 2-3 more rounds to make the handle sturdy and comfortable.
- After the last round on this handle, sl st to join, then Fasten Off (FO).
- Handle 2:
- Repeat the entire process for the second handle on the other side of the bag, making sure it’s symmetrical.
Part 5: Final Finishing Touches (The Polishing Touches!)
These last steps are crucial for making your bag look truly professional and ensuring its durability.
- Weave in All Ends (Meticulously!):
- You’ll have many yarn tails from starting each motif color, changing stripes, and joining. This is often the most time-consuming part, but it’s essential.
- Thread each yarn tail onto your yarn needle.
- How to Weave Neatly: Insert the needle into existing stitches of the same color as the tail. Weave the tail through the stitches for at least 3-4 inches (7.5-10 cm). To make it extra secure and prevent unraveling, subtly change direction within the stitches (e.g., weave along a stitch, then turn and weave back through some of the same stitches diagonally or perpendicularly) to “lock” the tail in place.
- Once secured, trim any excess yarn very close to the fabric, being careful not to snip any of your actual crocheted stitches.
- Blocking (Highly Recommended):
- Blocking will help your motifs lay flat, even out your stitches, and give your finished bag a much more professional and structured appearance. For cotton yarn, wet blocking is ideal.
- Method for Cotton Yarn (Wet Blocking):
- Gently mist your finished bag evenly with cool water using a spray bottle until it’s damp, but not soaking wet.
- Stuff the bag lightly with clean towels, old t-shirts, or even plastic bags to help it hold its intended rectangular shape and to pop out the flower motifs.
- Lay the bag flat on a clean, dry surface or a blocking mat, gently shaping it.
- Allow the bag to air dry completely and thoroughly in a well-ventilated area. This might take a day or two, depending on humidity. Do not move or use the bag until it’s bone dry.
- Optional: Add a Fabric Lining:
- For extra durability, to prevent small items from slipping through stitches, and to add a pop of contrasting pattern, consider adding a fabric lining. This involves basic sewing skills and can elevate the look of your bag significantly.
Congratulations! You’ve successfully crocheted a unique and beautiful Strawberry Flower Tote Bag with Striped Colors! This is a fantastic accomplishment, combining multiple techniques to create a truly one-of-a-kind accessory.
What lovely items will you carry in your new handmade tote?