by
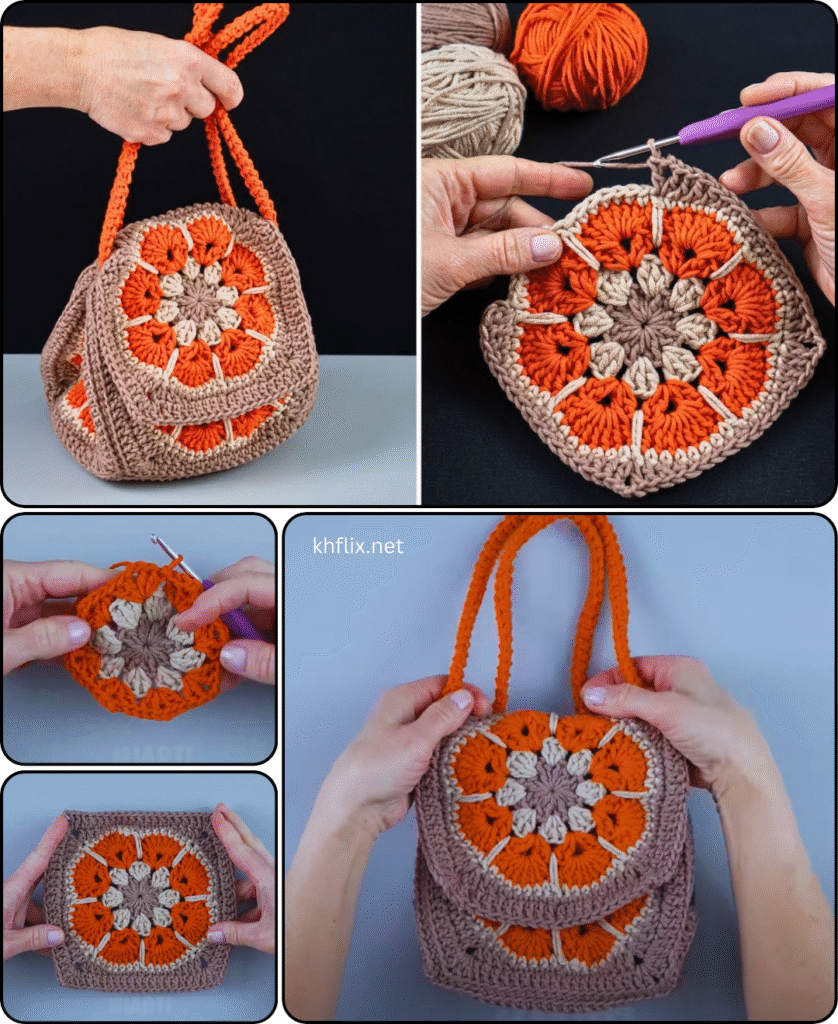
by Absolutely! Here’s a detailed, beginner-friendly guide to making an Easy Granny Square Crochet Bag in Red Color 🧶. This fun and stylish project is perfect for crochet beginners and makes a great accessory or gift.
🧶 Materials Needed
- Yarn: Worsted weight yarn (#4) – Red (approx. 200–250g)
- Crochet hook: 5.0 mm (H/8) or size appropriate for your yarn
- Scissors
- Tapestry needle (for sewing squares and weaving in ends)
- Stitch marker (optional)
- Lining fabric (optional – for inside of the bag)
- Bag handles or make your own with yarn
📏 Finished Size (Approximate)
- Bag body: 10–12 inches (25–30 cm) square
- Straps: 20–30 inches (50–75 cm) depending on preference
🧵 Stitches & Abbreviations (U.S. Terms)
- ch – chain
- sl st – slip stitch
- sc – single crochet
- dc – double crochet
- sp – space
- st – stitch
🔸 Step-by-Step Instructions
🔷 Step 1: Make Granny Squares
You will need at least 6 granny squares (for a small bag) or more depending on the size/design you want. Here’s how to make a basic granny square in red:
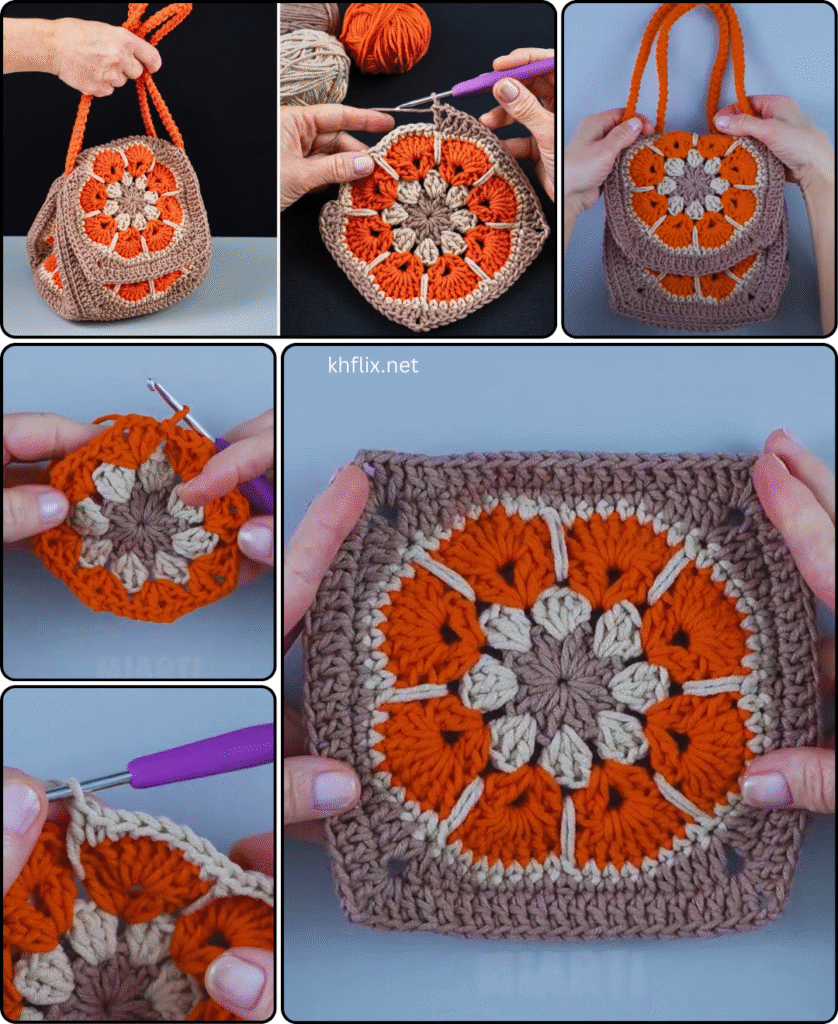
🌸 Basic Granny Square Pattern:
Round 1:
- Ch 4, join with sl st to form a ring.
- Ch 3 (counts as dc), 2 dc in ring, ch 2,
- (3 dc in ring, ch 2) × 3 times.
- Join with sl st to top of beginning ch-3. (You should have 4 clusters of 3 dc with ch-2 corners.)
Round 2:
- Sl st to next ch-2 corner space.
- Ch 3, 2 dc in same corner space, ch 2, 3 dc in same space (corner made).
- Ch 1, (3 dc, ch 2, 3 dc) in next corner space × 3.
- Ch 1, join with sl st.
Round 3 and onward:
- Continue this pattern by working (3 dc, ch 2, 3 dc) in each corner space, and (3 dc, ch 1) in each side space.
- Make each square 4 or 5 rounds depending on desired size.
Make 6–13 squares, depending on your layout:
- 6 squares: front, back, 2 sides, bottom, flap
- 13 squares: 9 for front/back, 4 for sides/bottom
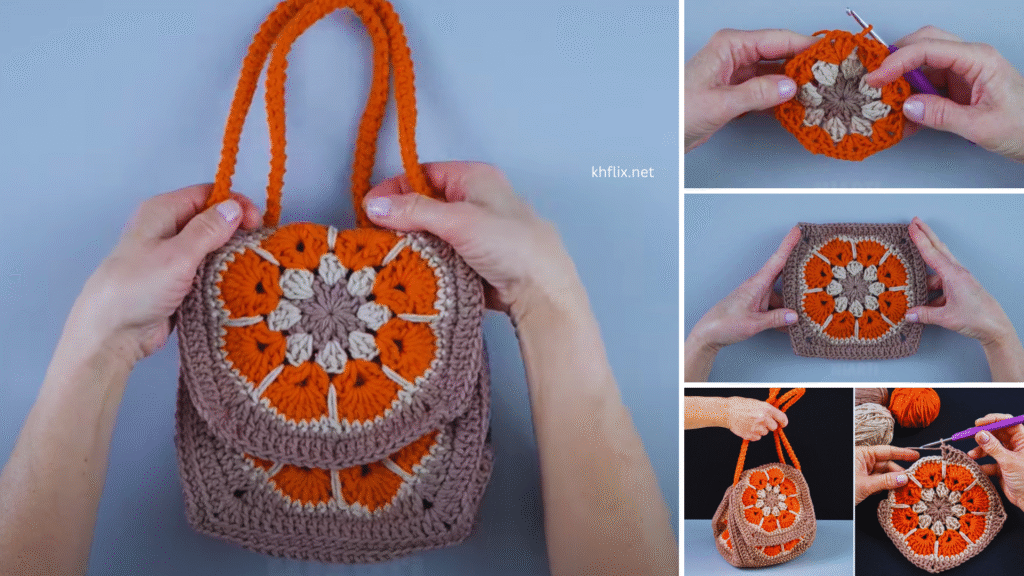
🪡 Step 2: Assemble the Bag
- Layout your squares on a flat surface in your desired pattern.
- Use slip stitch or whip stitch to join squares together on the wrong side.
- Match edges carefully to align stitches.
- Once all squares are connected, fold the piece to form a bag shape.
- Stitch the sides and bottom closed.
🪢 Step 3: Add the Strap
Option 1: Crochet a Strap
- Ch until it reaches desired length (e.g., 80–100 chains).
- Turn and work rows of sc or hdc until strap is thick enough.
- Sew securely to the top inner edge of the bag on both sides.
Option 2: Use Ready-Made Handles
- Purchase wooden or plastic bag handles and sew them on with yarn or thread.
🧵 Step 4: Optional Lining
For a cleaner and sturdier bag:
- Cut fabric the same size as the bag.
- Sew the lining into the inside of the bag using a needle and thread or fabric glue.
- Make sure the lining doesn’t interfere with stretch or shape.
🌟 Decorative Touches (Optional)
- Add a button, toggle, or magnetic snap for closure.
- Add tassels or pom-poms in a matching or contrasting color.
- Edge the top with a scallop or shell border.
✅ Tips for Success
- Use a stitch marker to keep track of your corners and joins.
- Weave in all loose ends securely.
- For a boho style, mix red with other earthy tones or pink shades.
- Block your squares before assembling for a neater look.
🧶 Project Summary
| Section | Description |
|---|---|
| Skill Level | Beginner |
| Yarn | Worsted weight, red color |
| Hook Size | 5.0 mm (H/8) |
| Pieces Needed | 6–13 granny squares |
| Time Required | 4–6 hours (approx.) |
Would you like me to help you with a visual diagram layout, video tutorial recommendation, or turn this into a printable PDF pattern?