 by
by Here is a detailed, long-form tutorial for creating a beautiful and modern crochet handbag. This project introduces a few new skills beyond a basic rectangle, like working in the round, but is absolutely achievable for a determined beginner.
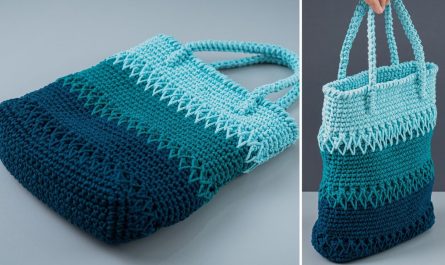
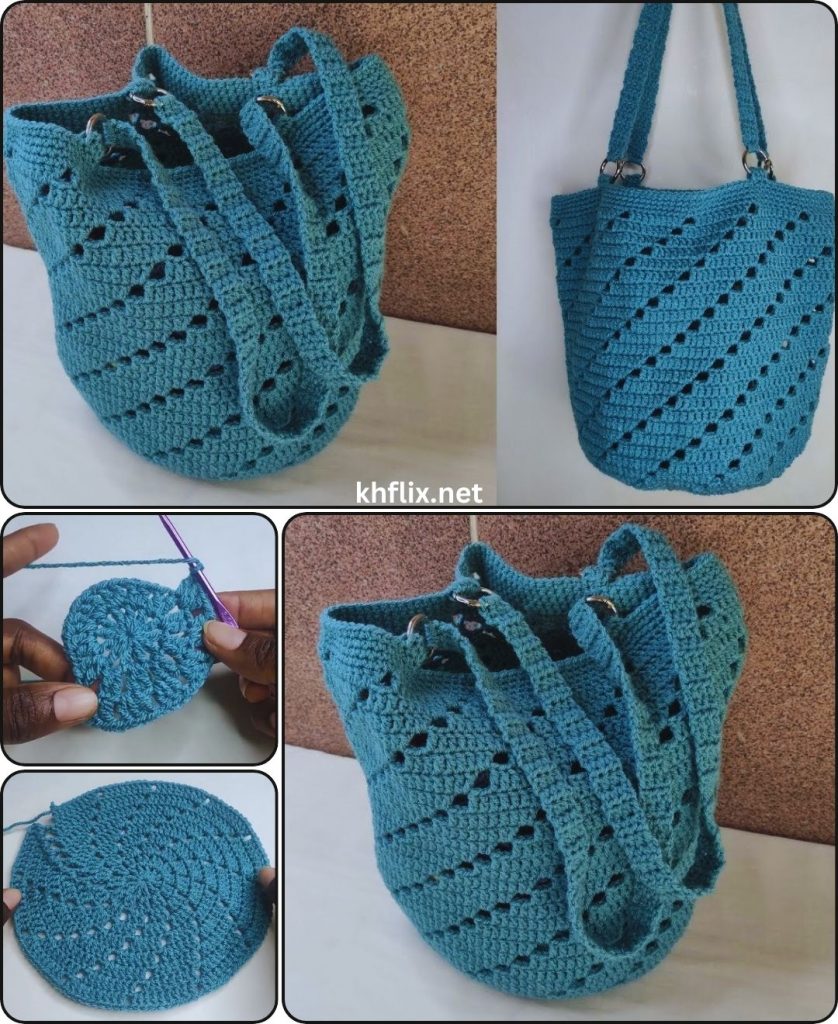
Create Your Own Chic Crochet Handbag: A Complete DIY Tutorial
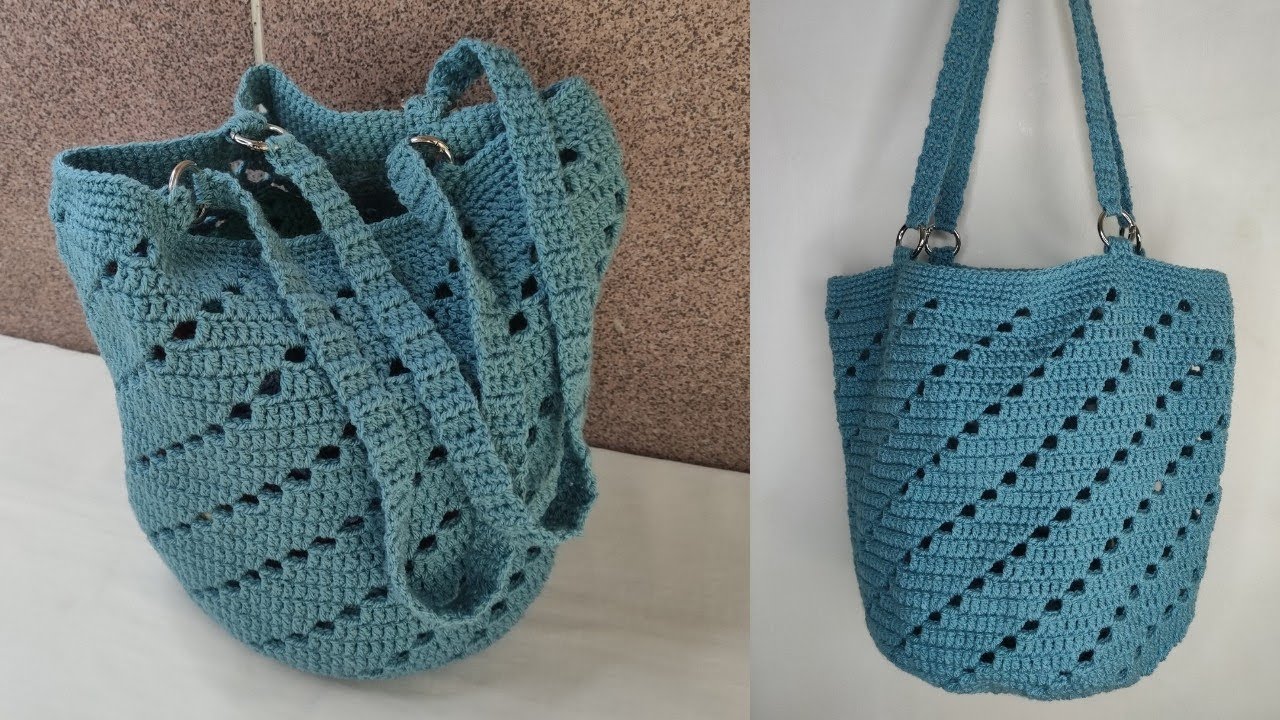
Ready to move beyond scarves and blankets and create a truly stunning accessory you can wear with pride? This DIY crochet handbag tutorial is your next perfect project. We’ll guide you step-by-step through crafting a stylish and sturdy bag with a modern, rounded base and a beautifully textured body.
While this handbag looks sophisticated and store-bought, it’s built on a foundation of simple stitches and techniques. This project is perfect for an advanced beginner or a confident novice looking to expand their skills. We will cover everything in detail, from creating a perfect circular base to attaching the handles for a professional finish.
Let’s gather our materials and begin creating an accessory that is uniquely yours.
Part 1: The Anatomy of Our Handbag
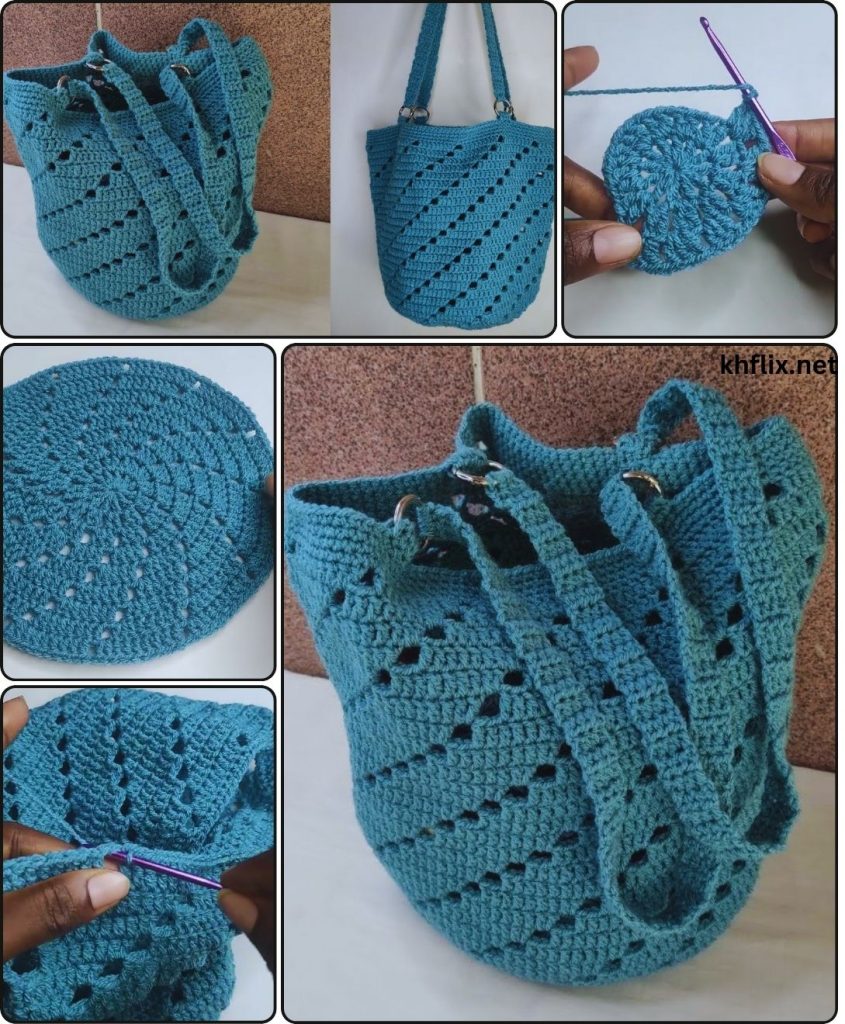
Understanding the construction before you start makes the process much clearer. We will build this bag in three main stages:
- The Circular Base: We’ll start at the very bottom, crocheting a flat circle. This technique of increasing stitches evenly in each round is fundamental to many crochet projects, like hats and amigurumi.
- The Body Walls: Once the base is the desired size, we’ll stop increasing and begin working straight up, round by round, to form the cylindrical body of the bag.
- The Handle & Finishing: Finally, we’ll create and securely attach a sturdy handle and add any finishing touches to complete our chic handbag.
Part 2: Gathering Your Materials & Tools
For a handbag, choosing a yarn with good structure is key. You want it to hold its shape rather than being overly floppy.
- Yarn: A worsted weight (Category 4) cotton yarn is an excellent choice. It’s strong, durable, and has very little stretch. Alternatively, for an even sturdier, more rustic look, you could use a 3mm cotton macrame cord. You’ll need approximately 350-400 yards (320-365 meters).
- Crochet Hook: A 4.0mm (G-6) or 4.5mm (G-7) hook works well with this yarn weight. Using a slightly smaller hook than recommended on the yarn label will create a tighter, denser fabric, which is ideal for a bag.
- Stitch Marker: This is essential for this project. Since we are working in a continuous spiral, the stitch marker will mark the beginning of each round so you don’t lose your place. A simple locking stitch marker is best.
- Scissors: For cutting your yarn.
- Yarn Needle / Tapestry Needle: A blunt needle with a large eye for weaving in all your ends and sewing on the handle.
- Measuring Tape: To check the diameter of your base and the height of your bag.
- Optional Add-ons:
- A magnetic snap closure for a professional touch.
- A decorative button and loop.
- Tassels, charms, or beads for personalization.

Part 3: Essential Stitches and Techniques
Familiarize yourself with these terms and techniques before you begin. Abbreviations are in parentheses.
- Magic Ring (MR): The ideal way to start a project in the round. It creates a tightly closed center with no hole.
- Chain (ch): Used to start and to create spaces.
- Slip Stitch (sl st): Used to join rounds or move the yarn without adding height.
- Single Crochet (sc): A short, dense stitch perfect for the bag’s sturdy base.
- Half Double Crochet (hdc): Slightly taller than a single crochet, this stitch will be used for the body of the bag to give it a lovely texture and help it grow faster.
- Increase (inc): To make two stitches in the same space. This is how we make our circle grow. A single crochet increase would be two single crochet stitches in the same stitch from the round below.
- Back Loop Only (BLO): Inserting your hook into only the back loop of the “V” of the stitch below. This creates a distinct ridge line, perfect for transitioning from the base to the walls of the bag.
Part 4: The Step-by-Step Pattern
Let’s begin crocheting!
Part A: The Circular Base
We will work in a continuous spiral of single crochet stitches. Place your stitch marker in the first stitch of each round and move it up as you go.
- Round 1: Create a Magic Ring, chain 1 (does not count as a stitch), and work 6 single crochet (sc) stitches into the ring. Pull the tail to tighten the ring. (6 stitches)
- Round 2: Work 2 sc stitches into each stitch around (this is a sc increase in every stitch). (12 stitches)
- Round 3:
[sc in the next stitch, then make a sc increase in the next]Repeat this pattern 6 times around. (18 stitches) - Round 4:
[sc in the next 2 stitches, then make a sc increase in the next]Repeat 6 times around. (24 stitches) - Round 5:
[sc in the next 3 stitches, then make a sc increase in the next]Repeat 6 times around. (30 stitches) - Round 6:
[sc in the next 4 stitches, then make a sc increase in the next]Repeat 6 times around. (36 stitches) - Round 7:
[sc in the next 5 stitches, then make a sc increase in the next]Repeat 6 times around. (42 stitches)
Continue this pattern of adding one more single crochet between the increases in each round until your circular base reaches your desired diameter. A good size for a handbag is 7-8 inches (18-20 cm) across.
Pro Tip: If you notice your circle starting to curl up like a bowl, your stitches may be too tight. If it starts to get wavy or ruffled, you may have too many stitches. A perfectly flat circle is the goal.
Part B: The Body of the Bag
Now we will build the walls.
- Transition Round: To create a defined edge between the base and the body, we will work one round in the Back Loop Only (BLO). Work 1 sc in the BLO of every stitch around. Do not increase in this round. At the end of the round, you should have the same number of stitches you finished the base with. This will cause the work to start turning upwards.
- Body Rounds: Now, we’ll switch to the half double crochet (hdc) stitch for the rest of the body.
- Work 1 hdc in every stitch around, making sure to go through both loops of the stitch as normal.
- Continue working in a continuous spiral of hdc stitches. Remember to keep moving your stitch marker at the beginning of each round.
- Keep going until the body of your bag reaches the desired height, typically around 8-10 inches (20-25 cm) tall.
Part C: Finishing the Top Edge
To create a sturdy, non-stretchy opening for your bag, we’ll finish with a clean edge.
- Final Rounds: Work 2 or 3 rounds of single crochet stitches evenly around the top opening of the bag.
- Finishing: Once you’ve completed your final round, slip stitch into the next stitch, cut your yarn (leaving a 6-inch tail), and pull the tail through the loop to fasten off.
Part 5: Crafting and Attaching the Handle
A sturdy handle is crucial. This method creates a comfortable, wide strap that won’t stretch out.
- Foundation: Leaving a long tail (about 12 inches) for sewing, chain 7.
- Row 1: Single crochet in the second chain from the hook and in each chain across. (You’ll have 6 sc).
- Row 2: Chain 1, turn your work. Single crochet in each of the 6 stitches across.
- Repeat Row 2 until your strap is the desired length. A shoulder strap is typically 25-30 inches (63-76 cm), while a shorter handle might be 15-20 inches (38-50 cm).
- Fasten Off: When the strap is your desired length, fasten off, leaving another long 12-inch tail for sewing.
Attaching the Handle:
- Lay the bag flat and decide on the placement. The handle should be centered on opposite sides of the bag opening.
- Pin one end of the strap to the inside of the bag, about 1-1.5 inches down from the top edge.
- Using a yarn needle and the long tail you left, sew the strap securely to the bag. For maximum durability, sew a rectangle or square shape, and then sew a diagonal ‘X’ inside the box. This reinforcement is key for a bag that will carry weight.
- Attach the other end of the strap to the opposite side of the bag, ensuring it isn’t twisted.
Part 6: Final Touches & Customization
This is the part that takes your project from “handmade” to “handcrafted.”
- Weave In All Ends: This is non-negotiable! Use your yarn needle to meticulously weave every loose tail into the inside of your bag. Weave in at least three different directions before snipping the yarn close to the fabric. This ensures nothing ever unravels.
- Add a Closure: Hand-sew a magnetic snap to the inside top edges of your bag for a secure and invisible closure. Alternatively, sew a beautiful button onto the outside and create a small chain loop on the opposite side to hook over it.
- Consider a Lining: For the ultimate professional finish, you can add a fabric lining. Cut two pieces of fabric to the shape of your bag (a circle for the base and a rectangle for the body), sew them together, and then hand-stitch the lining into the inside of your crochet bag.
- Accessorize: Add a playful yarn tassel, a string of wooden beads, or a small metal charm to the base of the handle for a touch of personal style.
You have now created a beautiful, functional, and durable crochet handbag. It’s a testament to your growing skills and a piece you can use and enjoy for years to come. Enjoy the compliments!