 by
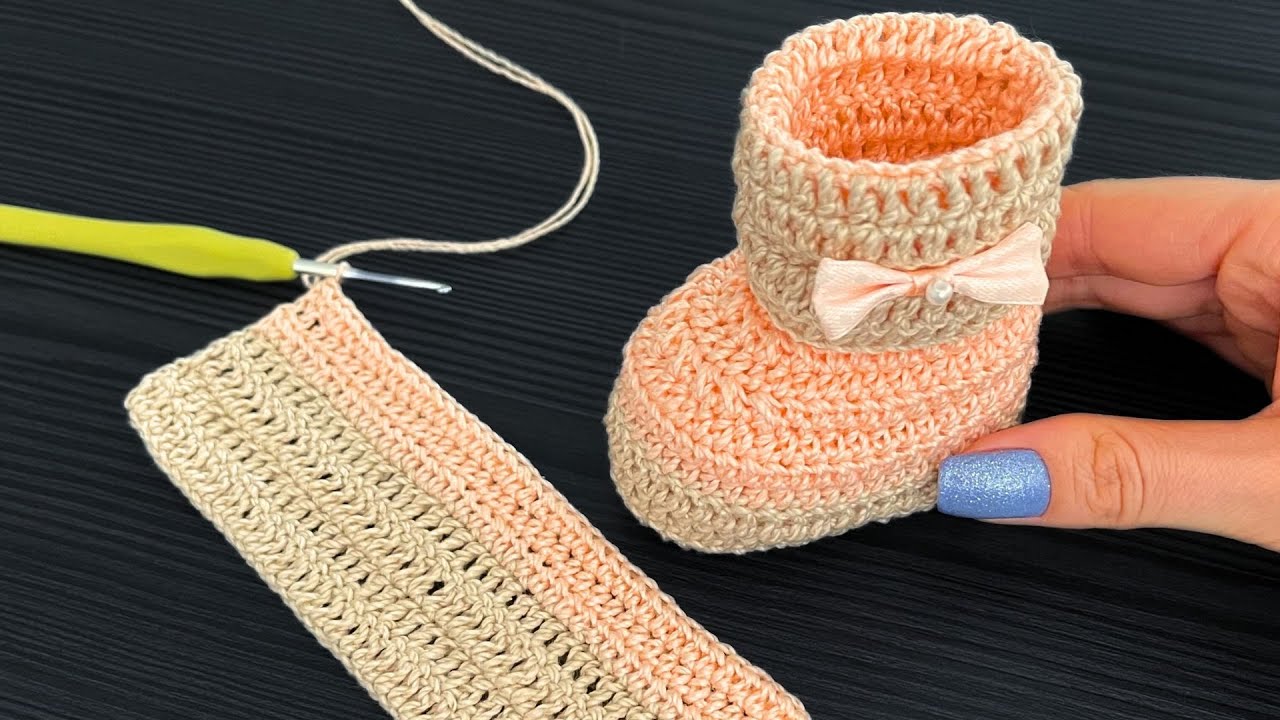
by Here is a detailed, step-by-step tutorial for creating an adorable pair of classic crochet baby booties, featuring a vibrant orange color.
How to Crochet Adorable Baby Booties (in Orange!)
There is nothing quite as heartwarming as a pair of tiny, handmade baby shoes. This pattern will guide you through creating a classic, cuff-style bootie in a beautiful, cheerful orange. We’ll use a contrasting color, like white or cream, to create a clean-looking sole and cuff, making that bright orange pop even more.
This project is perfect for a confident beginner. We will construct it in one piece, from the sole up, so there is minimal sewing involved.
Materials You’ll Need
- Yarn: Soft Baby Yarn (DK / 8-ply or Worsted / 10-ply). A soft acrylic or cotton blend is ideal.
- Main Color (MC): Orange (approx. 50g)
- Accent Color (AC): White or Cream (approx. 20g)
- Crochet Hook: A size appropriate for your yarn. A 4.0mm (G/6) hook is a great choice for DK yarn.
- Yarn Needle (Tapestry Needle): For weaving in your ends.
- Stitch Markers: At least 2. These are very helpful for marking the toe section.
- Scissors
Key Stitches (US Terms)
- ch: Chain
- sl st: Slip Stitch
- sc: Single Crochet
- hdc: Half Double Crochet
- hdc2tog: Half Double Crochet 2 Together (a decrease)
- How to hdc2tog: Yarn over, insert hook into the first stitch, pull up a loop. Yarn over, insert hook into the next stitch, pull up a loop. You now have 5 loops on your hook. Yarn over and pull through all 5 loops. This turns two stitches into one.
- BLO: Back Loop Only
Sizing
This pattern makes a 0-6 month bootie with a sole length of approximately 4 inches (10 cm).
- For a Newborn size (3.5 inches): Start with a chain of 9.
- For a 6-12 month size (4.5 inches): Start with a chain of 13 and add an extra increase round to the sole.
Part 1: The Sole (Make 2)
We’ll begin by making two identical soles using your Accent Color (AC) – White/Cream.
- Foundation: With AC Yarn, ch 11.
- Round 1:
- Work 2 hdc in the 3rd ch from the hook (the first 2 skipped chs count as 1 hdc).
- Work 1 hdc in each of the next 7 chains.
- Work 5 hdc in the last chain (this is the toe-end turn).
- Now, working down the other side of the foundation chain: 1 hdc in each of the next 7 chains.
- Work 3 hdc in the last chain (the same one you started in).
- Join with a sl st to the top of the starting ch-2.
- (Total: 26 stitches)
- Round 2:
- Ch 2 (counts as 1 hdc). Work 1 hdc in the same first stitch.
- Work 2 hdc in the next stitch (the heel is now turning).
- Work 1 hdc in each of the next 7 stitches.
- Work 2 hdc in each of the next 5 stitches (this is the toe turn).
- Work 1 hdc in each of the next 7 stitches.
- Work 2 hdc in each of the last 3 stitches (the heel finishes turning).
- Join with a sl st to the top of the starting ch-2.
- (Total: 38 stitches)
- Round 3:
- Ch 1. Work 1 sc in each stitch all the way around.
- Join with a sl st to the first sc.
- (Total: 38 stitches)
Fasten off the Accent Color. Weave in your ends for the sole. Make a second sole exactly the same way.

Part 2: The Bootie Upper (The Orange Part)
Now we build the walls of the shoe. This is where your vibrant orange color comes in!
- Join Yarn: Attach your Main Color (MC) – Orange yarn with a sl st to the center-most stitch at the heel of the sole.
- Round 1 (The Ridge):
- Ch 2 (counts as 1 hdc). Work 1 hdc in the Back Loop Only (BLO) of every stitch around.
- This BLO round is a key detail: it creates a sharp, professional-looking edge between the sole and the shoe, making the bootie stand up.
- Join with a sl st to the top of the starting ch-2.
- (Total: 38 stitches)
- Round 2 & 3 (Build Height):
- Ch 2 (counts as 1 hdc). Work 1 hdc (in both loops now) in each stitch around.
- Join with a sl st to the top of the starting ch-2.
- Repeat this round one more time. You will have 38 stitches at the end of Round 3.
Part 3: Shaping the Toe (The Trickiest Part!)
This is where the bootie takes shape. We’ll use decreases at the toe. Don’t worry, just follow the stitch count!
- Finding the Toe: Lay the bootie flat, with the heel seam at the back. Find the center 16 stitches at the front of the toe and place a stitch marker at the beginning and end of this 16-stitch section.
- Round 4 (First Decrease Round):
- Ch 2 (counts as 1 hdc). Work 1 hdc in the next 10 stitches (or until you reach your first stitch marker).
- (Now for the toe decreases): Work (hdc2tog) 8 times.
- Work 1 hdc in each of the last 11 stitches (or until you reach the end of the round).
- Join with a sl st to the top of the starting ch-2.
- (Total: 30 stitches)
- Round 5 (Second Decrease Round):
- Ch 2 (counts as 1 hdc). Work 1 hdc in the next 9 stitches.
- (More toe decreases): Work (hdc2tog) 4 times.
- Work 1 hdc in each of the last 9 stitches.
- Join with a sl st to the top of the starting ch-2.
- (Total: 26 stitches)
The main foot shape of your orange bootie is now complete!
Part 4: The Ankle and Fold-Over Cuff
Now we build the ankle cuff that will be folded down.
- Round 6 (Ankle):
- With your Orange yarn still attached:
- Ch 2 (counts as 1 hdc). Work 1 hdc in each stitch around the ankle opening.
- Join with a sl st to the top of the starting ch-2.
- (Total: 26 stitches)
- Round 7 (Ankle):
- Repeat Round 6.
- Change color: On the final slip stitch of this round, drop the orange yarn and pull through your Accent Color (White/Cream) yarn to complete the stitch.
- Round 8 (Cuff):
- With AC yarn, ch 2 (counts as 1 hdc). Work 1 hdc in each stitch around.
- Join with a sl st to the top of the starting ch-2.
- (Total: 26 stitches)
- Round 9 & 10 (Cuff):
- Repeat Round 8 for two more rounds, or until the white cuff is as tall as you’d like it (about 1.5 inches total).
Fasten off the Accent Color, leaving a 6-inch tail.
Part 5: Finishing Touches
This is what makes the bootie look polished and professional.
- Weave in ALL Ends: This is the most important step! Use your yarn needle to securely weave in all the tails on the inside of the bootie. A clean inside makes it comfortable for the baby.
- Fold the Cuff: Take the white ankle cuff and simply fold it down over the orange part of the bootie.
- Optional Tie (Highly Recommended):
- This tie is both cute and functional—it keeps the bootie on the baby’s foot!
- With your Accent Color (AC), chain 80 (or about 15-18 inches long).
- Fasten off and tie small knots at the very ends to prevent unraveling.
- Using your yarn needle, weave this chain-tie through the stitches at the ankle (where the orange and white meet, around Round 7).
- Tie in a gentle bow at the front.
Repeat all parts to make the second, matching bootie.
Congratulations! You have a beautiful, handmade pair of bright orange baby booties, ready to keep a little one’s feet warm and stylish.