by
by Crocheting coasters is a fantastic project for beginners and experienced crocheters alike! They are quick to make, use minimal yarn, and are incredibly practical. This tutorial will guide you through creating a classic round crochet coaster, perfect for protecting your surfaces from cups and mugs.
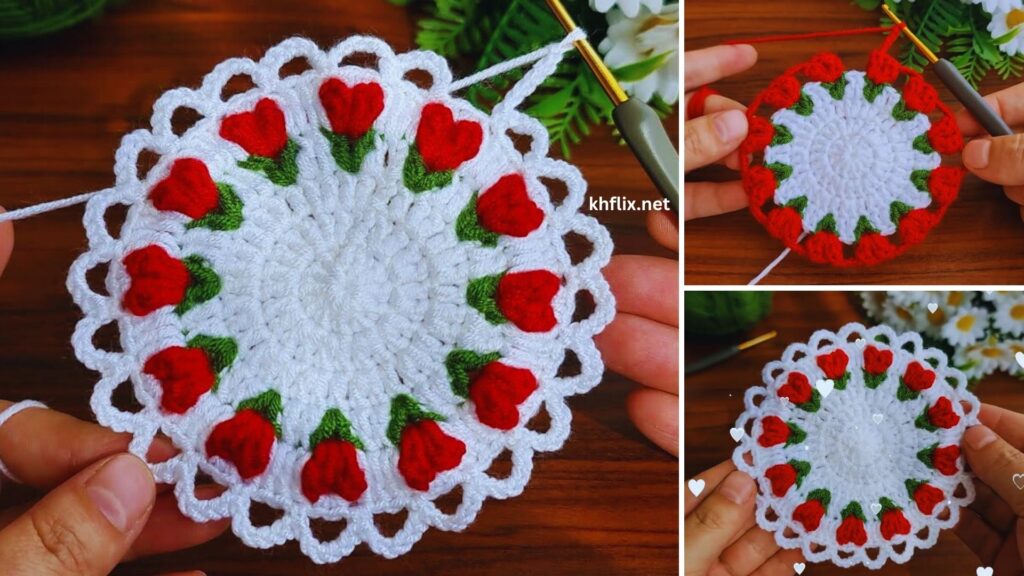
Crochet Cup Coaster Tutorial: Classic Round Design
Project Overview: This pattern creates a sturdy, absorbent, and flat round coaster. It’s an excellent project to practice working in the round and increasing stitches evenly. You can make them in a single color or experiment with multiple colors for fun sets!
Skill Level: Beginner (Requires knowledge of chain, slip stitch, and single crochet).
Finished Coaster Dimensions (Approximate):
- Diameter: 4-4.5 inches (10-11.5 cm)
Materials You’ll Need:
- Yarn:
- Worsted Weight (Medium #4) Cotton Yarn: Approximately 20-25 yards (18-23 meters) per coaster.
- Why cotton? Cotton is highly absorbent, durable, and can withstand heat better than acrylic, making it ideal for coasters. It also creates a nice, firm fabric.
- Crochet Hook:
- Size H/5.0mm (or the hook size that helps you achieve a dense, firm fabric without large gaps. This is important for a functional coaster).
- Yarn Needle (Tapestry Needle): Essential for weaving in loose yarn ends neatly.
- Scissors
- Stitch Marker (Optional but Recommended for Beginners): To mark the beginning of each round when working in continuous spirals, or the joining stitch if you join rounds.
Gauge (Less Critical but Helps with Consistency):
While not strictly necessary for a coaster, aiming for a consistent gauge will ensure your coasters are all the same size.
With your H/5.0mm hook, working in single crochet:
- Approximately 6 sc stitches across 2 inches (5 cm)
- Your fabric should be dense and firm.
Abbreviations Used:
- ch: chain
- sl st: slip stitch
- sc: single crochet
- inc: increase (work 2 single crochet stitches into the same stitch)
- FO: fasten off
- MR: Magic Ring (also known as Magic Circle or Adjustable Ring)
Understanding Round Crochet (and why it stays flat!):
To create a flat circle in crochet, you must increase stitches evenly in each round. The general rule of thumb for single crochet (sc) circles is:
- Round 1: Start with a small number of stitches (e.g., 6-8 sc) in a ring.
- Round 2: Work 2 sc into every stitch from the previous round (e.g., if you started with 6, you’ll have 12).
- Round 3: Work (1 sc, 2 sc in next st) around (e.g., 1 sc, then inc, then 1 sc, then inc, etc.).
- Round 4: Work (1 sc, 1 sc, 2 sc in next st) around.
- And so on. The number of single stitches between your increases grows by one each round. This ensures the circle lays flat.
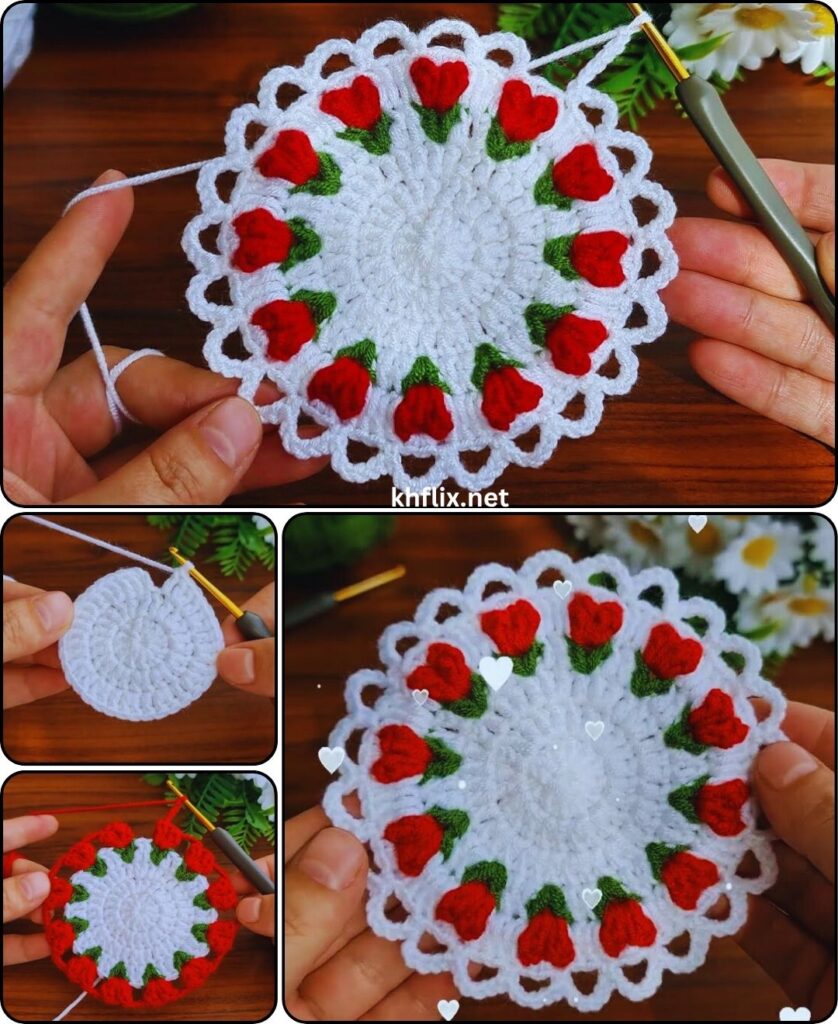
Let’s Start Crocheting Your Coaster!
You’ll have two options for starting your circle: the Magic Ring (preferred for a tight center) or the Chain 2 method.
Option A: Starting with a Magic Ring (Recommended for a tight center)
- Start: Make a Magic Ring (MR). (If you don’t know how, search for “crochet magic ring tutorial” on YouTube – it’s a game-changer for circular projects!)
- Round 1: Ch 1 (does NOT count as a stitch). Work 6 sc into the Magic Ring. Pull the tail tight to close the ring. Sl st to the first sc to join. (Total: 6 sc).
Option B: Starting with Chain 2 Method (Alternative)
- Start: Ch 2.
- Round 1: Work 6 sc into the first chain (the 2nd chain from your hook). Sl st to the first sc to join. (Total: 6 sc).
Continuing for Both Options A & B:
Now that you have your starting ring, we will continue to increase evenly in each subsequent round to create a flat circle.
Working in joined rounds: You will “ch 1” at the beginning of each round (does not count as a stitch unless specified), work your stitches, and “sl st” to the first sc of the round to join.
Round 2: Ch 1. Inc (work 2 sc) in each stitch around. Sl st to the first sc to join. (Total: 12 sc).
Round 3: Ch 1. (Sc in the next st, inc in the next st). Repeat from * to * around. Sl st to the first sc to join. (Total: 18 sc).
Round 4: Ch 1. (Sc in the next 2 sts, inc in the next st). Repeat from * to * around. Sl st to the first sc to join. (Total: 24 sc).
Round 5: Ch 1. (Sc in the next 3 sts, inc in the next st). Repeat from * to * around. Sl st to the first sc to join. (Total: 30 sc).
Round 6: Ch 1. (Sc in the next 4 sts, inc in the next st). Repeat from * to * around. Sl st to the first sc to join. (Total: 36 sc).
Round 7: Ch 1. (Sc in the next 5 sts, inc in the next st). Repeat from * to * around. Sl st to the first sc to join. (Total: 42 sc).
Your coaster should now be roughly 4-4.5 inches in diameter and laying flat.
Part 3: Finishing Your Coaster
- Fasten Off: After completing the last stitch of Round 7 and making your sl st to join, cut your yarn, leaving a tail about 4-6 inches (10-15 cm) long.
- Weave in Ends: Thread the yarn tail onto your yarn needle. Carefully weave the tail through several stitches on the back side of your coaster. This secures the end and makes it invisible. If you used a Magic Ring, ensure the starting tail is pulled very tight and also woven in securely.
Congratulations! You’ve made your first crochet coaster.
Tips for Success & Customization:
- Yarn Choice: Always opt for cotton yarn for coasters. It’s absorbent, heat-resistant, and washable, unlike acrylic which can melt or warp with heat.
- Consistent Tension: Try to maintain consistent tension throughout your work. This helps the coaster lie flat and look uniform. If your coaster starts to curl up like a bowl, you might be crocheting too tightly or need to add more increases in a round (unlikely with this pattern, but possible if your gauge is off). If it ruffles, you might have too many increases or your tension is too loose.
- Making a Larger/Smaller Coaster:
- Larger: Simply continue adding more rounds, following the established increase pattern. For each new round, you’ll add one more single crochet between your increases (e.g., Round 8 would be sc in next 6 sts, inc in next st).
- Smaller: Stop at an earlier round (e.g., Round 5 or 6).
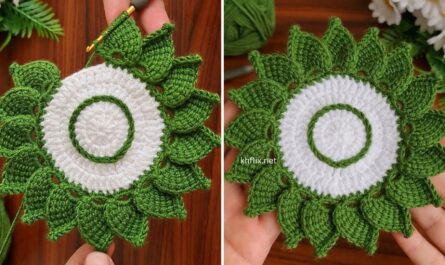
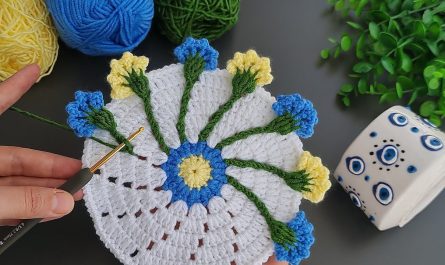
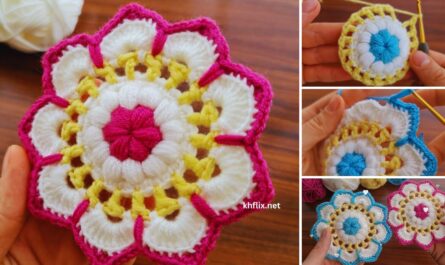
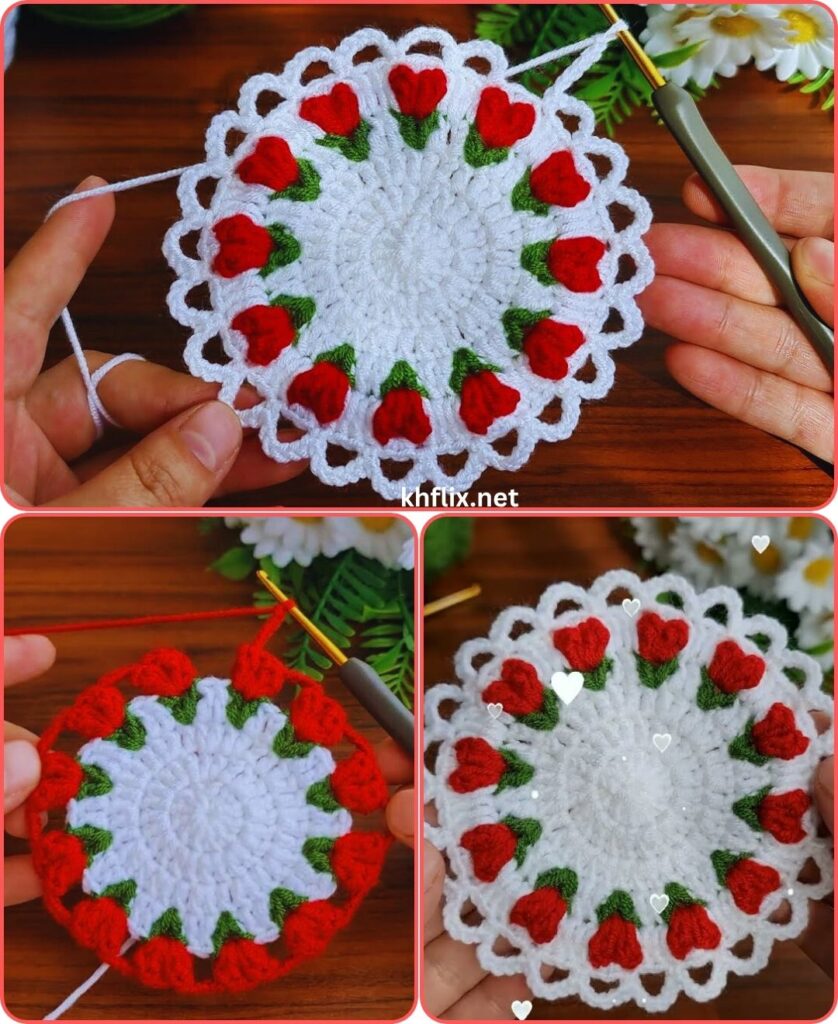
- Multicolor Coasters:
- To make striped coasters, simply change colors at the beginning of any new round. Remember to carry the new color through the last pull-through of the final stitch of the previous round.
- You can make each round a different color, or work a few rounds in one color before switching.
- Edging Variations:
- For a decorative edge, after your final round, you could work a round of slip stitches for a neat border, or crab stitch (reverse single crochet) for a rope-like edge.
- You could also add a round of picot stitches or mini-shells for a more elaborate border.
- Different Stitches: Once you’re comfortable with single crochet, try making coasters using half double crochet (hdc) or double crochet (dc). The increase pattern is similar, but the stitches are taller, so the coaster will grow faster with fewer rounds.
Enjoy making a whole set of these practical and pretty crochet coasters!