by
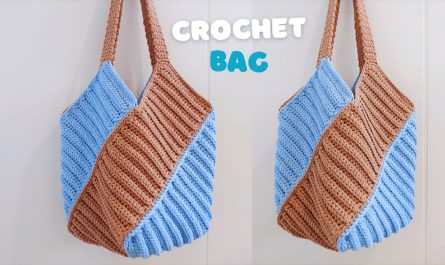
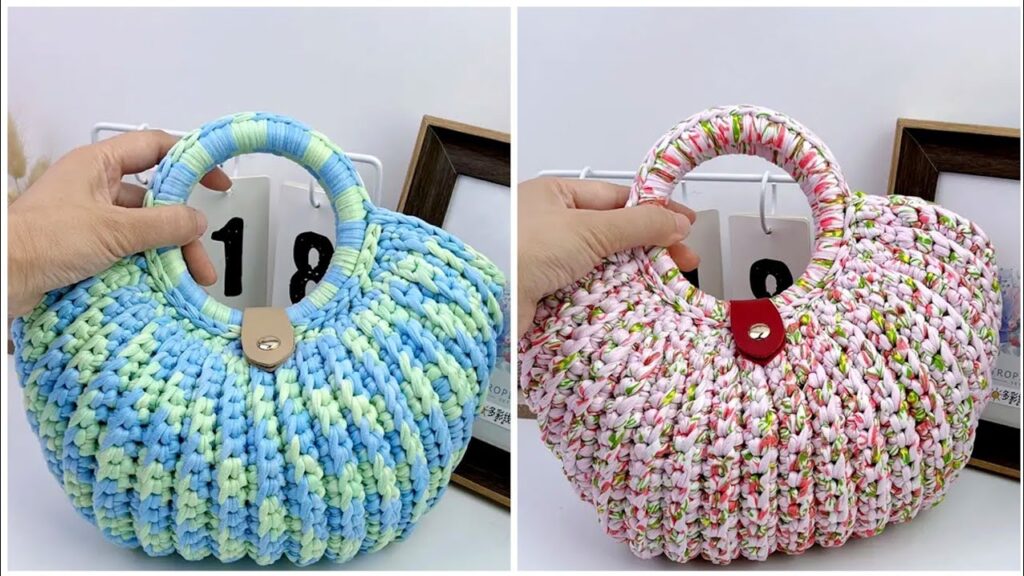
by That’s an incredibly creative and fun idea! A snail-shaped, striped crochet tote bag will be a truly unique accessory. This project will involve creating two main components: the spiral shell (the body of the bag) and the snail’s head/body, then joining them together.
Due to the unique shaping, this will be an Intermediate to Advanced project, as it involves increasing stitches to create the spiral, working in different directions, and assembling distinct pieces.

How to Crochet a Snail-Shaped, Striped Tote Bag
This tutorial will guide you through crocheting the spiral shell (the bag itself) and the snail’s body, incorporating colorful stripes into the shell.
Skill Level: Intermediate to Advanced
You’ll need to be comfortable with:
- Basic crochet stitches: (chain, slip stitch, single crochet, half double crochet, double crochet, treble crochet).
- Working in continuous rounds (spirals) without joining for the shell (or joined rounds if you prefer a seam and consistent stripe start).
- Working in rows for the snail’s body.
- Increasing stitches to create flat circles and expanding spirals.
- Performing clean color changes for stripes.
- Sewing crochet pieces together with a yarn needle.
- Stuffing with fiberfill.
Finished Tote Bag Dimensions (Approximate):
- Shell Diameter: 12-14 inches (30-35 cm)
- Shell Depth (Bag Capacity): 4-5 inches (10-12.5 cm)
- Snail Body Length: 10-12 inches (25-30 cm)
- Overall Bag Size: This will be a compact, novelty tote.
Materials You’ll Need:
- Yarn:Worsted Weight (Medium #4) Cotton or Cotton Blend Yarn is recommended for durability and shape retention.
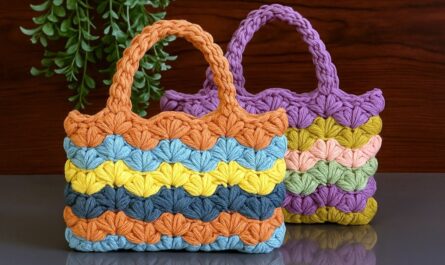
- For the Shell: Approximately 300-400 yards (275-365 meters). Choose 3-5 contrasting or complementary colors for your stripes.
- Color A (Base/Main Stripe): Approx. 100-150 yards.
- Color B, C, D, etc. (Accent Stripes): Approx. 50-70 yards each.
- For the Snail Body: Approximately 150-200 yards (135-180 meters). Choose one solid color that contrasts or complements your shell colors (e.g., a nice green, brown, or blue).
- For the Eyes/Cheeks (Optional): Small amounts of black and pink/red yarn.
- For the Shell: Approximately 300-400 yards (275-365 meters). Choose 3-5 contrasting or complementary colors for your stripes.
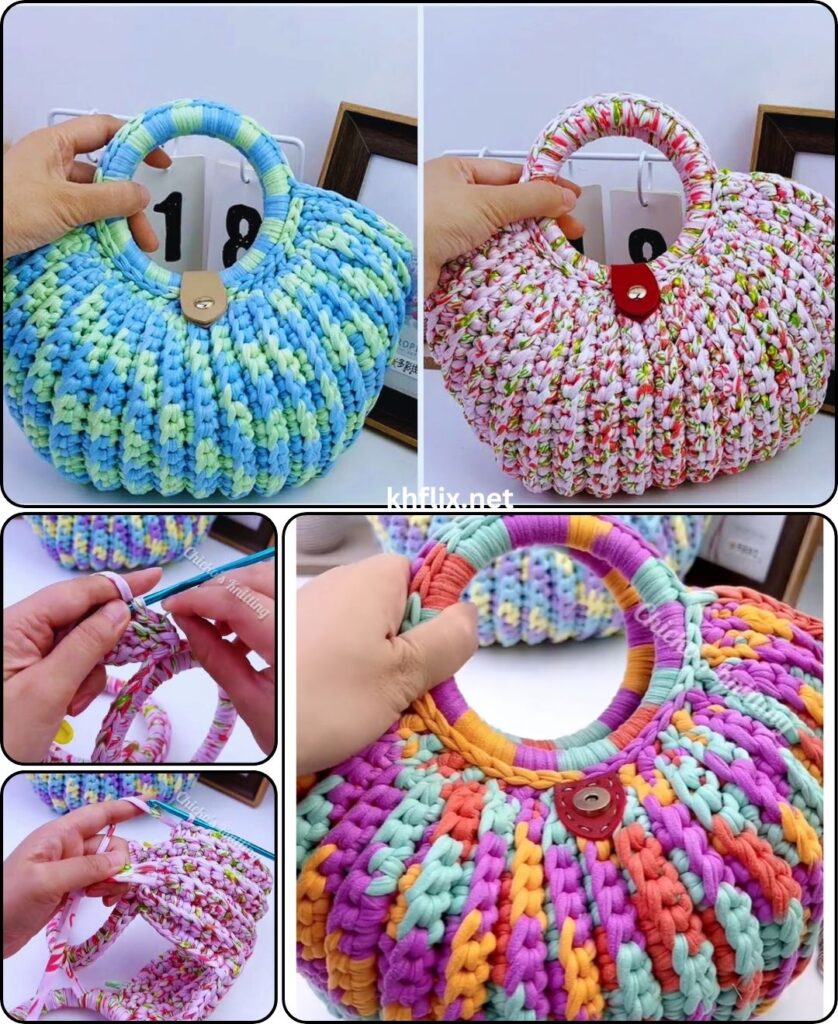
- Crochet Hook: Size H/5.0mm or the hook size that gives you a firm, dense fabric for the bag and neat stitches for the body.
- Yarn Needle (Tapestry Needle): Essential for weaving in ends and assembling the pieces.
- Scissors
- Stitch Markers (Recommended): Crucial for marking the beginning of rounds in the spiral shell, as you won’t be joining.
- Fiberfill/Polyester Stuffing: A small amount for the snail’s head and eye stalks.
- Optional:
- Magnetic Snap Closure or Zipper: For the bag opening if desired.
- Fabric for Lining: If you want a more structured bag or to prevent small items from falling through.
Gauge:
- For single crochet: 15 sc and 16 rows = 4 inches (10 cm).
- Achieving a firm, dense fabric is important for the bag’s structure. Adjust your hook size if needed.
Abbreviations Used:
- ch: chain
- sl st: slip stitch
- sc: single crochet
- hdc: half double crochet
- dc: double crochet
- st(s): stitch(es)
- inc: increase (work 2 stitches into the same stitch)
- dec: decrease (sc2tog – single crochet 2 together)
- MR: Magic Ring (or Magic Circle/Adjustable Ring)
- BLO: back loop only
- FLO: front loop only
- FO: fasten off
- (): repeat instructions within parentheses a specified number of times.
- []: indicates the total number of stitches at the end of a round.
How to Make Clean Color Changes in Spirals (for the Shell):
When working in continuous rounds (spirals), perfect stripes are a bit trickier than joined rounds, but here’s a common method:
- Work the last stitch of your current color as usual, but on the very last yarn over, pull through with your new color.
- Continue with the new color for the next stitch.
- For a cleaner line, you might slip stitch into the next stitch with the new color, then chain 1, then start your sc for the new round. This will create a slight seam, but it can make stripe changes more even. If you prefer a completely seamless spiral, just continue to the next stitch with the new color (the color change will be diagonal).
- Always cut the old color yarn, leaving a 4-6 inch tail. These tails must be woven in very securely on the inside of the shell as you go, or after every few rounds.
Part 1: The Snail Shell (The Bag Body – Striped)
The shell will be crocheted as a large, expanding spiral. We’ll add depth later.
Start with Color A. We’ll alternate colors every 2-3 rounds. Decide on your stripe pattern (e.g., 2 rounds A, 2 rounds B, 2 rounds C, then repeat).
- Start: Make a Magic Ring (MR).
- Round 1: Work 6 sc into the MR. Do NOT join. [6 sc]
- Place a stitch marker in the first stitch of this round, and move it up with each new round to mark the beginning.
- Round 2: (Sc inc in next st) 6 times. [12 sc]
- Round 3: (Sc in next st, sc inc in next st) 6 times. [18 sc]
- Change to Color B at the end of Round 3.
- Round 4: (Sc in next 2 sts, sc inc in next st) 6 times. [24 sc]
- Round 5: (Sc in next 3 sts, sc inc in next st) 6 times. [30 sc]
- Change to Color C at the end of Round 5.
- Round 6: (Sc in next 4 sts, sc inc in next st) 6 times. [36 sc]
- Round 7: (Sc in next 5 sts, sc inc in next st) 6 times. [42 sc]
- Change to Color A at the end of Round 7.
- Round 8: (Sc in next 6 sts, sc inc in next st) 6 times. [48 sc]
- Round 9: (Sc in next 7 sts, sc inc in next st) 6 times. [54 sc]
- Change to Color B at the end of Round 9.
- Round 10: (Sc in next 8 sts, sc inc in next st) 6 times. [60 sc]
- Round 11: (Sc in next 9 sts, sc inc in next st) 6 times. [66 sc]
- Continue this increasing pattern (increasing by 6 stitches each round) until your spiral measures your desired shell diameter (e.g., 12-14 inches across). A general guide is to continue until you have around 120-140 stitches in the last round. Keep track of your color changes every 2 rounds.
- Example Continuation:
- Round 12: (Sc in next 10 sts, sc inc) 6 times. [72 sc]
- Round 13: (Sc in next 11 sts, sc inc) 6 times. [78 sc]
- …and so on.
- Stop increasing when the flat spiral reaches the desired diameter. Let’s assume you stop at Round 20, with 120 stitches (Sc in next 18 sts, sc inc, 6 times). Ensure your last round ends with Color A for consistency with the opening.
Adding Depth to the Shell (Bag Sides)
Now, we’ll create the depth of the bag from this flat spiral.
- Round 21 (First Depth Round – Color A): Ch 1 (does NOT count as a stitch). Sc in the back loop only (BLO) of each stitch around. Sl st to the first sc to join. [120 sc]
- This BLO round creates a defined edge for the bag’s side.
- Rounds 22-30 (Bag Sides – continue stripes): Ch 1. Sc in each stitch around (working through both loops). Sl st to the first sc to join. [120 sc]
- Continue this for 9 more rounds (or until you have about 4-5 inches of depth).
- Continue your stripe pattern during these rounds. For instance, if Round 21 was A, then Rounds 22-23 would be B, Rounds 24-25 would be C, Rounds 26-27 would be A, Rounds 28-29 would be B, and Round 30 would be C.
- FO after the final round of the shell, leaving a long tail for seaming (at least 20 inches / 50 cm). Weave in all stripe ends as you go, or very carefully before final assembly.
Creating the Shell Opening/Cinch
You need to close off most of the shell to form the bag.
- Lay the shell flat. The “beginning” of your spiral should be the center.
- Fold the shell in half, so the two “ends” of the spiral meet.
- Decide on your bag’s opening size. You’ll sew most of the shell together, leaving an opening at the top.
- Using the long tail from the shell and your yarn needle, whip stitch or mattress stitch the edges of the shell together, starting from the tightly coiled center and working outwards.
- Stop seaming when your opening is about 8-10 inches wide. Secure the seam and weave in the end. This creates a 3D shell shape with an opening.
Part 2: The Snail Body (Main Color)
This will be crocheted in rows and then sewn into a 3D shape.
Use your chosen Snail Body Color.
- Chain 11.
- Row 1: Sc in 2nd ch from hook. Sc in each ch across. Ch 1, turn. [10 sc]
- Row 2-10: Sc in each st across. Ch 1, turn. [10 sc]
- This forms the base of the head/neck area.
- Row 11 (Start of taper): Sc dec over first 2 sts. Sc in next 6 sts. Sc dec over last 2 sts. Ch 1, turn. [8 sc]
- Row 12: Sc in each st across. Ch 1, turn. [8 sc]
- Row 13: Sc dec over first 2 sts. Sc in next 4 sts. Sc dec over last 2 sts. Ch 1, turn. [6 sc]
- Row 14: Sc in each st across. Ch 1, turn. [6 sc]
- Row 15: Sc dec over first 2 sts. Sc in next 2 sts. Sc dec over last 2 sts. Ch 1, turn. [4 sc]
- Row 16-25 (Body Length): Sc in each st across. Ch 1, turn. [4 sc]
- Continue for desired body length. This section will be the main part of the snail’s body. Adjust length here if you want a longer or shorter body for your snail.
- Row 26 (Tail taper): Sc dec over first 2 sts. Sc dec over last 2 sts. Ch 1, turn. [2 sc]
- Row 27: Sc dec over 2 sts. FO, leaving a long tail for sewing. [1 sc]
Shaping the Snail Body:
- Fold the crocheted body piece in half lengthwise, right sides facing in.
- Using the long tail and your yarn needle, whip stitch or mattress stitch along the raw edges, starting from the tail end and working towards the head, leaving the head opening unsewn.
- Stuff the body firmly with fiberfill, starting from the tail and working towards the head. Don’t overstuff the head completely yet.
Snail Head & Eye Stalks:
- Eye Stalk 1: Rejoin yarn to one side of the head opening. Ch 6.
- Work (sc in 2nd ch from hook, sc in next 4 ch). Sc into the edge of the head piece where you chained from. [5 sc stalk]
- Eye Stalk 2: Skip a few stitches (about 2-3) along the head opening, rejoin yarn. Ch 6.
- Work (sc in 2nd ch from hook, sc in next 4 ch). Sc into the edge of the head piece where you chained from. [5 sc stalk]
- Stuff the Head: Add more fiberfill to the head area around the base of the eye stalks to give it shape.
- Close Head: Sc evenly around the remaining opening of the head to close it, or use a yarn needle to gather and sew it shut. FO and weave in ends.
Optional: Eyes & Cheeks
- Eyes: Using black yarn, make a tiny Magic Ring and 4-5 sc into it. Sl st to join. Or simply embroider French knots onto the tips of the eye stalks.
- Cheeks: Using pink/red yarn, make a tiny Magic Ring and 5-6 sc into it. Sl st to join. Sew to the sides of the head.
Part 3: Assembly & Finishing
- Attach Snail Body to Shell:
- Position the snail body against the base of the shell. The tail should curl slightly around the base, and the head should extend forward.
- Using the long tail from the snail body (or a new piece of matching yarn) and your yarn needle, securely sew the snail body to the shell. Stitch through multiple points along the body to ensure it’s firmly attached and won’t flop. Make sure your stitches are strong but hidden.
- Weave in all ends.
- Add Bag Closure (Optional):
- If you want a closure, sew a magnetic snap closure to the inside top edges of the bag opening, or install a zipper.
- Lining (Optional, but Recommended for Novelty Bags):
- For a truly functional bag, sewing a fabric lining is highly recommended. It will give your snail bag more structure and prevent items from slipping out through the crochet stitches. Measure the shell’s opening and depth to create a custom-fit pouch. Hand-sew the lining securely to the inside top edge of your crocheted shell opening.
- Final Shaping: Gently shape your snail. You can lightly mist the crochet with water and let it air dry to help it hold its shape.
Congratulations! You’ve created a whimsical and utterly unique Crochet Snail-Shaped Tote Bag! This bag is sure to be a delightful conversation starter and a testament to your crochet skills. Enjoy showing off your charming new creation!