 by
by There’s a special kind of magic in the world of DIY (Do-It-Yourself). It’s the joy of transforming a simple skein of yarn into something beautiful, functional, and uniquely yours. A crochet tote bag is the perfect DIY project; it’s a practical accessory you’ll use for years to come and a stylish canvas for your personal creativity.
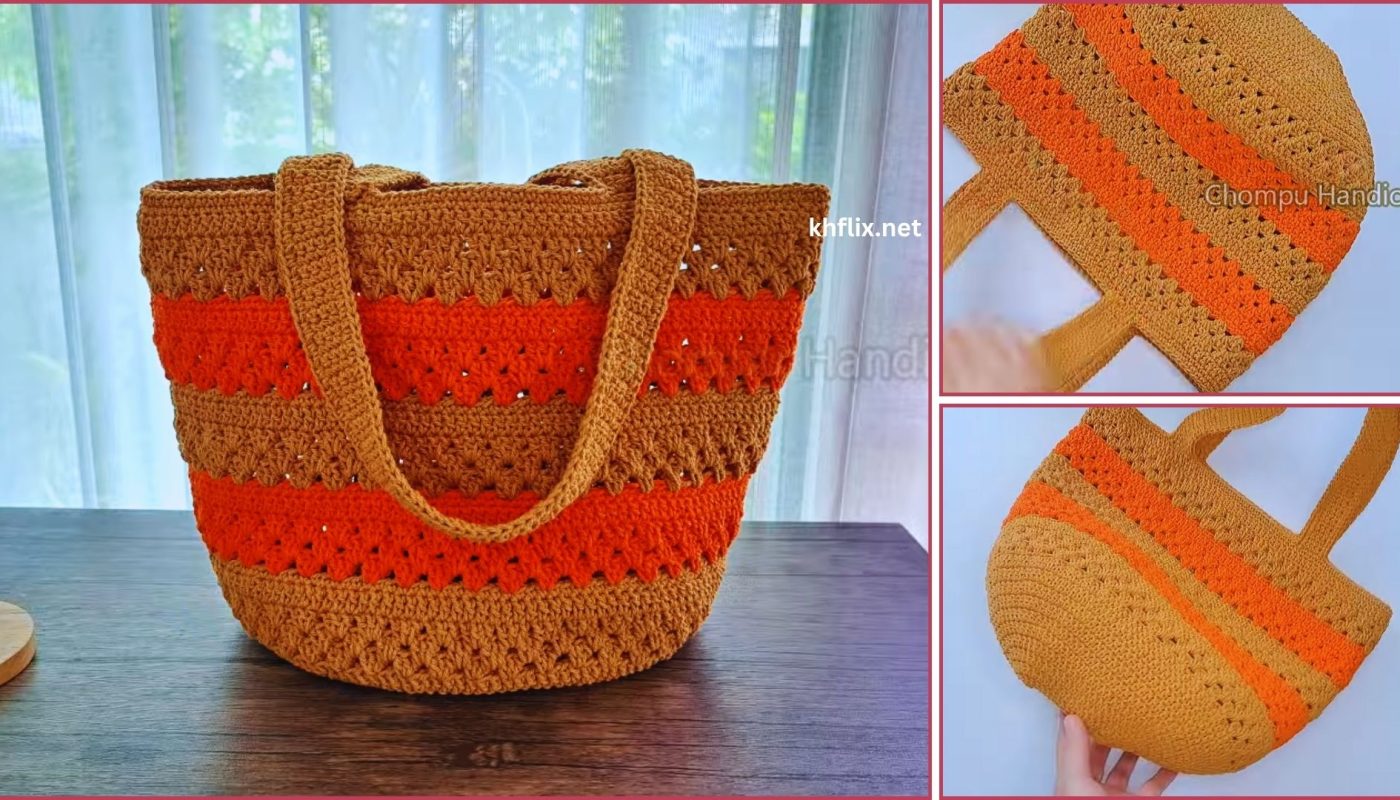
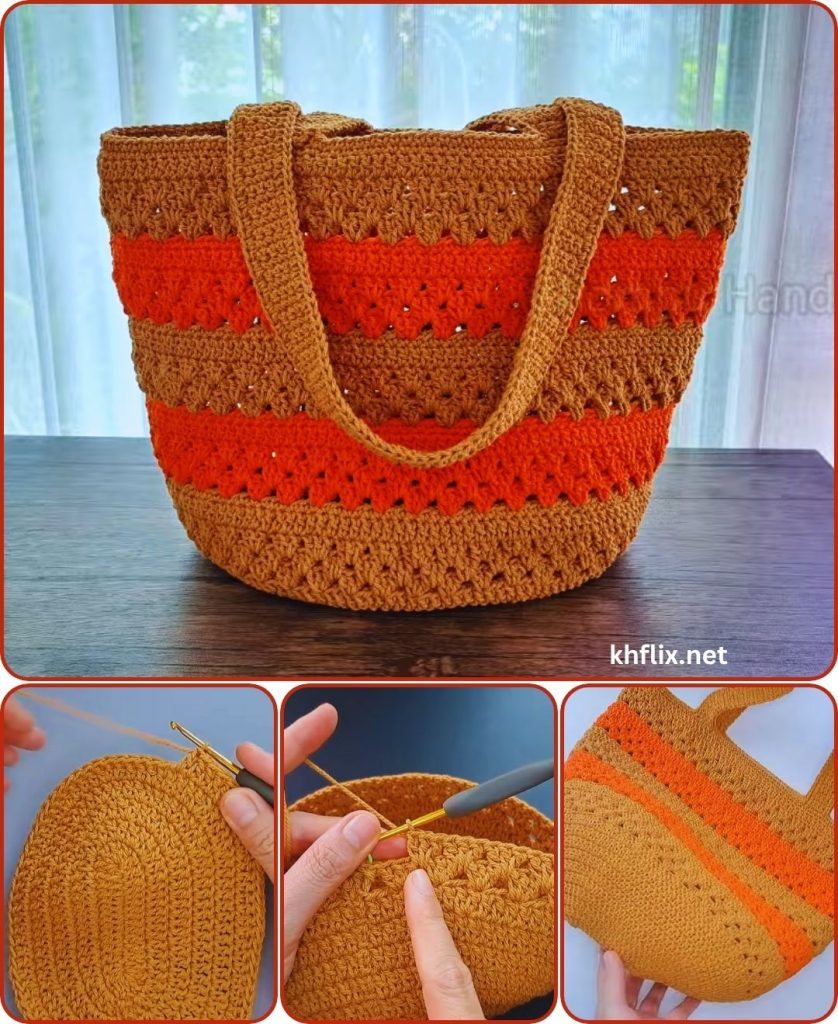
This comprehensive tutorial will guide you through every stage of creating a chic, modern tote bag. We’ll move beyond basic stitches to embrace a gorgeous textured stitch that is surprisingly simple to master. Forget flimsy, hole-filled bags—this pattern creates a dense, sturdy fabric that looks professionally made. Get ready to create your new favorite accessory!
Part 1: The Design – Why This Tote is the Perfect DIY Project
This isn’t just another tote bag pattern. The design choices here are intentional to give you the best possible result with the most enjoyable process.
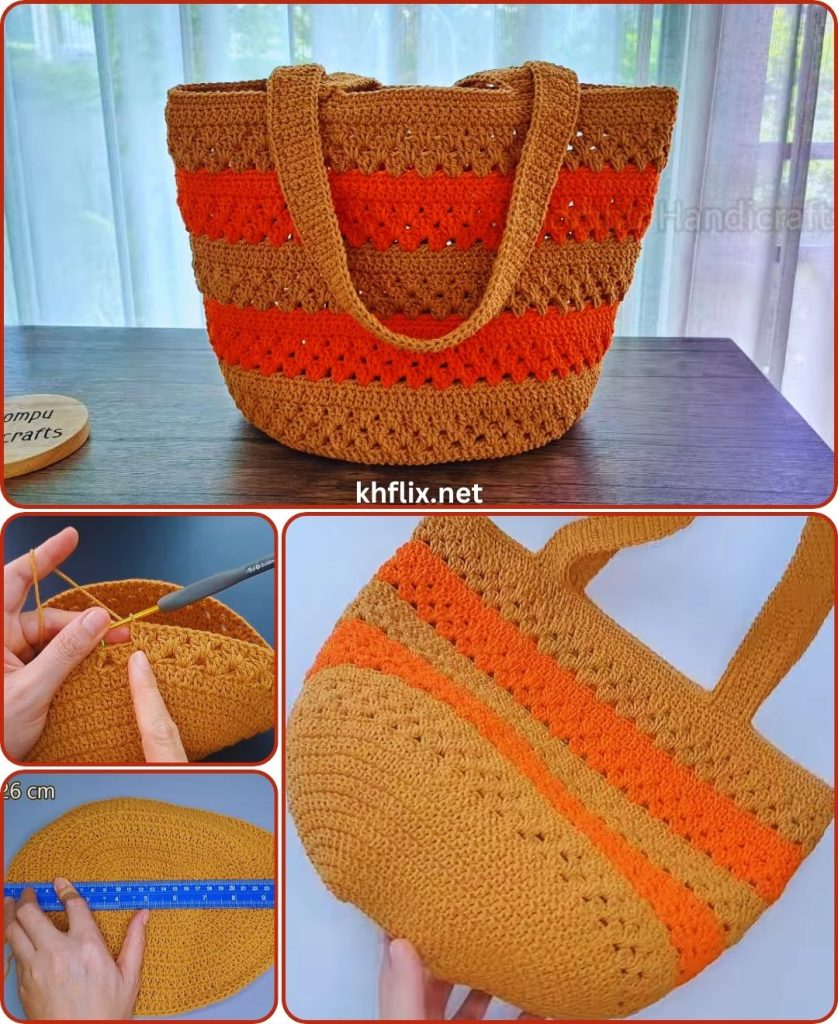
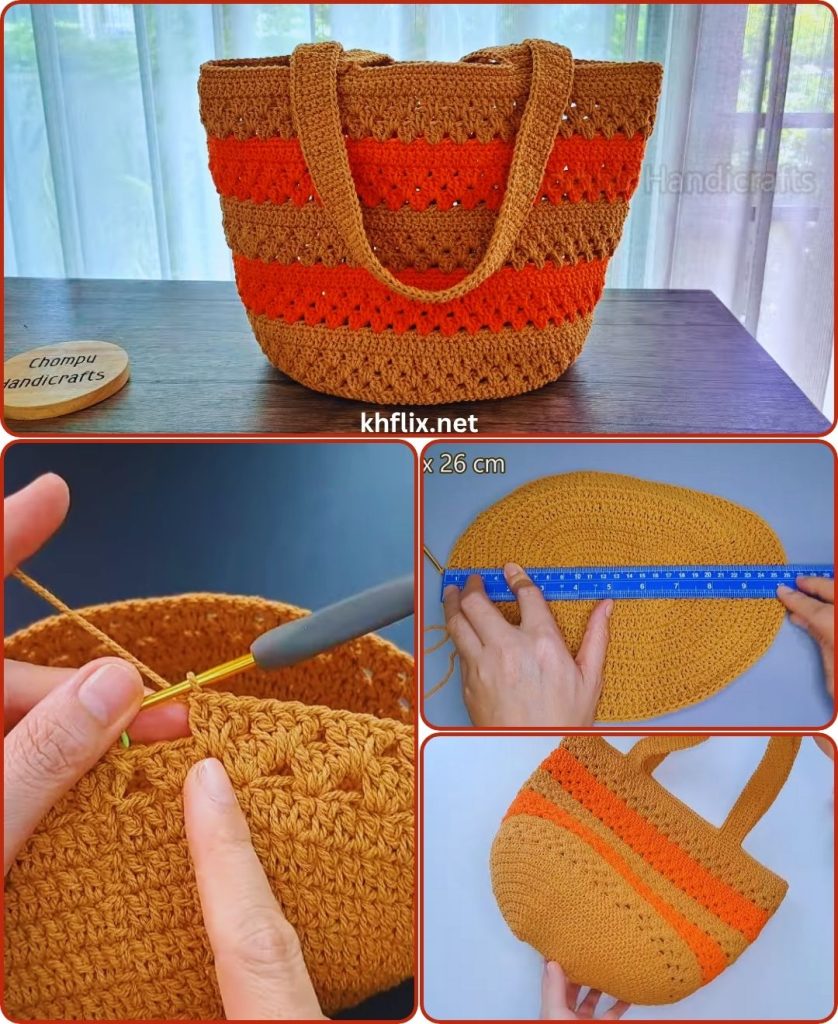
- The Star of the Show: The Moss Stitch. We will be using the elegant Moss Stitch (also known as the Granite or Linen Stitch). This stitch is created by alternating single crochets and chain stitches. The result is a stunning woven-like texture that is both beautiful and incredibly dense. It has no large gaps, making it perfect for a bag that needs to securely hold your belongings.
- A Sturdy Foundation. We will begin by creating a solid rectangular base in single crochet. This provides a strong, stable bottom that prevents the bag from sagging.
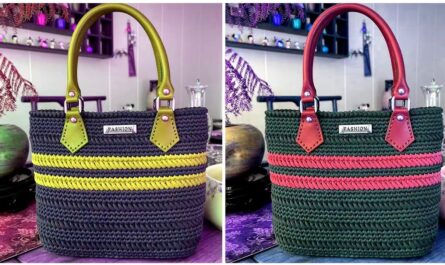
- Modern Color Blocking. While you can make this bag in any color you wish, this pattern is designed with a modern, two-toned look in mind: a main solid color for the body to showcase the texture, and a contrasting accent color for the top border and straps to create a clean, polished finish. For our project, we’ll use an earthy Terracotta as the main color and a neutral Cream for the accent.
This project is designed to be a mindful, relaxing experience that builds your skills and leaves you with a high-quality finished product.
Part 2: Gathering Your DIY Toolkit
Before you begin, let’s gather all the necessary materials. Having everything ready makes the creative process smooth and uninterrupted.
Materials & Tools
- Yarn: Worsted weight (Category 4) cotton or a durable cotton-blend yarn. Cotton is essential for a good tote bag as it is strong, holds its shape, and won’t stretch out over time.
- Main Color (MC): Terracotta (approx. 300 yards / 275 meters)
- Accent Color (AC): Cream (approx. 100 yards / 91 meters)
- Crochet Hook: A 5.0mm (H-8) hook is recommended. Using a hook on the smaller side for your yarn weight will help create that tight, dense fabric we want.
- Stitch Marker: You will need at least one to mark the beginning of your rounds.
- Tapestry Needle: Non-negotiable for weaving in ends neatly.
- Scissors: A sharp pair for snipping yarn.
Part 3: Essential Skills & Stitches
This pattern uses simple, foundational stitches. Let’s review them.
Abbreviations (Standard US Terminology)
$ch$= chain$st(s)$= stitch(es)$sl\ st$= slip stitch$sc$= single crochet$sk$= skip stitch$MC$= Main Color$AC$= Accent Color
Featured Stitch: The Moss Stitch
The Moss Stitch is a simple one-row/round repeat that creates a beautiful texture.
- In Rows:
$sc$in a stitch,$ch$1,$sk$the next stitch. - In Rounds: You will work a (
$sc$,$ch$1) combination into the$ch-1$spaces from the round below. It sounds complex, but you’ll see it creates a very easy rhythm once you begin.
Part 4: The Step-by-Step Crochet Tutorial
Let’s start creating! We will work from the bottom up.
Step A: The Solid Rectangular Base
Using your MC (Terracotta):
- Foundation:
$ch$36. - Row 1:
$sc$in the 2nd$ch$from the hook and in each$ch$across.$ch$1, turn. (35 sts) - Row 2:
$sc$in each$st$across.$ch$1, turn. (35 sts) - Rows 3 – 10: Repeat Row 2.
At the end of Row 10, you will have a solid rectangle measuring approximately 10 inches by 2.5 inches. Do not fasten off. We will now begin working in rounds around this base.
Step B: The Textured Body
Round 1 (Set-up Round): We need to create an even ring of single crochet stitches around our base. $ch$ 1 (does not count as a stitch).
- Work 1
$sc$in each of the 35 stitches along the top edge of your rectangle. - Work 10
$sc$evenly down the short side (this is about 1$sc$per row-end). - Work 1
$sc$in each of the 35 stitches along the bottom edge (the foundation chain). - Work 10
$sc$evenly up the other short side. Join with a$sl\ st$to the very first$sc$. You should have a total of 90 stitches. (35 + 10 + 35 + 10 = 90). Place a stitch marker in the first stitch.
Round 2 (Begin Moss Stitch):
$ch$1.$sc$in the first$st$.$ch$1,$sk$the next$st$.$sc$in the next$st$,$ch$1,$sk$the next$st$. Repeat from * to * all the way around.- Join with a
$sl\ st$to the first$sc$.
Round 3:
$sl\ st$into the first$ch-1$space.$ch$1.$sc$in that same$ch-1$space.$ch$1.$sc$in the next$ch-1$space,$ch$1. Repeat from * to * all the way around.- Join with a
$sl\ st$to the first$sc$.
Rounds 4 – 35: Repeat Round 3. You will see the beautiful woven texture begin to emerge as you work the stitches into the chain spaces from the round below. Continue with your MC (Terracotta). Your bag will grow taller with each round.
Round 36 (Color Change): Work Round 35 as normal. On the final $sl\ st$ to join the round, drop your $MC$ and pull through with your AC (Cream) to complete the stitch.
Rounds 37 – 40 (Top Border): With your AC (Cream), continue repeating the Moss Stitch pattern from Round 3.
Rounds 41 – 42 (Finishing the Rim): To create a clean, sturdy top edge:
$ch$1. Work 1$sc$in each$sc$and in each$ch-1$space around. Join with a$sl\ st$. (90 sts)- Repeat this one more time.
At the end of the final round, fasten off and use your tapestry needle to weave in the end for an invisible finish.
Step C: The Straps (Make 2)
Using your AC (Cream):
- Foundation:
$ch$8. - Row 1:
$sc$in the 2nd$ch$from hook and in each$ch$across.$ch$1, turn. (7 sts) - Row 2:
$sc$in each$st$across.$ch$1, turn. (7 sts) - Continue repeating Row 2 until your strap measures your desired length. A standard shoulder strap is typically 20-22 inches (50-55 cm) long.
- Fasten off, leaving a very long tail (at least 15 inches) for sewing the strap onto the bag.
- Repeat the entire process to make a second strap.
Step D: Assembly & Finishing
This is the final step that brings it all together!
- Weave In Ends: Before assembly, turn the bag inside out and meticulously weave in all your yarn ends from the body of the bag.
- Position Straps: Lay the bag flat. Place the ends of one strap on the outside of the bag. A good rule of thumb for placement is about 3 inches in from the side seams and 1.5 inches down from the top rim.
- Pin in Place: Use stitch markers or pins to hold the strap ends where you want them. Make sure the strap isn’t twisted.
- Sew Securely: With the long yarn tail and your tapestry needle, sew the strap end onto the bag. For maximum strength, sew a box shape and then sew an “X” through the middle of the box. This reinforcement is crucial for a durable tote.
- Repeat for the Other Side: Attach the second strap on the opposite side of the bag, making sure its placement is perfectly symmetrical to the first.
- Weave in the final ends from the straps.
Part 5: Make It Your Own – Customization Ideas
The best part of a DIY project is adding your personal touch.
- Add a Fabric Lining: Sewing in a simple cotton lining will make your bag even more durable and prevent small items from poking through. You can even add pockets to the lining!
- Button Closure: Add a crochet loop to one side of the top opening and sew a large, stylish button on the other side.
- Tassels & Pom-Poms: Craft a large, chunky tassel or a few fun pom-poms in your accent color and attach them to a strap base for a boho vibe.
- Play with Color: Instead of a solid body, why not create large blocks of color? Or use the moss stitch to create subtle, thin stripes?
Part 6: Care for Your Creation
If you used 100% cotton yarn, your tote is built to last. To clean it, machine wash on a gentle cycle with cold water, and then lay it flat to air dry. Reshape it while it’s damp.
Congratulations! You have now completed your very own DIY crochet tote bag. You’ve not only created a beautiful and functional accessory but have also honed your skills and made something that truly reflects your style. Enjoy using it with pride!