 by
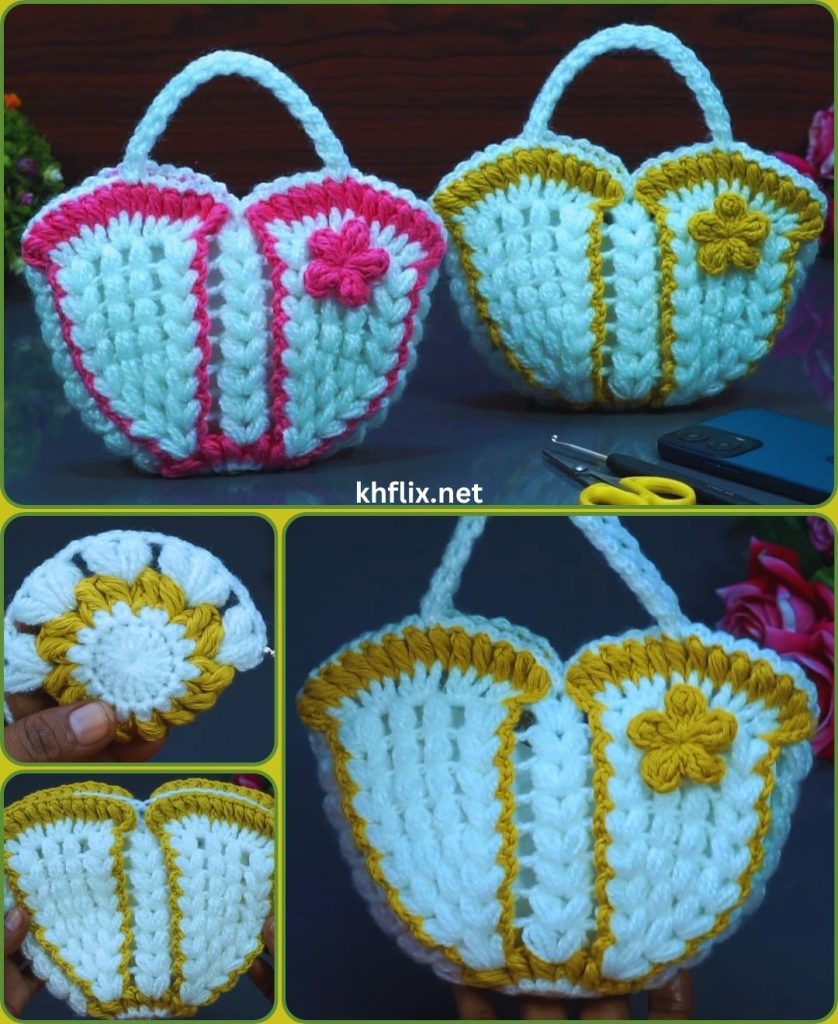
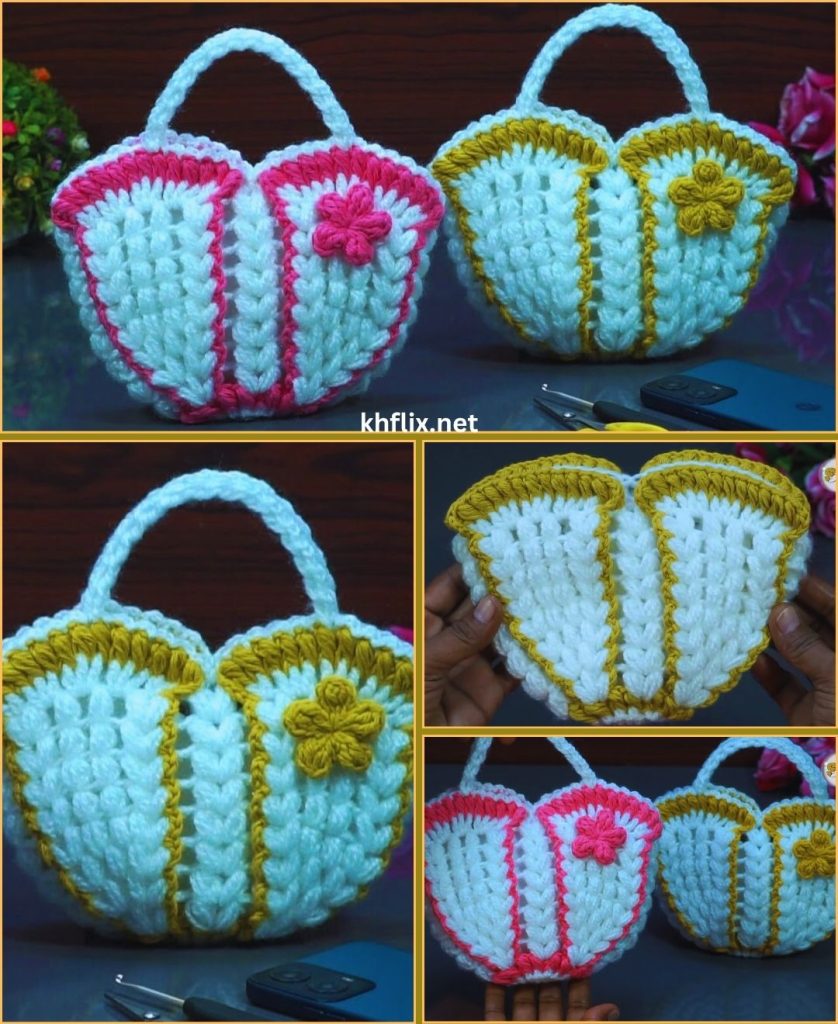
by Crochet handbags have become one of the most beloved DIY fashion trends — they’re stylish, functional, and full of handmade charm. Whether you’re creating a thoughtful gift, building your own accessory collection, or simply looking for a relaxing craft project, a crochet small handbag is a beautiful project for any skill level.
This step-by-step, beginner-friendly guide will walk you through everything: materials, common stitches, full construction, strap options, embellishments, and tips for a professional finish. Let’s begin crafting a handbag that’s not just useful, but made with heart, creativity, and love. 🤩💖
🎀 Why Crochet a Small Handbag?
Crocheted bags are more than accessories — they’re wearable art. And small handbags have the perfect balance of cuteness and practicality.
✔ Perfect for everyday essentials
Keys, phone, lip balm, cards — everything fits nicely.
✔ Great for gifts 🎁
Handmade presents show care and effort.
✔ Beginner-friendly construction
Most small handbags are built from rectangles, rounds, and simple stitches.
✔ Personalizable
Colors, textures, straps, charms — you choose every detail.
✔ Fast to make
Can be completed in one afternoon.
🧶 Materials You’ll Need
Start with simple supplies — nothing complicated or expensive.
✔ Yarn
- Worsted weight (Medium/4) cotton or acrylic
Cotton: holds shape and structure
Acrylic: soft and flexible
✔ Crochet Hook
- 5.0 mm (H/8) hook
(Use 4 mm if you want tighter stitches)
✔ Notions
- Yarn needle
- Scissors
- 1 stitch marker (optional)
- Optional closures: button, magnetic snap, bead, bow 🎀
💕 Stitches Used (Beginner-Friendly)
Most of this handbag uses simple stitches:
- CH – Chain
- SC – Single Crochet
- SL ST – Slip Stitch
- SC INC – Increase (2 SC in one stitch)
- BLO – Back Loop Only (optional for texture)
If you can chain and single crochet, you can make this entire handbag!
🤩 Step-by-Step Tutorial: Crochet Small Handbag
This design is clean, modern, and easy for beginners. We’ll build a sturdy base, then crochet the handbag upward in the round.
📍 Step 1: Crochet the Handbag Base
Most small handbags begin with a rectangular bottom.
- CH 26
(This determines the width — adjust to desired size) - Row 1: SC in second CH from hook. SC across. (25 SC)
- Row 2–12: CH 1, turn, SC across.
You’ll now have a neat rectangle — this is the foundation of your handbag.
Want a deeper bag?
Add more rows (increase height).
Want it wider?
Start with a longer chain.
📍 Step 2: Work Around the Rectangle to Form the Bottom
Without fastening off:
- Rotate the rectangle.
- SC evenly all the way around the edges.
- Place 3 SC in each corner to keep it flat and smooth.
- Join with SL ST.
This step transforms your flat base into the start of a 3-dimensional handbag.
📍 Step 3: Build the Handbag Walls (Working in Rounds)
From here, your handbag will grow upward like a little box.
Round 1–18:
- SC in each stitch around
- SL ST to join each round
- DO NOT increase
Your handbag will slowly rise and form its signature shape.
✔ Optional texture idea
Work 1–2 rounds in BLO for a decorative ridge.
📍 Step 4: Shape the Top Edge Cleanly
A smooth finished top makes your handbag look professional.
- Final Round: SL ST loosely around the entire top.
- Fasten off.
- Weave ends.
This creates a firm, neat edge that won’t stretch.
🎀 Step 5: Crochet the Handbag Straps
You can choose from a variety of strap styles depending on your desired look. Here are three beginners love:
💕 Option A: Simple Basic Strap (Light & Cute)
- Attach yarn to one top corner.
- CH 120–150 (depending on length)
- Attach to opposite corner with SL ST.
- Optional: SC back across the chain for a thicker feel.
💕 Option B: Thick Modern Strap (Sturdy)
- CH 80
- Row 1: SC in each CH
- Row 2–6: CH 1, turn, SC across
- Sew each end to the inside of the handbag top
This creates a clean, modern look.
💕 Option C: Short Handles (Cute Handbag Style)
Perfect for a small purse aesthetic.
- CH 35
- SC across for 3 rows
- Make two handles
- Sew them to the front and back evenly
🎀 Step 6: Add a Closure (Optional but Recommended)
The right closure enhances both security and style.
Options include:
- Button + loop closure
- Magnetic snap
- Ribbon tie
- Bead loop
- Zipper (optional for advanced crafters)
Quick button loop:
CH 12, attach to opposite edge.
🌸 Step 7: Personalize Your Handbag — Make It Yours!
This is where your creativity truly shines. Add embellishments to make the bag a one-of-a-kind handmade treasure.
💗 Cute Add-ons:
- Crochet hearts
- Mini flowers
- Bows 🎀
- Pom-poms
- Butterflies
- Pearl beads
- Embroidered initials
💗 Creative Color Ideas:
- Alternating color stripes
- Two-toned panels
- Ombre yarn
- Color block
- Pastel vs. bold themes
💗 Texture Options:
- Moss stitch body
- Half-double crochet body
- Ribbed sides
- Puff stitch rows
💡 Helpful Tips for Beginners
- Keep tension loose — tight stitches can make the handbag stiff
- Cotton yarn gives the best structure
- Count stitches occasionally to avoid accidental increases
- Attach straps securely with double stitching
- Block the handbag lightly if you want sharper edges
👜 What Can You Use the Small Handbag For?
This small crochet handbag is perfect for:
- Everyday essentials
- A cute accessory for outings
- Handmade gifts 🎁
- Kids’ purse or play accessory
- Travel pouch
- Makeup bag
- Craft fair items
- Phone + wallet mini bag
A single pattern opens endless possibilities!
❓ Frequently Asked Questions
Q: Can beginners make this handbag?
Absolutely — it uses only basic stitches.
Q: How do I make the bag bigger?
Start with a longer chain and add more base rows.
Q: What yarn works best for crochet bags?
Cotton for structure, acrylic for a soft, casual look.
Q: Can I add a lining?
Yes! Hand sewing a fabric lining makes the bag stronger and more durable.
🤩🎀 Final Thoughts: A Handmade Treasure
Crocheting a small handbag is not just a fun craft — it’s an opportunity to create something meaningful, beautiful, and functional. Whether you’re giving it as a gift or using it every day, this handmade accessory carries a personal touch that store-bought bags simply can’t match.
This beginner-friendly pattern is customizable, fast to make, and full of charm. With just a little yarn and love, you can create a stylish small handbag you’ll be proud to show off or gift. 💖✨
If you’d like, I can also create:
📌 A printable PDF version
📌 Stitch diagram / chart
📌 A video-style tutorial script
📌 A more advanced handbag pattern
📌 A kawaii bow-themed variation
Just tell me! 🎀